Table of Contents
Advertisement
Advertisement
Table of Contents

Related Manuals for McQuay PDAA


Summary of Contents for McQuay PDAA
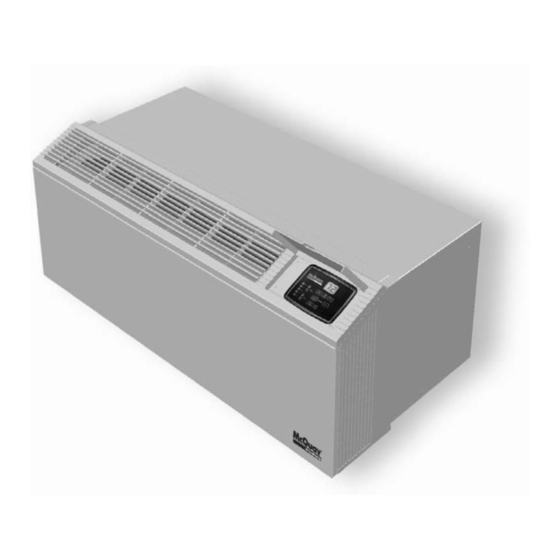
- Page 1 Installation & Maintenance Data IM 934-2 Group: PTAC Part Number: 668966802 Date: October 2009 Applied Packaged Terminal Air Conditioner and Heat Pump Model PDAA & PDHA Dual Motor Angled Top Unit - 16" x 42" with R-410A Refrigerant ® ©2009 McQuay International...
-
Page 2: Table Of Contents
Now that you have made an investment in modern, efficient McQuay equipment, its care and operation should ® be a high priority. For training information on all McQuay HVAC products, please visit us at www.mcquay.com and click on Training or phone 540-248-0711 and ask for the Training Department. -
Page 3: Safety Information
Failure to do so can damage equipment. carrier’s agent within fifteen (15) days of the delivery date. File a claim with the carrier since such damage is the carrier’s responsibility. IM 934-2 Applied PDAA/PDHA / Page 3 of 44... -
Page 4: Nomenclature
A = Automatic (Required for Hydronic Heating Subbase) J = Hot Water Subbase (Normally Open) A = Fresh Air Boost Fan Y = None M = Manual Y = No Damper IM 934-2 Applied PDAA/PDHA / Page 4 of 44... -
Page 5: Introduction
3.4 BTUs per watt with resistance 13, Figure 13. electric heat. The unit will restart at its last setting after a power interruption. Figure 2. Exploded View of the Applied PTAC Unit IM 934-2 Applied PDAA/PDHA / Page 5 of 44... -
Page 6: Dimensional Data
Hydronic subbase is flush with the front of the cabinet. Electric subbase is flush with wall sleeve. 2. Subbase side channels are adjustable from 4 " to 13 " (111mm to 349mm). IM 934-2 Applied PDAA/PDHA / Page 6 of 44... -
Page 7: Wall Opening Requirements
" Wide Wall Pillars Sleeve Rough Opening " x 42 " Floor Wall Sleeve Rough Opening or " x 42 " When using a Louver Frame (See page 11 for Installation) IM 934-2 Applied PDAA/PDHA / Page 7 of 44... -
Page 8: Installation Of Subbase
Main Power Connection 3" x 5" (76 to 127mm) Opening for Electrical and/or Drain Rough-In Knockouts for Opitonal Fuse & Disconnect Switch Receptacle (Req’d on 265V Units) Plug/Cord Cover (Req’d on 265V Units) IM 934-2 Applied PDAA/PDHA / Page 8 of 44... -
Page 9: Hydronic Subbase
2. Subbase shown with louvered front panel removed. Front panel is hinged to allow access to valve, coil, filter & electrical junction box. 3. Leveling legs are adjustable from "–1 ". Optional Condensate Drain Kits External Drain Kit Internal Drain Kit Alternate 6" Long, 1/2" O.D. Straight Copper Tube IM 934-2 Applied PDAA/PDHA / Page 9 of 44... -
Page 10: Installation Of Condensate Drain Kit
" (13mm) O.D. Drain Tube Neoprene Sponge Gasket Alternate 6" Long, 1/2" O.D. Steel Mounting Plate Straight Copper Tube Note: Use of 6" straight drain tube will require modification of architectural louver. IM 934-2 Applied PDAA/PDHA / Page 10 of 44... -
Page 11: Installation Of Wall Sleeve
3. Assemble the wall sleeve extension to the wall sleeve. Clean out weep holes to assure proper Note: Wall Sleeve rough opening when using a drainage. Louver Frame must be 16 " x 42 " IM 934-2 Applied PDAA/PDHA / Page 11 of 44... -
Page 12: Installation Of Recessed Louver Wall Sleeve
3. lf the optional drain kit is to be employed (heat DO NOT drill holes in the bottom of the wall sleeve as it pump only), see IM 942. will cause leaks. IM 934-2 Applied PDAA/PDHA / Page 12 of 44... -
Page 13: Anchoring The Wall Sleeve
7. Caulk the wall sleeve to the wall opening on both the inside and outside perimeter. Be careful not to plug the weep holes. Caulking should be resilient, nonhardening type such as silicone. IM 934-2 Applied PDAA/PDHA / Page 13 of 44... -
Page 14: Panel Wall Construction Type
4. Be sure the wall sleeve is mechanically attached to the wall and caulked to assure a proper seat. It Wall is recommended that the louver frame be used for Finished Floor Receptacle or Carpet (by others) this purpose. IM 934-2 Applied PDAA/PDHA / Page 14 of 44... -
Page 15: Attaching Cabinet Wall Sleeve To Subbase
Be careful not to Power Supply Connect plug the weep holes. Caulking should be resilient, (Alternate Entry) nonhardening type such as silicone. Leveling Legs with 1" Adjustment IM 934-2 Applied PDAA/PDHA / Page 15 of 44... -
Page 16: Thick Wall Construction Type
Cabinet Extension Table 2. Maximum Wall Thickness 3"Min. (76mm) Maximum Wall Thickness Louver Type Standard Hydronic Subbase Subbase Subbase Floor Stamped 14"(356mm) "(241mm) "(333mm) "(378mm) "(264mm) 14"(356mm) Receptacle (by others) Architectural IM 934-2 Applied PDAA/PDHA / Page 16 of 44... -
Page 17: Attaching Cabinet Wall Sleeve To Subbase
(optional colors are also available). a sample of the proposed louver must be sent to the factory for testing and certification. The sample sent for testing must be at least 16" high by 42" wide. IM 934-2 Applied PDAA/PDHA / Page 17 of 44... -
Page 18: Typical Louver Design
• Concrete walls or barriers • Overhangs that do not allow discharge air to rise CAUTION Do not lift by pulling on the tubing. Tubing can crack or bend damaging the unit. IM 934-2 Applied PDAA/PDHA / Page 18 of 44... - Page 19 On units equipped with the Tinnerman Clips Figure 28. Chassis Installation Wall Sleeve Left end view Chassis Wall Sleeve Rails (See Note 21 Above) Damper & Damper Actuator Screws (4) IM 934-2 Applied PDAA/PDHA / Page 19 of 44...
- Page 20 The push buttons on the touchpad become inactive in the remote thermostat mode. However, the control pad LED display will indicate the mode of operation, and the room temperature. IM 934-2 Applied PDAA/PDHA / Page 20 of 44...
-
Page 21: Controls
Touchpad and is 60°F to 85°F, with the limits included. The Remote Thermostat selectable operating range is 60°F to 90°F with limits included. The range is set in the Set-up menu. IM 934-2 Applied PDAA/PDHA / Page 21 of 44... -
Page 22: Modes Of Operation
To exit the Lockout Mode and return to normal (regular) mode of operation, press the Mode button for 10 seconds. Display will show “nL” for five seconds to confirm normal mode has been resumed. IM 934-2 Applied PDAA/PDHA / Page 22 of 44... - Page 23 Figure 31. Zone A = Zone Determination Time Compressor Low Fan 12 mins. = Zone Determination Time Figure 32. Zone B Compressor 8 mins. 4 mins. Low Fan 30 secs. 30 secs. IM 934-2 Applied PDAA/PDHA / Page 23 of 44...
-
Page 24: Heat Mode
To exit Set Up, press the Mode Up and Down buttons simultaneously for 5 seconds or control will automatically exit Set Up in 15 seconds. Settings within the Set Up Mode are as follows: IM 934-2 Applied PDAA/PDHA / Page 24 of 44... -
Page 25: Modes Of Operation
90 seconds. The compressor can be stopped at any time if the system is switched to any Mode, except the Cool Dry Mode. IM 934-2 Applied PDAA/PDHA / Page 25 of 44... -
Page 26: Modes Of Operation
(102mm) height and can be furnished with factory by repositioning the discharge grille to change mounted fused disconnect option. airflow pattern in a room. The building superintendent or assistant manager should be requested to make any changes. IM 934-2 Applied PDAA/PDHA / Page 26 of 44... -
Page 27: Start-Up Report-Audit
SM ______________ Date CTS _____________ Sales Representative Signature T________________ Customer Signature Service Manager Approval Date McQuay International 4900 Technology Park Boulevard, Auburn, New York 13021-9030 USA (315) 253-2771 Form No. 13F-1206 IM 934-2 Applied PDAA/PDHA / Page 27 of 44... -
Page 28: Premium (Programmable) Digital Touchpad Control Operating Instructions
However, the control pad LED display will indicate the Remote Thermostat. mode of operation, and the room temperature. IM 934-2 Applied PDAA/PDHA / Page 28 of 44... -
Page 29: Digital Touchpad With Automatic Changeover From Cooling To Heating & Heating To Cooling
• Cooling initiates when the room temperature reaches one degree above the thermostat setpoint. Cooling terminates when the room temperature falls two degrees below the setpoint IM 934-2 Applied PDAA/PDHA / Page 29 of 44... - Page 30 5 seconds button. Once in the configuration mode, the default temperature scale will be displayed as shown below. Toggle the temperature scale to degree Celsius by pressing either button: IM 934-2 Applied PDAA/PDHA / Page 30 of 44...
- Page 31 See Clock Set buttons. Menu instructions to reset the time and day of week. DAY 1 HEAT 8:00 MORN IM 934-2 Applied PDAA/PDHA / Page 31 of 44...
-
Page 32: Remote Wall Mounted Thermostats
• RC, RH, C, W, Y, O, B, G • 1 stage heat, 1 stage cool or single stage electric heat pump Terminations: • R, C, W, Y, O, B, G IM 934-2 Applied PDAA/PDHA / Page 32 of 44... -
Page 33: Wireless Remote Control (Option)
Notes: The remote must be aimed in a line of sight of the window in the upper right corner on the front pan- el, at less than a 45° angle from center of the window. IM 934-2 Applied PDAA/PDHA / Page 33 of 44... -
Page 34: Remote Thermostat With Secondary Units Wiring Connections
Refer to the instructions furnished with the thermostats should be wired as shown in Figure 40. chosen thermostat. Other considerations for this arrangement are as follows: Figure 40. Remote Thermostat With Secondary Units Wiring Connections IM 934-2 Applied PDAA/PDHA / Page 34 of 44... -
Page 35: Premium (Programmable) Digital Control
OAS = Outdoor Air Sensor ICS = Indoor Coil Sensor IAS = Indoor Air Sensor LUI = Local User Interface HYV = Hydronic Valve REV = Reversing Valve EHC = Eletric Heat Contactor IM 934-2 Applied PDAA/PDHA / Page 35 of 44... -
Page 36: Standard (Non-Programmable) Digital Control Wiring Diagram
Outdoor Coil Sensor OCS = Outdoor Air Sensor OAS = Indoor Coil Sensor ICS = Indoor Air Sensor IAS = LUI Local User Interface REV = Reversing Valve Eletric Heat Contactor EHC = IM 934-2 Applied PDAA/PDHA / Page 36 of 44... -
Page 37: Wiring Diagrams
Note: The gray tinted areas in the wiring diagram; are options available only with the premium control board. For the latest drawing version refer to the wiring diagram located on the inside of the controls access panel of the unit. IM 934-2 Applied PDAA/PDHA / Page 37 of 44... -
Page 38: Digital Control Board Without Standby Power
Note: The gray tinted areas in the wiring diagram; are options available only with the premium control board. For the latest drawing version refer to the wiring diagram located on the inside of the controls access panel of the unit. IM 934-2 Applied PDAA/PDHA / Page 38 of 44... -
Page 39: Scheduled Maintenance
Clean condensate drain and clear weep holes located at the bottom rear of wall sleeve. 9. Dry equipment thoroughly, especially electric parts and installation. IM 934-2 Applied PDAA/PDHA / Page 39 of 44... -
Page 40: Recommended Spare Parts
Touch-up Paint (1 pt. spray can) ......... 2 For the current spare parts list, and applicable prices, see your McQuay representative or write McQuay Service, P.O. Box 1551, Minneapolis, MN 55440. IM 934-2 Applied PDAA/PDHA / Page 40 of 44... -
Page 41: Faults And Protection Codes For Ptac/Pthp Control Board
Fault and Protection Codes for Applied PDAA/PDHA Control Board Fault code Description Cause for the fault Communication Error 1. Cable not plugged in properly on either LUI or relay board. 2. Defective cable. Missing Shunt The user configurable shunt for System Select, Control Select Off Fan Cycle, and/or Hydronic Valve is missing or not placed properly. -
Page 42: Troubleshooting Chart
* Ship prepaid to nearest McOuay warranty Restricted capillary or strainer. 1 ) Frost on capillary or strainer station. 2) Low wattage. 3) Condenser not warm. 4) Evaporator partially frosted, only partially cool or not at all. IM 934-2 Applied PDAA/PDHA / Page 42 of 44... - Page 43 Operate the conditioned air blowers only. If this doesn’t cause the noise, operate on cooling. Then disconnect one compressor lead. If the noise stops, the compressor is the source, If not, it is caused by the condenser blower. IM 934-2 Applied PDAA/PDHA / Page 43 of 44...
-
Page 44: Approximate Shipping Weights
8" (203mm) High Hydronic ......20 lbs. (9kg) McQuay Training and Development Now that you have made an investment in modern, efficient McQuay equipment, its care should be a high priority. For training information on all McQuay HVAC products, please visit us at www.mcquay.com and click on training, or call 540-248-9646 and ask for the Training Department.
Need help?
Do you have a question about the PDAA and is the answer not in the manual?
Questions and answers