Table of Contents
Advertisement
Installation and Operation Manual
Floor Ceiling Air-Conditioning Unit
(1.5TON - 5TON)
Unit Model:
Indoor unit
MQS-24018-CFC216A
MQS-24024-CFC216A
MQS-24030-CFC216A
MQS-24036-CFC216A
MQS-24048-CFC216A
MQS-24060-CFC216A
Please read this manual carefully before using this product and keep it properly for future reference.
Advertisement
Table of Contents

Related Manuals for McQuay MQS-24018-CFC216A


Summary of Contents for McQuay MQS-24018-CFC216A
- Page 1 Installation and Operation Manual Floor Ceiling Air-Conditioning Unit (1.5TON - 5TON) Unit Model: Indoor unit MQS-24018-CFC216A MQS-24024-CFC216A MQS-24030-CFC216A MQS-24036-CFC216A MQS-24048-CFC216A MQS-24060-CFC216A Please read this manual carefully before using this product and keep it properly for future reference.
- Page 3 User Notice ☆ Ensure unified power supply for each indoor unit. ☆ Never install wired controller in wet place or under sunlight directly. ☆ Shielding twisted pair line must be adopted as signal line or wiring (communication) of wired controller once the unit is installed in the place where there is electromagnetic interference.
-
Page 4: Table Of Contents
CONTENTS Names and Functions of Parts .................. 1 Safety Precaution ...................... 2 Defrosting Control (Heat Pump) ................6 Names and Functions of Remote Controller Buttons..........8 Wired Remote Controller..................11 Maintenance......................29 Operating Instructions .................... 30 Precautions......................31 Trouble Shooting ....................32 10 Installation Notes .................... -
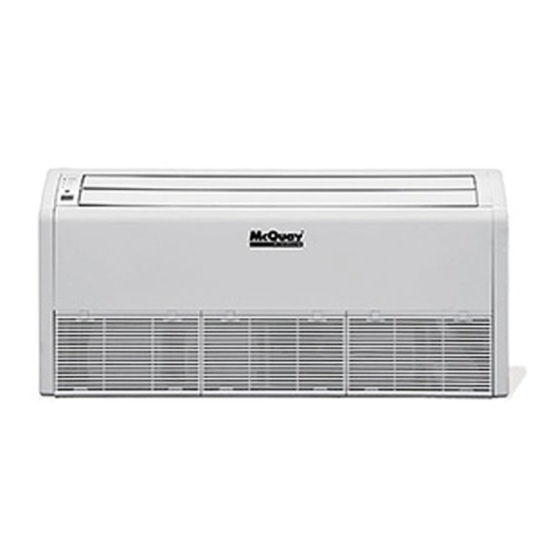
Page 5: Names And Functions Of Parts
Names and Functions of Parts ① POWER ② COOL ③ HEAT ④ Power cable Air outlet Remote controller Drainage pipe Refrigerant pipe Instruction of LED Board Display ① Indication LED of “POWER”: The LED will go on when the unit is power on The LED will go off when the unit is power off ②... -
Page 6: Safety Precaution
Safety Precaution To gain full advantage of the air conditioner’s functions and to avoid malfunction due to mishandling, we recommend that you read this instruction manual carefully before use. This air conditioner is classified under “appliances not accessible to the general public”. Please read these “SAFETY PRECAUTIONS”... - Page 7 repaired. Consult our local dealer regarding what to do in case of refrigerant leakage. When the air conditioner is to be installed in a small room, it is necessary to take proper measures so that the amount of any leaked refrigerant does not exceed the concentration limit in the event of a leakage. Otherwise, this may lead to an accident due to oxygen depletion.
- Page 8 Failure to use the specified parts may result in the unit falling, water leakage, electric shocks or fire. Install the air conditioner on a foundation strong enough to withstand the weight of the unit. A foundation of insufficient strength may result in the equipment falling and causing injury. Carry out the specified installation work after taking into account strong winds, typhoons or earthquakes.
- Page 9 Falling or tumbling may result in injury. Do not block air inlets or outlets. Impaired air flow may result in insufficient performance or trouble. Be sure that children, plants or animals are not exposed directly to airflow from the unit, as adverse effects may ensue.
-
Page 10: Defrosting Control (Heat Pump)
radios to prevent picture interference and noise. (Depending on the incoming signal strength, a distance of 1 meter may not be sufficient to eliminate noise.) Remote controller (wireless) transmitting distance can be shorter than expected in rooms with electronic fluorescent lamps (inverter or rapid start types). Install the indoor unit as far away from fluorescent lamps as possible. - Page 11 In Summary: After t mins of operation of the compressor under “heating” mode, defrosting starts when the defrosting thermistor indicates the temperature below T1 for 1 min. Meanwhile, the 4-way valve is energized, the fan motor of outdoor unit stops running and the auxiliary electric heating device is powered. The defrosting will stop after it operates for 10 consecutive minutes or the temp sensor detects the ambient temperature over T2 .
-
Page 12: Names And Functions Of Remote Controller Buttons
High Pressure Protection Flashing every 0.5s Low Pressure Protection Flashing every 0.5s Outdoor Ambient Temp. Sensor Malfunction Defrosting Temp. Sensor Malfunction Table 3-2: Main Board LED Display Instruction Names and Functions of Remote Controller Buttons NOTE: This remote controller is applicable to many units. Some buttons unavailable in this unit such as “TURBO”, “BLOW”, “LIGHT”, “TEMP”... - Page 13 3. “+” and “–” button Press the “+” or “–” button to set your desired temperature. The temperature ranges from 16 to 30 .It is not necessary to set temperature at the AUTO mode. And when setting the timing hours, press the “+” or “–” button once, and the timing hours will increase or decrease 0.5 hour.
- Page 14 Notices of Batteries Replacement Slightly press the mark and push the back cover of remote controller towards the arrowheaded direction (as shown in Fig. 4-2). Take out the old batteries and insert two AAA alkaline cells (as shown in Fig. 4-3). Attach the back cover of the remote controller.
-
Page 15: Wired Remote Controller
Wired Remote Controller 5.1 Displaying Part Fig.5-1 Outline of wired controller 5.1.1 LCD Display of Wired Controller Fig.5-2 LCD display... - Page 16 5.1.2 Instruction to LCD Display Table 3.1 Description Instruction to Displaying Contents Swing Swing function Air * Air exchange function Sleep Sleeping states Running mode Each kind of running mode of indoor unit (auto mode) Cooling Cooling mode Dry mode Fan mode Heating Heating mode...
- Page 17 5.2 Buttons 5.2.1 Silk Screen of Buttons Fig. 5-3 Silk screen of buttons 5.2.2 Instruction to Function of Buttons Table 3.2 Description Function of Button (1) Function selection and canceling; Enter/cancel (2) Press it for 5s to enquiry the outdoor ambient temperature. (1) Running temperature setting of indoor unit, range :16~30 C (2) Timer setting, range:0.5-24hr (3) Switchover between quiet/auto quiet...
- Page 18 5.3 Installation of Wired Controller 5.3.1 Installation of Wired Controller Fig.5-4: Sketch for Installation of Wired Controller Socket’s base box Soleplate Front panel Description Screw ST2.2X6.5 installed in the controller Screw M4X25 controller wall Fig.5-4: Sketch for Installation of Wired Controller. Pay attention to the following items during installation of wired controller: 1.
- Page 19 5.4 Instruction to Operation 5.4.1 On/Off Press On/Off button to turn on the unit. Repress this button to turn off the unit. Note: The state shown in Fig.5-5 indicates off-state of the unit after energization. The state shown in Fig.5-6 indicates on-state of the unit after energization. Fig.5-5 Off state of the unit Fig.5-6 On state of the unit 5.4.2 Mode Setting...
- Page 20 5.4.3 Temperature Setting Press button to increase or decrease of setting temperature under on-state of the unit. If press either of them continuously, temperature will be increased or decreased by 1°C every 0.5s. In Cooling, Dry, Fan and Heating mode, temperature setting range is 16°C~30°C. In Auto mode, the setting temperature is un-adjustable.
- Page 21 5.4.5 Swing Control Function Under on-state of unit, press Function button till the unit enters swing control function and then press “Enter/cancel “ button to turn on “swing” control function. During swing function, press Function button till the unit enters swing control function and then press Enter/cancel button to cancel swing control function.
- Page 22 is canceled. Timer off setting under on-state of the unit is shown as Fig.5-10 Fig. 5-10 Timer setting under on state of the unit Timer range: 0.5-24hr. Every press of button will make setting time increased or decreased by 0.5hr.If press either of them continuously, setting time will automatically increase/ decrease by 0.5hr every 0.5s.
- Page 23 5.4.7 Air Exchange Setting* Turn on air Exchange function: Under on-state of the unit, press Function button to go to the this function setting (Air mark blinks).AIR 1 displayed at the ambient temperature-displayed location (888) is defaulted (the last type of AIR will be displayed after adjustment).Press button to adjust air type.
- Page 24 5.4.8 Sleep Setting Sleep on: Press Function button under on-state of the unit into sleep function and then press Enter/cancel button to turn on sleeping function. Sleep off: During sleep on-state, press Function button to go to the sleep function and then press Enter/cancel button to turn off this function.
- Page 25 5.4.9 Turbo Function Setting TURBO function: The unit at high fun speed can realize quick cooling or heating so that room temperature can quickly approach setting temperature. In cooling or heating mode, press Function button till the unit enters TURBO function and then press Enter/cancel button to turn on TURBO function.
- Page 26 After energy saving function is turned on, press Function button into energy saving function and press Enter/cancel to cancel this function. The energy saving setting is shown in the fig.5-14. Fig.5-14 Energy Saving Setting Note: 1. In Auto running mode with save function on, the unit will be forcibly quit Auto running Mode and change to current operation mode, After setting of save, sleep function will be canceled.
- Page 27 5.4.11 E-HEATER Setting* E-HEATER: In the heating mode, E-heater is allowed to be turned on for improvement of efficiency. If heating mode is turned on by button operation, auxiliary electric heating function will be automatically turned on. Press Function button in heating mode to go to the auxiliary electric heating function, the E-HEATER blinking, and press Enter/cancel button to turn on this function.
- Page 28 5.4.12 Blow Function Setting BLOW function: After the unit is turned off, water in evaporator of indoor unit will be automatically evaporated to avoid mildew. In cooling and dry mode, press Function button till the unit enters BLOW function, with BLOW blinking, and then press Enter/cancel button to turn on this function.
- Page 29 5.4.13 Quiet Function Setting Quiet function consists of two kinds: QUIET and AUTO QUIET. Press Function button till the unit enters quiet function setting state, Quiet or Auto Quiet mark blinks. In this case, press button to switch between Quiet and Auto Quiet and then press Enter/cancel button to turn on this function.
- Page 30 4. There is not auto quiet function in fan or dry mode. Quiet off is default after power failure and then power recovery. 5. If quite function is set, turbo function will be canceled. 5.4.14 Field Functions Under off-state of the unit, press Function and Timer buttons continuously for 5s to go to the debugging menu. Press Mode button to adjust the setting items and button to set the actual value.
- Page 31 5.4.15.3 Selection of Centigrade and Fahrenheit Under off-state of the unit, press Mode and at the same time for 5s, the displayer panel will switch between Centigrade and Fahrenheit. 5.5 Error Display If there is malfunction during running of the system, LCD will display error code at temperature–displayed location. Once there is more than one malfunction , error codes will be displayed circularly.
- Page 32 5.6 Setting of Indoor Room Sensor 5.6.1 Setting of Double Indoor Room Sensors This series of ducted air-conditioning unit has two indoor room sensors. One is located at the air intake of the indoor unit and the other one is located inside the wired controller. User can select one from the two indoor room sensors on the basis of the engineering requirement.
-
Page 33: Maintenance
Fig.5-20 Fig.5-21 Caution: During the installation of the bottom plate of the wired controller, pay attention to the direction of the bottom plate. The plate’s side with two notches must be at the lower position, otherwise the panel of the wired controller cannot be correctly installed. -
Page 34: Operating Instructions
2、Do not wash with hot water (above 40 ), otherwise some parts of the unit may be deformed. Before the seasonal use 1、Check that nothing blocks the air inlet and outlet of the indoor and outdoor unit. 2、Running the unit without air filters can cause malfunctions due to dirt or dust. Always install the air filter at all times. -
Page 35: Precautions
Precautions Turn off the air conditioner if it is not needed, as electricity interference may occurs while it is running .If the unit is not to be used for a long time, cut off the unit power supply. Do not insert objects into the air inlet or outlet when the air conditioner is running as it may cause damage or personal injury .Also pay special attention when children are around. -
Page 36: Trouble Shooting
Trouble Shooting WARNINGS In case of abnormal operation (such as bad smell), turn off the power switch immediately and contact the service center. Do not repair the air conditioner by yourself because wrong repair may cause fire. Please contact a service center to do it for you. -
Page 37: Installation Notes
10 Installation Notes... -
Page 38: Instructions Of The Unit Installation
When installing the indoor unit, you can use a paper pattern for reference and make sure that the drainage side is 10mm lower than the other side in order to drain the condensation water fluently. Fig. 11-1 Unit:mm Model 1220 1158 MQS-24018-CFC216A MQS-24024-CFC216A 1420 1354 MQS-24030-CFC216A MQS-24036-CFC216A MQS-24048-CFC216A... - Page 39 Selection of an Installation Location Such a place where cool air can be distributed throughout the room. Such a place where condensation water is easily drained out. Such a place that can support the weight of indoor unit. Such a place which has easy access of maintenance. Such a place which is easy to connect the outdoor unit.
- Page 40 Side panel fixing screw (M4.2) Fig. 11-4 3. Loosen two hanger bracket setting bolts (M8) on earth side for less than 10mm. Remove two hanger bracket fixing bolts (M6) on the rear side. Detach the hanger bracket by pulling it backward (See Fig. 11-5) Hanger bracket fixing bolt Hanger bracket...
- Page 41 Ceiling slab Bolt position inward Hanger bracket Fig. 11-7 Suspension bolts should stay side the cap of the indoor unit .Never remove the cap. Lift the unit and slide the hanger bracket in the way that the holes on it will match with the corresponding bolts. (See Fig. 11-8) Fig.11-8 Screw tightly both hanger brackets setting bolts (M10.) (See Fig.
-
Page 42: Installation Of The Outdoor Unit
Fig. 11-10 11.2 Installation of the Outdoor Unit A. Profile Dimensions of the Outdoor Unit Fig. 11-11 Unit: mm Model 1.5TON SIDE- 3.5TON SIDE- 4 TON SIDE- 2 TON SIDE- 3 TON SIDE- 2.5 TON SIDE- DISCHARGE DISCHARGE DISCHARGE DISCHARGE DISCHARGE DISCHARGE OUTDOOR UNIT... - Page 43 Fig. 11-12 Unit: mm Item Model 5 TON SIDE- DISCHARGE 1255 1350 OUTDOOR UNIT Unit: mm 5 TON SIDE- Model DISCHARGE Item OUTDOOR UNIT Fig. 11-13...
- Page 44 B. Schematic Diagram of Installation Spaces Fig. 11-14 Fig. 11-15...
- Page 45 Amount of Additional Max. Height Difference (mm) Max. Pipe Refrigerant to be Filled between Indoor Unit Length (m) (For Extra Length of and Outdoor Unit(m) Gas Pipe Liquid Pipe Pipe) Model 60g/m MQS-24018-CFC216A MQS-24024-CFC216A 60g/m MQS-24030-CFC216A MQS-24036-CFC216A MQS-24048-CFC216A 120g/m MQS-24060-CFC216A...
- Page 46 Note: 1 The standard pipe length is 7.5m. When the length (L) of the connecting pipe is less than or equals 7.5m, there is no need to add refrigerant. If the connecting pipe is longer than 7.5m, it is required to add refrigerant. In the above table, the amounts of refrigerant to be added for the models are listed for each additional meter of pipe length.
- Page 47 Pressure Gage Pressure Gage “HI” Knob “LO” Knob Liquid Valve Vacuum Pump Connecting Hose Gas Valve Fig. 11-18 Caution: 1. When connecting the indoor unit with the connecting pipe, do not pull the big and small joints of the indoor unit forcefully, so as to prevent the capillary of the indoor unit and other pipes from breaking and leaking.
- Page 48 overflowing out from the drainage pipe, separate the drainage pipe from the connecting pipe and the cables. Use thermal insulation tape to wrap the pipes from the bottom of the outdoor unit to the upper end of the pipe where the pipe enters the wall. When wrapping thermal insulation tape, the later circle of tape must cover half of the front circle of tape (refer to Fig.
-
Page 49: Drainage Pipeline Installation
(4) Use cable fasteners to bundle and fix the cable. 2. Air-conditioning unit with 3-phase power supply CAUTION: (1) Remove the front panel of the outdoor unit. Take great care when carrying out the following connections, so as to avoid malfunction of the (2) Attach the rubber ring to the bond hole of the air-conditioning unit due to electromagnetic outdoor unit. - Page 50 Fig. 11-21 If the outdoor unit is installed higher than the indoor unit (refer to Fig. 11-22) Taping should be done from lower to the upper part. All pipes are bound and taped together and also should be trapped to prevent water from returning to the room (See Fig.11-22).
- Page 51 The diameter of the drain pipe should be equal to or greater than the diameter of the connecting pipe. (Vinyl tube: pipe size:20 mm, outer dimension: 26mm) Keep the drain pipe as short as possible and incline downwards at a gradient of at least 1/100 to prevent air pockets (refer to Fig.
- Page 52 Fig. 11-27...
-
Page 53: Operation Test
12 Operation Test 1. Preparations for Test (1) Do not turn on the power switch before all installation is finished. (2) Connect wires correctly and firmly. (3) Open the check valve. (4) Remove all dust. Testing (1) Turn on the power switch and press ON/OFF button. (2) Press MODE button and select COOL, HEAT, or FAN, etc to test whether it operates normally. -
Page 54: Appendix
Appendix: Nominal Working Condition and Working Range of the Air Conditioner Test condition Indoor side Outdoor side DB( ) WB( ) DB( ) WB( ) Nominal cooling Nominal heating Rated cooling Low temp. cooling Rated heating Low temp. heating NOTES: The design of this unit conforms to ISO 5151 requirements. - Page 56 66129907510...
Need help?
Do you have a question about the MQS-24018-CFC216A and is the answer not in the manual?
Questions and answers