Table of Contents
Advertisement
Quick Links
Advertisement
Table of Contents

Related Manuals for Precor Home Bench


Summary of Contents for Precor Home Bench
-
Page 1: Assembly Guide
Assembly Guide Home Bench... -
Page 3: Important Safety Instructions For Owners
Never operate the unit if it is damaged, not working properly, when it has been dropped, or has been dropped in water. Return the equipment to a service center for examination and repair. Home Bench Assembly Guide: Important Safety Instructions for Owners... -
Page 4: Table Of Contents
Unpacking the Equipment ..............3 Installation Requirements ..............3 Hardware Kit (not to scale) ............... 4 Required Tools..................4 Obtaining Service .................. 5 Assembling the Home Bench ............. 6 Maintaining the Home Bench ............ 8 Home Bench Assembly Guide: Table of Contents... -
Page 5: Before You Begin
Before You Begin Thank you for purchasing the Home Bench. This unit is part of the Precor To unpack the equipment: Strength line of quality strength training equipment that help you target specific muscle groups to achieve better muscle tone and overall body 1. -
Page 6: Installation Requirements
Note: The ³ ₈-inch bolts and the ⁵ ₁₆-inch bolts are very similar, but the lock nuts will only fit on the ³ ₈-inch bolts. Test these fasteners with a lock nut before you begin assembly. Home Bench Assembly Guide: Before You Begin... -
Page 7: Obtaining Service
If any items are missing, contact your dealer. If you need more information regarding customer support numbers or a list of Precor authorized service centers, visit the Precor website at www.precor.com. If you have any questions regarding a piece of equipment, locate its serial number and contact Precor Customer Support. -
Page 8: Assembling The Home Bench
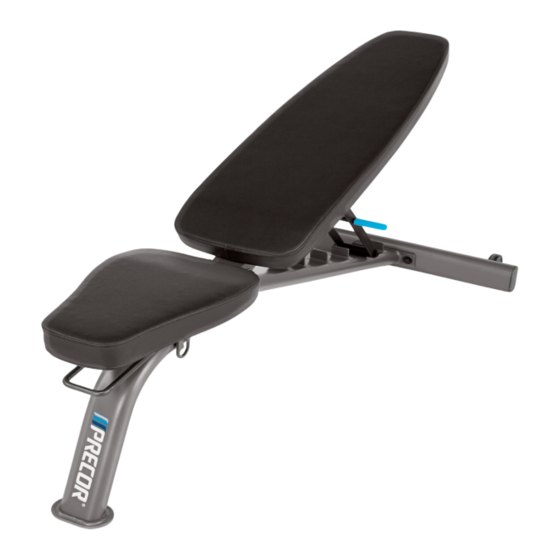
³ ₈-inch bolts. Test these fasteners with a lock nut before you begin assembly. Figure 2: Wheel crossbar attachment Figure 1: Major components of the home bench Home Bench Assembly Guide: Assembling the Home Bench... - Page 9 ¹ ₂-inch wrench. 6. Adjust the seat base to the lowest position. Figure 6: Lower the seat frame 7. Remove the protective film covering the Precor logo on the front leg of the bench frame. Figure 4: Seat pad attachment...
-
Page 10: Maintaining The Home Bench
To clean your home bench, Precor recommends mixing a few drops of mild dish washing liquid in a gallon of water and using it to clean the equipment with a soft cloth. - Page 12 Precor product designs is hereby forewarned that Precor considers the unauthorized Home Bench Assembly Guide Woodinville, WA USA 98072-4002 appropriation of its proprietary rights to be a very serious matter. Precor will vigorously pursue all unauthorized 48827-102 rev B, en 1-800-347-4404 appropriation of its proprietary rights.
Need help?
Do you have a question about the Home Bench and is the answer not in the manual?
Questions and answers