Table of Contents
Advertisement
Quick Links
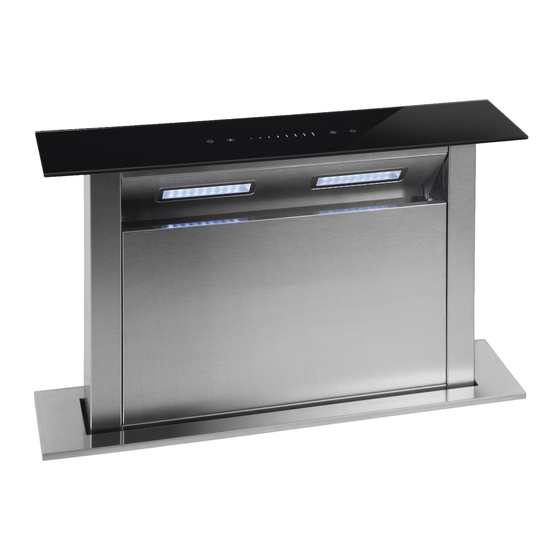
Model:
DD-600RR-G
DD-900RR-G
As part of Parmco Appliances commitment to improving and updating product ranges,
we reserve the right to alter, change and update technical specifications and appearance
attributes of all Parmco Appliances products. E&OE.
Installation
and Operating
Instructions
727626092012
Advertisement
Table of Contents

Subscribe to Our Youtube Channel
Related Manuals for Parmco DD-600RR-G


Summary of Contents for Parmco DD-600RR-G
- Page 1 Installation and Operating Instructions Model: DD-600RR-G DD-900RR-G As part of Parmco Appliances commitment to improving and updating product ranges, we reserve the right to alter, change and update technical specifications and appearance attributes of all Parmco Appliances products. E&OE. 727626092012...
- Page 2 Parmco Appliances before any installation is carried out. We hope you enjoy your new appliance. If you would like to find out more about this product or any other products in Parmco’s extensive range, visit us on the web at www.parmco.co.nz. Regards,...
-
Page 3: Important Safety Information
IMPORTANT SAFETY INFORMATION Thank you for choosing a Parmco Appliance Downdraft. For best performance and to extend the life of your appliance we recommend that you read the instructions in this owners manual thoroughly before using your new appliance. It will provide you with all the information you need to ensure its safe installation, proper use and maintenance. Retain this owners manual for future reference. Parmco is not liable for any damages or injuries caused as a result of not following the installation instructions in this manual. SAFETY INFORMATION This appliance is designed for non‐commercial, domestic household use only and must not be altered in any way. This appliance must be installed by a qualified and registered professional, and be connected to the correct power supply before use. This appliance must only be used by adults. Young children should be supervised to ensure they do not play with the appliance to prevent any possible injuries. This appliance is not intended for use by persons (including children) with reduced physical, sensory, or mental capabilities, or lack of experience and knowledge, unless they are given supervision or instruction concerning the use of this appliance by a person responsible for their safety. Before cleaning, switch off the downdraft and the power supply. The downdraft and its filter mesh should be cleaned regulary in order to maintain it in good working condition. Clean the downdraft according to the instructions manual to avoid any product damage or personal injuries. Keep the appliance away from fire. ... -
Page 4: Installation
INSTALLATION Step 1: For best results, the downdraft should be placed at a minimum distance of 15mm from the wall (Refer Pic 1). Step 2: To ensure there is no water ingress, apply moderate silicon on the edge of the panel bottom (Refer Pic 3), and then insert the downdraft into the hole of the cabinet, 25mm distance between the hole and the wall, 500 mm or 800mm width depending on your downdraft model and 95mm depth (Refer Pic 2). Use 4 screws ST4*8, then screw ST4*14 and mount the bracket to fix the downdraft (Refer Pic 4). Step 3: Fix the outlet on the motor using the 4 screws ST4*8 (Refer Pic 5). Step 4: Attach the motor to the main downdraft using the 8 supplied screws M10*10, ensuring the ducting directions are according to the space available in the cabinet. The possible directions of the ducting can be up, down, left, or right and can be selected by the user according to the space of the cabinet (Refer Pic 6). Step 5: Fix the ducting on the outlet, and use 4 screws ST4*14 to fix the PCB box, connect the power and finish the installation (See Pic 7). Pic. 1 Pic. 2 Pic. 3 Pic. 4 Pic. 5 Pic.6 ... -
Page 5: Lamp Replacement
Pic. 7 The installation of kitchen ventilation over electrical and gas cooktops must be undertaken in full accordance and reference to the relevant New Zealand building standards. LAMP REPLACEMENT Switch off the downdraft and unplug it from the main power supply. Open the decorative door of the downdraft. Insert a small screw‐driver “‐“ type into the gap and pry up the lamp fitting and disconnect the plug (Refer Pic 8). Pic. 8 MAINTENANCE Replace and clean the filter The filter is made of high‐density metal. Do not use corrosive detergent on it. Keeping this filter clean will keep the appliance running correctly. To remove the filter, remove the decorative door of the downdraft and following the indications (Refer to Pic 9). ... - Page 6 Pic. 9 Method 1: Place the filter into 40‐50°C clean soapy water. Allow soaking for at least 2‐3 minutes. Clean with a soft brush and wear gloves. Do not apply too much pressure, as the filter is delicate and will damage easily. Method 2: If the detergent used in the dishwasher is of a non‐caustic type, the filters can be put into a dishwasher. Set the temperature at around 60 C. NOTE: 1. Do not place anything that can block the up and down of the downdraft to avoid damage or body injury. 2. Keep the power off when cleaning the downdraft. OPERATING INSTRUCTIONS The control system consists of two parts: the power panel and the touch panel. The touch panel have five function buttons: Power, Speed, Slide Control, Light and Timer. Timer Light Slide control Speed Power ...
- Page 7 downwards, and stop working. If powered off without turning off the motor, the downdraft will operate at the last set speed option when restarted. 2.2 To stop the downdraft while sliding upwards or downwards, touch the “power” button. Its motor will continue to run. Touch the “power” button again to restart the downdraft sliding downwards or upwards. Step 3: Motor on/off and speed setting 3.1 Touch the “speed” button to turn the motor on; touch it again to turn it off. 3.2. To set the speed, touch the “slide control” area and slide your finger over it. When your finger stops at the first or second point, the motor will run at the lowest speed; when your finger stops at the third or fourth point, the motor will run at the second speed; when your finger stops at the fifth or sixth point, the motor will run at the third speed; when your finger stops at the seventh or eighth point, the motor will run at the highest speed. Step 4: Lighting 4.1. After the downdraft slides up, the lights will turn on automatically in 8‐10 seconds. 4.2 Touch the “light” button and the lights will turn on. Touch the “light” button again, the lights will turn off. 4.3 Touch the “light” button, the pilot light will flash. Touch the “slide control” area to determine the light intensity when the pilot light is flashing. There are 8 speeds of the “slide” button, each speed indicating one light intensity option. When touching the “slide” button, the light will be on with the corresponding light intensity. The manual keys can also be used by touching the “slide” button to operate the downdraft on one pilot light, which will be on with the corresponding light intensity. The pilot light will stop flashing after 15 seconds if there is no function adjustment. Step 5. Timer button 5.1 To set the timer, touch the “timer” button when the downdraft is switched on. When the pilot light of the timer is flashing, touch the “slide control” button to select the timer section. The “timer” button has 8 intervals: 5‐10‐15‐20‐25‐30‐35‐40. Touch the “timer” button to enter into timer mode and confirm the timer section, or it will enter into timer mode automatically 5 seconds later. The motor and the light will turn off automatically when the timer finishes. The downdraft will then enter into standby mode, and the decorative cover will close automatically. 5.2 To reuse the previous setting, touch the “timer” button but without the time setting. Note that the downdraft will record this setting only if it has not been turned off in the meantime. The downdraft will start operating after 5 seconds and the new time will be the last setting. 5.3 When touching the “speed” button or the light intensity control button while the timer ...
-
Page 8: Warranty
09 573 5678 f: 09 573 5699 e: sales@parmco.co.nz w: www.parmco.co.nz Parmco Appliances extended 5 year warranty The Warranty: The Warranty is not valid: • If the product is not installed and operated in accordance with the operating • Subject to the terms and conditions contained within this instructions. warranty, if the product is not of Acceptable Quality (as • If the product is not installed to comply with the electrical, gas, plumbing defined in the Consumer Guarantees Act) within 5 years of and other Regulations and Codes of Practice in New Zealand. the date of original purchase, then Parmco Sales undertakes • If the product is operated on voltages or frequencies outside the normal range for domestic appliances in New Zealand. to repair or, at it’s sole discretion, replace the product.
Need help?
Do you have a question about the DD-600RR-G and is the answer not in the manual?
Questions and answers