Table of Contents
Advertisement
Quick Links
Advertisement
Table of Contents

Subscribe to Our Youtube Channel
Related Manuals for Parmco DD-600RR-G


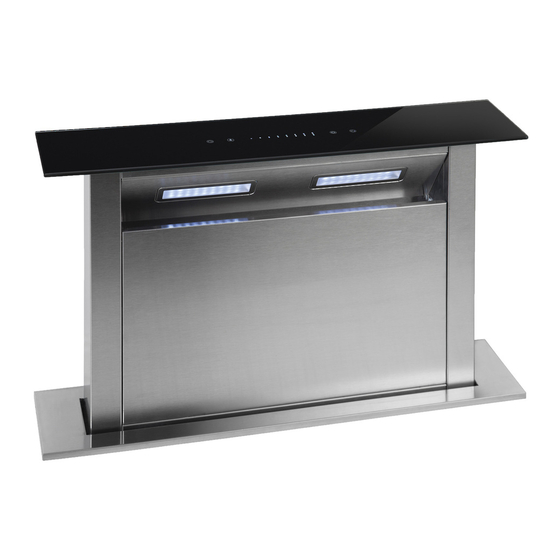
Summary of Contents for Parmco DD-600RR-G
- Page 1 Installation and Operating Instructions Model: DD-600RR-G DD-900RR-G 727623112020...
- Page 2 Liability under this warranty will not be accepted for: Subject to updates without prior notice, please visit www.parmco.co.nz for E & O.E. 727626062017 the latest version.
- Page 3 Dear Valued Customer, Thank you and congratulations on purchasing your new Parmco appliance. All Parmco products are made to the highest quality and design standards. We are sure you will enjoy your new appliance. As a note, please read through these instructions carefully. These will assist you appliance.
-
Page 4: Table Of Contents
Content SAFETY INSTRUCTIONS ..........................1 FEATURES ..............................1 INSTALLATION (VENT OUTSIDE) ......................... 2 REMOTE MOUNTING INSTRUCTIONS ......................3 LAMP REPLACEMENT ..........................4 MAINTENANCE ............................5 OPERATING INSTRUCTIONS ........................6 TECHNICAL DATA ............................8 TROUBLESHOOTING ........................... 9... -
Page 5: Safety Instructions
SAFETY INSTRUCTIONS • This appliance is designed for non-commercial, household use only and must not be altered in any way. • This appliance can only be used safely when it is correctly connected to an efficient earthing system in compliance with New Zealand Electrical Standards requirements. •... -
Page 6: Installation (Vent Outside)
INSTALLATION (VENT OUTSIDE) For best results, the downdraft should be placed at a minimum distance of 15mm from the wall (Refer Pic 1). To ensure there is no water ingress, apply moderate silicon on the edge of the panel bottom (Refer Pic 3), and then insert the downdraft into the hole of the cabinet, 25mm distance between the hole and the wall, 500 mm or 800mm width depending on your downdraft model and 95mm depth (Refer Pic 2). -
Page 7: Remote Mounting Instructions
Pic 4 Pic 5 Pic 6 REMOTE MOUNTING INSTRUCTIONS When remote mounting the fan motor unit, two cover plates are required to be fitted to allow ducting to be connected between the fan motor and the riser unit (Pic.7). The remote fan motor unit has a 4.5metre cord attached so this will dictate the distance the fan motor unit can be mounted from the riser unit. -
Page 8: Lamp Replacement
• Fit the corresponding plate to the fan motor in the orientation that best suit the installation see and keep in mind the least amount of bends the ducting does the better the air flowwill be • Install the motor in its final position and connect ducting between the riser unit and the fanmotor. •... -
Page 9: Maintenance
MAINTENANCE Replace and clean the filter • The mesh filters can be cleaned by hand. • Remove the decorative board and wipe it clean with a damp cloth. Then,remove the aluminium filter by pressing and holding the 2 slots. • Soak the aluminium filter into the solution of warm water and mild detergent for about 10 minutes. -
Page 10: Operating Instructions
OPERATING INSTRUCTIONS This control system consists of two parts, power panel and touch panel. Touch panel contains five function buttons (power, speed, light, timer, slide control) Timer Light Slide control Speed Power 1. Standby mode Power on, the hood will standby with backlight, backlight will be extinguished after 5 seconds without any operation, for using the hood again, touch any key to wake up it’s standby motion. - Page 11 4. Lighting: 4.1. After the hood slides up, the lights will turn on automatically in 8-10 seconds. 4.2 Touch the button of light , lights will turn off. Touch the light button again, the lights will turn off. 4.3 When you touch the button of light , the pilot light is flashing.
-
Page 12: Technical Data
TECHNICAL DATA Model DD-600RR-G; DD-900RR-G Parmco Appliances Company 519 Mt. Wellington Highway, Auckland, 1062 Voltage 220-240V, ~ 50Hz Rated input power 383W Air movement capacity 1000 m³/h... -
Page 13: Troubleshooting
TROUBLESHOOTING Fault Possible Cause Solution Fan switch turned off Select a fan switch position. Light on, but motor Fan switch failed Contact service center. does not work Motor failed Contact service center. House fuses blown Reset/Replace fuses. Light does not work, Refit mains power cable to power Mains power cable is loose or motor does not work...
Need help?
Do you have a question about the DD-600RR-G and is the answer not in the manual?
Questions and answers