
Related Manuals for Pioneer Eclipse PE320AS


Summary of Contents for Pioneer Eclipse PE320AS
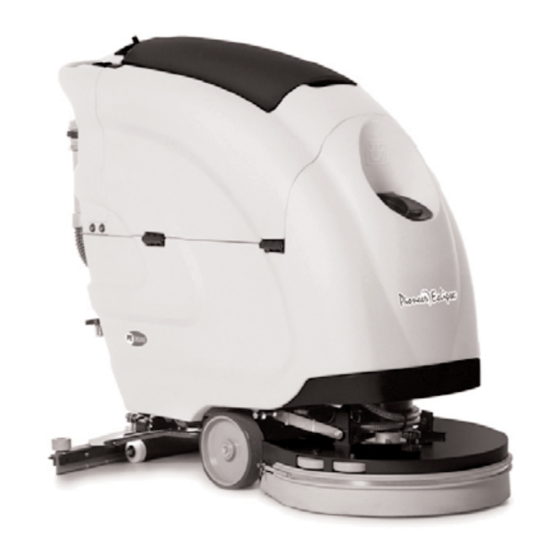
- Page 1 Grou p A company of the Operation Manual Subtitle PE320AS Title We help you shine.™...
- Page 3 The descriptions contained in this document are not binding. The company therefore reserves the right to make any modifications at any time to elements, details, or accessory supply, as considered necessary for reasons of improvement or manufacturing/commercial requirements. The reproduction, even partial, of the text and drawings contained in this document is prohibited by law.
-
Page 4: Table Of Contents
CONTENTS ON CONSIGNMENT OF THE MACHINE ............................4 SERIAL NUMBER PLATE ................................4 INTRODUCTORY COMMENT ............................... 4 TECHNICAL DESCRIPTION ................................4 TECHNICAL DESCRIPTION ................................5 TECHNICAL DESCRIPTION ..................... ERROR! BOOKMARK NOT DEFINED. SYMBOLS USED ON THE MACHINE............................6 GENERAL SAFETY REGULATIONS ............................. 7 MACHINE PREPARATION................................ -
Page 5: On Consignment Of The Machine
(organised collaboration with our dealers) is always available for advice or direct intervention. TECHNICAL DESCRIPTION PE320AS Rated power Working width Width of rear squeegee Work capacity, up to 1750 ∅ mm Brushes (diameter and quantity) 500 x 1... -
Page 6: Technical Description
TECHNICAL DESCRIPTION PE320AS Rated power 1100 Working width Width of rear squeegee Work capacity 1750 ∅ mm Brushes (diameter and quantity) 500 x 1 Brush rotations Pressure on the brushes Brush motor V / W 24/400 Type of advance Automatic... -
Page 7: Symbols Used On The Machine
SYMBOLS USED ON THE MACHINE Tap symbol Used to indicate water regulation changes. (CDS versions) Detergent symbol Used to indicate detergent regulation changes. (CDS versions) Indicator showing battery charge level on the upper line and hour-counter on the lower line. (B-BT versions) Indicator showing the type of hour-counter (total) on the upper line and the type of service (none) on the lower line. -
Page 8: General Safety Regulations
GENERAL SAFETY REGULATIONS The regulations below must be carefully followed in order to avoid harm to the operator and damage to the machine. Read the labels on the machine carefully. Do not cover them for any reason and replace them immediately if they become damaged. -
Page 9: Machine Preparation
2. HANDLING THE PACKED MACHINE The machine is contained in specific packaging. It is not possible to place more than two packages on top of each other. The overall dimensions of the package are: PE320AS 1145mm 665mm 1230mm 3. HOW TO UNPACK THE MACHINE 1. -
Page 10: How To Move The Machine
MACHINE PREPARATION 4. HOW TO MOVE THE MACHINE 1. To safely move the machine, you should use a pallet to support it (positioning wooden wedges to block the wheels, as shown in the previous paragraph). Lower the squeegee by means of the lever at the rear of the machine. To assemble the squeegee, read the “ASSEMBLING THE SQUEEGEE”... -
Page 11: Battery Type
MACHINE PREPARATION 6. BATTERY TYPE (B-BT versions) To power the machine it is necessary to use: • Liquid electrolyte lead traction batte ries • Sealed traction batteries with gasrecombination or gel tec hnology THER TYPES MUST NOT BE USED. he batteries must meet the requisites laid out in standards C EI EN 60254-1:2005- 2 (CEI 21-5) + CEI EN 60254-2:2008-06 (CEI 21-7). - Page 12 6. Disconnect the machine connector (1) of the battery connector (2). 7. Connect the battery charger connector to the battery connector (2). 8. Wait for the green LED of the battery charger to light. 9. Disconnect the battery charger conne ctor from the battery connector (2).
-
Page 13: Recharging The Batteries (Version With Built-In Battery Charger)
MACHINE PREPARATION . RECHARGING THE BATTERIES (VERSION WITH BUILT-IN BATTERY HARGER) (B-BT versions) A TENTION: Please read carefully the use and maintenance instructions of the battery charger that is included with the machine. To charge the batte ries you must: Turn the key of the master switch anticlockwise to the “OFF”... -
Page 14: Instrument Panel Components
MACHINE PREPARATION 11. INSTRUMENT PANEL COMPONENTS The instrument panel components are identified as follows: 1. Levers to activate brushes/traction (located b eneath the grip) 2. Water outlet regulation switch (DS versions) Detergent outlet regulation switch (DS versions) Battery level / hour-counter display Battery level hour-counter display command button Speed level key (BT versions) 12. -
Page 15: Assembling The Squeegee
MACHINE PREPARATION 14. ASSEMBLING THE SQUEEGEE The squeegee, that for reasons of packaging comes disassembled from the machine, must be assembled while assembling the machine. Pro ceed as follows for assembly: Turn the key of the master switch anticlockwise to the “O FF”... -
Page 16: Adjusting The Squeegee Height
16. ADJUSTING THE SQUEEGEE HEIGHT The height of the squeegee must be adjusted on the basis of the state of wear and ar of the rubb er. To do this, turn the knob (1) anticlockwise to raise the squeegee, and clockwise to low er it. -
Page 17: Solution Tank With Automatic Cds Distribution System
MACHINE PREPARATION The solution tank has a maximum capacity of about 48 litres. Add the liquid detergent to the tank in the concentration and manner indicated on the detergent manufacturer' s label. The formation of excess foam could damage the suction motor, so use only the minimum amount of detergent necessary. -
Page 18: Assembling The Splashguard Rubbers
MACHINE PREPARATION Close the recovery tank, rotating it by hand. Hold the recovery tank by the handle only to avoid crushing your hands. Loosen the front cap of the solution tank. Check that the filter cover (3) beneath the solution tank is correctly closed. 0. -
Page 19: Assembling The Brush
MACHINE PREPARATION ASSEMBLING THE BRUSH 1. Use the parking brake handle (1) to stop the achine. 2. Raise the base by means of the appropriate pedal. 3. Turn the key of the master switch anticlockwise to the “OFF” position. With the base in a raised position, place the brush under the seat of the base plate. -
Page 20: Regulating The Solution For Versions Without Ds
MACHINE PREPARATION You are advised to invert the right and left-hand brushes every day. If the brushes are ot new however, and have deformed bristles, it is better to reassemble them in the same position (the right-hand one on the right, and the left-hand one on the left), to prevent the different inclination of the bristles producing an overload on the brush motor as well as excessive vibrations. -
Page 21: Potentiometer Regulation Version With Bt
TENTIO N: If the CDS system does not work , or you want to clean without using this device, you can intervene on the tap (3) on the brush base near the motor, rotating the lever by 180° as shown in the figure. Rotate the knobs (1) and (2) anticlockwise, to “OFF”. -
Page 22: Work
WORK . PREPARING TO WORK Connect the connector (1) to the batteries (versions without a built-in battery charger), insert the machine plug into the mains socket for the electric versions. ATTENTION: before using the machine, the operators must be suitable trained. We therefore suggest you read this instruction booklet carefully and read it again whenever difficulties arise while using the machine Rotate the key of the master switch (2) to the "ON"... -
Page 23: Work
WORK Release the lever (3) an d lower the base. Lower the squeegee, turning the lever (4) anticlockwise. The suction motor will start when fully lowered. At the end of the work, turn the key to the “OFF” position to switc h off the suction motor. -
Page 24: At The End Of The Work
AT THE END OF THE WORK . AT THE END OF THE WORK t the end of the work, and before carrying out any type of maintenance: Turn the key of the master switch to the "OFF" position and then immediately to the "ON"... -
Page 25: Daily Maintenance
DAILY MAINTENANCE 1. CLEANING THE RECOVERY TANK Take the machine in an area designated for the disposal of liquids. Check that the parking brake is engaged. Raise the suction cover and keep it still using the lifting rod (1) at the side. Turn the key of the master switch to the "OFF"... -
Page 26: Disassembling And Cleaning The Squeegee
DAILY MAINTENANCE 4. DISASSEMBLING AND CLEANING THE SQUEEGEE Check the squeegee is always clean, for better drying results. T clean it you must: Raise the squeegee body by turning the lever anticlockwise. Check that the parking brake is engaged. Remove the suction tube (1) from the sque egee. -
Page 27: Weekly Maintenance
W EEKLY MAINTENANCE CLEA NING THE SQUEEGEE TUBE Every week, or w henever suction seems to be unsatisfactory, check the squeegee tube s not obstructed. clean it, proceed as follows: Remove the tube from the sleeve on the squeegee. elease the hinges on the upper part of the machine. Open the recovery tank. -
Page 28: Troubleshooting
TROUBLESHOOTING 1. REPLACING THE SQUEEGEE RUBBERS Check the state of wear and tear of the squeegee rubbers and, if necessary, replace them. The rear rubber (1) should be replaced when the squeege e fails to pick up well, leaving water on the floor. To replace the rubber, you must: 1. -
Page 29: The Machine Does Not Clean Well
3. THE MACHINE DOES NOT CLEAN WELL heck the state of wear and tear of the brush and, if necessary, replace it (the brush must be replaced when the bristles are about 15 mm long). 2. Use a different kind of brush to the one fitted as standard. For cleaning floors where dirt is particularly resistant, we recommend the use of special brushes supplied upon request and according to needs (see “CHOOSING AND USING THE... -
Page 30: Disposal
DISPOSAL dispose of the machine, take it to a demolition centre or an authorised collection centre. fore scrapping the machine it is necessary to remove and separate the following materials and send them to the appropriate co llection centres in accordance with the ironmental hygiene regulations currently in force: •... -
Page 31: Choosing And Using The Brushes
CHOOSING AND USING THE BRUSHES POLYPROPYLENE BRUSH (PPL) Used on all types of floors. Good resistance to wear and tear, and hot water (no greater than 60°C). The Polypropylene brush is on-hygroscopic and therefore retains its characteristics even when working in wet condition BRASIVE BRUSH he bristles of this type of brush are charged with highl y aggressive abrasives. -
Page 32: Replacement Parts
CONTENTS PARTS LIST......................................1. Brushes Base As sembly ................................2. Bodywork Assembly.................................. 3. Squeegee Assembly ................................. 4. Squeegee Control Assembly ..............................5.Tank and Water Unit Assembly ..............................6. Solution Tank Assembly ................................7. Recovery Tank Assembly ................................. 8 Suction Assembly .................................. - Page 33 Le descrizioni contenute nella presente pubblicazione non si intendono impegnative. L’azienda pertanto, si riserva il diritto di apportare in qualunque momento, le eventuali modifiche ad organi, dettagli, forniture di accessori, che essa ritiene convenienti per un miglioramento o per qualsiasi esigenza di carattere costruttivo o commerciale. La riproduzione anche parziale dei testi e dei disegni, contenuti nella presente pubblicazione, è...
- Page 82 2) Batteries are warranted by battery manufacturer for (1) year. Call APEC for R/A number. 3) The model PE320AS is warranted to be free from defects in You will need the Engine Serial Number, Machine Serial Number, material and workmanship for a period of one (1) year from date and the Machine Model Number.
- Page 84 16 A. · EN 62233: Household and similar electrical appliances - Electromagnetic fields Methods for evaluation and measurement . shine on. © 2011 Amano Pioneer Eclipse Corporation We help you shine.™...
Need help?
Do you have a question about the PE320AS and is the answer not in the manual?
Questions and answers