
Subscribe to Our Youtube Channel
Related Manuals for GridConnect NET232


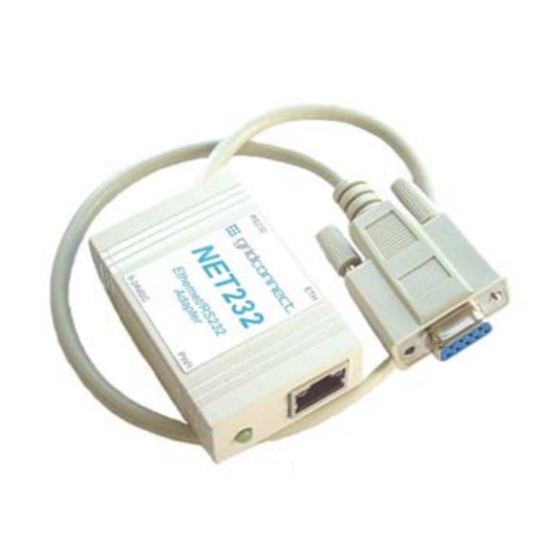
Summary of Contents for GridConnect NET232
- Page 1 NET232/NETUSB Serial to Ethernet Adapter Revision C July 25, 2008 Document Part Number GC-800-232...
- Page 3 NET232 and NETUSB are trademarks of Grid Connect, Inc. XPort is a trademark of Lantronix. Ethernet is a trademark of XEROX Corporation. UNIX is a registered trademark of The Open Group.
- Page 4 The information in this guide may change without notice. The manufacturer assumes no responsibility for any errors that may appear in this guide. Date Rev. Author Comments 11/23/04 Preliminary Release 03/07/06 Update for XPort-03 firmware 6.1.0.0 07/25/08 Update for changes to firmware and OEM pins NET232/NETUSB User Guide...
-
Page 5: Declaration Of Conformity
Declaration of Conformity The XPort Device contained in the NET232/NETUSB conforms to the following standards: (according to ISO/IEC Guide 22 and EN 45014) Manufacturer’s Name & Address: NET232/NETUSB: Grid Connect, 1841 Centre Point Circle, Naperville, IL 60563 USA XPort: Lantronix 15353 Barranca Parkway, Irvine, CA 92618 USA Declares that the following product: XPort™... - Page 6 The contents of this document shall not become part of or modify any prior or existing agreement, commitment or relationship. NET232/NETUSB User Guide...
-
Page 7: Table Of Contents
3.7 Email Settings....................3-11 3.7.1 Trigger Configuration................3-12 3.8 Configurable Pin Settings..................3-13 3.9 Apply Settings ....................3-14 3.10 Apply Factory Defaults ...................3-14 3.11 Configuration Using Telnet or Serial Port............3-15 3.11.1 Using the Serial Port................3-15 3.11.2 Using a Telnet Connection ..............3-15 NET232/NETUSB User Guide... - Page 8 3.16.5 Disable Port 77FE (Hex)..............3-35 3.16.6 Disable Web Server ................ 3-36 3.16.7 Disable Web Setup................3-36 3.16.8 Disable ECHO Ports ............... 3-36 3.16.9 Enable Encryption................3-36 3.16.10 Enable Enhanced Password............3-37 3.16.11 Disable Port 77F0 (Hex) ............... 3-37 NET232/NETUSB User Guide...
- Page 9 6.1.1 Entering Monitor Mode Using the Serial Port........6-1 6.1.2 Entering Monitor Mode Using the Network Port ........6-1 6.1.3 Monitor Mode Commands..............6-1 List of Figures Figure 1 - NETUSB Drivers Installation ................3-2 Figure 2 - Setup Mode Window ...................3-17 Figure 3 - Hostlist Option .....................3-24 NET232/NETUSB User Guide...
- Page 10 List of Tables Table 1 - RS232 Signals......................2-5 Table 2 - USB Signals......................2-6 Table 3 - NET232 LED Functions ..................2-7 Table 4 - Technical Specs ...................... 2-8 Table 5 - Standard IP Network Netmasks................3-18 Table 6 - Netmask Examples ....................3-19 Table 7 - Interface Mode Options ..................
-
Page 11: Overview
Computer To overcome the serial cable limits, you can use a NET232 to make a serial to Ethernet link. Now you can connect the control point to the serial device over the Internet. The software on the control system does not have to be changed. -
Page 12: Additional Documentation
How to use UDP to configure the unit. UDPconfig_800238_a.pdf UDP Configuration How to acquire and use setup records Guide to configure a unit. Additional information to aid in using Tech_Notes_800239_a.pdf Tech Notes the NET232/USB. Serial Tunneling Application Note NET232/NETUSB User Guide... -
Page 13: Introduction
RS232 device, however, there are some that just can’t or won’t work. So here are some things to think about before you start trying to connect a NET232 to your device. If you are not sure, give us a call. -
Page 14: Protocol Support
RS232 cable? Since the NET232 will be using an Ethernet connection to connect your PC to a target device, you will need some way for your software application to think it is still using a COM port instead of an Ethernet application. -
Page 15: Addresses And Port Number
3-21. 2.5 Serial RS232 Interface The table below lists the RS232 signals for the NET232. The RS232 interface is a 9-pin D-style connector. Male connectors are wired as DTE and female connectors are wired as DCE. Table 1 - RS232 Signals... -
Page 16: Usb Interface
2.7 OEM Module The NET232 circuit board can be supplied as an OEM module. The module has two headers that are used to secure the module to a motherboard. One hole on the edge of the board can be used for mounting to a standoff. -
Page 17: Ethernet Interface
Blinking Green Full Duplex Activity 2.10 Product CD The product CD sent with the NET232/USB contains Device Installer software, USB Device Drivers, Application Notes, firmware, user guides and technical documents. The CD contains Virtual COM Port Drivers for the NETUSB device. -
Page 18: Technical Specifications
Direct & Indirect ESD - complies with EN55024:1998 RF Electromagnetic Field Immunity - complies with EN55024:1998 Electrical Fast Transient/Burst Immunity - complies with EN55024:1998 Power Frequency Magnetic Field Immunity - complies with EN55024:1998 RF Common Mode Conducted Susceptibility - complies with EN55024:1998 NET232/NETUSB User Guide... -
Page 19: Getting Started
Web Manager on page 3-7 and in Configuration Using Telnet or Serial Port on page 3-15. 3.2 Physically Connecting the Unit 1. NET232-DTE: Use a null modem adapter to connect the serial cable to a COM port on your PC. NET232-DCE: Connect the serial cable to a COM port on your PC. -
Page 20: Install Usb Device Drivers
Configure 3.3 Install USB Device Drivers Note: Install the NETUSB drivers ONLY if you are using a NETUSB. The files are not needed for NET232. Skip to Methods of Assigning the IP Address on page 3-5. 4. Insert the product CD into your CD-ROM drive. The CD will automatically start and display the main window. -
Page 21: Virtual Com Port Driver Installation Windows 2000
6. Verify that the correct path and filename are shown and press Next. 7. Press Finish to finish installing the "CP2101 USB Composite Device". 8. Windows will open a second “Found New Hardware Wizard” window. 9. Select "Install from a list or specific location (Advanced)" and press Next. NET232/NETUSB User Guide... -
Page 22: Virtual Com Port Driver Installation Windows 98 Se
11. Press Browse to locate the "C:\SiLabs\MCU\CP2101\WIN" directory. Once this directory is selected press Next. 12. Verify that the correct path and filename are shown and press Next. 13. Press Finish to finish installing the "CP2101 USB to UART Bridge Controller". NET232/NETUSB User Guide... -
Page 23: Methods Of Assigning The Ip Address
Hardware Address: 00-20-4a- ____ - ____ - ____ 3.4.2 IP Address Your NET232/USB must have a unique IP address on your network. The systems administrator generally provides the IP address and corresponding subnet mask and gateway. The IP address must be within a valid range, unique to your network, and in the same subnet as your PC. -
Page 24: Autoip
Device Installer is a Windows-based utility for configuring embedded device servers like XPort and WiPort devices. The XPort is found in products such as the NET232, NET232jr. and NET485 Serial to Ethernet adapters. The WiPort is found in the Wi232 Wireless Serial to Ethernet adapter. Device Installer supports several functions such as setting network parameters, pinging a network device, and changing baud rate. -
Page 25: Configuration Using Web Manager
The unit performs a reset after you change and store the configuration. In this chapter, we describe how to configure the XPort in the NET232 using Web-Manager, a browser- based configuration tool. (For information on using Setup Mode, our command line configuration interface, see Configuration Using Telnet or Serial Port on page 3-15. -
Page 26: Network Configuration
Set to Auto Negotiate. With this option, the Ehernet port auto-negotiates the speed and duplex with the hardware endpoint to which it is connected. This is the default. 4. When you are finished, click the OK button. 5. On the main menu, click Apply Settings. NET232/NETUSB User Guide... -
Page 27: Channel 1 Configuration
2. In the available fields, enter the following information: Port Settings Protocol Must be RS232 for the NET232 Flow Control Flow control manages data flow between devices in a network to ensure it is processed efficiently. Too much data arriving before a device is prepared to manage it causes lost or retransmitted data. -
Page 28: Connection Settings - Tcp
The other device can also use port 10001. Remote Host Enter the IP address of the remote device. If you are connecting two NET232 devices in Tunnel Mode, enter the remote IP address of the other device here. 3. When you are finished, click the OK button. -
Page 29: Email Settings
The unit sends an email to multiple recipients when a specific trigger event occurs. You can use a two-byte serial string to initiate a trigger. Note: Using configurable pins for Email is not supported on the NET232. See also E-mail Settings on page 3-31. To configure the NET232’s email settings: 1. -
Page 30: Trigger Configuration
Match Data Enter the data, which, when it appears in the communication stream, prompts a trigger. Note: All of the conditions must match for the NET232 to send an email notification. Message Properties Message The subject line of the trigger event email to the specified recipient(s). -
Page 31: Configurable Pin Settings
Note: On the NET232, CP0 should only be set to Clear To Send (CTS) or the default setting. CP1 is not used. CP2 should only be set to Ready To Send (RTS), Data Terminal Ready (DTR) or the default setting. -
Page 32: Apply Settings
Apply Settings makes the changes permanent and reboots the XPort. 2. Click Yes to set factory settings or click No to cancel. 3.10 Apply Factory Defaults Click the Apply Factory Defaults button to set the device server back to the default settings. 3-14 NET232/NETUSB User Guide... -
Page 33: Configuration Using Telnet Or Serial Port
6. To enter a value for a parameter, type the value and press Enter, or to confirm a current value, just press Enter. 7. When you are finished, save the new configurations (option 9). The unit will reboot. NET232/NETUSB User Guide 3-15... - Page 34 Recipient 2: *** Trigger 1 Serial trigger input: disabled Channel: 1 Match: 00,00 Trigger input1: x Trigger input2: x Trigger input3: x Message : Priority: L Min. notification interval: 1 s Re-notification interval : 0 s 3-16 NET232/NETUSB User Guide...
-
Page 35: Figure 2 - Setup Mode Window
Re-notification interval : 0 s Change Setup: 0 Server 1 Channel 1 3 E-mail 5 Expert 6 Security 7 Defaults 8 Exit without save 9 Save and exit Your choice ? Figure 2 - Setup Mode Window NET232/NETUSB User Guide 3-17... -
Page 36: Server Configuration (Network Configuration)
The unit prompts for the number of host bits to be entered, then calculates the netmask, which is displayed in standard decimal-dot notation when the saved parameters display (for example, 255.255.255.0). Table 5 - Standard IP Network Netmasks Network Class Host Bits Netmask 255.0.0.0 255.255.0.0 255.255.255.0 3-18 NET232/NETUSB User Guide... -
Page 37: Change Telnet Configuration Password
0.0.0.0, then the last option in "Server configuration" will be "Change DHCP device name". The "Change DHCP device name" option will allow you to change the DHCP name to an alpha-numeric name. Change DHCP device name (not set) ? (N) Y Enter new DHCP device name : LTX NET232/NETUSB User Guide 3-19... -
Page 38: Channel 1 Configuration (Serial Port Parameters)
Even Parity Odd Parity 1 Stop bit 2 Stop bit (1) 2 stop bits are implemented by software. This might have influence on performance. Note: RS-422/485 I/F Modes are supported on XPort-03 with firmware 6.1.0.0 and above. 3-20 NET232/NETUSB User Guide... -
Page 39: Flow
Note: RTS and CTS control lines are not enabled at the factory. See Configurable Pin Settings on page 3-13. Note: On the NET232, CP0 should only be set to Clear To Send (CTS) or the default setting. CP1 is not used. CP2 should only be set to Ready To Send (RTS), Data Terminal Ready (DTR) or the default setting. -
Page 40: Connect Mode
With a specific start character Manual connection Autostart Hostlist Datagram Type Directed UDP Modem Mode No Echo Data Echo and Modem Response (Numeric) Data Echo and Modem Response (Verbose) Modem Response Only (Numeric) Modem Response Only (Verbose) 3-22 NET232/NETUSB User Guide... - Page 41 129.1.2.3, then an example command string would be C3/7. (This would connect to 129.1.2.3 and port 7.) You may also use a different ending for the connection string. For example, C50.1/23 would connect you to 129.1.50.1 and port 23. NET232/NETUSB User Guide 3-23...
-
Page 42: Figure 3 - Hostlist Option
Port : 00023 03. IP : 010.010.010.003 Port : 00023 Change Hostlist ? (N) Hostlist Retrycounter Hostlist Retrytimeout (250) DisConnMode (00) FlushMode (00) DisConnTime (00:00) : SendChar 1 (00) SendChar 2 (00) Figure 3 - Hostlist Option 3-24 NET232/NETUSB User Guide... - Page 43 PC to the remote machine, accumulating phone charges for each connection. Modem Mode allows you to replace modems with NET232/USBs, and to use an Ethernet connection instead of a phone call, without having to change communications applications and make potentially expensive phone calls.
- Page 44 When an active connection is in effect, the unit will terminate the connection if the following sequence is received from the attached serial device: 1. No serial data is received for one second. 2. The character sequence +++ is received, with no more than one second between each two characters. 3-26 NET232/NETUSB User Guide...
-
Page 45: Send The Escape Sequence (+++) In Modem Mode
Disable or enable the ability to send the escape sequence. The default is Y (Yes) (send the escape sequence). 3.13.7 Show IP addr after ‘RING’ 3.13.8 Auto Increment Source Port Y (Yes) auto increment the source port. The NET232 increments the port number used with each new connection NET232/NETUSB User Guide... -
Page 46: Remote Ip Address
State LED off with connection Disconnect with EOT (^D) 1. The NET232 will send the "Terminal Type" upon an outgoing connection. 2. A password is required for a connection to the serial port from the network. 3. The TCP connection will close even if the remote site does not acknowledge the disconnection. -
Page 47: Flush Mode (Buffer Flushing)
Clear with a connection that is initiated from the device to the network Clear with a connection initiated from the network to the device Clear when the network connection to or from the device is disconnected Alternate Packing Algorithm (Pack Control) Enable NET232/NETUSB User Guide 3-29... -
Page 48: Pack Control
Enter time in the following format: mm:ss, where m is the number of minutes and s is the number of seconds. To disable the inactivity timeout, enter 00:00. Range is 0 (disabled) to 5999 seconds (99 minutes, 59 seconds). Default setting is 0. 3-30 NET232/NETUSB User Guide... -
Page 49: Send Characters
*** Trigger 2 Enable serial trigger input (N) ? Trigger input1 [A/I/X] (X) ? Trigger input2 [A/I/X] (X) ? Trigger input3 [A/I/X] (X) ? Message (): Priority (L): Min. notification interval (1 s): Re-notification interval (0 s): NET232/NETUSB User Guide 3-31... -
Page 50: E-Mail Setup
E-mail setup requires you to set up the e-mail server location as follows: The IP address in decimal-dot notation. Mail server: The user name used by the NET232/USB to send e-mail messages Unit: The Domain name of your e-mail server Domain: Full e-mail address of the recipient. -
Page 51: Expert Settings
RS-485 interface mode to operate correctly, configure one of the configurable pins to RS485_TXEN. To change the configurable pins’ settings, use DeviceInstaller or send setup records to port 77FE. On the NET485, the only valid pin is CP1. See the NET485 manual. NET232/NETUSB User Guide 3-33... -
Page 52: Http Port Number
If necessary, enable the alternate MAC address (if specified in the OEM setup record). 3.15.10 Ethernet Connection Type The NET232 allows for the Ethernet speed and duplex to be manually configured. Enter 0 for auto- negotiation (default). To select the speed and duplex, enter one of the following: 2 (10Mbit/half duplex), 3 (10Mbit/full duplex), 4 (100Mbit/half duplex), or 5 (100Mbit/full duplex). -
Page 53: Security Settings
The default setting is the N (No) option, which enables remote configuration. You can configure the unit by using Device Installer, web pages, Telnet, or serial configuration. The Y (Yes) option disables remote configuration and web sites. NET232/NETUSB User Guide 3-35... -
Page 54: Disable Web Server
192-, and 256-bit encryption key lengths. Note: Configuring encryption should be done through a local connection to the serial port of the NET232, or via a secured network connection. Initial configuration information, including the encryption key, is sent in clear text over the network. -
Page 55: Enable Enhanced Password
3.16.11 Disable Port 77F0 (Hex) Port 77F0 is a setting that allows a custom application to query or set the three NET232 configurable pins when they are functioning as general purpose I/O (GPIO). You may want to disable this capability for security purposes. -
Page 57: Updating Firmware
3. Select the desired unit and click the Upgrade icon or select Upgrade from the Device menu. The Device Upgrade Wizard appears. Follow the instructions on the wizard screens. The unit performs a power reset after the firmware has been loaded and stored. NET232/NETUSB User Guide... -
Page 59: Troubleshooting
Some unexplained errors might be caused by duplicate IP addresses on the network. Make sure that your unit's IP address is unique. When troubleshooting the following problems, make sure that the NET232/USB is powered up. Confirm that you are using a good network connection. See... - Page 60 (77FEh) is not blocked with any message “No Connection With on the server. router that you are using on the The server” displays. network. Also make sure that port 77FEh is not disabled within the Security settings of the server. NET232/NETUSB User Guide...
-
Page 61: Technical Support
If you are experiencing an error that is not described in this chapter, or if you are unable to fix the error, you may: Contact Grid Connect at (630) 245-1445. Our phone lines are open from 8:00AM - 4:30 PM Central Time Monday through Friday excluding holidays. Firmware downloads, FAQs, and XPort manuals are available at: www.lantronix.com/support NET232/NETUSB User Guide... -
Page 63: Monitor Mode
(opt) parameter (xxx.xxx.xxx.xxx). If the IP address is given, the command is applied to another Device Server with that IP address. If no IP address is given, the command is executed locally. Note: All commands must be given in capital letters. NET232/NETUSB User Guide... -
Page 64: Table 18 - Monitor Mode Commands
Entering any of the commands listed above will generate one of the following command response codes: Table 19 -Command Response Codes Response Meaning 0> OK; no error 1> No answer from remote device 2> Cannot reach remote device or no answer 8> Wrong parameter(s) 9> Invalid command NET232/NETUSB User Guide... - Page 65 NET232/NETUSB User Guide...
Need help?
Do you have a question about the NET232 and is the answer not in the manual?
Questions and answers