Table of Contents
Advertisement
Quick Links
Advertisement
Table of Contents

Subscribe to Our Youtube Channel
Related Manuals for Ossa TR280i


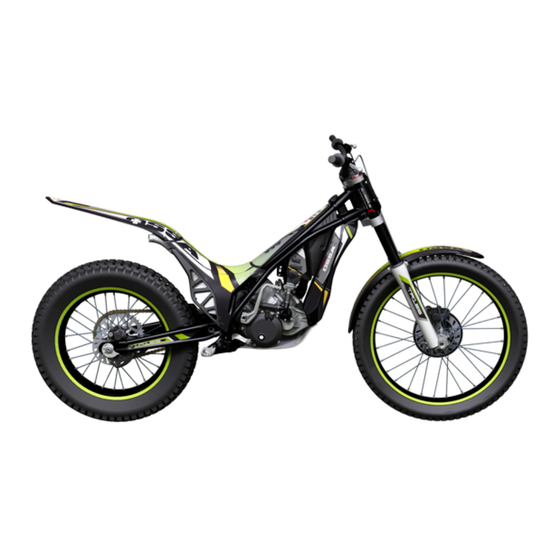
Summary of Contents for Ossa TR280i
-
Page 2: Table Of Contents
CONTENTS 1. Motorcycle specifications 2. Engine part 2.1 Assembling or dismantling the engine from the chassis 2.2 Assembly and disassembly of engine parts 2.2.1 Engine start 2.2.2 Clutch 2.2.3 Gears 2.2.4 Ignition 2.2.5 Cylinder head 2.2.6 Cylinder 2.2.7 Piston and rings 2.2.8 Ignition 2.2.9 Ignition inner cover 2.2.10 Crankshaft... - Page 3 Ground clearance (unloaded) 340 mm Fuel tank capacity 2,6 litros Weight (no fuel) 64 Kg OSSA Factory S.L. reserves the right to modify this manual without notice. Kokusan, Marzocchi, OHlins are registered brands and the use of their name is under license.
-
Page 4: Engine Part
ENGINE PART All operations on the engine of TR280i can be done without taking it appart from the chassis, except when it is needed to work on the fuel pumps situated at the bottom of the fuel tank. For this case or to work more comfortably on other operations, this is the procedure to disassemble the engine from the chassis. -
Page 5: Clutch
ASSEMBLY AND DISASSEMBLY OF THE ENGINE FROM THE CHASSIS 5. Take off the rear wheel, the swing arm, the shock absor- ber and the brake pump from the chassis. 7. Empty the clutch oil and remove the hose from the engi- 8. -
Page 6: Gears
ENGINE PARTS 1- STARTING SYSTEM Before taking appart the starting system, you must make sure the engine has no oil in the crankcase leaning the bike to both sides. Also the clutch oil, removing the hose from the clutch cover. Unscrew the 6 bolts that hold the clutch cover on the crankcase and take of the cover toghether with the ignition system, kickstart pedal, shaft and gear. - Page 7 ENGINE ASSEMBLY AND DISASSEMBLY 2- CLUTCH Once the clutch cover is out, you can see the clutch system. Follow these steps to take it appart. Take out the 18 bolts which hold the clutch spring support plate. Take off the spring, the pressure plate and the 18 clutch release arms to access the clutch discs. Remove the clutch discs.
- Page 8 ENGINE PARTS 3- GEAR SHIFTING ASSEMBLY Once you have taken out the clutch discs, the clip that holds the countershaft sprocket, the sprocket, the bushing with its two O-rings and the gear shifting pedal, we can separate the gear assembly from the engine.
-
Page 9: Cylinder Head
ENGINE ASSEMBLY AND DISASSEMBLY 4- CYLINDER HEAD It is recommendable to take out the cooling system hoses which are connected to the cylin- der head with zip-ties, and the temperature sensor. After this, the cylinder head can be disassembled by unscrewing the 8 bolts which hold it toghether with the cylinder. - Page 10 ENGINE PARTS 5- CYLINDER Before taking the cylinder appart from the engine, it is recommendable to remove the hoses from the cooling system. To proceed, the 4 bolts that fix the cylinder to the crankcase must be taken out.
-
Page 11: Piston And Rings
ENGINE ASSEMBLY AND DISASSEMBLY 6- PISTON AND RINGS Once the cylinder is out, the next step is to take out the cylinder and the rings, removing the locking snap rings and the piston pin, we can take the piston appart from the rod, and then remove the rings if desired. -
Page 12: Ignition
If we remove the ignition cover we can access the rotor. Once the rotor is out we can get to the stator. Remove the 5 bolts from the ignition cover. Using the special tool (included in the tool kit Ossa ref. 1499960211) we can take out the rotor. - Page 13 ENGINE ASSEMBLY AND DISASSEMBLY We can proceed to remove the stator, taking out the bolts that hold it toghether with the inner cranks- haft cover, toghether with the pick-up.
-
Page 14: Crankshaft
Once the stator and rotor are out, the inner crankshaft cover can be removed. It is held toghether with the crankshaft by 6 bolts. It is necessary to use the extractor kit which is part of the Ossa workshop toolkit (ref. 1499960211). After this step, the crankshaft can be accessed. - Page 15 ENGINE ASSEMBLY AND DISASSEMBLY Using the tool we take out the inner crankshaft cover. Be careful to avoid damaging the gasket.
- Page 16 ENGINE PARTS 9- CRANKSHAFT To remove the crankshaft it is necessary to use the special tools. (ref. 1499960211) Follow these steps: Unscrew the long pin that locks the bearing of the crankshaft (1). Heat up the area in the circle (2) with a heat blower so that the crankshaft expands and makes the extraction of the crankshaft easier.
-
Page 17: Water Pump
ENGINE ASSEMBLY AND DISASSEMBLY 10- WATER PUMP To remove the water pump, it is recommended to remove first the rubber water hoses which are attat- ched to it with metal zipties. Take out the 3 bolts that hold the pump onto the crankcase. The water pump can be removed. - Page 18 ENGINE PARTS RECOMMENDED TORQUE VALUES FOR THE ENGINE BOLTS PART TORQUE (N·m) Spark plug Ignition fixing points Clutch fixing points Cylinder bolts Reed block The 18 bolts for the clutch spring support plate Water pump Clutch cover Rotor Water tubing fittings Ignition cover Oil draining cap Bolts for the kickstart pedal...
- Page 19 ENGINE ASSEMBLY AND DISASSEMBLY RECOMMENDED TOOLS FOR SERVICING THE OSSA TR280i ENGINE IGNITION & STATOR TOOL CLUTCH POSITION TOOL CRANKSHAFT TOOL PRIMARY BEARING TOOL 1499960211 OSSA WORKSHOP KIT 1000960211 MOTOR SUPPORT TOOL...
-
Page 20: Cycle Part
CYCLE PARTS RECOMMENDED PERIODIC MAINTEINANCE GREASE/ PART CHECK ADJUST REPLACE WASH LUBE Rear shock Every ride Every 2 years Front fork Every ride When re- Every 2 years quired Front fork oil 60 hours Brakes Every ride When re- If damaged quired Swingarm and linkage Every ride... - Page 21 RECOMMENDED TORQUE VALUES FOR CYCLE PARTS PART TORQUE (N·m) Front Wheel axle 40-50 70-80 Swingarm to chassis fixing points Upper and lower joints from the shock absorber 40-50 Suspension linkage 40-50 Handblebars 18-25 Front brake and clutch levers 7-10 Radiator 7-10 Front mudguard support 7-10...
-
Page 22: Electrical Part
ELECTRICAL PARTS... - Page 23 ESQUEMAS ELÉCTRICOS...
- Page 24 ELECTRICAL PARTS...
- Page 25 ESQUEMAS ELÉCTRICOS...
- Page 26 ELECTRICAL PARTS INTRODUCTION This document describes the K-Scan System for PC. Figure 1 shows the system composition. The K-Scan gives instructions of Active Test, gathers and displays sensor values of the ECU. Figure 1 System Composition Chart INSTALLATION 1. Execute ‘setup.exe’ to show component setup wizard. 2.
-
Page 27: Kscan
KSCAN 3. After installed the component, K-Scan setup wizard will be shown. A) Click [Next] button in a ‘Welcome to the K-Scan Setup Wizard’ screen. B) Select installation folder and user button in a ‘Select Installation Folder’ screen, then click [Next]. - Page 28 ELECTRICAL PARTS FOLDER COMPOSITION [C:¥Program Files¥K-Scan(OSSA)] K-Scan.exe Execute File K-Scan.ini Main Setting File GraphSetting.txt Graph Setting File MakerCodeSetting.txt Maker Code Setting File A ctiveTestSetting.txt Active Test Setting File PCodeSetting.csv PCode Setting File K-Scan.pdf User Manual(this document) [¥Image] English.bmp American National Flag for the Language Screen.
- Page 29 KSCAN SPECIFICATION FUNCTION Title View This is the start screen of the application. Figure 2 Title View Screen Data View Large This screen is to display sensor values of 8 Data Items and 3 fixed Data Items. 3 fixed Data Items, En- gine Temperature, Engine Speed and Intake Air Temperature, are displayed by meters and values.
- Page 30 ELECTRICAL PARTS 1 Engine Temperature Display Data Item Engine Temperature by meter and value. 2 Engine Speed Display Data Item Engine Speed by meter and value. 3 Intake Air Temperature Display Data Item Intake Air Temperature by meter and value. 4 Selected Data Item Display selected Data Item by value.
- Page 31 KSCAN DATA VIEW This screen is to display sensor values of Data Items. Sensor values are updated by every 0.5 seconds. Figure 5 Data View Screen List box Display all Data Items that the ECU corresponds. #: Index Data Item: name of each Data Item. Value: sensor values of each Data Item.
- Page 32 ELECTRICAL PARTS GRAPH VIEW This function is to display sensor values by graphs. Graphs are updated every 0.1 seconds. You can select 8 Data Items using Graph Setting Dialog that is shown by clicking ‘View Setting’ menu, or toolbar button. You can also select a type of graph, parallel and overlay, using Graph Setting Dialog. If you se- lect less than 8 Data Items and parallel view mode, size of graphs will be automatically adjusted.
- Page 33 KSCAN Figure 7 Graph View(Overlay) Screen Graph Display sensor values of Data Items by graphs. These graphs keep sensor values for 10 seconds. Leftpart of the graph will be discarded and the other partswill be shifted to the left after 10 seconds. These graphswill be cleared when you move to other screens.
- Page 34 ELECTRICAL PARTS Graph Setting This dialog is used to set graph parameter. Figure 8 Graph Setting Dialog Data Items Check box Set a channel to be displayed or not. Checked channels will be displayed on the graph. Data Items Combo box Select Data Item of the channel.
- Page 35 KSCAN ACTIVE TEST This function is to execute Active Test items. There are 8 Data Items in one page, and you can scroll page by clicking [<<] and [>>] buttons. You cannot click any button during Active Test, except [Stop] button.
- Page 36 ELECTRICAL PARTS Diagnosis This function is to display DTC (Data Trouble Code) of the ECU. This screen displays DTC errors by 2 list-boxes, to show two types of DTC error, current error and historic error. Figure 10 Diagnosis Screen...
- Page 37 KSCAN Current list box Display current DTC errors. #: Index Description: DTC Description Failure Type: Failure Type name P Code: P Code History list box Display historic DTC errors. #: Index Description: DTC description. Failure Type: Failure Type name P Code : P Code [Toolbar] Save button Save a screen data as csv format file.
- Page 38 ELECTRICAL PARTS DATA RECORDING This function is to record sensor values of 8 Data Items. You can select 8 Data Items using Select Data Items Dialog that is shown by clicking ‘View Setting’ menu or toolbar button. You can also give the file name, recording time and trigger setting using Data Recording Setting Dialog that is shown by clicking Data Recording Setting menu or toolbar button.
- Page 39 KSCAN List box Display 8 Data Items. CH: Index of Channel. Data Item: name of each Data Item. Value: sensor values of each Data Item. Unit: units of each Data Item. File Name Display a filename. When ‘Use Date/Time’ is displayed, the filename is created by date and time before start recording.
- Page 40 ELECTRICAL PARTS SELECT DATA ITEMS This dialog is to select 8 Data Items. Figure 12 Select Data Items Dialog CH0 - CH7 combo box Select a Data Item from a list. The list is created when this dialog is created. [OK] button Save selection of Data Items and close this dialog.
- Page 41 KSCAN DATA RECORDING SETTING This dialog is used to set Data Recording settings. Figure 13 Data Recording Setting Dialog Recording Time Set the record time (H: hour M: minute S: second) byspin controls. File Name Display a file name. [Date/Time] button Set the filename by date and time.
- Page 42 ELECTRICAL PARTS LOG FILE VIEW This function is to display graphs of sensor values in a log file created by Data Recording function of this application or K-Scan(PDA) application. You can open a log file using common dialog that is shown by clicking ‘View Setting’...
- Page 43 KSCAN Figure 15 Log File View(Overlay) Screen Date/Time Display date and time in a log file. Graph Display sensor values of Data Items. There is no limitation to the x-axis that means time span. Operation Mode Set mouse operation mode on graphs. When [Zoom] is selected,plot areas of graphs will be initia led.
- Page 44 ELECTRICAL PARTS Log File View Setting This dialog is used to set graph parameter. Figure 16 Log File View Setting Dialog Data Items Check box Set a channel to be displayed or not. Checked channelsare displayed by graph. Data Items Combo box Select Data Item of a channel.
- Page 45 KSCAN OPERATING TIME VIEW This dialog is used to set Operating time view. Figure 17 Operating time View Total operating time Display the Total operating time. Can not be cleared. Operating time 1 Display the Operating time 1. [Clear] button Operating time 1 Clear Clear the Operation time 1.
- Page 46 ELECTRICAL PARTS Transfer Setting This dialog is used to set the transfer. Figure 18 Transfer Setting Dialog Transfer Type combo box Set the transfer type. You can select the transfer type only ‘RS232C’ in this version. RS232C Port Number combo box Set the COM port.
- Page 47 KSCAN Language Setting This dialog is used to select a language. Figure 19 Language Setting Dialog English Select English as the language setting. Spanish Select Spanish as the language setting. [OK] button Save settings and close this dialog. [Cancel] button Cancel settings and close this dialog.
- Page 48 ELECTRICAL PARTS Throttle Setting This function is to set a TPS (Throttle Position Sensor) voltage at closing point to the ECU. In order to adjust differences of throttle body (TH/B) on a vehicle, it is possible to let the ECU to learn the TPS voltage at the metal touch position of throttle butterfly.
- Page 49 KSCAN ECU INFORMATION This dialog is used to see ECU information. Figure 21 ECU Information Dialog ECU ID Display the ECU ID (Serial Number). Display a VIN (Vehicle Identification Number) code of the ECU. Software Type Display a software type of the ECU. Software Version Display a hardware version of the ECU.
- Page 50 ELECTRICAL PARTS VIN SETTINGS This dialog is used to set a VIN code to the ECU. Figure 22 VIN Setting Dialog Current Code Display a VIN (Vehicle Identification Number) code ofthe ECU. Write Code text box Input a VIN code to be set to the ECU. [Set to ECU] button Set inputted VIN code to the ECU.
- Page 51 KSCAN About K-Scan This dialog is used to display version information. Figure 23 About K-Scan Dialog [OK] button Close this dialog.
- Page 52 ELECTRICAL PARTS MESSAGE LIST Message Type Screen Case Cannot open 'K-Scan.txt'. Title ‘K-Scan.txt’ does not exist. Cannot open 'GraphSetting.txt'. Title ‘GraphSetting.txt’ does not exist. Cannot open 'PCodeSetting.csv'. Title ‘PCodeSetting.csv’ does not exist. Cannot open Title 'MakerCodeSetting.txt' does not ‘MakerCodeSetting.txt’ exist. Cannot open ' Title 'ActiveTestSetting.csv' does not...
- Page 53 KSCAN The ECU returned invalid code. Please reset the ECU. Diagnosis When the ECU returned invalid code. Push the stop button, and try again. Graph View When you click the Active Test Running button to Switch Screen Data Recording while each process of Screens is running.
- Page 54 ELECTRICAL PARTS Would you like to write VIN code? YESNO VIN Setting When you click the Set to ECU button. Cannot write VIN Code. VIN Setting When the application failed to write the ‘Histo ric Error’. Cannot save screen data. Data View When the application Diagnosis...
- Page 55 KSCAN...
-
Page 56: Kwrite
ELECTRICAL PARTS QUICK SOFTWARE UPDATING 1.First of all disconnect the Capacitor Unit wires (under the headlight mask) and connect to a 12V Battery. 2.Execute the [Kwrite Pro] software. 3.Register the “kds file” in [Kwrite Pro]. Note: this process is necessary to execute only once for each update version. Step 1 Start [Kwrite Pro] and click on “KCM”... - Page 57 KWRITE PRO 4. Write/-Update the .kds file in ECU. Step 1 Click on “Pro” Step 2 Click on “Edit” only the first time. Step 3 The .dks file registered by Pro- cess 2 is displayed. Select the file that executes writing. Step 4 Click on “Start Download”.
- Page 58 ELECTRICAL PARTS 5. Adjustment of Idle Position: Execute the [Kscan] software. Step 1 Click the icon “Ajuste de la aceleracion” Step 2 With the thottle on the base position (idle position) click “Set de ECU” Step 3 Click “Yes” to confirm. Step 4 The adjustment ot the idle position is done.
- Page 59 KWRITE PRO...
-
Page 60: Cylinder
MAINTENANCE 5.1 CYLINDER HEAD Check the flatness of the surface and the state of the rubber O-rings. If the O-rings are deteriorated they should be replaced 5.2 CYLINDER Check the state of the ‘Nikasil’ plating. There should be no abnormal vertical scratches. 5.3 PISTON AND RINGS Check the wear using a 0.25mm gauge for the maximum separation space on the rings. -
Page 61: Gear
5.7 GEAR ASSEMBLY Check the state of the shift drum and the possible wear on the gear forks. The minimum thickness on the contact part with the moving gears is 2’55mm 5.8 TRANSMISSION Replace sprockets and chain if the chain has 4 mm of play between the sprocket teeth. 5.9 BEARINGS Check their lateral play and smooth rolling.
Need help?
Do you have a question about the TR280i and is the answer not in the manual?
Questions and answers