Table of Contents
Advertisement
Quick Links
Advertisement
Table of Contents

Related Manuals for Ossa Explorer


Summary of Contents for Ossa Explorer
- Page 1 USER MANUAL EXPLORER...
-
Page 2: Introduction
Introduction We at OSSA Motor would like to thank you for purchasing one of our products. When designing the Explorer, OSSA engineers and designers were based on the following approach: create a bike that was easier to reach the most difficult places. Its extreme lightness and trials qualities, combined with its enhanced ergonomics, make it possi- ble to enjoy both tours real quiet as trial areas. - Page 3 - Never ride if you have consumed alcohol or any type of substance Read this manual thoroughly and keep it in a safe place. This This manual has been put together with the OSSA Explorer current riding a motorcycle. (medication, drugs) that might affect your driving capability.
-
Page 4: Table Of Contents
Maintenance grid 32-33 Adjustments to the motorcycle controls Electric connections Simplified lighting wiring diagram Simplified injection wiring diagram Air filter Radiator Spark plug Chain Tension adjustments Lubriction of moving parts 42-44 OSSA EXPLORER - User manual OSSA EXPLORER - User manual... -
Page 5: Technical Specifications
Technical specifications Technical specifications WEIGHTS AND MEASUREMENTS ENGINE Wheelbase 1.328 mm Cylinder size 247,7 cc (Explorer 250) / 272,2 cc (Explorer 280) Seat height 840 mm Type 2 stroke inverted monocylinder with reed box admission Ground clearance 340 mm Cooling... -
Page 6: Recommendations
- When the motorcycle is new the oil must be changed for the first time after 5 hours of use and for the second time after 12 hours of use. OSSA EXPLORER - User manual OSSA EXPLORER - User manual... -
Page 7: Location
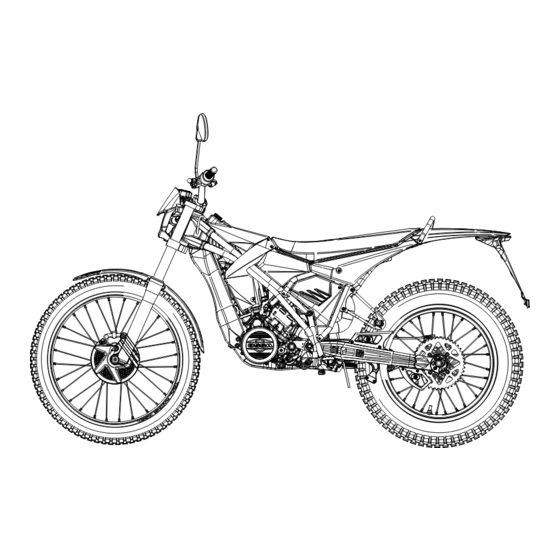
24 Front brake disc 10 Shift pedal 25 Air filter 11 Chain 26 Rear footrests (depending on version) 12 Chain slider 27 Passenger handle 13 Rear sprocket protector 14 Rear tyre OSSA EXPLORER - User manual OSSA EXPLORER - User manual... -
Page 8: Multi-Function Box
Location of elements OSSA Multifunction Display The OSSA TR multi-function box and the indicator lights next to it provide very useful information at all times. The multi-function box is a power box system with an LCD screen controlled by a... - Page 9 Running temperature / storage: from 0ºC to 60ºC (from 32ºF to 140ºF) / from -20ºC to 80ºC (from - 4ºF to 176ºF) gear is changed. Battery / Life: 3V CR2032 / 1 year approx OSSA EXPLORER - User manual OSSA EXPLORER - User manual...
- Page 10 Note: If you don’t know the whe- digit, press button 3. Confirm the sing button 2. el circumference, consult the selection by “Measuring the wheel circumfe- pushing button 2. rence” section. OSSA EXPLORER - User manual OSSA EXPLORER - User manual...
- Page 11 Ensure that the positive side of the battery is Confirm the selection by pres- Confirm that you want to set these functions to zero by simulta- facing upwards. sing button 2. neously pressing buttons 1 and 2. OSSA EXPLORER - User manual OSSA EXPLORER - User manual...
-
Page 12: Control Pad
5 – Horn seconds when the button is pressed. the measurement is taken. 6 – Button to switch off engine OSSA EXPLORER - User manual OSSA EXPLORER - User manual... -
Page 13: Suspensions
(Fig. C) The fork contains oil SAE 5, with 310 cc in the left bar (C) and 310cc in the right bar (R). (Fig. 2) OSSA EXPLORER - User manual OSSA EXPLORER - User manual... -
Page 14: Anti-Theft Immobilizer
DO NOT try to start in a gear . The kick-start pedal is part of the mechanism that is used to kick start the motorcycle mechanically. The EXPLORER has an immobilization system for protection against theft. To kick start the motorcycle, the kick-start pedal must be sepa- rated from the bike and moved outwards. -
Page 15: Fuel Tank
4: Disconnect the conector that connects both fuel tanks. 5: Unscrew the upper tank central screw (which is located where The Explorer has two fuel tanks, one forms a struc- indicated with number 5). tural part of the chassis and is located on the front 6: We proceed to lift the tank from the front, pivoting backwards. -
Page 16: Section 2 - Maintenance And Basic Operations
Section 2 – Maintenance and basic operations OSSA EXPLORER - User manual OSSA EXPLORER - User manual... -
Page 17: Maintenance Grid
Crankcase protector First useE When damaged ach use Piston and piston ring Each year 60 Hours Protective stickers Each use When damaged Each use When necessary Radiator tube and connections OSSA EXPLORER - User manual OSSA EXPLORER - User manual... -
Page 18: Adjustments To The Motorcycle Controls
Carry out a regular and thorough maintenance of your motorcycle. Always use original spare parts and top quality products to ensure that it works correctly. min. 3 mm min. 3 mm OSSA EXPLORER - User manual OSSA EXPLORER - User manual... - Page 19 Simplified diagram of the injection wiring Simplified diagram of the lights wiring OSSA EXPLORER - User manual OSSA EXPLORER - User manual...
-
Page 20: Air Filter
Carry regular thorough maintenance of your motorcycle. Always use original spare parts and top quality products to ensure that it works correctly. OSSA EXPLORER - User manual OSSA EXPLORER - User manual... -
Page 21: Sparkplug
The sparkplug can accumulate charcoal and dirt with use. For this reason, it can be removed and cleaned so that it lasts longer. OSSA EXPLORER - User manual OSSA EXPLORER - User manual... -
Page 22: Chain
Clutch and brake lever joints 4.Rear brake pedal joints and bearings 5.Footrest brackets and springs 6.Engine kick-start pedal joints Rear brake pedal Chain drive joints and bearings 7.Gas handle (right grip) Chain drive OSSA EXPLORER - User manual OSSA EXPLORER - User manual... -
Page 23: Tyres
NEVER forget to periodically check the tyre pressure to ensure that the tyres have a good grip. Tyre in bad working condition Engine kick-start pedal joints Gas handle (right grip) OSSA EXPLORER - User manual OSSA EXPLORER - User manual... -
Page 24: Brakes
Ignition cover (C) on the side of the hood, and the screw (E), and lean the bike over in both directions to ensure that no oil remains inside the hood. OSSA EXPLORER - User manual OSSA EXPLORER - User manual... -
Page 25: Tightening Torques
Cylinder head screws 8 - 9 Front brake caliper fixation Exhaust pipe fixation 8 - 9 Engine fixation 22 (F) 30 (R) Rear brake pump fixation 5 - 7 OSSA EXPLORER - User manual OSSA EXPLORER - User manual... -
Page 26: Troubleshooting
- Change the front fork. Contact an officially registered mechanic. - Rear shock absorber badly adjusted - Adjust the rear shock absorber - Tyre pressure too great - Check the pressure of the tyres OSSA EXPLORER - User manual OSSA EXPLORER - User manual... - Page 27 - Front fork spring weak or broken - Replace front fork spring - Brake disc wear - Replace brake disc - Brake pads badly positioned or - Change position of brake pads or replace crystallised them. OSSA EXPLORER - User manual OSSA EXPLORER - User manual...
-
Page 28: Ossa Explorer - User Manual
- Brake fluid in bad condition - Drain brake fluid and replace with new fluid recommended by a mechanic - Pump piston broken - Replace the pump piston - Brakes badly adjusted - Adjust brakes OSSA EXPLORER - User manual OSSA EXPLORER - User manual... - Page 29 OSSA mechanic to remedy the problem. functioning, it is recommended that you go to an official OSSA mechanic to remedy the problem. Your Ossa EXPLORER is standardised in compliance with EU regulations. It adheres to all standardisation requirements EURO-3 regulations.
- Page 30 11. Pinion output z=11 12. Lock 13. Horn e13*28R00*28R00*0037*00 14. Kickstand 15. Throttle limiting bolt Manufacturer’s plate Serial number 16. Passenger handle 17. Passenger footrests (in the bike homologated for 2 people). OSSA EXPLORER - User manual OSSA EXPLORER - User manual...
- Page 31 Standardisation components Warranty The key number can be found under the red cover. Engine number Key number OSSA EXPLORER - User manual OSSA EXPLORER - User manual...
- Page 32 The warranty is associated to the product indicated in the “CERTIFICATE OF DELIVERY AND INSPECTION”, which shall be filed out by authorised staff in OSSA FACTORY, SL (hereinafter referred to as OSSA). It is valid for those countries indicated on page 33. The...
- Page 33 OSSA (maximum load, passenger capacity, speed of motor and others) Damages due to the use of parts that are not original or not recommended by OSSA, or the use of fuel, lubricant and com- pound ACTIVATING THE WARRANTY liquids with specifications that are different to those indicated in the Owner’s Manual.
- Page 34 Under normal circumstances, periodical revisions reduce overall maintenance costs. Fluids If you need to use the warranty service, please contact your authorised OSSA dealer immediately and make an appointment so that the necessary work can be carried out. Lubricants (such as oil, grease, etc.), and fluids for functioning (for example, refrigerant liquid for the radiator, break and gear fluids, It is recommended that periodical motorcycle services are planned in advance.
- Page 35 Procedure for obtaining repairs under warranty If your motorcycle needs a repair to be carried out under warranty, it should be taken to your official OSSA dealer where the repair will be made (YOU ARE RESPONSIBLE FOR THE TRANSPORT COSTS TO AND FROM THE DEALER).
- Page 36 Ossa Motor Carretera antiga d’Amer, nau 12 17007 Girona, Spain tel 0034 972 107 107 fax 0034 972 117 899...
Need help?
Do you have a question about the Explorer and is the answer not in the manual?
Questions and answers