
Related Manuals for Eurolux DW12V-AAA-9


Summary of Contents for Eurolux DW12V-AAA-9
- Page 1 Dishwasher Instruction Instruction Manual Instruction Instruction Manual Manual Manual DW12V-AAA-9 EUROLUX...
-
Page 2: Table Of Contents
CONTENTS Getting familiar with your machine …………………………………………… Technical specifications …………………………………………………….. • Conformity with the standards and Test data …………………………….. • Safety information and Recommendations………………………………….. Recycling ..………………………............• Safety information …………………………………………………………… • Recommendations …...……………………………………………………… • Items not suitable for dishwashing ………………………………………… •... - Page 3 Loading your dishwasher .……………………………………………………. Top basket…………………………………………………………………... • Lower basket………………………………………………………………... • Alternative basket loads …………………………………………………... • Standard loading and Test data ………………………………………….. • Programme descriptions .…………………………………………………….. Programme items ………………………………………………………….. • Switching on the machine and selecting a programme……………..Switching on the machine…………………………………………………. •...
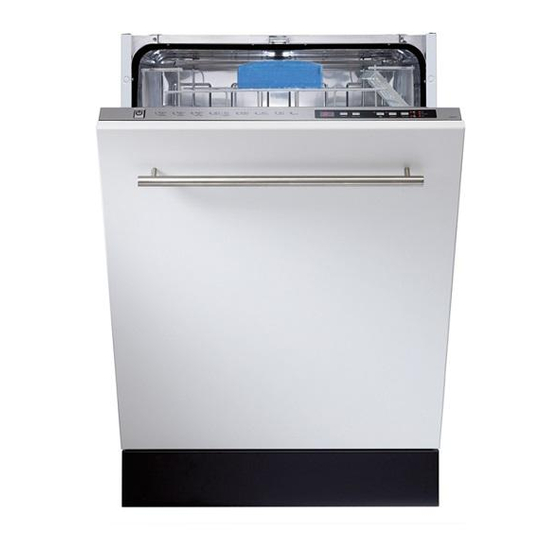
- Page 4 Upper basket with racks Upper spray arm Lower basket Lower spray arm Filters Rating plate Control Panel Detergent and rinse-aid dispenser Cutlery basket Lower basket handle Salt dispenser Upper basket track latch Top basket handle Drying with fan: This system provides better drying performance for your dishes.
-
Page 5: Getting Familiar With Your Machine
GETTING FAMILIAR WITH YOUR MACHINE 1.) Power On/Off Button 4.) Delay Timer Button You can delay the start time of a selected program for 1-2 ….19 When the Power On/Off button is pressed, end of program hours by pressing the delay timer button of your machine. When indicator starts lighting. - Page 6 6.) Prewash Buton Note : If you have used an extra feature on the latest washing program, this feature will remain active also on the next washing If you select an extra pre-washing program, you improve washing program. If you do not want to use this feature on the newly performance.
-
Page 7: Technical Specifications
Technical specifications Capacity ………………………… 12 place settings Height……………………………. 815 mm – 870 mm Width …………………………….. 596 mm 550 mm Depth ……………………………. Net Weight ……………………... 38 kg Electricity input ……………..220-240 V, 50 Hz Total Power …………………….. 2200 W Heating Power ………………….. 2000 W Pump Power ……………………. - Page 8 Before installing, be sure that the machine is unplugged. • Check whether the indoor electrical fuse system is connected according to the regulations. • All electrical connections must match the values indicated on the rating plate. • Pay special attention and be sure that the machine does not stand on the electricity supply cable. •...
-
Page 9: Recommendations
Recommendations For energy and water saving, remove coarse residues on your dishes before placing the dishes • into the machine. Start your machine after having fully loaded it Use the pre-wash programme only whenever necessary. • Place such hollow items as bowls, glasses and pots into the machine in such a way that they will •... -
Page 10: Water Connections
Water connection Be sure that the indoor plumbing is suitable for installing a dishwasher. Also, we recommend that you fit a filter at the entrance of your place or apartment so as to avoid any damage to your machine because of any contamination (sand, clay, rust etc.) that might be occasionally carried in through the mains water supply or the indoor plumbing, and to forestall such complaints as yellowing and formation of deposits after washing. -
Page 11: Electrical Connection
Electrical connection The earthed plug of your machine should be connected to an earthed outlet supplied by suitable voltage and current. If there is no earthing installation, have a competent electrician carry out an earthing installation. In case of usage without earthing installed, our company will not be responsible for any loss of usage that might occur. -
Page 12: Prior To Using The Machine
Prior to using the machine for the first time Check whether the electricity and supply water specifications match the values indicated by the • installation instructions for the machine. Remove all packaging materials inside the machine. • Set the water softener. •... -
Page 13: Testing Strip
Testing strip The washing effectiveness of your machine depends on the softness of the tap water. For this reason, your machine is equipped with a system that reduces the hardness in mains water supply. The washing effectiveness will increase when the system is correctly set. To find out the water hardness level of water in your area, contact your local water board or determine water hardness level by using the test strip(if available). - Page 14 After resetting your machine, press the program selection button and keep it pressed down.3 Meanwhile, energise the machine by pressing the Power On/Off button. Keep the program selection button pressed until “SL” disappears from the display.3 Release the program selection button after “SL” disappears from the display. Your machine displays the latest entered water hardness setting.
-
Page 15: Detergent Usage
Detergent usage Use a detergent specifically designed for use in domestic dishwashers. You can find powder,gel,and tablet detergents in the market that have been designed for household dishwashers. Detergent should be put into the compartment prior to starting the machine. Keep your detergents in cool, dry places out of reach of your children. -
Page 16: Filling With Rinse Aid And Making The Setting
They produce good results for certain types of usage only. If you are using this type of • detergents, you need to contact the manufacturers and find out about the suitable conditions of use. When the conditions of use of such products and the machine settings are appropriate, •... -
Page 17: Loading Your Dishwasher
Warning: Use only those rinse aid materials which are allowed for use in the machine. As rinse aid residues left as a result of overflowing will create extremely high amounts of foam and thus reduce the washing performance, remove the excess amount of rinse aid by wiping it with a rag. LOADING YOUR DISHWASHER If you properly place your dishes into the machine, you will be using it in the best way in terms of energy consumption, washing and drying performance. -
Page 18: Lower Basket
Spoon Rack with Goblet clamp You can place your spoons and forks in Spoon Rack and also it enables safe wash of your goblets with long foot and glasses. Do not lean your long glasses on one another, this way they can not remain stable and can be damaged during washing. - Page 19 Modular Cutlery Basket You can separate modular cutlery basket into 2 parts according to the amount of your dirty spoons, forks and knifes. You can place that separated parts in different places within the lower basket and upper basket. In order to separate modular cutlery basket, hold it from both sides and move one part forwards, while moving the other part backwards.
-
Page 20: Alternative Basket Loads
Alternative basket loads Lower Basket Top basket Faulty loads... -
Page 21: Standard Loading And Test Data
Standard loading and test data Capacity: Upper and lower baskets: 12 place settings. The upper basket should be adjusted to high position.Cups should be placed on to the dish rack pins. Detergent / Rinse aid 5+25 cm , in accordance with EN50242-DIN 44990 IEC 436 (international norms) / Rinse aid dosage adjustment: 4 Programme test Economic 50°... -
Page 22: Programme Descriptions
PROGRAMME DESCRIPTIONS Programme items Programme No Auto Auto Auto Hygiene 55’60° C Economic Quick Rinse Extra Hygiene Intensive Normal Delicate (Prewash+Hygiene 60° C) Programme names 60-70° C 50-60° C (P2) 30-50° C(P3) 60° C (P4) 60° C ( P5) 50° C ( P6) 40°... -
Page 23: Switching On The Machine And Selecting A Programme
SWITCHING ON THE MACHINE AND SELECTING A PROGRAMME Switching on the machine Machine is energized when the On/Off button is pressed , two dashes appear in the program display When you select a program with the and the end of program indicator turns on. program selection buton,the program you select ( P1,P2,etc )appears on the program display and the end of program... -
Page 24: Changing A Programme With Resetting
Changing a programme with resetting If you would like to cancel a program while a washing program is resumed Open the door of your machine. The last selected program will appear on the screen. Discharge process starts after closing the Keep the program selection button pressed for door of the machine.The machine 3 seconds. -
Page 25: Maintenance And Cleaning
MAINTENANCE AND CLEANING Cleaning the machine in regular intervals prolongs the machine’s service life. Oil and lime may accumulate in the machine’s washing section. In case of such accumulation; -Fill the detergent compartment without loading any dishes into the machine, select a programme that runs at high temperature, and start the machine. -
Page 26: Spray Arms
Spray arms Check whether or not the holes for the upper and lower spray arms are clogged. If there is any clogging, remove the spray arms and clean them under water. You can remove the lower spray arm by pulling it upwards, while the upper spray arm nut can be removed by turning the nut to the left. -
Page 27: Failure Codes And What To Do In Case Of Failure
FAILURE CODES AND WHAT TO DO IN CASE OF FAILURE ERROR CODE ERROR DESCRIPTION CONTROL Make sure the water input tap is totally open and that there is no water cut. • Inadequate water supply • Close the water input tap, separate the water input hose from the tap and clean the filter at the connection end of the hose. - Page 28 If the programme won’t start Check if the plug is connected. • Check your indoor fuses. • Be sure that the water inlet tap is turned on. • Be sure that you have closed the machine door. • Be sure that you switched off the machine by pressing the Power On / Off button. •...
-
Page 29: Practical And Useful Information
If there are rust stains on the dishes Stainless-steel quality of the dishes washed is insufficient. • High rate of salt in the wash water. • Salt compartment cap not closed well. • Too much salt spilt into the sides and into the machine while filling it with salt. •... - Page 30 52017265...
Need help?
Do you have a question about the DW12V-AAA-9 and is the answer not in the manual?
Questions and answers