Table of Contents
Advertisement
Quick Links
Advertisement
Table of Contents

Related Manuals for Okina SIRZ36-754LP


Summary of Contents for Okina SIRZ36-754LP
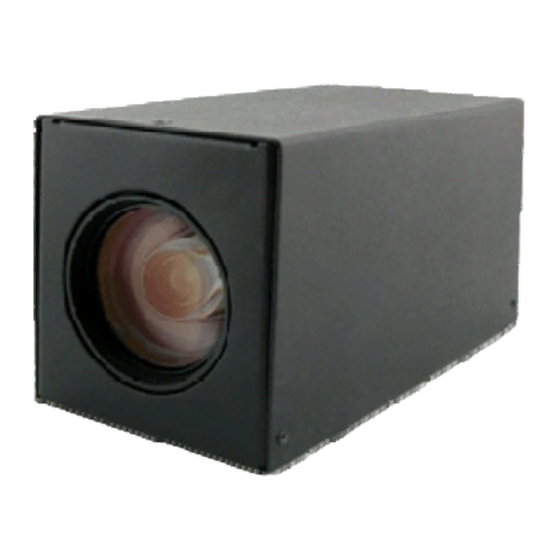
- Page 1 SIRZ36-754LP 36x License Plate Zoom Camera with IR Kit SZ36-7540 HI11-TKHBL 36x Zoom Camera 11 IR Housing & Bracket Thanks for purchasing our product. Before operating the unit, please read the instructions carefully and keep this manual for future reference.
-
Page 2: Safety Warnings
Safety Warnings 1. Read manual carefully before installing the unit. Please read this manual first for correct installation and operation. 2. Never install the camera on a ceiling that cannot hold its weight. The product may fall down and cause damages. ... - Page 3 The safety and operating instructions should be retained for future reference. Warranty OKINA USA products are covered under warranty for one year from the date of purchase. The warranty will automatically be voided if any of the following occurs: 1. Camera sticker is removed If the camera sticker is removed, we will not be able to confirm any information regarding when and where the product was purchased.
-
Page 4: Table Of Contents
Table of Contents Product Overview……….………………..………………………………..…………….…..4 Main Features.…..…………..………………………………………………………..4 Content List……………………………………………………………………….…….4 Specifications……………..……….………………………………………………..….5 Dimension………………………………………………………………………………………6 2.1 Dimension…………….…………………………………………………………………… 2.2 Descriptions………………………………………………………………………………… Camera Setup Operations……………………………………………………………………6 Menu Tree……………………………………………………….…………….…..6 Main Menu…………………………...………………………………………………….6 3.3 Submenus of the Main Menu………………………………………………………… 3.3.1 SYSTEM……………………………………………………………………………..7 3.3.2 DISPLAY……………………………………………………………………………..8 3.3.3 PRESET……………………………………………………………………………..9 3.3.4 CAMERA…………………………………………………………………………...10 3.3.4.1 CAMERA – LENS………………………………………………………..11 3.3.4.2 CAMERA - IMAGE…………............…..13 3.3.5 ALARM………..................…..15 3.3.6 REBOOT....................…….. -
Page 5: Product Overview
1. Product Overview SIRZ36-754LP is an integration of a powerful 36x License Plate Zoom Camera, SZ36-7540, plus an 11 IR Housing and Bracket, HI11-TKHBL. The camera is built with 1/4" Sony Exview HAD CCD. Featured with 36x optical auto focus, this camera reproduces sharp and clear images whether zooming-in or zooming-out. -
Page 6: Specifications
1.3 Specifications Kit P.I.C. L-812 Model SIRZ36-754LP SIRZ36-754LPP NTSC TV System 16.07.87”(L) x 4.33”(W) x 4.53”(H) / 200mm(L) x 110mm(W) x Dimension 115mm(H) 8.23 lbs / 3730g (w/out bracket) ; 12.26 lbs / 5560g (with bracket) Weight Model SZ36-7540 SZ36-7540P... - Page 7 Model HI11-TKHBL 11 Super Power IR LEDs, 6pc x 25° / 5pc x 45° LED Quantity & Beam Angle 850nm ; 395ft / 120m IR Wave Length & Distance Auto Light Sensor Control IR Light On / Off 18C / 64F (on); 28C / 82F (off) Heater Control 35C / 95F (on);...
-
Page 8: Dimension
2. Dimension 2.1a Camera Dimension 比例 485+ 485- 2.1b Housing & Bracket Dimension Bracket (on left): Max Load: 3500g Material: Die-cast aluminum alloy with light ivory powder coated and stove finish Scan Angle: 180° Tilt Angle: 90° ... -
Page 9: Descriptions
2.2a Camera Descriptions 485+ 485- Video Connector This is an output for BNC connection to a video monitor, etc (75Ω). Setting Button SETUP button UP & DOWN button LEFT & RIGHT button Communication Connector 1. RS485+ 2. RS485- 3. - Page 10 2.2b Housing & Bracket Descriptions Copyright 2010. All Rights Reserved. www.okinausa.com REV122010-V17...
- Page 11 1. Lens Cap with Heater 2. Temper Glass 3. IR LED: 7pcs or 11pcs Super Power IR LED with Refractor 4. IR Board and IR Board Bracket 5. Universal IR Control Circuit Board: When the IR light turns on, it automatically adjusts the color to monochromatic through the universal IR control circuit.
-
Page 12: Camera Setup Operations
3. Camera Setup Operations 3.1 Menu Tree MAIN MENU SYSTEM CAMERA LANGUAGE CAMERA ID BAUD RATE PROTOCOL FIRMWARE RESTORE TITLE DISPLAY CAMERA PRESET CARMERA ID DATE/TIME ZOOM RATIO ALARM ALARM MESSAGE TITLE TITLE PRESET PRESET NO. POSI SAVE DELETE TITLE PAUSE TIME CAMERA LENS... -
Page 13: Submenus Of The Main Menu
3.2 Main Menu MAIN MENU SET SYSTEM SET DISPLAY SET PRESET SET CAMERA SET ALARM STARTUP REBOOT EXIT 3.3 Submenus of the MAIN MENU There’re several submenus of the main menu: SYSTEM, DISPLAY, PRESET, CAMERA, ALARM, and REBOOT. -
Page 14: System.........................................................................................7
3.3.1-SYSTEM ENGLISH TRADITIONAL CHINESE SIMPLIFIED CHINESE JAPANESE LANGUAGE 1~1024 CAMERA ID SET CAMERA TITLE 0 1 2 3 4 5 6 7 8 9 A B C D E F G H I J K L M N O P Q R S T U V W X Y Z a b c d e f g h i j k l m n o p q r s t u v w x y z . -
Page 15: Display.........................................................................................8
3.3.2-DISPLAY OFF ON CAMERA ID OFF ON CAMERA TITLE OFF ON PRESET TITLE OFF ON DATE/TIME DATE / TIME HH:MM:SS TIME YY:MM:DD DATE FORMAT YY:MM:DD MM:DD:YY DD:MM:YY RETURN EXIT OFF ON ZOOM RATIO OFF ON ALARM MESSAGE CAMERA ID: Select ON to show the Camera ID on the screen;... -
Page 16: Preset.........................................................................................9
3.3.3-PRESET 1-256 PRESET NO. POSI SET U ZOOM D/L FOCUS R PRESS ENTER CONFIRM SAVE SET OK ABOVE ALL DELETE TITLE SET 0 1 2 3 4 5 6 7 8 9 A B C D E F G H I J K L M N O P Q R S T U V W X Y Z a b c d e f g h i j k l m n o p q r s t u v w x y z... - Page 17 3.3.4-CAMERA 3.3.4.1-CAMERA-LENS LENS SET REAL TIME AF ONE PUSH MANUAL FOCUS AUTO MANUAL IRIS 1-15 BRIGHTNESS 1-15 ZOOM SPD 1-15 FOCUS SPD COLORB&WAUTOEXT SCHEDULE DAY / NIGHT COLOR B&W AUTO LEVEL 1-10 DLY TIME 1-10 SEC OUTPUT ...
- Page 18 Settings concerning Lens can be set in here. LENS: FOCUS: REAL TIME AF: Select REAL TIME AF to detect the ambiance light and to adjust the focus automatically. ONE PUSH: When the zoom is changed with the TELE or the WIDE buttons, it becomes AF Mode.
- Page 19 EXTERNAL: Use the external signal to switch COLOR/B&W. INPUT: Select input level. D&N IN: It’s the PIN 4 external control connector. INPUT L LEVEL H LEVEL SYSTEM D&N IN COLOR B&W HIGH B&W COLOR (HIGH: OPEN or 5V; LOW: GND) SCHEDULE: When SCHEDULE is selected, timing can be set to switch Day/Night Mode.
- Page 20 3.3.4.2-CAMERA-IMAGE IMAGE SET MANUAL AUTO EXPOSURE MODE AUTO--SHUT SPD 1/250 1/500 1/1000 1/2000 1/4000 1/10000 1/100000 MANUAL-SHUT SPD 1/60 Sec. 1/100 Sec. 1/150 Sec., 1/200 Sec. 1/250 Sec. 1/300 Sec., 1/350 Sec. 1/400 Sec. 1/450 Sec., 1/500 Sec.
- Page 21 IMAGE EXPOSURE MODE: To adjust the shutter speeds. AUTO: Automatic Electronic Shutter MAX SHUT SPD: adjust the maximum shutter speed; shutter will change from 1/50(60) to maximum shutter speed automatically. 1/250 1/500 1/1000 1/2000 1/4000 1/10000 1/100000 MANUAL: Adjust shutter manually. SHUT SPD: adjust shutter speed.
- Page 22 BACKLIGHT: Even when there’s a massive backlight behind the object, bright images of the background and the object can still be obtained by using the BACKLIGHT function. Levels: 1~16. FLC: Flicker can be eliminated by setting FLC to be ON. AGC (AUTO GAIN CONTROL) AUTO: when AUTO is selected, the maximum gain is 26dB.
-
Page 23: Reboot
3.3.5-ALARM OFF ON IN SWITCH NC NO IN MODE OFF ON OUT SWITCH 100ms 200ms 300ms 500ms 1000ms 2000ms 3000ms OUT TIME 5000ms IN SWITCH: Select ON to set the alarm or OFF to cancel the alarm. IN MODE: NO: NORMAL OPEN; NC: NORMAL CLOSE. III. -
Page 24: Control Via Rs-485
3.3.7-Control via RS-485 Pairing with Camera Keyboard Controller The Protocol between Camera and the Keyboard Controller should be the same to ensure a successful communication. Please refer to the 3.3.1 System for further communication settings. 485+ 485- MZC-EX1000A KeyBoard RS485+ ←... -
Page 25: Exit
II. Using Camera Keyboard Controller The operation methods may vary from model to model. *the 95 Preset Point for MENU, please press Call the 95 the 95 Preset the 95 Call *Memorize 95 Preset Point to Preset the 95 , please press the 95 ... -
Page 26: Bracket Installation
5. Bracket Installation 1. Loosen two screws on both sides of the camera bracket first. 2. Use the provided screw to fix the camera (not included) on the camera bracket. 3. Adjust zoom, focus and iris of the lens on the camera. 4.
Need help?
Do you have a question about the SIRZ36-754LP and is the answer not in the manual?
Questions and answers