Table of Contents
Advertisement
Quick Links
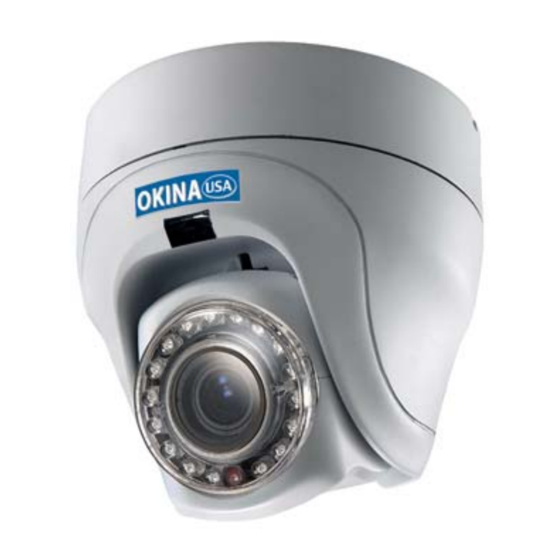
3x PTZ Series
P3D-E48
P3ID17-E48
PT Series
PD-E5343
PID17-E5343
Also Available for 6.0mm Lens , PD-E5360 & PID17-E5360
Copyright © 2009. All Rights Reserved.
PAL Version Also Available
http://www.okinausa.com
3x Pan/Tilt/Zoom Indoor Mini Dome Camera
3x Pan/Tilt/Zoom Indoor Mini Dome Camera w/ 17 IR
Pan/Tilt Indoor Mini Dome Camera w/ 4.3mm Lens
Pan/Tilt Indoor Mini Dome Camera w/ 4.3mm Lens w/ 17 IR
OPERATIONAL MANUAL
INDOOR MINI DOME CAMERA
3x PTZ
P3D-E48
P3ID17-E48
Please read the Operational Manual
before attempting to use this product.
PT Only
PD-E5343
PID17-E5343
1
REV081709
Advertisement
Table of Contents

Summary of Contents for Okina P3D-E48
- Page 1 3x PTZ Series P3D-E48 3x Pan/Tilt/Zoom Indoor Mini Dome Camera P3ID17-E48 3x Pan/Tilt/Zoom Indoor Mini Dome Camera w/ 17 IR PT Series PD-E5343 Pan/Tilt Indoor Mini Dome Camera w/ 4.3mm Lens PID17-E5343 Pan/Tilt Indoor Mini Dome Camera w/ 4.3mm Lens w/ 17 IR Also Available for 6.0mm Lens , PD-E5360 &...
-
Page 2: Package Contents
12V DC, 1000mA • 12V DC, 1000mA *IR Lens = IR Corrected Type Lens PACKAGE CONTENTS • One (1) P3D-E48 / P3ID17-E48 / PD-E5343 or PID17-E5343 Camera • One (1) Quick Installation Plate • One (1) Signal-Power Cable • One (1) Operational Manual... - Page 3 Then take out the quick-installation plate which is provided inside the accessory bag. Again insert the Signal- Power cable through any round holes of the quick-installation plate and screw it into the platform as shown in photo A below. Connect the Signal-Power cable to the camera. Twist the base of the dome camera into the quick-installation plate as shown in photo B.
-
Page 4: Using Ir Remote Control
Step 3: Power On Test a. Before connecting the power, make a final check to confirm that the wiring is correct. b. Before installing this camera, please execute camera self-testing as following: when powering on the camera, it will automatically execute tilt up/down scanning, then pan horizontal scanning for around 20~30 seconds, then camera will stop at the Preset Point 1. - Page 5 NOTE: Please POWER-OFF the camera before resetting. The new setting will become valid after power is reapplied to the camera. Open the plastic cover (as shown below) on the back-side of the camera. DIP 9 DIP 10 OKINA USA You will find one 10-PIN DIP SWITCH. SW9/10 is for setting the PELCO P-9600 camera’s protocols. PELCO P-4800 1.
- Page 6 2. Setting the ID address of the camera is shown below: Please change DIP SWITCH SW1~8 as below: 1 2 3 4 5 6 7 8 Copyright © 2009. All Rights Reserved. http://www.okinausa.com REV081709...
- Page 7 1 2 3 4 5 6 7 8 Copyright © 2009. All Rights Reserved. http://www.okinausa.com REV081709...
- Page 8 1 2 3 4 5 6 7 8 Copyright © 2009. All Rights Reserved. http://www.okinausa.com REV081709...
- Page 9 1 2 3 4 5 6 7 8 Copyright © 2009. All Rights Reserved. http://www.okinausa.com REV081709...
- Page 10 1 2 3 4 5 6 7 8 Copyright © 2009. All Rights Reserved. http://www.okinausa.com REV081709...
- Page 11 1 2 3 4 5 6 7 8 RS485 COMMON TROUBLESHOOTING Error Possible Causes Solutions Able to do self-test on 1. Keyboard’s (or DVR’s) Alter protocols for consistency initial power on, but is communication protocol is not unable to be controlled consistent with camera’s A.
- Page 12 Enter: SHOT + N + ON If you choose OKINA USA Protocol for one of our speed dome cameras, you may set up 4 preset point groups by following the operation procedure: A.
-
Page 13: Extended Command
6. Horizontal Revolution of 2 Preset Points (Do not apply to PELCO Protocol) Description: This function is designed to set the speed dome at horizontal revolution in a small zone. Enter: Press [AUTO]. LCD displays: 1ST N0: Enter a start point for Auto Pan scanning. The start point should be one of the preset points. Complete preset point setting first by following Step 2. -
Page 14: Specification
SPECIFICATION 3x PTZ PT Fixed Lens Model P3D-E48 P3ID17-E48 PD-E5343 PID17-E5343 CCD Sensor 1/4” Sony Super HAD CCD 1/3” Sony Super HAD CCD Picture Pixels NTSC: 410,000 pixels / PAL: 470,000 pixels Resolution 480 TV Lines 530 TV Lines Minimum 1.0 Lux @ F2.0... -
Page 15: Precautions On Installation
PRECAUTIONS ON INSTALLATION 1. Basic requirements for installation Follow local regulations about installation safety request. Check out if accessories are complete. Optional accessories are required for different installation sites. Please contact your local distributors for proper installation accessories, so that the camera could be installed safely without causing danger. -
Page 16: Damage Requiring Service
When the video product exhibits a distinct change in performance. WARRANTY OKINA USA products are covered under warranty for one year from the date of purchase. The warranty will automatically be voided if any of the following occurs: 1. Camera sticker is removed If the camera sticker is removed, we will not be able to confirm any information regarding when and where the product was purchased.


Need help?
Do you have a question about the P3D-E48 and is the answer not in the manual?
Questions and answers