Table of Contents
Advertisement
Quick Links
Advertisement
Table of Contents

Related Manuals for Okina SEIRX30-761AI-VD


Summary of Contents for Okina SEIRX30-761AI-VD
-
Page 1: User Manual
SEIRX30-761AI-VD 12V DC SEIRX30-761AI-VDD 12V DC / 24V AC 3-AXIS Vandalproof IR Camera - Effio-E User Manual Thanks for purchasing our product. Before operating the unit, please read the instructions carefully and keep this manual for future reference. -
Page 2: Safety Warnings
Safety Warnings 1. Read this manual carefully before installing the unit Please read this manual first for correct installation and operation. 2. Never install the camera on a ceiling that cannot hold its weight The product may fall down and cause damages. 3. - Page 3 THE SAFETY AND OPERATING INSTRUCTIONS SHOULD BE RETAINED FOR FUTURE REFERENCE. Warranty OKINA USA Products are covered under warranty for one year from the date of purchase. The warranty will automatically be voided if any of the following occurs: 1. Camera sticker is removed If the camera sticker is removed, we will not be able to confirm any information regarding when and where the product was purchased.
-
Page 4: Table Of Contents
Table of Contents 1. INTRODUCTION ..........................1 1.1 M ......................... 1 EATURES 1.2 C ..........................1 ONTENT 1.3 S ......................... 2 PECIFICATIONS 2. CAMERA OVERVIEW ........................3 2.1 D ..........................3 IMENSIONS 2.2 D ....................4 ESCRIPTION OF AMERA ARTS 3. -
Page 5: Introduction
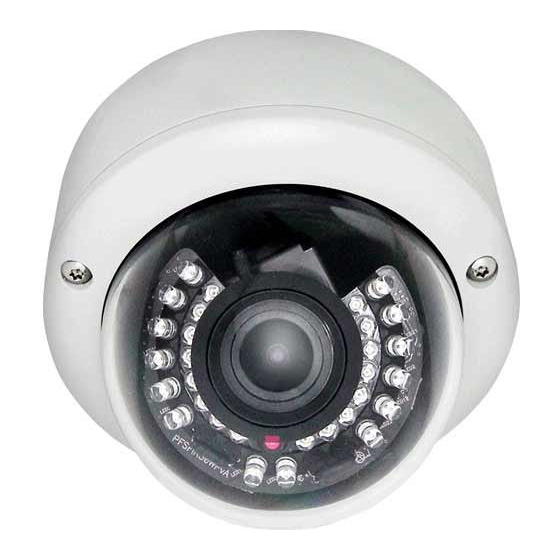
1. Introduction SEIRX30-761AI-VD / SEIRX30-761AI-VDD built with Sony’s latest image processor, this super-wide dynamic camera has the capability of achieving resolutions of over 610 TVL. The features include 2D noise reduction, spot removal, strong-light suppression, intelligent motion detection and OSD functions. -
Page 6: Specifications
1.3 Specifications I-323 I-326 Model SEIRX30-761AI-VD SEIRX30-761AI-VDD Image Sensor 1/3" Sony 760H Super HAD CCD II Number Of Total Pixels NTSC: 811(H) x 508(V) / PAL: 795(H) x 596(V) Resolution ; DSP Color: 610 TVL, B/W: 630 TVL ; Sony Effio-E... -
Page 7: Camera Overview
2. Camera Overview 2.1 Dimensions Copyright © 2010. All Rights Reserved. www.okinausa.com REV012011-V05... -
Page 8: Description Of Camera Parts
VIDEO Connector This is an output for BNC connection to a video monitor, etc (75Ω). Power Input Terminal Connect the power input of 12V DC for SEIRX30-761AI-VD or 12V DC / 24V AC for SEIRX30-761AI-VDD. Secondary Power Input Terminal Connect the power input of 12V DC (Available for SEIRX30-761AI-VDD only). -
Page 9: Osd Operation
3. OSD Operation 3.1 OSD Control Buttons ENTER U (UP) ① Use this button to move the cursor upwards to the desired item. R (RIGHT) ② Use this button to move the cursor to the right to select or to adjust the parameters of the selected item. -
Page 10: Osd Operation
3.2 OSD Operation SETUP MENU ENTER LENS AUTO<┘ SHUTTER/AGC AUTO<┘ <┘ WHITE BAL ATW<┘ BACKLIGHT DAY/NIGHT AUTO<┘ NEXT<┘ EXIT<┘ SAVE ALL<┘ 1. Start to operate the OSD menu Press the ENTER button to bring up the OSD main menu to start operating OSD menus. -
Page 11: Configuration
4. Configuration 4.1 LENS When the SETUP MENU is displayed on the screen, use buttons select the LENS and press the ENTER button to do further settings. SETUP MENU AUTO IRIS LENS AUTO<┘ TYPE SHUTTER/AGC AUTO<┘ MODE AUTO <┘ SPEED |||| ||||||||||| 080 WHITE BAL... - Page 12 MODE Select to set the type of control to be exercised over the mechanical iris. - OPEN : The mechanical iris is fixed to open. - CLOSE : The mechanical iris is fixed to close. - AUTO : The mechanical iris is controlled automatically. SPEED Select to set the convergence speed of the mechanical iris.
-
Page 13: Shutter/Agc
4.2 SHUTTER/AGC When the SETUP MENU is displayed on the screen, use buttons select the SHUTTER/AGC and press the ENTER button to do further settings. SETUP MENU LENS AUTO<┘ SHUTTER/AGC AUTO<┘ <┘ WHITE BAL ATW<┘ BACKLIGHT DAY/NIGHT AUTO<┘ NEXT<┘ EXIT<┘ SAVE ALL<┘... -
Page 14: Manual Setup
- BRIGHTNESS Select to specify the high- and medium-brightness side reference. The brightness changes depending on whether the ATR function is ON or OFF , and whether the CRS mode has been selected as the AWB function. Please note that the brightness will change when ATR or WHITE BAL is set to ANTI CR (CRS mode), etc., after BRIGHTNESS has been set. - Page 15 4.3 NR This item is used to set the noise reduction. SETUP MENU LENS AUTO<┘ SHUTTER/AGC AUTO<┘ <┘ WHITE BAL ATW<┘ BACKLIGHT DAY/NIGHT AUTO<┘ NEXT<┘ EXIT<┘ SAVE ALL<┘ Select to bring up the NR sub-menu for further settings. Function Option NR MODE Y LEVEL 000-015...
-
Page 16: White Bal (White Balance)
4.4 WHITE BAL (White Balance) The screen color can be adjusted by using the WHITE BAL function. 1. Please use the buttons to WHITE BAL on the SETUP MENU and press the ENTER button to do further settings. 2. Please select the desired item and press buttons to adjust the settings. -
Page 17: Atw (Auto Trace White Balance)
PUSH LOCK Select to set the white balance mode to the PUSH LOCK mode 4.4.1 ATW (Auto Trace White Balance) Adjust the settings of the ATW . Function Option SPEED 000-255 DELAY CNT 000-255 ATW FRAME x0.50 ; x1.00 ; x1.50 ; x2.00 ENVIROMENT INDOOR ;... -
Page 18: User2
4.4.4 USER2 The gain values for the outdoor fixed mode are used as the adjustment items of USER2 WB on the internal OSD menu. Function Option B-GAIN 000-255 R-GAIN 000-255 B-GAIN Used for operating the B gain in the WB fixed gain mode. R-GAIN Used for operating the R gain in the WB fixed gain mode. -
Page 19: Atr
4.5 ATR This item is used to set the Day/Night function. SETUP MENU LENS AUTO<┘ SHUTTER/AGC AUTO<┘ <┘ WHITE BAL ATW<┘ BACKLIGHT DAY/NIGHT AUTO<┘ NEXT<┘ EXIT<┘ SAVE ALL<┘ Select to set ATR to OFF or ON . Function Option LUMINANCE HIGH MIDLOW CONTRAST... -
Page 20: Backlight
4.6 BACKLIGHT This item is used to set the backlight compensation operation. SETUP MENU LENS AUTO<┘ SHUTTER/AGC AUTO<┘ <┘ WHITE BAL ATW<┘ BACKLIGHT DAY/NIGHT AUTO<┘ NEXT<┘ EXIT<┘ SAVE ALL<┘ Select to set BACKLIGHT to OFF , BLC or HLC . Function Option BACKLIGHT... -
Page 21: Day/Night
4.7 DAY/NIGHT This item is used to set the Day/Night function. SETUP MENU LENS AUTO<┘ SHUTTER/AGC AUTO<┘ <┘ WHITE BAL ATW<┘ BACKLIGHT DAY/NIGHT AUTO<┘ NEXT<┘ EXIT<┘ SAVE ALL<┘ Select to set DAY/NIGHT to AUTO , COLOR or B/W . Function Option AUTO <┘... -
Page 22: Day/Night
4.7.2 DAY/NIGHT Adjust the settings of DAY/NIGHT . Function Option BURST DELAY CNT 000-255 DAY->NIGHT 000-255 NIGHT->DAY 000-255 BURST Select to set whether to output the burst signal when the Night status has been identified. - ON : Burst signal ON - OFF : Burst signal OFF DELAY CNT Select to set the Night/Day identification transfer time. -
Page 23: Pict Adjust
4.8 PICT ADJUST This item is used to set the PICT ADJUST function. SETUP MENU PICT ADJUST <┘ MOTION DET ON<┘ PRIVACY CAMERA ID LANGUAGE ENGLISH CAMERA RESET BACK<┘ EXIT<┘ SAVE ALL<┘ Select to bring up the PICT ADJUST sub-menu for further settings. Function Option MIRROR... -
Page 24: Motion Det (Motion Detection)
4.9 MOTION DET (Motion Detection) This item is used to set the Motion Detection function. SETUP MENU PICT ADJUST <┘ MOTION DET ON<┘ PRIVACY CAMERA ID LANGUAGE ENGLISH CAMERA RESET BACK<┘ EXIT<┘ SAVE ALL<┘ Select to set motion detection to OFF or ON . Function Option MOTION DET... - Page 25 BLOCK DISP Select to control the ON/OFF status of the motion detection block display. - OFF : No display - ON : Luminance highlighted MONITOR AREA Select to set whether to use the monitoring frames. - OFF : The monitoring frames are not used. - ON : The monitoring frames are used.
-
Page 26: Privacy
4.10 PRIVACY This item is used to set up to eight privacy masks. When monitoring frames are used for motion detection, the maximum number of masks which can be used is four. SETUP MENU PICT ADJUST <┘ MOTION DET ON<┘ PRIVACY CAMERA ID LANGUAGE... - Page 27 TOP/BOTTOM/LEFT/RIGHT Select to set the mask frame selected by the AREA SEL parameter. COLOR Select to set the colors of the mask frames. TRANSP Select to set the transparency ratio of the mask frames. MOSAIC Select to set the mask frame mosaic function to ON or OFF. - OFF : Mosaic function OFF - ON : Mosaic function ON Copyright ©...
-
Page 28: Camera Id
4.11 CAMERA ID This item is used to set the camera ID. SETUP MENU PICT ADJUST <┘ MOTION DET ON<┘ PRIVACY CAMERA ID LANGUAGE ENGLISH CAMERA RESET BACK<┘ EXIT<┘ SAVE ALL<┘ Select to set the camera ID to OFF or ON. Function Option CAMERA ID... - Page 29 Select to clear one letter of the input. Adjust the position of the camera ID. Copyright © 2010. All Rights Reserved. www.okinausa.com REV012011-V05...
-
Page 30: Language
4.12 LANGUAGE This item is used to select the language in which to display the internal OSD menu. SETUP MENU PICT ADJUST <┘ MOTION DET ON<┘ PRIVACY CAMERA ID LANGUAGE ENGLISH CAMERA RESET BACK<┘ EXIT<┘ SAVE ALL<┘ Select to set the language displayed in the OSD menus. The menus will be changed to the selected language in real time. -
Page 31: Camera Reset
4.13 CAMERA RESET Click to restore all the settings to the default values. SETUP MENU PICT ADJUST <┘ MOTION DET ON<┘ PRIVACY CAMERA ID LANGUAGE ENGLISH CAMERA RESET BACK<┘ EXIT<┘ SAVE ALL<┘ 4.14 SAVE ALL Click to save all the settings made. NOTE: There will be no prompt windows while the settings are being saved.
Need help?
Do you have a question about the SEIRX30-761AI-VD and is the answer not in the manual?
Questions and answers