Advertisement
Quick Links
Advertisement

Related Manuals for Ledj Event Panel


Summary of Contents for Ledj Event Panel
-
Page 1: User Manual
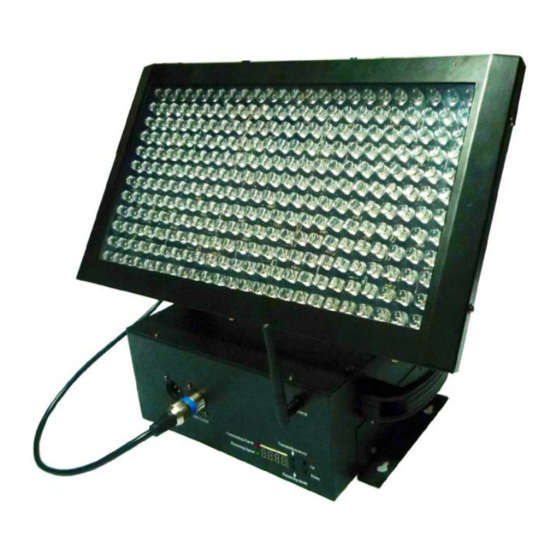
LEDJ Event Panel (Order code: LEDJ68) User Manual... -
Page 2: Safety Instructions
LEDJ Event Panel Safety WARNING FOR YOUR OWN SAFETY, PLEASE READ THIS USER MANUAL CAREFULLY BEFORE YOUR INITIAL START-UP! CAUTION! Keep this equipment away from rain, moisture and liquids. SAFETY INSTRUCTIONS Every person involved with the installation, operation & maintenance of this... -
Page 3: Operating Determinations
LEDJ Event Panel Safety IMPORTANT: The manufacturer will not accept liability for any resulting damages caused by the non-observance of this manual or any unauthorised modification to the equipment. • Never let the power-cable come into contact with other cables. Handle the power-cable and all mains voltage connections with particular caution! •... - Page 4 Auto run: Runs the built-in programmes in a continuous loop. DMX mode: The unit can be controlled by any universal DMX controller. Slave mode: The units in this mode can be synchronously run with a Event Panel set to master mode.
- Page 5 LED display will show: , or this selects which DMX mode the Event Panel is being run in. You can select any of these 5 DMX modes by using the “UP” and “DOWN” buttons. DMX Values 03CH...
- Page 6 Slave Mode: SlA- To activate the Slave Mode, press the “MODE” button to show , this will now run the Event Panel in slave mode. Sound Mode: SO.31 To activate the Sound Mode, press the “MODE” button to select , now the sound mode is activated it will run one step at a time, you can adjust the sensitivity by using the “UP”...
- Page 7 Panel is now ready for use. Note: 1, When using the battery to power the event panel, do not connect the 110V-240V power cable 2, When the battery is fully charged, it can supply a single colour on full output on the LED Event Panel for about eight hours.
- Page 8 DATA Cable (DMX cable) requirements (for DMX operation): • The LEDJ Event Panel can be controlled via DMX-512 protocol. The DMX address is set on the back of the unit. Your unit and your DMX controller require a standard 3-pin XLR connector for data input/output (figure 1).
- Page 9 LEDJ Event Panel DMX Set Up Notice: • Be sure to follow figures 2 & 3 when making your own cables. Do not connect the cable’s shield conductor to the ground lug or allow the shield conductor to come in contact with the XLR’s outer casing.
- Page 10 LEDJ Event Panel Features Features: DMX Channels: ..................3/4/6/12 or 24 selectable Display: ....................4 Push button LED display Connections: ..................3-Pin XLR In/Out for DMX Operations: .......Built-in programmes, Auto run, Sound active, Slave and DMX LEDs: ............288 Ultra Bright 10mm LEDs (R: 48, G: 120, B: 120) Beam angle: ........................40 degrees...
- Page 11 LEDJ Event Panel Notes Notes:...
Need help?
Do you have a question about the Event Panel and is the answer not in the manual?
Questions and answers