ELECRAFT K3 Installation Instructions Manual
High-performance 160 – 6 meter transceiver
Hide thumbs
Also See for K3:
- Assembly manual (84 pages) ,
- Owner's manual (82 pages) ,
- Installation and operation manual (55 pages)

Related Manuals for ELECRAFT K3


Summary of Contents for ELECRAFT K3
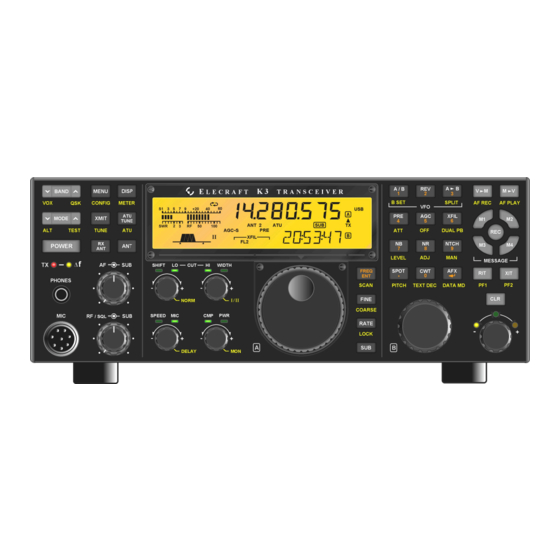
- Page 1 LECRAFT 160 – 6 M ERFORMANCE ETER RANSCEIVER KDVR3 D IGITAL OICE ECORDER PTION NSTALLATION NSTRUCTIONS Rev C, February 16, 2012 Copyright © 2012, Elecraft, Inc. All Rights Reserved...
-
Page 2: Table Of Contents
Removing the Front Panel Assembly ........................6 Removing the DSP Board(s) ..........................8 Installing the KDVR3 Board ..........................9 Hardware Upgrades ............................10 Reassembling the K3 ............................11 Preparing the KDVR3 for Operation ...................... 13 Using the Digital Voice Recorder ........................14 ... -
Page 3: Introduction
Elecraft at the time of original order, are not covered by this warranty. If the Elecraft product is being bought indirectly for a third party, the third party's name and address must be provided to Elecraft at time of order to insure warranty coverage. -
Page 4: Preventing Electrostatic Discharge Damage
How ESD Damage Occurs Whenever an object containing a static charge touches a circuit in your K3, current will rush into the circuit until the components reach the same voltage as the source of the static charge. If the voltage or current that passes through a component during that brief period exceeds its normal operating specifications, it may be damaged or destroyed. -
Page 5: Preparing For Installation
If you choose to use a soldering iron to work on your K3 for any reason, be sure your iron has an ESD- safe grounded tip tied to the same common ground used by your mat or wrist strap. -
Page 6: Installation Procedure
K3. See Preventing ESD Damage on page 4 for more information. Stand the K3 on its side feet, remove the seven screws shown in Figure 2 and lift the left side panel off. Set the side panel aside in a safe place to avoid scratches. - Page 7 Remove the three screws securing the top of the front panel assembly as shown in Figure 4. Figure 4. Removing the Top Front Panel Screws. Turn the K3 upside down. Place it on a clean, soft surface to avoid scratching the top of the front or rear panels.
-
Page 8: Removing The Dsp Board(S)
CAUTION: Before continuing on with the next step, be sure you have removed the three top Front Panel Assembly screws shown in Figure 4. You may bend and damage the front panel or shield assemblies if the screws are not removed! Use a screwdriver in the pry tool openings to press back against the circuit board while pushing the lip on the front panel assembly toward the front as shown in Figure 6. -
Page 9: Installing The Kdvr3 Board
With the three screws removed, the main DSP board is held on to the front panel board by two multi-pin connectors. Slip your finger tips between the boards and pull the main DSP board away from the front panel board to unplug it. A large, thick spacer washer should be lying on the front panel near the hole for the phones jack (see Figure 9). -
Page 10: Hardware Upgrades
Hardware Upgrades The following changes have been implemented in newer K3s to avoid the possibility of shorts or intermittent operation in some K3s. All the hardware needed is supplied with your KDVR3 kit. If you have the KRX3 installed, check the three screws securing the auxiliary DSP board to the main DSP board to see if they are nylon or metal (see Figure 11). -
Page 11: Reassembling The K3
Figure 13. Checking and Trimming the VFO B Encoder Pins. Reassembling the K3 Mount the DSP board assembly on the front panel board as follows. Place the front panel assembly face down on a soft, clean surface to protect the finish. The back side of the front panel board should be facing upward. - Page 12 Turn the chassis upside down and position the front panel so the pins of P30 and P35 on the bottom of the RF board just begin to engage the connectors on the lower edge of the front panel assembly as shown in Figure 14).
-
Page 13: Preparing The Kdvr3 For Operation
Replace the forward bottom cover using seven 3/16” (4.8 mm) black pan head screws (see Figure 5 on page 7). Hold the top cover above the K3, route the speaker wire under the stiffener bar and plug it into P25 on the KIO3 board at the left rear of the K3 as shown in Figure 16. -
Page 14: Using The Digital Voice Recorder
Using the Digital Voice Recorder Note: You must have MCU firmware version 2.73 Hold to start play. The icon will AF P L AY or later installed. flash quickly. A seconds counter will be displayed on VFO B, along with an asterisk (*) if you’re The KDVR3 option allows you to record and play within the most recently recorded audio segment.
Need help?
Do you have a question about the K3 and is the answer not in the manual?
Questions and answers