
Related Manuals for ELECRAFT K144XV


Summary of Contents for ELECRAFT K144XV
- Page 1 LECRAFT 160 – 6 M ERFORMANCE ETER RANSCEIVER K144XV 2-M ETER PTION NSTALLATION AND PERATION Revision D July 25, 2011 Copyright © 2011, Elecraft, Inc. All Rights Reserved...
-
Page 2: Table Of Contents
Parts Included ..............................7 Installation Procedure ............................9 Removing the K3Top Cover ........................... 9 Preparing the K3 for Installing the K144XV ....................9 Installing the K144XV Module in the K3 ..................... 13 Enabling the K144XV Module ........................16 Replacing the Top Cover ..........................17 ... -
Page 3: Introduction
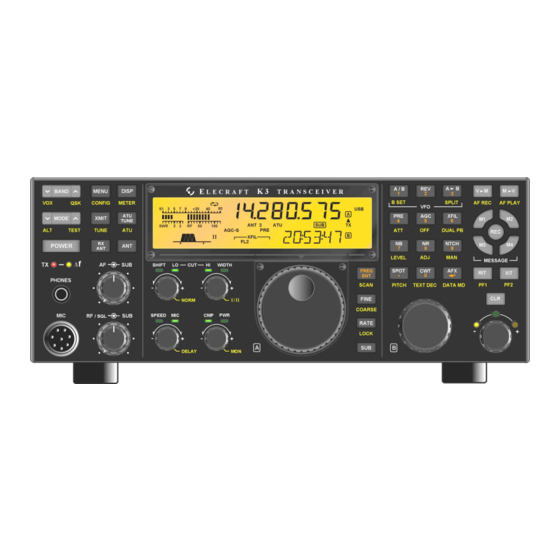
Introduction If your K144XV is already installed in your K3, turn to Using the K144XV on page 18 for operating instructions. The K144XV option adds 144 to 148 MHz receive and 10-watt transmit capability to your K3 via a separate antenna connector on the rear panel. -
Page 4: Customer Service And Support
Elecraft at the time of original order, are not covered by this warranty. If the Elecraft product is being bought indirectly for a third party, the third party's name and address must be provided to Elecraft at time of order to insure warranty coverage. -
Page 5: Assembling And Installing The K144Xv
Assembling and Installing the K144XV If you purchased your K3 with the K144XV already installed, turn to Using the K144XV on page 18 for operating instructions. Preventing Electrostatic Discharge Damage There is no climate or work location where the components of your K3 are safe from Electrostatic Discharge (ESD) unless you take specific steps to prevent such damage. -
Page 6: Preparing For Installation
We strongly recommend you take the following anti-static precautions (listed in order of importance) to avoid trouble: Leave ESD-sensitive parts in their anti-static packaging until you install them. The packaging may be a special plastic bag or the component’s leads may be inserted in conductive foam. Parts which are especially ESD-sensitive are identified in the parts list and in the assembly procedures. -
Page 7: Parts Included
Parts Included The following parts should be included in your kit. Check to ensure you have them all. If any parts are damaged or missing, contact Elecraft for replacements (see Customer Service and Support, page 4). ELECRAFT ILLUSTRATION DESCRIPTION QTY. - Page 8 ELECRAFT ILLUSTRATION DESCRIPTION QTY. PART NO. TMP Cable, 6-Inch (15.2 cm) marked near the connector at each end.(Typically the marking E850389 will be in color. White is shown here for clarity.) E850369 Serial Cable Assembly E700005 Screw, Pan Head, Zn, 4-40 1/4” (6.4 mm) E700186 Screw, Flat Head, Black, 6-32 1/4”...
-
Page 9: Installation Procedure
K3. See Preventing ESD Damage on page 5 for more information. Preparing the K3 for Installing the K144XV Remove the stiffener bar that runs from side to side across the top of the K3 chassis. This is the bar the three screws across the center of the top cover thread into. - Page 10 Remove the K3’s left side panel (the side with the handle). Check the panel to determine whether it has the three mounting holes for the K144XV module shown in Figure 2. The three mounting holes may have screws in them: ...
- Page 11 Solder the male half of the one –pin connector to the via (copper plated hole through the board) near the front right area of the K3 main RF board just behind the front panel shield as shown in Figure 4. That via may be occupied on some K3’s.
- Page 12 KIO3 board. Pass it through the opening in t he shield and, if the KRX3 is installed, pull the end up on top of the KRX3 module. It will be connected to the K144XV module later. Mount the fan panel using the four screws you removed earlier. After the panel is secured, inspect both fans to ensure the blades turn freely and are not in danger of hitting one of the cables.
-
Page 13: Installing The K144Xv Module In The K3
Mount the left side panel on the K3. Be sure you use the side panel equipped with the holes for mounting the K144XV module (see Figure 2). Route the two TMP cables from the KXV3 through the slot in the KIO3 board (see Figure 6) so they are not pinched between the side panel and the KIO3 circuit board. - Page 14 Lift the top cover off of the K144XV module and connect the cables as follows (See Figure 7). The top cover is supplied fitted but not screwed onto the module. CAUTION DO NOT touch the small red coils on the K144XV pc board. Doing so will disturb the alignment and compromise the performance of your K144XV.
- Page 15 Install the top cover on the K144XV module. Ensure the lip fits outside the bottom cover on all three sides, then secure the cover with five 4-40 1/4” (6.4mm) zinc pan head screws as shown in Figure 8. Figure 8. Installing the K144XV Module Top Cover.
-
Page 16: Enabling The K144Xv Module
1 for the K144XV. (XV1). If you already have one or more external transverters connected to the K3, you can select a different band for the K144XV. For example, if you wish to use band XV2, tap ‘2’ on the numeric keypad before setting up parameters. -
Page 17: Replacing The Top Cover
Hold the top cover above the K3, route the speaker wire under the stiffener bar. Route it under the stiffener bar at the depression in the top of the K144XV module as shown in Figure 11 and plug it into P25 on the KIO3 board at the left rear of the K3. -
Page 18: Using The K144Xv
10 on the bar graph indicates 1.0 mW drive. The drive power has a range of 1.5 mW down to 0.1 mW. The K144XV has a gain of about 40 dB, which means that typically 1.0 mW of drive will produce the maximum 9 to 11 W output. If 1.0 mW drive does not produce at least 9W output as measured by a known, calibrated 144MHz wattmeter, first calibrate your K3’s 1.0 mW... -
Page 19: Frequency Calibration
K3’s configuration menu (this was done at the factory if you purchased your K3 with the K144XV already installed). Each K144XV is tested at the factory and offset data is printed on the K144XV module top cover label in the following format: The 144 and 146 indicate the tuning range OFFSETS 144 MHZ ±... -
Page 20: Using External Transverters With The K144Xv
Windows, Macintosh and Linux operating systems. The K144XV Utility program is available free for downloading from www.elecraft.com. Updated program files may be obtained in two ways. You can check the box in the K144XV Utility that says “Copy new files from Elecraft into local folder.” This will download the latest production released firmware. -
Page 21: Serial Port Control
STATUS LED. Verify that the STATUS LED flashes once or twice and then turns off, indicating normal operation. Turn the K3 off, unplug the RS232 cable from the K144XV and replace the K3’s top cover. Be sure to connect the loudspeaker (see Replacing the Top Cover on page 17). -
Page 22: Dc Power On Antenna Cable During Transmit
A jumper is provided to add +5VDC to the antenna cable center conductor during transmit if desired. The load must not draw more than 1 mA. The jumper is P8 on the K144XV pc board. To access the jumper, remove the K3 top cover (see Figure 1on page 9), then remove the K144XV top cover (see Figure 8on page15).
Need help?
Do you have a question about the K144XV and is the answer not in the manual?
Questions and answers