KoamTac KDC200 User Manual
Barcode scanner and data collector
Hide thumbs
Also See for KDC200:
- User manual (122 pages) ,
- Programming manual (85 pages) ,
- Quick manual (9 pages)
Table of Contents
Advertisement
Quick Links
Advertisement
Table of Contents

Subscribe to Our Youtube Channel
Related Manuals for KoamTac KDC200


Summary of Contents for KoamTac KDC200
- Page 1 REVISION 2.86F User Manual KDC200 December, 2009 ...
-
Page 2: Table Of Contents
Scan Options Menu ..........................27 Data Process Menu ..........................28 Data Editor Menu ..........................29 Bluetooth Menu - KDC200 / KDC200P / KDC300 ................29 PDF417 Menu – KDC200P ........................30 System Menu ............................31 3.4 LED Status ............................32 3.5 Empty Battery ............................. - Page 3 KDC200 User Manual 4.4 Auto Power On ............................ 36 4.5 Auto Power Off ............................ 36 4.6 Beep Warning ............................36 4.7 PWR OFF Time ........................... 37 4.8 PowerOFF Msg ........................... 37 4.9 MAC Address ............................37 4.10 BT FW Version ..........................37 4.11 Connect To ............................
- Page 4 B.2 Host Interface ............................. 73 B.3 Battery ..............................73 B.4 Memory .............................. 73 B.5 Programming ............................74 B.6 KDC200 vs. KDC200P ........................74 APPENDIX C - SPECIAL BARCODES ....................75 C.1 Set Symbologies ..........................75 C.2 Barcode Options ..........................78 C.3 Delete Last Scanned Barcode ......................
-
Page 5: Listing Of Figures
Figure 3 - Characteristics of KDC200 - KDC200P - KDC300 __________________________________ 11 Figure 4 - Location of Scroll Buttons _____________________________________________________ 24 Figure 5 - KDC Display _______________________________________________________________ 25 Figure 6 - Reset Function for KDC200 - KDC200P - KDC300 __________________________________ 33 Figure 7 - Reset Function of KDC100 ____________________________________________________ 33 ®... -
Page 6: Listing Of Tables
Table 2 – Approximate Time to Charge KDC Battery ________________________________________ 23 Table 3 - KDC Menu Options ___________________________________________________________ 26 Table 4 – Factory Default Settings for KDC200 _____________________________________________ 31 Table 5 - Explanation of LEDs __________________________________________________________ 32 Table 6 - Troubleshooting Techniques ___________________________________________________ 62... - Page 7 No part of this publication may be reproduced or used in any form, or by any electrical or mechanical means, without permission in writing from KoamTac, Inc. The material in this manual is subject to change without notices. KoamTac reserves the right to make changes to any product to improve reliability, function, or design.
-
Page 8: Introduction
Lightweight and compact, with a user-friendly design and superior functionality, KoamTac’s KDC works in a variety of portable applications. Use it independently or as an accessory to your PC, PDA, or smartphone. To find out more about KoamTac, Inc. and our family of products, visit us at www.koamtac.com. -
Page 9: Kdc Package
1.1 KDC Package The standard KDC package contains: 1. One KDC Barcode Data Collector 2. One USB Cable 3. One Neck Strap 4. KoamTac Installation CD with © KTSync for Microsoft Windows XP, Vista, 7 and Mobile 5.0+ KDC Device Driver User Manual 5. -
Page 10: Kdc Characteristics
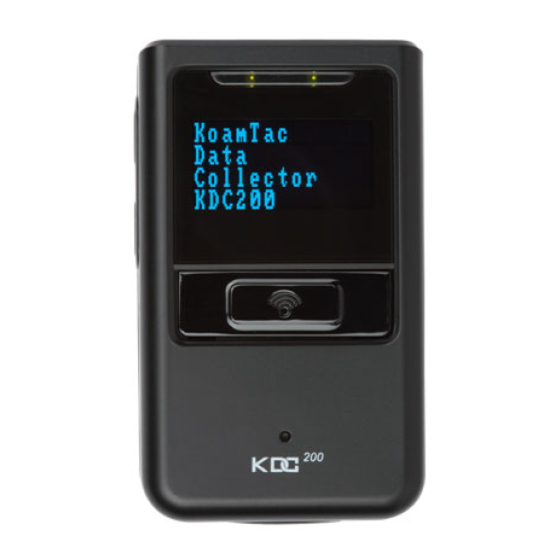
KDC. All KDC models are similar except for the KDC100 which includes an additional USB connector. KDC100 Barcode Reader and Data Collector Figure 2 - Characteristics of KDC100 KDC200 - KDC200P - KDC300 Barcode Reader and Data Collector (KDC200, KDC200P) -
Page 11: Figure 3 - Characteristics Of Kdc200 - Kdc200P - Kdc300
KDC200 User Manual (KDC300) Figure 3 - Characteristics of KDC200 - KDC200P - KDC300... -
Page 12: Installation
2. Click Start icon then My Computer icon. A listing of devices on your computer will display including the disk drive containing the KoamTac Installation CD. 3. Click on the KoamTac Installation CD icon then click on the Setup directory. Click on the PC_Setup.exe file which executes the KTSync Setup Wizard. - Page 13 KDC200 User Manual Click Next icon in KTSync Confirm Installation window • Within a few minutes, installation of KTSync is complete. Click Close icon and wait for the Device Driver Installation Wizard to load.
- Page 14 KDC200 User Manual Device Driver Installation Wizard Below are the screen images you will see during the installation of the KDC Device Driver. Click Next icon in Device Driver Installation Wizard window Click Continue Anyway icon in Software Installation Logo testing window...
- Page 15 KDC200 User Manual Connect KDC to Computer Using the USB cable included with the KDC, follow the directions below. Connect the cable’s ultra mini USB connector to the KDC. Connect the cable’s Type A USB connector to your PC. Wait until your computer beeps and/or displays the message Found New Hardware.
- Page 16 KDC200 User Manual Click Continue Anyway icon in Software Installation Logo testing window Click Finish icon in Found New Hardware Wizard window Verify COM Port Address User can verify installed COM Port in Device Manager...
-
Page 17: Vista And Windows 7
2. Click Start icon then My Computer icon. A listing of devices on your computer will display including the disk drive containing the KoamTac Installation CD. 3. Click on the KoamTac Installation CD icon then click on the Setup directory. Click on the PC_Setup.exe file which executes the KTSync Setup Wizard. - Page 18 KDC200 User Manual Click Next icon in KTSync Confirm Installation window Click Close icon in KTSync Installation Complete window and wait for Device Driver Installation Wizard Click Install this driver software anyway in Windows Security window...
- Page 19 KDC200 User Manual Click Finish icon in Device Driver Installation Wizard window Connect KDC to Computer Using the USB cable included with the KDC, follow the directions below. Connect ultra mini USB connector to the KDC. Connect Type A USB connector to your PC.
-
Page 20: Windows Mobile 5.0
KDC200 User Manual Windows Mobile 5.0+ WARNING: PLEASE CONNECT PDA TO PC PRIOR TO INSTALLATION 1. PC_Setup.exe creates Mobile_Setup.exe file under C:\Program Files\KoamTac\KTSync\Windows.Mobile directory 2. Execute Mobile_Setup.exe Select Windows Mobile version to install. Click Next icon. - Page 21 KDC200 User Manual Click OK icon in Pending Application Install window Connect the PDA and follow the instructions on screen COM port Assignment Connect PDA and follow the instructions on screen User should assign a COM port for KDC before using pKTSync.
-
Page 22: Manual Installation
New Hardware Found. You will be prompted to search for a device driver for KDC. 6. Browse then select KTReader.inf file from the KoamTac directory created in Step 2. Follow screen prompts to continue with the device driver installation. -
Page 23: Operating The Kdc
KDC200 User Manual 3. OPERATING THE KDC 3.1 Getting Started Attach Neck Strap to KDC To prevent possible damage to the KDC, we strongly recommend wearing it around your neck by the included neck strap. Also, please don’t swing KDC by the neck strap because contact with another object may cause it to malfunction or become damaged. -
Page 24: Configure Kdc
KDC200 User Manual Configure KDC The KDC is designed to meet the data collection requirements of many different industries in a variety of dynamic situations. To perform well in these diverse environments, the KDC is designed to be configured easily and quickly. But, to perform at its maximum level, the KDC must be configured properly. -
Page 25: Basics
KDC200 User Manual 3.2 Basics Reading Barcodes Reading a barcode is simple. Point the KDC at a barcode and press the scan button. Be sure to point the scan engine at the barcode, not at your face, and make sure to position the light beam on the barcode. -
Page 26: Kdc Menus
KDC200 User Manual 3.3 KDC Menus Top Menu Sub Menu Note Top Menu Sub Menu Note Wedge Only Normal Default Wedge & Store KDC Mode Application Custom Application Wedge / Store Store Only View Data View/Delete View/Delete Data Wedge & Store if Sent... -
Page 27: Kdc Mode Menu
KDC200 User Manual KDC Mode Menu The KDC Mode Menu has two options – Normal and Application modes. Normal: This is the default mode which provides basic barcode scanning. In Normal mode ® barcode data can be manipulated directly through the KDC or using KTSync during the synchronization process. -
Page 28: Data Process Menu
KDC200 User Manual the KDC will read a barcode. Security Level is set from 1 up to 4. The higher security level means more reliable readings though some performance degradation is likely. For poor quality barcodes, we recommend increasing the security level. The default is 2. -
Page 29: Data Editor Menu
Set Partial Data Start Position to y, Partial Data Length to x, Partial Data Action to Erase Partial Data Length 0 means Erase all characters from y position. Bluetooth Menu - KDC200 / KDC200P / KDC300 The KDC supports Bluetooth Ver2.0+EDR. Before utilizing the advantages of Bluetooth functionality with the KDC, you should become familiar with Bluetooth connectivity and its impact on your host environment. -
Page 30: Pdf417 Menu - Kdc200P
PDF417 Menu – KDC200P PDF417 Symbology The KDC200P has the same functionality as the KDC200 but it has an added option for supporting the PDF417 symbology. For maximum scanning performance for the PDF417 symbology, please become familiar with the following details. -
Page 31: System Menu
Partial Data – Start 1, Length 0 Display Format – Time & Battery UPCEreturnCheckDigit Scrolling – Enabled UPCAreturnCheckDigit PDF417-KDC200P EAN8returnCheckDigit Quality Level - 2 EAN13returnCheckDigit Tilt Level - 3 Start/Stop – Disable Table 4 – Factory Default Settings for KDC200... -
Page 32: Led Status
KDC200 User Manual 3.4 LED Status LED Color Status Successful Reading Green USB is connected and battery is fully charged Low battery Orange USB is connected and battery is charging No reading Empty battery Table 5 - Explanation of LEDs 3.5 Empty Battery... -
Page 33: Reset Feature
KDC100 - Connect to your PC directly using the swing out, Type A USB connector. See Figure 7. KDC200 / KDC200P / KDC300 - Connect to your PC using the included cable, attaching the ultra mini USB connector to your KDC and the standard, Type A connector to your PC’s USB port. -
Page 34: Replace Battery
KDC200. Replacement batteries can be purchased from a KoamTac distributor. Batteries should be disposed properly. Step One - Place KDC200 face down on a firm surface. On the back, locate the small black screw in the middle of KDC. This screw secures the battery cover. -
Page 35: Bluetooth - Kdc200/Kdc200P/Kdc300
KDC200 User Manual 4. BLUETOOTH - KDC200/KDC200P/KDC300 The KDC supports SPP (Serial Port Profile) and is tested with the following Bluetooth stacks. BlueSoleil Broadcom (Widcomm) Microsoft Windows XP, Vista, 7, and Mobile5.0+ Toshiba 4.1 Power The POWER option allows you to Enable or Disable the Bluetooth functionality of the KDC. To use Bluetooth, this option must be set to Enable. -
Page 36: Auto Connect
1. One high short beep when Bluetooth is connected. 2. One low short when Bluetooth is disconnected. 3. Five short beeps if: “Beep Warning is ENABLED” “Auto Power Off is DISABLED” “KDC200/200P/300 is DISCONNECTED from HOST” “Bluetooth power is ON”... -
Page 37: Pwr Off Time
KDC200 User Manual 4.7 PWR OFF Time The PWR Off Time option works in conjunction with the Auto Power Off option. If Auto Power Off is Enabled, the KDC powers off Bluetooth when the time duration specified in the PWR Off Time option is met and the KDC is NOT CONNECTED to the host. -
Page 38: Synchronization
KDC200 User Manual 5. SYNCHRONIZATION ® When barcode data is collected, it must be uploaded to your application. KTSync , which is bundled with the KDC, is software that allows barcode data to be uploaded to any PC, PDA, or smartphone running Windows XP, Vista, Windows 7, or Mobile 5.0+. - Page 39 KDC200 User Manual Bluetooth: This option is not available on KDC100. Exit: This option ends the KTSync program. You must re-run KTSync before you can synchronize data on the KDC. Figure 9 – File Menu Settings Menu Synchronization: Select Synchronize options.
- Page 40 KDC200 User Manual Application Menu Generation: Create user application or download predefined application. Import: Import existing application. Import & Download: Import existing application and download into KDC. Export: Export created application. Figure 11 – Application Menu ® About Menu - KTSync - Version Information Figure 12 –...
-
Page 41: File Menu
NOTE: You can manually assign the COM port using KTSync Connect option under the File menu. Synchronize Under the File Menu, this option allows you to manually synchronize data on KDC with host. This option is similar to clicking on the Synchronize button in the KoamTac Data Synchronizer box. -
Page 42: Bluetooth
KDC200 User Manual Bluetooth This menu option allows you to register up to ten Bluetooth devices including their MAC address, PIN #, and optional prefixes or suffixes. This option enables direct Bluetooth connection between KDC and other Bluetooth devices such as Bluetooth printer. User should choose Bluetooth device to be connected in “Connect to”... -
Page 43: Synchronization Settings
KDC200 User Manual 5.3 Synchronization Settings ® KTSync provides several synchronization options for synchronizing data from your KDC to host devices such as your PC, PDA, or smartphone running Windows XP, Vista, Windows 7, or Mobile 5.0+. ® Figure 15 - KTSync... -
Page 44: Synchronization Methods
KDC200 User Manual Select from Current Running Application – This option allows you to select a currently running application for data synchronization. Note: • Data synchronization begins immediately if Automatically After Connection is selected. If not selected, data synchronization is started manually by the user. -
Page 45: Current Kdc Wedge Method
KDC200 User Manual KDC is connected to the host. IMPORTANT: Remember to configure all options properly before selecting this option. Data synchronization can be done manually by clicking the synchronize icon if this option is not selected. Beep while Synchronization You can enable or disable the beep tone during the synchronization process. -
Page 46: Synchronization Options
KDC200 User Manual Synchronization Options Synchronize KDC Time with PC Time when Connected This option enables you to synchronize the KDC date and time with the host date and time. Synchronization of date and time occurs after the data is uploaded to the host device. -
Page 47: Barcode & Kdc Settings
KDC200 User Manual 5.4 Barcode & KDC Settings ® KTSync allows you to configure the KDC Scan Options and Barcode Settings. The configurations ® options for the KDC using KTSync are similar to the Set Barcodes, Code Options, Data Editing and Scan Options on the KDC Menu. -
Page 48: Select Symbologies And Symbology Options
KDC200 User Manual Select Symbologies and Symbology Options The process for scanning and reading barcodes is delicate and complicated. Your KDC, though equipped with a high performance scan engine, if configured incorrectly, may not perform at its peak performance level. To ensure its high performance, the KDC comes configured to optimize its scan engine technology. -
Page 49: Others Settings
KDC200 User Manual 5.5 Others Settings Others option under the Settings menu allows you to select four additional settings. • Ask Confirmation before Trying Auto Connection prevents unintentional launch of KTSync. • Ask Confirmation before Starting Auto Synchronization prevents unintentional synchronization of data. -
Page 50: Mobile Pktsync
KDC200 User Manual 5.6 Mobile pKTSync For Mobile Device Use Only pKTSync provides limited functionality for Pocket PC 2003 and Mobile 5.0+ users. 1. Synchronization - Provides data upload functionality to your applications. 2. Keyboard Emulator - Allows scanned data to upload directly into your application as if the data were being entered manually on a keyboard. -
Page 51: Application Generation
KDC200 User Manual 6. APPLICATION GENERATION When you select Application menu from the KTSync, you can choose from the following four Applications – Generation, DB Lookup, Master/Slave, and Pick/BIN. User can also download saved programs using Import & Download option. -
Page 52: Application Generation
KDC200 User Manual 6.1 Application Generation KDC Application Generation tool is a robust feature that allows you to create custom applications for collecting and managing barcode data. To create a custom application, select the Generation submenu ® from the Application menu in KTSync Figure 21 –... -
Page 53: Data Filter Settings
KDC200 User Manual Starting quantity Enter a predefined start quantity for each scanned barcode. The start quantity can be defined from 1 to 128 and is modifiable using up or down side key. Waiting to scan Enter the number of seconds the KDC pauses before the user prompts display. During this timeout period, the user can modify the quantity. - Page 54 KDC200 User Manual Barcode Type This field allows you to select the type of barcodes the KDC will collect. When you click on the box, Select Symbols is enabled. A listing of the symbologies supported by the KDC displays. To select a barcode symbology, click on the box associated with the symbology.
-
Page 55: Application Download And Execution
KDC200 User Manual If this field is enabled, non-compliant data is NOT stored in the KDC. If this option is not enabled, non-compliant data is stored. Generate step 2 To include another step in your data collection process, click the box, Generate step 2. This step has the same options as Step 1. -
Page 56: Predefined Applications
KDC200 User Manual 6.2 Predefined Applications KTSync provides three Predefined Applications – Master/Slave, Pick/Bin, and DB Lookup. Master/Slave Master/Slave predefined application allows you to define a master barcode for comparison with one or more slave barcodes. The predefined application can be run once or continuously and within either setting, you can define a substring for comparison of master and slave barcodes. - Page 57 KDC200 User Manual KDC Mode Collation : Define substring to be compared . Default is entire barcode Select MS Mode : Onetime (Onetime, Continuous Continuous ) Scan Master Scan Master Barcode Barcode Matched Scan Check Scan Check Mismatched Mismatched Matched...
-
Page 58: Pick/Bin
KDC200 User Manual Pick/Bin The Pick/Bin predefined application is a special version of the Master/Slave predefined application. The Pick/Bin application allows you to define Pick ID and the barcode symbology for comparison with a defined Bin. Number of ID and Symbology Define Pick ID characters from 1 to 32 and the barcode symbology. - Page 59 KDC200 User Manual Exit to KDC Menu <Up>+<Down> User ID Scan User ID Valid User ID Defined Side Key Please Store User ID scan Pick data User Input Scan button Valid Barcode Please scan Bin data Ignore Scanned Pick Label...
-
Page 60: Db Lookup Application
KDC200 User Manual DB Lookup Application The DB Lookup application allows you to download a database to the KDC which it can then utilize for advanced AUTO-ID applications like displaying additional data after scanning a barcode. For example, using our DB Lookup application, you could download a product database including information like description, price, and stock quantity. - Page 61 KDC200 User Manual Figure 27 – DB Lookup Application Menu...
-
Page 62: Troubleshooting
Out of scan range Move scanner farther from the barcode Incorrect angle Change the angle of scanner to barcode Failed reading Symbology Contact KoamTac - www.koamtac.com for possibility of not supported custom symbology support Scan options Check scan option settings Dirty scan window... -
Page 63: Warranty
KoamTac will not be liable in cases (i) in which the unit has been repaired or altered unless done or approved by KoamTac, (ii) in which the unit has not been maintained... -
Page 64: Contact Information
KDC200 User Manual 9. CONTACT INFORMATION CORPORATE HEADQUARTERS 116 Village Boulevard, Suite 200, USA Princeton, NJ 08540 PH: 609-734-4335 FAX: 609-228-4373 email: support@koamtac.com For more information, visit our website - www.koamtac.com... -
Page 65: Appendix A - Barcode & Scan Options
A.1 Symbologies KoamTac’s KDC products support most major barcode symbologies including 1D, 2D, Postal, and OCR- Fonts. Below is a list of the barcode symbologies supported by the KDC with respect to each models particular area of support. -
Page 66: Table 8 - Add-On For Ean-13 Symbology
KDC200 User Manual and Bookland EAN are both enabled, Bookland EAN takes precedence. Bookland EAN does not have any options. The Bookland EAN barcode does not contain any groupings – that is, there are no hyphens or separators. Thus, the ISBN 957-630-239-0 is transmitted as 9576302390. -
Page 67: Code Options
KDC200 User Manual A.2 Code Options The KDC supports the following barcode options: Transmission of start and stop characters Reverse direction Symbology conversion Verification of optional check character Transmission of check digit Transmission of Start and Stop Characters For Codabar symbols you can choose not to transmit the start and stop symbols, the NOTIS Editing. By default, they are transmitted. -
Page 68: Verification Of Optional "Check Digit
KDC200 User Manual Verification of Optional “Check Digit” Code39 and Interleave 2 of 5 have an optional check digit, which, by default, is not verified. Their verification can be enabled by selecting the option VerifyCheckDigit to true or you can enable the verification for individual symbologies. -
Page 69: Resolution Of Inconsistencies
KDC200 User Manual Resolution of Inconsistencies Three types of inconsistencies could arise in the assignment of symbology options. The decoder has pre- defined strategies to resolve these inconsistencies: If UPCE_as_EAN13 is true, then UPCE_as_UPCA is ignored. If symbology conversion is selected but the target symbology is not enabled, then the decoder still outputs the symbol in the target symbology. -
Page 70: Miscellaneous Barcode Information
KDC200 User Manual A.3 Miscellaneous Barcode Information Height of a Linear Barcode Industry standards suggest a height of either 6.5mm or 15% of the symbol length, whichever is greater. Symbols of less than recommended heights may cause recognition problems. Check Characters Yes, we recommend the use of check-characters in barcodes. -
Page 71: Equation To Determining Potential Number Of Stored Barcodes
KDC200 User Manual Equation to Determining Potential Number of Stored Barcodes The number of barcodes that can be stored in the KDC memory depends on the size of the barcodes. Example: If only UPCA barcodes are scanned and the check digit is not transmitted, then each barcode takes up 11 (barcode data) + 2 (added bytes) + 2 (length and type) + 4 (time stamp) = 19 bytes. -
Page 72: Appendix B - Faq
Appendix B – FAQ B.1 Symbology Q: What barcode symbologies are supported by the KDC200? A: The KDC200 supports most major 1D barcode symbologies. Below is a list of the1D symbologies supported by the KDC200. KDC300 KDC100 / KDC 200 / KDC200P... -
Page 73: Host Interface
A: The battery on the KDC200 can be charged at least 300 times before it needs to be replaced. Q: How long does it take to charge the KDC200? A: It takes about 2 hours to fully charge the KDC200 from an empty battery status to a fully charged status. -
Page 74: Programming
Q: What are the differences between the KDC200 and the KDC200P? A: The only difference between these two models of KDC is that the KDC200P supports PDF417, a 2D symbology which is not supported by the KDC200. All other features of the KDC200 are included in the KDC200P. -
Page 75: Appendix C - Special Barcodes
KDC200 User Manual APPENDIX C - SPECIAL BARCODES C.1 Set Symbologies Enable EAN-13 Disable EAN-13 Enable EAN-8 Disable EAN-8 Enable UPCA Disable UPCA Enable UPCE Disable UPCE Enable Code39 Disable Code39 Enable ITF-14 Disable ITF-14... - Page 76 KDC200 User Manual Enable Code128 Disable Code128 Enable Interleave 2 of 5 Disable Interleave 2 of 5 Enable Codabar Disable Codabar Enable GS1-128 Disable GS1-128 Enable Code93 Disable Code93 Enable Code35 Disable Code35...
- Page 77 KDC200 User Manual Enable Bookland EAN Disable Bookland EAN Enable EAN-13 Supplements Disable EAN-13 Supplements Enable EAN-8 Supplements Disable EAN-8 Supplements Enable UPCA Supplements Disable UPCA Supplements Enable UPCE Supplements Disable UPCE Supplements...
-
Page 78: Barcode Options
KDC200 User Manual C.2 Barcode Options Codabar - do NOT transmit start/stop Codabar - transmit start/stop Convert UPCE to UPCA Do NOT convert UPCE to UPCA Convert EAN8 to EAN13 Do NOT convert EAN8 to EAN13 Convert UPCE to EAN13... - Page 79 KDC200 User Manual VerifyCheckDigit Do NOT VerifyCheckDigit Verify check digit for I2of5 Do NOT verify check digit for I2of5 Verify check digit for Code39 Do NOT verify check digit for Code39 Return check digit for I2of5 Do NOT return check digit for I2of5...
-
Page 80: Delete Last Scanned Barcode
KDC200 User Manual Return check digit for UPCA Do NOT return check digit for UPCA Return check digit for EAN8 Do NOT return check digit for EAN8 Return check digit for EAN13 Do NOT return check digit for EAN13 C.3 Delete Last Scanned Barcode... -
Page 81: Scan Options
KDC200 User Manual C.4 Scan Options Reversed Scan Normal Scan Wide scan angle Narrow scan angle High filter mode Normal filter mode... -
Page 82: Scan Timeout
KDC200 User Manual C.5 Scan Timeout Timeout = 500msec Timeout = 1sec Timeout = 2sec Timeout = 3sec Timeout = 4sec Timeout = 5sec Timeout = 6sec Timeout = 7sec Timeout = 8sec Timeout = 9sec Timeout = 10sec... -
Page 83: Minimum Barcode Length
KDC200 User Manual C.6 Minimum Barcode Length Minimum Length = 2 Minimum Length = 3 Minimum Length = 4 Minimum Length = 5 Minimum Length = 6 Minimum Length = 7 Minimum Length = 8 Minimum Length = 9 Minimum Length =... - Page 84 KDC200 User Manual Minimum Length = 14 Minimum Length = 15 Minimum Length = 16 Minimum Length = 17 Minimum Length = 18 Minimum Length = 19 Minimum Length = 20 Minimum Length = 21 Minimum Length = 22 Minimum Length = 23...
- Page 85 KDC200 User Manual Minimum Length = 29 Minimum Length = 30 Minimum Length = 31 Minimum Length = 32 Minimum Length = 33 Minimum Length = 34 Minimum Length = 35 Minimum Length = 36...
-
Page 86: Security Level
KDC200 User Manual C.7 Security Level Security level = 1 Security level = 2 Security level = 3 Security level = 4... -
Page 87: Data Process - Wedge/Store
KDC200 User Manual C.8 Data Process - Wedge/Store Wedge Only Wedge & Store Store Only Wedge & Store if Sent Wedge & Store if Not Sent... -
Page 88: Data Process - Data Format - Handshake
KDC200 User Manual C.9 Data Process - Data Format - Handshake Data format - Barcode only Data format - Packet data Enable Handshake Disable Handshake... -
Page 89: Data Process - Termination Character
KDC200 User Manual C.10 Data Process - Termination Character None CR+LF... -
Page 90: Bluetooth
KDC200 User Manual C.11 Bluetooth Enable Bluetooth Power Disable Bluetooth Power Enter Pairing Mode Enable Auto Connect Disable Auto Connect Enable Auto Power Off Disable Auto Power Off Enable Auto Power On Disable Auto Power On Enable Beep Warning Disable Beep Warning... - Page 91 KDC200 User Manual Enable PowerOff Msg Disable PowerOff Msg BT MAC Address BT FW Version Enable Wakeup Nulls Disable Wakeup Nulls Enable Scrolling Disable Scrolling...
-
Page 92: Bluetooth Pwr Off Time
KDC200 User Manual C.12 Bluetooth PWR Off Time 1min 2min 3min 4min 5min 6min 7min 8min 9min 10min... - Page 93 KDC200 User Manual 11min 12min 13min 14min 15min 16min 17min 18min 19min 20min...
- Page 94 KDC200 User Manual 21min 22min 23min 24min 25min 26min 27min 28min 29min 30min...
-
Page 95: System
KDC200 User Manual C.13 System Memory Status Reset Memory Date/Time Battery Version Button Lock Button Unlock Enable Auto Menu Exit Disable Auto Menu Exit... - Page 96 KDC200 User Manual Enable Port Status Disable Port Status Time & Battery Type & Time Type & Battery Memory Status Enable Scrolling Disable Scrolling Factory Default...
-
Page 97: Sleep Timeout
KDC200 User Manual C.14 Sleep Timeout Disable 1sec 2sec 3sec 4sec 5sec 10sec 20sec 30sec 1min 2min 5min 10min... -
Page 98: Function
KDC200 User Manual C.15 Function... -
Page 99: Number
KDC200 User Manual C.16 Number... -
Page 100: Lower Case Alphabet
KDC200 User Manual C.17 Lower Case Alphabet... - Page 101 KDC200 User Manual...
- Page 102 KDC200 User Manual...
-
Page 103: Upper Case Alphabet
KDC200 User Manual C.18 Upper Case Alphabet... - Page 104 KDC200 User Manual...
- Page 105 KDC200 User Manual...
-
Page 106: Control Character
KDC200 User Manual C.19 Control Character Space... -
Page 107: Symbol Character
KDC200 User Manual C.20 Symbol Character “ & ‘... - Page 108 KDC200 User Manual < >...
- Page 109 KDC200 User Manual...
- Page 110 KDC200 User Manual Start-String Stop-String Note: • You can compose a string up to 16 characters. • A string would be composed by scanning the “Start-String”, number/alphabet/special characters, and “Stop-String” special barcodes. • The KDC will abort string composition if you do not scan “Stop-String”...
-
Page 111: Index
KDC200 User Manual INDEX Angle ......26, 27 Format ......26, 28 Process ....26, 28, 29 Auto ........89 Full ......... 32, 61 Reset ......26, 31 barcode scanner ....8 Handshake ..... 26, 28 Resolution ......68 Battery ....23, 31, 94, 95 High ......
Need help?
Do you have a question about the KDC200 and is the answer not in the manual?
Questions and answers