Table of Contents
Advertisement
Advertisement
Table of Contents

Related Manuals for Teradek CUBE


Summary of Contents for Teradek CUBE
-
Page 2: Introduction
This manual is intended for user information only. Every effort has been made to ensure that the contents within are accurate at the time of printing, and that updates are made in a timely manner. Teradek cannot be held responsible for inaccuracies, typographical errors, or out-of-date information contained within this manual. -
Page 3: Table Of Contents
Warning ................................. 2 Connect and Power Your Device ........................5 Getting started: ..........................5 Physical connections: ........................5 Connect Cube to Your Network ........................8 Ad Hoc instructions ........................8 Infrastructure instructions ......................8 Connect to Cube using TeraCentral ......................9 Encoder –... - Page 4 Network Services ......................... 21 Configuration pages ............................ 21 Dashboard ............................. 21 Video Setup ........................... 22 System ............................25 Info ..............................28 Advanced and/or activatable applications ....................29 RTSP announce ........................... 29 RTP push ............................29 UDP multicast ..........................30 Transport stream .......................... 31 Proxy Recording ...........................
-
Page 5: Connect And Power Your Device
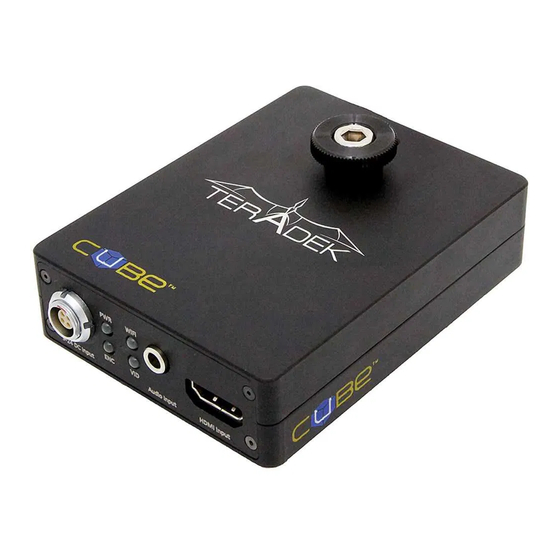
1. To power your Cube, connect the included AC adapter (or accessory power cable, sold separately) to Cube via the 4 pin LEMO connector marked ‘6-28 DC Input’ (b). Cube begins to boot as soon as power is connected. NOTE: The ENC/DEC LED blinks to indicate Cube is booting. - Page 6 2.2. Cube accepts 6-28 volts DC input via a 4 pin LEMO connector. 2.3. An AC adapter is included with Cube. Teradek also offers a number of power accessory cables and battery plates to integrate with your existing power equipment. Accessories are available online at http://store.teradek.com or through your local Teradek dealer.
- Page 7 1.2. WiFi 1.2.1. Cube 100/200 – USB modem status (see above). 1.2.2. Cube 120/150, 220/250, 320/350, 420/450 – Wireless status. Off, wireless disabled. Red, wireless disconnected. Green, wireless associated/connected. 1.3. ENC/DEC – Green, encoding/decoding. Orange, no video detected. Red, codec is restarting or recording is in progress.
-
Page 8: Connect Cube To Your Network
Connect Cube to Your Network Cube allows you to connect multiple ways. The simplest is to connect Cube to one other device (Ad Hoc mode), or you can add Cube to an existing network (Infrastructure mode). Find brief descriptions of these modes below. -
Page 9: Connect To Cube Using Teracentral
2.1. Connect video and power to your Cube Encoder (see Connect and Power Your Device, page 2.2. Connect Cube to your computer via Ethernet. 2.3. Launch TeraCentral (included on the USB drive), and click the ‘Configure Settings’ button next to your Cube’s listing. -
Page 10: Encoder - Pick Your Application
3. Refer to the following sections for other streaming applications. Encoder – Pick Your Application Cube can be used for a variety of different applications – local monitoring with a computer/decoder, local monitoring with iOS devices, or Internet streaming with Livestream. For information on other advanced or activatable features (refer to later sections). -
Page 11: Local Monitoring With Ios Devices Using Oplayer Hd
2.3. Choose your streaming interface and then select ‘RTSP capable iOS app’ for your decoder. Click ‘Apply Settings.’ Proceed to step 6. 2.4. If the login screen appears, log in to Cube’s web UI and Navigate to ‘Video Setup’ -> ‘Stream settings.’... -
Page 12: Internet Streaming Using Livestream
3. Internet streaming using Livestream Cube offers native integration with Livestream for live event broadcasts and turnkey remote content distribution. Depending on your needs, Livestream offers multiple free or paid membership options. A Livestream account is required to use this feature. - Page 13 3.1. To enable Live Internet streaming, first launch Cube’s configuration page by Clicking “Configure Settings” in TeraCentral. 3.2. If the wizard appears, click ‘Skip the Setup Wizard,’ then log in to Cube’s web UI. Navigate to ‘Video Setup’ -> ‘Stream settings.’...
-
Page 14: Decoder
1. Changing output format 1.1. Open your Cube decoder’s web UI and log into the device. 1.2. Navigate to ‘Video Setup’ -> ‘Device Settings.’ 1.3. Select your desired resolution under ‘Video Output Format.’... -
Page 15: Switching Between Available Streams
UI on the ‘Video Setup’->’Stream Settings’ page. RTP/RTSP 1.1. 1.2. RTP is Cube’s default streaming mode. Use this for local streaming to computers and Cube decoders. The URL for a standard RTP stream is rtsp://xxx.xxx.xxx.xxx/stream1, where the x’s are your Cube’s IP address or link-local hostname. -
Page 16: Secondary Quickview Stream
1.3. RTP Port and Max clients – Use these fields to configure the port Cube accepts RTP requests on and how many simultaneous clients are allowed. The default port is 554 and the default maximum number of clients is 10. -
Page 17: Live Internet Streaming
(Mac users can also open this stream in Quicktime 3.4. Transport Stream over RTP – Enabling this allows Cube to stream an RTP stream while in HTTP Live mode. This allows you to stream HTTP Live to iOS devices while using the RTP stream on other devices. -
Page 18: Options (In Order Of Display)
1.1. Title Text: Enter your desired title text here. Check ‘Show Title’ to display the title text on your video stream. If the title text is enabled, you can also display Cube’s system time by checking ‘Show Time Code.’ The title text is also used as your channel name, and is displayed wherever you see a Cube stream advertisement. -
Page 19: Network Settings
1.8. Intra Refresh Mode: This mode allows for the lowest possible latency when streaming between Cube encoders and decoders. It also allows the above caching value to be set lower without affecting the stream stability. This mode is not currently compatible with available software decoders (e.g. - Page 20 1.2. Global settings – The global settings displays the currently used gateway and nameserver values, current domain, and allows you to set Cube’s hostname. The default hostname for cube is cube-xxx-yyyyy, where xxx is Cube’s model number and yyyyy is the last five digits of the serial number.
-
Page 21: Network Services
Cube to be easily discovered on your network. The default friendly name for cube is Cube xxx yyyyy, where xxx is Cube’s model number and yyyyy is the last five digits of the serial number. The friendly name must only contain alphanumeric characters, and can be up to 40 characters long. -
Page 22: Video Setup
The file is valid as long as network and stream settings are not modified. 1.3. Primary Stream Configuration – Use this section to make quick adjustments to Cube’s primary video stream. You can select from multiple settings presets or individually adjust Cube’s output (streaming) resolution, frame rate, bitrate, and Key Frame Interval. - Page 23 2.2. Device Settings – The Device Settings page contains options related to Cube’s audio and video input and output. 2.2.1. Video Input Resolution: select the resolution provided by your video source. It can be set to Auto (default) in most situations. Change this if Cube does not recognize the input resolution or if you are using a non-standard input.
- Page 24 Stream info – Additional stream information can be seen by clicking the 2.3.1.4. button. 2.3.2. Advanced/Manual Configuration – If your network restricts Cube’s service advertisements or if streaming over a WAN or the Internet, manual configuration of the Cube decoder may...
-
Page 25: System
Intra Refresh: Set this to ‘Enabled’ if your encoder is using Intra Refresh mode. 2.3.3.8. 3. System 3.1. Licenses – Cube supports a variety of features that are activatable on a per-device basis. More details regarding activatable features and license keys can be found in Advanced and/or... - Page 26 ‘Import a License File,’ browsing for the file in the field at the bottom of the page, and clicking ‘Import.’ You will need to reboot after importing the license file. Note: Licenses and license files are specific to individual devices. License files are only valid for the Cube they are exported from.
- Page 27 ‘Include System Information’ before clicking ‘Export.’ 3.2.4. Factory Reset Settings – To restore Cube to its original settings, click the ‘Reset to Factory Settings’ button, and then confirm the reset by clicking ‘Yes.’ You can preserve Cube’s...
-
Page 28: Info
‘.bin’ and current release notes in PDF format. 3.4.2. If Cube is connected to the internet it will periodically check for updates. When an update is available, a message is displayed in the top right corner of the web UI. -
Page 29: Advanced And/Or Activatable Applications
1. RTSP announce 1.1. 1.2. RTSP Announce streaming allows Cube to start and stop broadcasts to a remote streaming server (such as Wowza). The RTSP announce license is provided by request, free of charge. 1.3. Configuration: Enter the host name or IP address of your server in the ‘Host Name’ field. Enter the host port configured on your server in the ‘Host Port’... -
Page 30: Udp Multicast
3. UDP multicast 3.1. 3.2. UDP multicast allows Cube to send multicast streams over RTP/RTSP. Compared to unicast streaming, where each client connection requires Cube to send additional data, multicast streaming relies on compatible networking equipment to intelligently duplicate the video streams. -
Page 31: Transport Stream
RTP stream. The multicast IP address does not need to be entered to open the video stream. For example, if a Cube has the IP address 192.168.1.100 and is set to multicast using 239.192.20.1, you would use the URL rtsp://192.168.1.100/stream1 to open the video stream. - Page 32 replace the unicast IP address with the multicast IP address. Please refer to following section for instructions on configuring your decoder to work with transport stream. 4.5.1. Decoder Configuration Select ‘Manually Configure’ on the Video Setup ->Decoder Settings page (see 4.5.1.1.
-
Page 33: Proxy Recording
‘Initial buffer length’ and ‘Maximum Buffer Usage’ fields. 5. Proxy Recording 5.1. Proxy recording is an activatable feature that allows Cube to generate video files on a remote server (via NFS) using start/stop information present on your camera’s SDI output. For information on installing the proxy recording license, please refer to section 3.1 Licenses (page... - Page 34 HaneWin NFS, etc.). Please refer to your chosen software’s documentation for set up instructions. 5.4. Configuring Cube 5.4.1. Log in to Cube’s web UI and go to the Recording page under Video Setup. Change the ‘Recording Mode’ setting from ‘Disabled’ to ‘Camera Controlled’ and click ‘Apply.’ 5.4.2.
- Page 35 5.4.3.4. If the share is successfully mounted, the dialog window will disappear and you will see information about the current Volume displayed in the ‘Volume Management’ field. 5.4.4. Recording options Record Mode – Select ‘RED Camera,’ ‘Record Run,’ or ‘Manual’ mode. Please 5.4.4.1.
-
Page 36: Troubleshooting
CAUSE REMEDY Cannot open video stream Cube may not be encoding. Stream Verify that Cube is encoding (ENC LED URL may be incorrect. is green). If ENC LED is red, but VID is green, wait for encoder to start. Verify stream URL is correct. Stream URL is available to copy on the Dashboard page (see page 21). - Page 37 May be disconnected from network, -If Wifi LED stays red, connect ethernet (Infrastructure mode). network settings may be incorrect. to Cube, access web UI and double check that infrastructure SSID, password, and security type are correct (see Network Settings, page 19).
- Page 38 bandwidth. avoid lost/late video data. See Encoder Controls, page 17.
Need help?
Do you have a question about the CUBE and is the answer not in the manual?
Questions and answers