Table of Contents
Advertisement
Quick Links
Advertisement
Table of Contents

Related Manuals for Teradek Wave


Summary of Contents for Teradek Wave
- Page 1 Wave Live Streaming Encoder/Monitor Quick Start Guide...
- Page 2 PHYSICAL PROPERTIES...
- Page 3 A: Wi-Fi antennas E: RP-SMA connectors I: Ethernet port B: Power button F: USB modem port J: HDMI input C: Monitor display G: SD card slot K: Mic/Line stereo input D: Sony L-series dual battery plate H: USB-C power input Headphone output...
-
Page 5: Table Of Contents
TABLE OF CONTENTS Smart Streaming Monitor ....2 Power and Connect ......3 Mounting ..........4 Get Started ......... 6 UI Overview ........9 Network Configuration ...... 12 Sharelink .......... 14 Wave App ........16 Recording ........17... -
Page 6: Smart Streaming Monitor
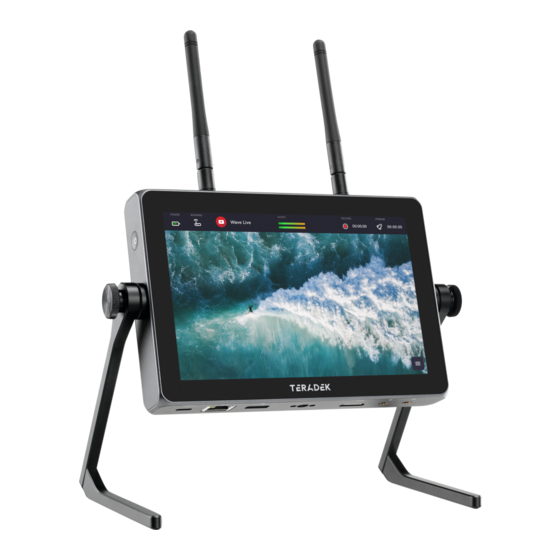
SMART STREAMING MONITOR Teradek’s Wave is the only live streaming monitor that handles encoding, smart event creation, network bonding, multistreaming, and recording – all on a 7” daylight- viewable touchscreen display. Wave delivers high definition live streaming video with the quality and reliability expected in traditional broadcasts and utilizes Wave’s innovative project workflow: FlowOS. -
Page 7: Power And Connect
Sony L-series batteries to the built-in dual-battery plate on the back (D). Press the Power button (B). Wave begins to boot as soon as the power is turned on. NOTE: Wave encoders are hot swappable between USB-C and L-series batteries. Both power source types can be connected together, but Wave will draw power from the USB-C power source by default. -
Page 8: Mounting
MOUNTING Wave has a three 1/4”-20 threaded holes: one on the bottom to mount on a camera, and two on each side to install the included stand kit. MOUNT ON A CAMERA Wave can be Attach Wave to your camera’s arm mounted vertically on a camera. - Page 9 STAND KIT INSTALLATION Place a rosette disc over one of Wave’s side mounting holes. Affix one of the stands over the rosette disc so that the both rosettes are facing each other (1) and the feet are facing towards you (2).
-
Page 10: Get Started
GET STARTED From the main screen, tap the + icon to enter the Personalize your new Event screen. Create a name for your event (optional), then select a thumbnail so that it’s easily identifiable. Tap Next. Select a method to connect to the internet: •... - Page 11 Wave to any RTMP platform using a server url and stream key. • QUICK STREAM - Quick stream is also for RTMP streaming, but Wave will not save the server URL, stream key, or your login credentials for any future events.
- Page 12 Select one of the configured accounts, channels, or quick stream destinations then enter all applicable information (title, description, start time, etc.). NOTE: Depending on the streaming destination you select, there may be additional settings required to begin streaming. Select Enable or Disable Recording. If you select Enable, select a drive.
-
Page 13: Ui Overview
USER INTERFACE (UI) OVERVIEW NETWORK EVENT The Network drop-down tab displays The Event drop-down tab displays the the type of interface you are using event name and destination (streaming (WiFi, Ethernet, or Modem) along account) you are configured to stream with the corresponding IP address and to. - Page 14 AUDIO RECORDING The Audio drop-down tab allows you Tap the Recording tab to Start or Stop to select an HDMI or Analog input, and your recording when Recording is adjust the Audio input and Headphone enabled. If Recording is disabled, tap the tab to enter the Recording Settings, output volume.
- Page 15 STREAM SHORTCUT The Stream tab displays the status asnd The Shortcut tab provides access to the duration of your stream. Tapping the Event Configuration, Stream Quality, Stream tab allows you to start or end and System Settings menus. You can your live stream (Go Live and Preview also adjust the display’s brightness and options available only when YouTube is...
-
Page 16: Network Configuration
NETWORK CONFIGURATION Use Wave’s display to configure and/or reconnect Wave to a network and get online. CONNECT TO A WIFI NETWORK Wave supports two wireless (Wi-Fi) modes; Access Point (AP) Mode (for bonding multiple cellular devices for increased bandwidth) and Client Mode (for normal Wi-Fi operating and connecting to your local router). - Page 17 Plug an Ethernet cable from the Wave’s Ethernet port to an Ethernet switch or router. To verify that Wave is connected, tap the gear icon or swipe right on the display to enter the System Settings menu, then tap Wired to verify that Ethernet is set to DHCP and to reveal Wave’s IP address.
-
Page 18: Sharelink
SHARELINK Sharelink is Teradek’s cloud platform that offers Wave users two major advantages: multi-destination streaming for broader distribution, and network bonding for a more robust internet connection. Broadcast your live productions to an unlimited number of streaming platforms simultaneously while monitoring your stream from anywhere in the world. - Page 19 • Ethernet • Up to two Teradek Nodes or 3G/4G/5G/LTE USB modems. • WiFi (Client mode) − Connect to an existing wireless network or mobile hotspot • WiFi (AP mode) − Connect up to four cellular devices with the Wave App...
-
Page 20: Wave App
WAVE APP The Wave app allows you to remotely monitor your stream’s stats such as bitrate, bonding status, and resolution to ensure a stable stream. You can also enable hotspot bonding with multiple cellular devices for fast, reliable internet connectivity wherever you go. -
Page 21: Recording
RECORDING Wave supports recording to an SD card or compatible USB thumb drive. Each recording is saved with the same resolution and bitrate set in Wave. Insert a compatible SD card or USB drive into the corresponding slot. Enter the Recording menu, and select Enabled. - Page 24 Teradek regularly releases new firmware versions to improve performance, add features, or fix vulnerabilities. teradek.com/pages/downloads contains all the latest firmware and software updates. Visit support.teradek.com for tips, information, and to submit help requests to Teradek’s support team.
- Page 25 © 2021 Teradek, LLC. All rights reserved. v1.2...
Need help?
Do you have a question about the Wave and is the answer not in the manual?
Questions and answers