Table of Contents
Advertisement
Quick Links
Download this manual
See also:
Reference Manual
Advertisement
Table of Contents

Subscribe to Our Youtube Channel
Related Manuals for LXE MX9


Summary of Contents for LXE MX9
- Page 1 MX9 User Guide E-EQ-MX9OGWW-D 2010 Copyright© by LXE®, Inc, An EMS Technologies Company. All Rights Reserved.
- Page 2 Summit Data Communications, Inc. Summit Data Communications, the Summit logo, and “The Pinnacle of Performance” are trademarks of Summit Data Communications, Inc. The Bluetooth® word mark and logos are owned by the Bluetooth SIG, Inc. and any use of such marks by LXE, Inc. is under license.
-
Page 3: Table Of Contents
Toggle Vibrate Indicator Connecting Cables to the MX9 Connecting the USB Host and Power Cable Host Cable Assembly Connecting the USB Client and Power Cable Client Cable Assembly Connecting the Serial and Power Cable E-EQ-MX9OGWW-D [ i ] MX9 User Guide... - Page 4 Adjusting the Display Backlight Timer Apply the Touchscreen Protective Film Cleaning the Touchscreen and Scanner Aperture Setup Terminal Emulation Parameters Using the AppLock Switchpad Using the Keypad Using the Touchscreen Connecting to Bluetooth Devices E-EQ-MX9OGWW-D [ ii ] MX9 User Guide...
- Page 5 Warm Boot Troubleshooting Continuous Scan Mode Regulatory Notices and Safety Information Class B Digital Device RF Notices Laser Light Safety Statement Vehicle Power Supply Connection Safety Statement Hazardous Locations Warnings Revision History Index E-EQ-MX9OGWW-D [ iii ] MX9 User Guide...
-
Page 6: Set Up A New Mx9
9. Set the LXE DCWedge parameters End User License Agreement (EULA) When a new MX9 starts up a EULA is displayed on the touchscreen. It remains on the screen until the Accept or Decline button is tapped with a stylus. - Page 7 Software Setup Tap the Decline button to decline the EULA and the MX9 will reboot. It will continue to reboot until the Accept button is tapped with the stylus. Note: The EULA will be presented after any operating system upgrade or re-installation, including language-specific operating systems.
-
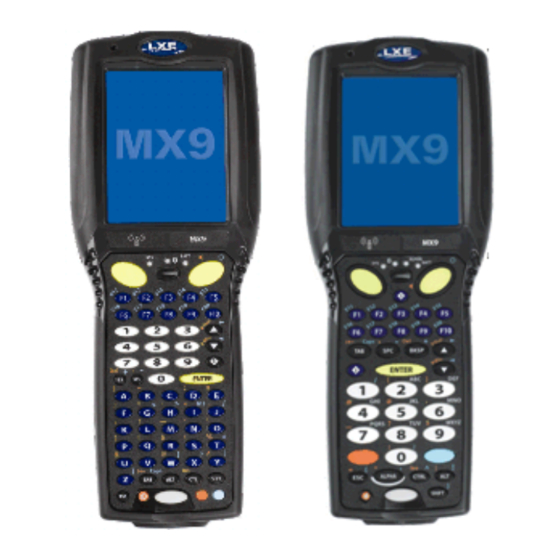
Page 8: Components
2. Touch screen 3. Speaker 4. Scan buttons 5. Enter key 6. Scanner status LED 7. Power key Note: The above list is the same on the 38 key MX9. Special keys are listed below. E-EQ-MX9OGWW-D [ 3 ] MX9 User Guide... - Page 9 4. Backspace [BS] key and Space [SPC] key 5. Escape [ESC] key 6. Power key 7. Tab key 8. Alt key 9. Control [CTL] key 10. Shift [SHFT] key 11. Blue key 12. Orange key E-EQ-MX9OGWW-D [ 4 ] MX9 User Guide...
- Page 10 3. Diamond 2 key 4. Orange key 5. Escape [ESC] key 6. Alpha key 7. Control [CTRL] key 8. Shift [SHIFT] key 9. Cursor up and down keys 10. Blue key 11. Alt key E-EQ-MX9OGWW-D [ 5 ] MX9 User Guide...
-
Page 11: Top
Barcode reader Imager aperture Barcode reader Scanner aperture Bottom Input / Output Connector Tethered boot cover (covers I/O connector) not shown E-EQ-MX9OGWW-D [ 6 ] MX9 User Guide... -
Page 12: Back
Back Back Battery Bay 1. Battery Terminals 2. Battery Bay 3. Battery Bay Access Tab E-EQ-MX9OGWW-D [ 7 ] MX9 User Guide... -
Page 13: Trigger Handle
Trigger Handle Trigger Handle Trigger handle attach points 1. Upper 2. Lower 1. Trigger 2. Tether attach point Stylus storage bay in handle E-EQ-MX9OGWW-D [ 8 ] MX9 User Guide... -
Page 14: Handstrap
Handstrap 1. Handstrap 2. Handstrap Base 3. Stylus 1. Attach - Upper Handstrap Base 2. Attach - Lower Handstrap Base 1. Handstrap connector, upper 2. Stylus holder on Handstrap 3. Handstrap connector, lower E-EQ-MX9OGWW-D [ 9 ] MX9 User Guide... -
Page 15: Label Locations
The tamper-proof label covers the top right screw in the battery bay. The label states "Warranty void if removed or damaged". The battery pack will not deface the label as the battery pack does not touch the label. Device with Summit Radio E-EQ-MX9OGWW-D [ 10 ] MX9 User Guide... -
Page 16: Laser Warnings And Labels
Do not look into the laser’s lens. Do not stare directly into the laser beam. Do not remove the laser caution labels from the MX9. Do not connect the laser barcode aperture to any other device. The laser barcode aperture is certified for use with the MX9 only. -
Page 17: Batteries
MX9. An MX9 will retain data, while the main battery is removed and replaced with a fully charged main battery, for 5 minutes. Important: When the backup battery power is Low or Very Low connect the AC adapter to the MX9 before replacing the main battery. -
Page 18: Insert Battery In Hazloc Mx9
3. Push down on the battery pack until it clicks into place. 4. Place the tethered plastic locking tab over the battery latch, matching up the screw holes in the MX9 and the screw holes in the tethered plastic locking tab. -
Page 19: Charge Or Recharge The Main Battery
Hazardous Locations. New batteries must be fully charged prior to use. The main battery can be recharged in an AC powered Multi-Charger after the battery has been removed from the MX9 or its packing material when new. The main battery while in the MX9 can be recharged using several different methods. -
Page 20: Tapping The Touchscreen With A Stylus
Place the cursor in a text box prior to retrieving data using the scanner/imager or an input/output device connected to the serial port. A right-click can be simulated by touching the touchscreen with the stylus and holding it for a short time. A stylus replacement kit is available. E-EQ-MX9OGWW-D [ 15 ] MX9 User Guide... -
Page 21: Backlights And Indicators
Backlights and Indicators Backlights and Indicators Status LEDs Several LEDs are located on the front of the MX9 above the integrated speaker. They are: System Status LED indicates power management status. Battery Charging Status LED indicates main battery charging status. -
Page 22: Keypad Backlight Setting
Start | Settings | Control Panel | Data Collection| Notification tab The MX9 vibration motor is activated when a scan is completed successfully (good scan vibration) or with a failure (scan key released before good scan, timeout, or rejected because of Data Options configuration). -
Page 23: Connecting Cables To The Mx9
1. Holding the cable I/O connector, pinch the catch release buttons in until the catches are open. Connect the cable to the MX9 I/O port by matching the shape of the I/O connector on the cable with the shape of the I/O connector at the base of the MX9. -
Page 24: Connecting The Usb Client And Power Cable
1. Holding the cable I/O connector (3), pinch the catch release buttons in until the catches are open. Connect the cable to the MX9 I/O port by matching the shape of the I/O connector on the cable with the shape of the I/O connector at the base of the MX9. -
Page 25: Connecting The Serial And Power Cable
1. Holding the cable I/O connector (1) , squeeze the catch release buttons in until the catches are open. Connect the cable to the MX9 I/O port by matching the shape of the I/O connector on the cable with the shape of the I/O connector at the base of the MX9. -
Page 26: Connecting An External Power Supply
LED on the power adapter illuminates green. 3. Squeeze the catches of the I/O connector and push the cable connector into the MX9 I/O port until it clicks. The click means the connector is seated firmly. -
Page 27: Connecting Vehicle Power
9000302PWRSPLY – Power Supply, 60-110VDC with cable Connecting Electrical Cables to Power Sources The DC to DC power supply is used to provide vehicle power to the MX9 when placed in a DC powered vehicle dock. Specifications for Electrical Supply... -
Page 28: Wiring Schematic
How To Connect Vehicle Electrical Connection 1. The vehicle cradle must be empty. 2. Begin by connecting the power cable to the MX9's vehicle cradle. Work from this connection with the last connection being to the vehicle’s power source. 3. Route the cable from the cradle to the DC to DC converter. - Page 29 15. Provide mechanical support for the cable by securing it to the vehicle structure at approximately one foot intervals, tak- ing care not to over tighten and pinch conductors or penetrate outer cable jacket. E-EQ-MX9OGWW-D [ 24 ] MX9 User Guide...
-
Page 30: Vehicle 12V Bare Wire Adapter
Avoid creating arcs and sparks at battery terminals. Vehicle Cable Connection Cable (Fuse Not Shown) 1. To Vehicle Battery 2. To Vehicle Mounted Device 3. Green (GND) 4. Brown (DC+) 5. Blue (DC-) 6. 12 VDC E-EQ-MX9OGWW-D [ 25 ] MX9 User Guide... -
Page 31: Connecting The Power Cable To The Vehicle
How To: Connect Vehicle 12 VDC Connection 1. The power cable must be UNPLUGGED from the MX9 vehicle cradle. 2. While observing the fuse requirements specified above, connect the power cable as close as possible to the actual bat- tery terminals of the vehicle. - Page 32 4. Provide mechanical support for the cable by securing it to the vehicle structure at approximately one foot intervals, tak- ing care not to over tighten and pinch conductors or penetrate outer cable jacket. 5. Refer to the following sections to complete the power connection to the MX9 vehicle cradle. E-EQ-MX9OGWW-D [ 27 ] MX9 User Guide...
-
Page 33: Connect Power Supply To Vehicle Cradle
Align the connector pins to the vehicle cradle Power connector; firmly pushing the connector into the Power port. Tighten the nut of the plug clockwise until the power cable is securely fastened. Secure the cable to the cradle with the LXE-installed strain relief cable clamp (see section titled Vehicle Cradle Strain Relief Cable Clamp). -
Page 34: Connecting The Headset Cable
2. Headphones 3. Microphone Connect the MX9 voice cable I/O connector to the I/O port on the MX9. The MX9 internal microphone and speaker are automatically disabled. Slide the voice cable ends together until they click shut. Do not twist or bend the connectors. -
Page 35: Adjust Headset / Microphone And Secure Cable
The headset consists of an earpiece, a microphone, a clothing clip and a cable. The headset attaches to the audio cable end of the voice cable which attaches to the MX9. Align the audio connector and the headset quick connect cable end. Firmly push the cable ends together until they click and lock in place. -
Page 36: Connecting A Tethered Scanner
1. Squeeze the I/O port connector latches inwards. Connect part (1) of the RS232 cable to the I/O port at the base of the MX9. Release the connector latches and test the connection for stability. 2. Match the shape of the serial port (2) on the RS232 cable with the shape of the tethered scanner cable end. -
Page 37: Attaching The Handstrap
3. Insert the screws (supplied) into each of the four holes and fasten the base securely. 4. Slide the handstrap bottom clip pins into the slots at the base of the MX9 and pull the strap towards the top of the MX9 until the top clip slips into the groove. -
Page 38: Attaching The Trigger Handle
Equipment needed: Torque wrench capable of torquing to 3±1 in/lb (.34±.11 N/m). Either the trigger handle or the handstrap is attached, not both. LXE recommends that, in the absence of a trigger handle, the handstrap be used at all times. -
Page 39: Carry Case With Metal Snaps
Carry Case with Metal Snaps 4. Slide the MX9 into the case, making sure the touchscreen and keypad (including the Scan LED) are visible and acces- sible through the front openings of the case. 5. Securely tether the stylus to the case, if necessary. Place the stylus in the stylus holder on the handstrap or in the trigger handle. -
Page 40: Set Date And Time Zone
The GrabTime utility can be configured to synchronize the time with a local server during each reboot function. Autolaunch Time-Sync By default, TimeSync does not automatically run on the MX9. To enable TimeSync to run automatically on the MX9 using the GrabTime utility, check this checkbox. -
Page 41: Using The Input Panel / Virtual Keyboard
Move the cursor into the text entry field when you want to enter data using the Input Panel. Keyboard icon in the taskbar When finished entering data, tap the icon in the Taskbar again. Select Hide Input Panel. E-EQ-MX9OGWW-D [ 36 ] MX9 User Guide... -
Page 42: Set Power Scheme Timers
System Idle timer has expired. When the User Idle timer is set to “Never”, the power scheme timers never place the MX9 in User Idle, System Idle or Suspend modes (even when the MX9 is idle). -
Page 43: Set Speaker Volume
You can also select / deselect sounds for key clicks and screen taps and whether each is loud or soft. As the volume scrollbar is moved between Loud and Soft, the MX9 emits a tone each time the volume increases or decreases. -
Page 44: Touchscreen
To begin, tap the Recalibrate button on the screen with the stylus. Follow the instructions on the screen and press the Enter key to save the new calibration settings or press Esc to cancel or quit. E-EQ-MX9OGWW-D [ 39 ] MX9 User Guide... -
Page 45: Adjust The Display Backlight Brightness
Adjusting the Display Backlight Timer Start | Settings | Control Panel | Display | Backlight The backlight settings use the LXE set of default timeouts and are synchronized to the User Idle setting in the Schemes tab in the Power control panel. -
Page 46: Cleaning The Touchscreen And Scanner Aperture
(802.11x), make sure your mobile client is communicating with the Access Point. 2. From Start | Program, run LXE RFTerm or tap the RFTerm icon on the desktop. 3. Select Session | Configure from the application menu and select the "host type" that you require. This will depend on the type of host system that you are going to connect to;... -
Page 47: Using The Applock Switchpad
Using the AppLock Switchpad Using the AppLock Switchpad Note: The touchscreen must be enabled. Select Start | Settings | Control Panel | MX9 Options | Misc. tab to verify touchscreen status. Switchpad Menu Switchpad Icon in Taskbar A checkmark indicates applications currently active or available for Launching by the MX9 user. When Keyboard, on the Switchpad Menu, is selected, the default input method (Input Panel, Transcriber, or custom input method) is activated. -
Page 48: Connecting To Bluetooth Devices
MX9 is out of range of all paired Bluetooth device(s). Connection is inactive. LED Connection Indicator When the Bluetooth LED on the MX9 is off, Bluetooth hardware has been turned off or it does not exist in the MX9. When the Bluetooth LED on the MX9 is on:... -
Page 49: Warm Boot
Start | Settings | Control Panel | Registry | Warmboot or Start | Run, type WARMBOOT and press Enter The Warm Boot function refreshes the Windows operating system without clearing RAM or deleting installed programs. MX9 user-set parameters are unchanged. -
Page 50: Regulatory Notices And Safety Information
Li-Ion Battery When disposing of the MX9 main battery, the following precautions should be observed: The battery should be disposed of properly. The battery should not be disassembled or crushed. The battery should not be heated above 212°F (100°C) or... -
Page 51: Rf Notices
Information to User A label on the exterior of the device should resemble one of the labels shown below (the label contains the LXE part number of the installed radio card). The labels shown below and affixed to the device, identify where the device may be used and where its use is restricted. -
Page 52: Laser Light Safety Statement
Advertencia: Este producto usa luz de láser. Las etiquetas se proveen en la máquina exploradora. Por favor, lea detenidamente la explicación para las precauciones. (ES) Waarschuwing: Dit product gebruikt laserlicht. Een van de volgende labels is op de scanner aangebracht. Lees a.u.b. de waarschuwing onder Oppassen. (NL) E-EQ-MX9OGWW-D [ 47 ] MX9 User Guide... - Page 53 Laser Light Safety Statement E-EQ-MX9OGWW-D [ 48 ] MX9 User Guide...
-
Page 54: Vehicle Power Supply Connection Safety Statement
Legend: Danish – DK; English – US; Finnish – FI; French- - FR; German – DE; Greek – GR; Italian – IT; Norwegian – NO; Portuguese – PT; Spanish – ES; Swedish – SE; Turkish – TR. E-EQ-MX9OGWW-D [ 49 ] MX9 User Guide... -
Page 55: Hazardous Locations Warnings
Separate connectors only in non-hazardous area. WARNING Only use LXE161888-0001 and 161915-0001 batteries as replacements. WARNING EXPLOSION HAZARD. DO NOT DISCONNECT WHILE THE CIRCUIT IS LIVE OR UNLESS THE AREA IS KNOWN TO BE FREE OF IGNITABLE CONCENTRATIONS. E-EQ-MX9OGWW-D [ 50 ] MX9 User Guide... - Page 56 LXE Inc. 125 Technology Parkway Norcross, GA 30092-2993 USA ph: 770/447-4224 fax: 770/447-6928 E-EQ-MX9OGWW-D [ 51 ] MX9 User Guide...
-
Page 57: Revision History
1. Getting Started 1. Added EULA instruction. D / Mar 2010 2. Regulatory Notices 2. Added Declaration of Conformity. Changed radio label Noti- and Safety Information fied Body number from 0560 to 0682. E-EQ-MX9OGWW-D [ 52 ] MX9 User Guide... -
Page 58: Index
Bluetooth connection EULA Bluetooth LED Bluetooth LED activity Bluetooth Status LED Front Bottom Grab Time Utility Calibrate the touchscreen Calibrating the Touchscreen Carry Case with Metal Snaps Charge or Recharge the Main Battery E-EQ-MX9OGWW-D [ 53 ] MX9 User Guide... - Page 59 Battery Status Special Purpose Keys - 38 Key Bluetooth Special Purpose Keys - 62 Key System Status Status LEDs LEDs (Light Emitting Diodes) Strain Relief Cable Clamps Stylus how to use main battery status E-EQ-MX9OGWW-D [ 54 ] MX9 User Guide...
- Page 60 Torque wrench Touchscreen and the stylus Touchscreen protective film Trigger handle assemble Trigger Handle Troubleshooting USB host cable assembly 18-20 Using the AppLock Switchpad Vibrate virtual keyboard Volume adjust Warm Boot WEEE Wiring Schematic E-EQ-MX9OGWW-D [ 55 ] MX9 User Guide...
Need help?
Do you have a question about the MX9 and is the answer not in the manual?
Questions and answers