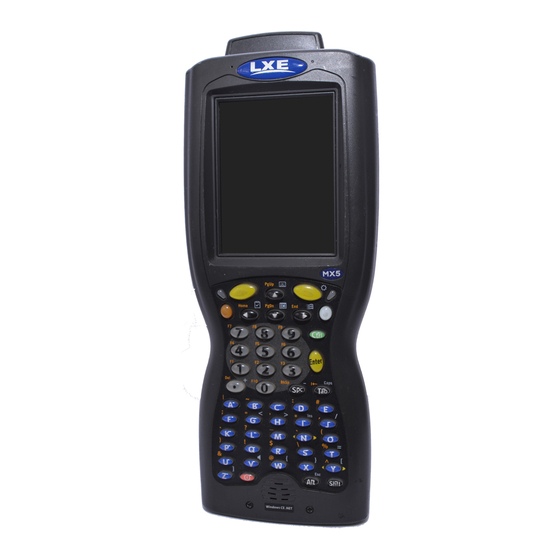
LXE MX5 User Manual
Rugged, portable, hand-held computer
Hide thumbs
Also See for MX5:
- Reference manual (144 pages) ,
- User manual (78 pages) ,
- Installation instructions manual (6 pages)
Table of Contents
Advertisement
Quick Links
MX5 User's Guide
®
®
®
(For Microsoft
Windows
Pocket PC
Equipped MX5's)
IMPORTANT NOTICE
LXE's MX5 running Pocket PC 2000/2002 is obsolete.
This electronic manual has been made available as a courtesy to LXE's
customers. Please contact your LXE customer support representative for
assistance and mobile device replacement.
Copyright © 2005 by LXE Inc.
All Rights Reserved
E-EQ-MX5PCOGWW-G-ARC
Advertisement
Table of Contents

Related Manuals for LXE MX5


Summary of Contents for LXE MX5
- Page 1 Equipped MX5’s) IMPORTANT NOTICE LXE’s MX5 running Pocket PC 2000/2002 is obsolete. This electronic manual has been made available as a courtesy to LXE's customers. Please contact your LXE customer support representative for assistance and mobile device replacement. Copyright © 2005 by LXE Inc.
- Page 2 Further, LXE Incorporated, reserves the right to revise this publication and to make changes to it from time to time without any obligation to notify any person or organization of such revision or changes.
-
Page 3: Table Of Contents
About Lithium-Ion Batteries ......................... 2 Pocket PC Versions..........................2 Identify Your Device ....................3 Document Conventions.................... 4 MX5 Environmental Specifications ................. 4 Laser Warnings and Labels ..................5 Quick Start......................... 6 Troubleshooting ............................ 6 Accessing Files on a CompactFlash Card ..................... 6 Components ............................ - Page 4 Touch Screen Calibration........................27 Cleaning the Glass Display/Scanner Aperture ..................28 Programmable Buttons........................28 COM Ports ....................... 29 Tethered Scanners and the MX5 ......................29 USB Port ............................. 30 IR Port ..............................30 The Keypad......................31 Scan Key Function ..........................32 Enter Key Function ..........................
- Page 5 Table of Contents Illustrations Figure 1 CDRH / IEC 825 Caution Label Location – MX5, Back ..............5 Figure 2 Caution Label - Scanner ........................5 Figure 3 Front of MX5............................7 Figure 4 Scan Aperture and Audio Jack ......................8 Figure 5 Ports...............................8 Figure 6 Back w/Optional Handle or Hand Strap ....................9...
- Page 6 Table of Contents MX5 User’s Guide E-EQ-MX5PCOGWW-G-ARC...
-
Page 7: Introduction
• Whenever possible, use the AC power adapter with the MX5 to conserve the main battery and recharge the backup battery. • When a new battery is installed in the MX5 for the first time (or when the Backup battery is completely depleted), the Time and Date reverts to it’s default values. -
Page 8: About Lithium-Ion Batteries
Li-Ion batteries (like all batteries) gradually lose their capacity over time (in a linear fashion) and never just stop working. This is important to remember -- the MX5 is always 'on' even when in the Suspend state and draws battery power at all times. Tap the Windows icon | Settings | System | Handheld Settings tab to check the battery status and power reading. -
Page 9: Identify Your Device
Identify Your Device Identify Your Device At the front bottom of the MX5 is a label indicating the operating system resident on the mobile device. This document is one in a series covering the MX5 family of computers: Label – Pocket PC... -
Page 10: Document Conventions
Shock 75G, 5ms duration, 100 shock impacts If the MX5 has a dead Main Battery and is as cold as the extended operating temperature’s lowest value, the unit must be warmed to above –20°C (-4°F) before installing a new Main Battery pack and the system being powered on. -
Page 11: Laser Warnings And Labels
• Do not stare directly into the laser beam. • Do not remove the laser caution labels from the MX5. • Do not connect the laser barcode window to any other device. The laser barcode window is certified for use with the MX5 only. -
Page 12: Quick Start
(e.g. hand strap) and a power source. Use this guide as you would any other source book -- reading portions to learn about the MX5, and then referring to it when you need more information about a particular subject. This guide takes you through an introduction to and operation of the LXE MX5. -
Page 13: Components
Quick Start Components Figure 3 Front of MX5 Scanner Housing Keypad Microphone Power Key Touch Screen Display Speaker E-EQ-MX5PCOGWW-G-ARC MX5 User’s Guide... -
Page 14: Figure 4 Scan Aperture And Audio Jack
Figure 4 Scan Aperture and Audio Jack Scan Aperture Audio Jack Figure 5 Ports COM 1 -- RS-232, USB and AC Power COM 4 -- RS-232 and AC Power Connection Connection COM 3 -- IR Port MX5 User’s Guide E-EQ-MX5PCOGWW-G-ARC... -
Page 15: Figure 6 Back W/Optional Handle Or Hand Strap
Quick Start Figure 6 Back w/Optional Handle or Hand Strap Scanner Trigger Stylus and Stylus Pocket Battery Fastener Trigger Handle Main Battery E-EQ-MX5PCOGWW-G-ARC MX5 User’s Guide... -
Page 16: Figure 7 Handle (Optional)
Quick Start Figure 7 Handle (Optional) Scan Aperture Handle Trigger MX5 User’s Guide E-EQ-MX5PCOGWW-G-ARC... -
Page 17: Insert Main Battery
Whenever possible, use the AC power adapter with the MX5 to conserve the main battery and charge the backup battery. If the MX5 has a dead main battery and is as cold as the extended operating temperature’s lowest value, the unit must be warmed to above –20°C (-4°F) before installing a new main battery pack and pressing the On button. -
Page 18: Power Key
The Power key is located next to the <Z> key on the keypad. When a battery is inserted in the MX5 for the first time press the Power key. Tapping the Power key places the MX5 immediately in Suspend mode. Tapping the Power key again, or connecting to AC power, immediately returns the MX5 from Suspend. -
Page 19: Connect External Power Supply (Optional)
The MX5 receives AC/DC power from the US AC/DC 12V Power Supply or the MX5 Cradle. The MX5 DC power jack is located at the base of the MX5. The cradle power jack (if available) is located on the back of the cradle. -
Page 20: Connect Audio Jack (Optional)
Quick Start Connect Audio Jack (Optional) The MX5 audio jack is located on the top of the unit next to the scan aperture. The internal speaker is disabled when the audio jack is connected. Figure 11 Connect Audio Jack Insert the barrel end of the connector into the MX5 audio jack and push in firmly. -
Page 21: Install Pistol Grip Handle (Optional)
Scan key on the keypad. With the handle installed the Scan key on the keypad remains active. The trigger duplicates the operation. The handle is built of a durable and flexible plastic that will not detach from the MX5 if the unit is dropped. -
Page 22: Install Handstrap
An elastic hand strap is available for the MX5. Once installed, the hand strap provides a means for the user to secure the computer to their hand. It is adjustable to fit practically any size hand and is easily moved to allow installation or removal of the MX5 battery pack. -
Page 23: Figure 15 Strap Inserted In Upper Bracket
MX5. Insure that both ends of the bottom assembly are securely installed. 6. After securing the bottom of the strap to the MX5, loosen the closed loop fastener strap and then secure the upper bracket to the unit with a screw. -
Page 24: Tapping The Touchscreen With A Stylus
An application can choose to interpret this stream of messages as a right mouse click. LXE does not support non-LXE application programming. An extra or replacement stylus can be ordered from LXE. See the section titled "Accessories" for the stylus part number. Keypad Shortcuts Use keyboard shortcuts instead of the stylus when the MX5 is running Pocket PC. -
Page 25: Toggle The Display And Keypad Backlight On And Off
Set the Display Backlight Timer Note: Refer to the section titled "Power Modes" in the “MX5 Reference Guide” for information relating to the power states of the MX5. Tap the Windows icon | Settings | System | Backlight icon. Select an option and tap OK to save the changes. -
Page 26: Set The Power Off Timer
Turn off device if not used for Change the parameter value and tap OK to save the change. The default is 3 minutes. When the MX5 is connected to A/C power, the device does not go into Suspend Mode. Note: When the Power Off timer expires, the computer enters Suspend Mode (when not connected by A/C power). -
Page 27: Set The Audio Speaker Volume
An application may override the control of the speaker volume. Turning off sounds saves power and prolongs battery life. The audio volume can be adjusted to a comfortable level for the user. The MX5 has an internal speaker and a jack for an external headset. -
Page 28: Enter Data
RS-232 or the IR port are used to input/output data, and the keypad provides manual entry. MX5's with a touch screen and Microsoft Pocket PC software can use a stylus to input data, the COM ports and/or the keypad. A virtual keyboard is available in applications that expect keyed input. -
Page 29: Scanner Entry
Align the red beam so that the barcode is centered within the beam. The laser beam must cross the entire barcode. Move the MX5 towards or away from the barcode so that the barcode takes up approximately two-thirds the width of the beam. -
Page 30: Voice Recording
• Tap the Shift key to type one capital letter. • Tap the CAPS key to type all capital letters. • Tap the au key to access symbols. Figure 18 Virtual Keyboard MX5 User’s Guide E-EQ-MX5PCOGWW-G-ARC... -
Page 31: Getting Help
Explanations of terms and acronyms used in this manual are located in the file titled "LXE Technical Glossary" on the LXE Manuals CD. Manuals LXEbook -- MX5 User’s Guide (can be downloaded to the MX5 Pocket PC device from the LXE Manuals CD.) MX5 Reference Guide... - Page 32 Power Supply, AC/DC w/ US Power Cable MX5A305PSACUS Power Supply AC/DC w/o Power Cable MX5A305PSACWW Power Supply, 12V, Bare Wire I, MX5 O MX5A306PS12V Power Supply, 12V Auto to VM Cradle MX5A380PSAUTO12VUS Power Supply, 12V Auto to VM Cradle (EU)
-
Page 33: The Mx5 Hand Held Computer
See the section titled "Set the Display Backlight Timer" in the previous section "Quick Start." Touch Screen Calibration If the MX5 is not responding properly to pen touch taps, the touch screen may need to be recalibrated. Contact your System Administrator for assistance. -
Page 34: Cleaning The Glass Display/Scanner Aperture
Windows icon | Settings | System tab | Scanner | Key tab Tap the desired radio button. Tap OK to close this menu option. Tap X to cancel changes. Any changes made are in effect immediately. MX5 User’s Guide E-EQ-MX5PCOGWW-G-ARC... -
Page 35: Com Ports
IR Port (COM 3) Figure 21 COM Ports COM 1 port is always the left RS-232 port on the base of the MX5. COM 1 port accepts RS-232, USB and AC power connectors. The RS-232 port on the docking cradle is “connected” to the MX5 when a tethered scanner is connected to the RS-232 port on the MX5 cradle, and the MX5 is in the cradle. -
Page 36: Usb Port
Slow IrDA (Infrared Data Access) PHY Layer standard that allows communication speeds up to 115k baud. When sending data through the IR port to another MX5's IR port, make sure both units are in close proximity to each other. The IR operating envelope has a distance range of 2 cm (.79 inches) to 15 centimeters (6 inches) with a viewing angle of 30 degrees. -
Page 37: The Keypad
Figure 23 The ANSI / Batch Keypad Scanner Active LED Left and Right Scan Blue and Orange 2 Function Key Power Key Ctrl Enter Shift The keymaps (keypress sequences) are located in “Appendix A - Key Maps.” E-EQ-MX5PCOGWW-G-ARC MX5 User’s Guide... -
Page 38: Scan Key Function
-- when CAPS is On alpha characters are capitalized. For example, when CAPS is On and the Shft key and the G key are pressed, a lower case g is displayed. MX5 User’s Guide E-EQ-MX5PCOGWW-G-ARC... -
Page 39: Spc Key Function
• No CapsLock AND No Shift keypress – result is a lowercase letter. • CapsLock OR Shift – result is an uppercase letter. • CapsLock AND Shift keypress – result is a lowercase letter. Keypress Sequences See Appendix A for key maps for all keypads. E-EQ-MX5PCOGWW-G-ARC MX5 User’s Guide... -
Page 40: Batteries
RF transmitter, the shorter the time required between battery recharges. The MX5 keeps date and time valid for a minimum of four days using a fully charged Backup Battery and a Main Battery that has reached the Low Warning point. -
Page 41: Battery Hot-Swapping
Batteries Battery Hot-Swapping Replace the main battery pack after first pressing the power key and placing the MX5 in Suspend Mode. LXE recommends any work in progress be saved prior to replacing the main battery pack. Simply replace the discharged main battery with a fully-charged main battery. The backup battery will retain data during a main battery hot-swap. -
Page 42: Battery Chargers
The external Power Supply connection for the Multi-charger is shipped with the multi-charger. External Power Supply (Optional) The MX5 DC adapter can be plugged into either of the D26 pin connectors on the bottom of the MX5. The cradle power jack is located on the back of the cradle. -
Page 43: Cradles
Cradles Important: The cradles are not designed to secure an MX5 with a protective padded case. The vehicle cradle is not designed to secure an MX5 with a trigger handle. The desktop cradles will secure mobile device’s with handstraps or trigger handles. - Page 44 Cradles MX5 User’s Guide E-EQ-MX5PCOGWW-G-ARC...
-
Page 45: Appendixa Key Maps
Ctrl, Alt, Shft, Blue and Orange keys are “sticky keys”. They do not need to be held down before pressing the next (or desired) key. It is valid to use combined modifiers on specific keys. E-EQ-MX5PCOGWW-G-ARC MX5 User’s Guide... -
Page 46: Key Map 101-Key Equivalencies
Note: This key mapping is used on hand held computers that are NOT running an LXE Terminal Emulator. When using a sequence of keys that includes the Orange or Blue keys, press the color key first then the rest of the key sequence. - Page 47 Ctrl Shft Lock Scroll Lock Up Arrow Up Arrow Down Arrow Down Arrow Right Arrow Right Arrow Left Arrow Left Arrow Insert Delete Home Left Arrow Right Arrow Page Up Up Arrow Page Down Down Arrow E-EQ-MX5PCOGWW-G-ARC MX5 User’s Guide...
- Page 48 Keypad Press These Keys and Then … To Get This Key / Function Press This Key Caps Blue Orange Ctrl Shft Lock MX5 User’s Guide E-EQ-MX5PCOGWW-G-ARC...
- Page 49 Keypad Press These Keys and Then … To Get This Key / Function Press This Key Caps Blue Orange Ctrl Shft Lock . (DOT) < > E-EQ-MX5PCOGWW-G-ARC MX5 User’s Guide...
- Page 50 Press These Keys and Then … To Get This Key / Function Press This Key Caps Blue Orange Ctrl Shft Lock : (colon) ; (semicolon) . (period) _ (underscore) , (comma) ‘ (apostrophe) ~ (tilde) “ & MX5 User’s Guide E-EQ-MX5PCOGWW-G-ARC...
-
Page 51: 3270 Keypad
3270 Keypad 3270 Keypad Figure 29 3270 Keypad Please refer to the Terminal Emulation Software manual for applicable key press sequences. E-EQ-MX5PCOGWW-G-ARC MX5 User’s Guide... -
Page 52: 5250 Keypad
5250 Keypad 5250 Keypad Figure 30 5250 Keypad Please refer to the Terminal Emulation Software manual for applicable key press sequences. MX5 User’s Guide E-EQ-MX5PCOGWW-G-ARC... -
Page 53: Appendixb Regulatory Notices And Safety Information
Li-Ion Battery When disposing of the MX5 Main Battery, the following precautions should be observed: The battery should be disposed of promptly. The battery should not be disassembled or crushed. The battery should not be heated above 212°F (100°C) or incinerated. -
Page 54: Approvals
Information to User A label on the exterior of the device should resemble one of the labels shown below (the label contains the LXE part number of the installed radio card). The labels shown below and affixed to the device, identify where the device may be used and where its use is restricted. - Page 55 Safety of information technology equipment, including electrical business equipment + Amendments A1..A4 We, LXE Inc., declare that the equipment specified above complies with all Essential Health and Safety Requirements of the above Directives and Standards, as amended. Signed: Place: LXE Inc., Norcross GA USA...
- Page 56 Safety of information technology equipment, including electrical business equipment + Amendments A1..A4 We, LXE Inc., declare that the equipment specified above complies with all Essential Health and Safety Requirements of the above Directives and Standards, as amended. Signed: Place: LXE Inc., Norcross GA USA R.
- Page 57 EN 60950-2: 1992 + A1..A4 Safety of information technology equipment, including electrical business equipment We, LXE Inc., declare that the equipment specified above complies with all Essential Health and Safety Requirements of the above Directives and Standards, as amended. Place LXE Inc., Norcross GA USA...
- Page 58 With regard to the use of external antennas The LXE 6726 can be equipped with external antennas. The antennas listed have been evaluated with the LXE 6726 pursuant to ETSI EN 300 328, and therefore meet the definition of ‘dedicated antenna’ per ERC/REC 70-03 Appendix 1 Table 3; thus the requirement set forth in ERC/REC 70-03 , Annex 3 are met by the LXE model 6726 transceiver.
- Page 59 EN60950-1: 2001 business equipment The product carries the CE Mark: We, LXE Inc., declare that the equipment specified above complies with all Essential Health and Safety Requirements of the above Directives and Standards, as amended. Date of issue: June 18, 2003 Cyril A.
- Page 60 With regard to the use of external antennas The LXE 6816 can be equipped with external antennas. The antennas listed have been assessed with the LXE 6816 pursuant to EN 300 328, and therefore meet the definition of ‘dedicated antenna’. The table below lists the maximum output power setting for the radio module in order to result in a total EIRP of 100mW or less.
- Page 61 Appendix B Regulatory Notices and Safety Information A/C Power Supply Safety Statement – MX5 Output Rated 12 VDC, 3.75 A. Optional A/C Power Supply: Outside North America, this unit is intended for use with an IEC certified ITE power supply with output rated as stated at the top of this page.
-
Page 62: Laser Light Safety Statement
Este producto usa luz de láser. Las etiquetas se proveen en la máquina exploradora. Por favor, lea detenidamente la explicación para las precauciones. (ES) Waarschuwing: Dit product gebruikt laserlicht. Een van de volgende labels is op de scanner aangebracht. Lees a.u.b. de waarschuwing onder Oppassen. (NL) MX5 User’s Guide E-EQ-MX5PCOGWW-G-ARC... - Page 63 Laser Light Safety Statement Aþaðýdaki etiketlerden bir tanesi tarayýcýnýn üstünde saðlanýr. Lütfen Dikkat ifadesini okuyun. (TR) (GR) (JP) (KR) Legend: Chinese-CN; Danish-DK; Dutch-NL; English-US; Finnish- FI; French-FR; German-DE; Greek-GR; Italian-IT; Japanese-JP; Korean-KR; Norwegian-NO; Portuguese-PT; Spanish-ES; Swedish-SE; Turkish-TR (CN) E-EQ-MX5PCOGWW-G-ARC MX5 User’s Guide...
- Page 64 Appendix B Regulatory Notices and Safety Information Class 2 Labels - MX5 Hand Held Computer MX5 User’s Guide E-EQ-MX5PCOGWW-G-ARC...
- Page 65 Appendix B Regulatory Notices and Safety Information Class 3R Labels - MX5 Hand Held Computer E-EQ-MX5PCOGWW-G-ARC MX5 User’s Guide...
- Page 66 Appendix B Regulatory Notices and Safety Information MX5 User’s Guide E-EQ-MX5PCOGWW-G-ARC...
-
Page 67: Index
Contacting LXE............25 Cradles ..............37 Ctrl key function...........32 IEC IP65 ..............4 Infrared (IR) port, described.........30 Infrared Data Access (IrDA) ........30 Data entry .............22 Insert Battery, How to ..........11 Desktop cradle ............37 IR operating envelope...........30 Display IR Port E-EQ-MX5PCOGWW-G-ARC MX5 User’s Guide... - Page 68 Suspend mode, How To........12 Manuals and Accessories........25 Switching Mode Key Functions ..........33 COM ports ............29 Multi-Charger ............36 MX5 family of computers ........3 Tethered Scanner ..........29 Toggle Backlight, How to ........19 Operating Temperature...........4 Touch Screen ..........18, 27 Keypad Shortcuts ..........18 Touch screen adjustment ........27 Touch Screen and data entry.........22...
Need help?
Do you have a question about the MX5 and is the answer not in the manual?
Questions and answers