LXE MX3 User Manual
Microsoft windows ce .net equipped
Hide thumbs
Also See for MX3:
- Programming manual (380 pages) ,
- Reference manual (232 pages) ,
- User manual (68 pages)

Related Manuals for LXE MX3


Summary of Contents for LXE MX3
- Page 1 MX3-RFID User’s Guide ® ® (Microsoft Windows CE .NET Equipped) Copyright © 2006 by LXE Inc. All Rights Reserved E-EQ-MX3RFIDOGWW-A...
- Page 2 LXE Inc. reserves the right to make improvements or changes in the products described in this guide at any time without notice. While reasonable efforts have been made in the preparation of this document to assure its accuracy, LXE assumes no liability resulting from any errors or omissions in this document, or from the use of the information contained herein.
-
Page 3: Table Of Contents
Endcap Options ...7 MX3-RFID Module ...7 RFID Introduction... 8 RFID Reader Scan Range ...8 Integrated Laser Scanner...8 RFID and the MX3 Cradles ...8 Quick Start ... 9 Troubleshooting ...9 Optional Devices ... 10 Connecting External Power Supply (Optional) ...10 Connecting the Audio Jack (Optional)...11 Attaching the Stylus Clip (Optional)...11... - Page 4 LED Functions ...32 Batteries... 33 Main Battery ...33 Backup Battery...33 Battery Hot-Swapping...33 Battery Chargers ... 34 LXE Multi-Charger Plus ...34 External Power Supply (Optional) ... 34 The Passive Vehicle Cradle... 35 Passive Cradle Assembly Components...36 RAM Mount Assembly ...37 PPENDIX Keypad ...
- Page 5 Approvals ... 47 NDEX Illustrations Figure 1 CDRH / IEC 825 Caution Label Location – MX3-RFID, Back ... 4 Figure 2 Caution Label – Laser Scanner... 4 Figure 3 Vent Aperture in Battery Well – Do Not Cover ... 5 Figure 4 Front ...
- Page 6 Table of Contents MX3-RFID User’s Guide E-EQ-MX3RFIDOGWW-A...
-
Page 7: Introduction
The keys on the keypad are constructed of a phosphorescent material that can easily be seen in dimly lighted areas. The MX3-RFID has an RFID module permanently attached to the back of the device. The module protects the RFID antenna and tag reader. A passive vehicle cradle is available that has been designed specifically for the MX3-RFID device deeper back cover. -
Page 8: Features/Options For The Mx3X Family
An abbreviated user’s guide (LXEbook – MX3-RFID User’s Guide) is available for download to the mobile device from the LXE Manuals CD or the LXE ServicePass website. Please refer to the “MX3 Cradle Reference Guide” for technical information relating to the MX3- RFID Passive Vehicle Mount cradle. -
Page 9: Document Conventions
Color display : 32°F to 122°F (0°C to 50°C) [non-condensing] -22°F to 158°F (-30°C to 70°C) [non-condensing] IEC IP65 5% to 95% non-condensing at 104°F (40°C) Based on MIL Std 810D 8 kV air, 4kV contact 75G, 5ms duration, 100 shock impacts MX3-RFID User’s Guide... -
Page 10: Laser Warnings And Labels
• Do not stare directly into the laser beam. • Do not remove the laser caution labels from the MX3-RFID. • Do not connect the laser aperture to any other device. The laser aperture is certified for use with the MX3-RFID only. -
Page 11: Battery Well Vent Aperture
Figure 3 Vent Aperture in Battery Well – Do Not Cover If the vent hole is covered by an object, e.g. a tracking label, other than an approved LXE main battery, the touch screen may be damaged. If damage occurs to the touch screen, please contact your LXE representative for the process to follow when returning the device to LXE for repair. -
Page 12: Components
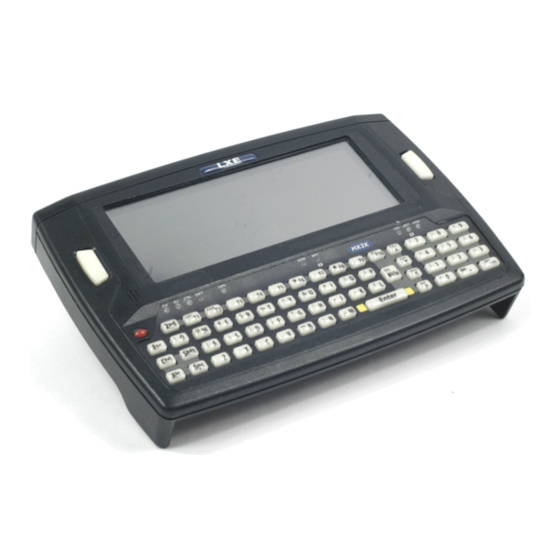
Scan, Enter or Field Exit (programmable) Beeper On/Off Button Alt LED Ctrl LED Endcap RFID Enclosure IR Port (Com 2 Port) MX3-RFID User’s Guide Figure 4 Front Shift LED Caps LED Scanner LED Backup Battery LED Status LED Main Battery LED... -
Page 13: Endcap Options
Components Endcap Options DC Power Jack Scanner Port MX3-RFID Module MX3X E-EQ-MX3RFIDOGWW-A Figure 6 Endcap USB Client Port Audio Jack 1 Endcap w/Laser Scanner 2 Touchscreen 3 Keypad 4 RFID Module MX3-RFID Figure 7 Side View MX3-RFID User’s Guide... -
Page 14: Rfid Introduction
Pressing the RFID Read button on the MX3-RFID starts a 360 degree search “beam” that stops at the limits of the scan range of the RFID reader. The “beam” stops searching when the read timer expires. -
Page 15: Quick Start
This section’s instructions are based on the assumption that your new system is pre-configured and requires only accessory installation (e.g. stylus) and a power source. LXE recommends that installation or removal of accessories be performed on a clean, well-lit surface. When necessary, protect the work surface, the mobile device, and components from electrostatic discharge. -
Page 16: Optional Devices
Optional Devices Connecting External Power Supply (Optional) The LXE-approved AC Power Adapter is only intended for use in a 25ºC (77ºF) maximum ambient temperature environment. There are three external power supplies available: • US AC/DC 12V Power Supply • Cigarette Lighter Adapter •... -
Page 17: Connecting The Audio Jack (Optional)
Stylus Clip so that the ends don’t interfere with placing the stylus in the Stylus Clip. Place the stylus in the Stylus Clip when not in use. An extra stylus or replacements can be ordered from LXE. See the section titled “Accessories” for the stylus part number. -
Page 18: Insert Main Battery
Do not slide the battery sideways into the battery well. Firmly press the battery into the battery well until the Retaining Clip on the battery clicks. The battery is now securely fastened to the mobile device. The MX3-RFID draws power from the battery immediately upon successful connection. Note: Do not cover the vent aperture in the battery well (located in the left side of the battery well) with anything other than the main battery. -
Page 19: Power Button
When the Windows desktop is displayed or an application begins, the power up (or reboot) sequence is complete. Please refer to the section titled "Power Modes" in the MX3-RFID Reference Guide for a list of the kinds of activities (Primary Events) that will return the device from Suspend Mode. -
Page 20: Tapping The Touchscreen With A Stylus
Place the cursor in a text box prior to typing in data or retrieving data using the integrated barcode scanner or an input/output device connected to the serial port. An extra or replacement stylus can be ordered from LXE. See the section titled "Accessories" for the part numbers. -
Page 21: Touchscreen
Use the Up Arrow and Down Arrow keys to adjust contrast until the display lightens or darkens to your satisfaction. • Press the Enter key to exit this mode. The LED for the 2 E-EQ-MX3RFIDOGWW-A Figure 16 Touchscreen Recalibration key blinks until the special editing mode (set contrast) is complete. MX3-RFID User’s Guide... -
Page 22: Set The Display Backlight Timer
Set the Display Backlight Timer Note: Refer to the section titled "Power Modes" in the MX3-RFID Reference Guide for information relating to the power states of the mobile device. Select Start | Settings | Control Panel | Display | Backlight tab. Change the parameter values and tap OK to save the changes. -
Page 23: Set The Power Schemes Timers
Set the Power Schemes Timers Note: Refer to the section titled "Power Modes" in the MX3-RFID Reference Guide for information relating to the power states of the mobile device. Select Start | Settings | Control Panel | Power | Schemes tab. Change the parameter values and tap OK to save the changes. -
Page 24: Set The Audio Speaker Volume
As the volume scrollbar is moved between Loud and Soft, the computer will emit a tone each time the volume increases or decreases in decibel range. MX3-RFID User’s Guide key blinks until the special editing mode (set audio speaker volume) is... -
Page 25: Enter Data
Input Panel icon. Use the input panel to enter information in any program. E-EQ-MX3RFIDOGWW-A key LED illuminates. By then pressing the key LED turns off when key sequence key LED will flash at those times). MX3-RFID User’s Guide... -
Page 26: Integrated Laser Scanner Data Entry
Is the scan aperture unscratched and unsoiled? Note: An MX3-RFID manufactured prior to July 2006 contained an SE923 barcode scanner. The SE955 scanner replaced the SE923 scanner in devices manufactured after July 2006. See the “Integrated Scanner Programming Guide” for scanner engine programming barcodes, default scanning ranges, barcode reading instruction and troubleshooting. -
Page 27: Rfid Tag Data Collection
Getting Help RFID Tag Data Collection When the RFID Read button is pressed, the reader turns on and the MX3-RFID beeps once if the tag was located and read successfully. The reader turns off at a predetermined time limit after a good read or a failed read. - Page 28 Getting Help MX3-RFID User’s Guide E-EQ-MX3RFIDOGWW-A...
-
Page 29: The Mx3-Rfid Mobile Device
The MX3-RFID Mobile Device Touchscreen Display The Touchscreen Display is an LCD unit capable of supporting VGA graphics modes. Display size is 640 x 240 pixels. The touchscreen allows signature capture and touch input. A pen stylus is included. The touchscreen responds to an actuation force (touch) of 4 oz. of pressure (or greater). -
Page 30: Touchscreen Calibration
To start, tap Recalibrate. Follow the instructions on the screen and press the Enter key to save the new calibration settings or press <Esc> to cancel or quit. See the "MX3-RFID Reference Guide" for complete instructions. MX3-RFID User’s Guide Figure 20 Touchscreen Recalibration... -
Page 31: Scan Buttons
The Field Exit key is used to exit an input field. If the field is an Auto Enter field, the auto transmit function is activated. This key function is present on the IBM 5250/TN5250 specific keypad only. E-EQ-MX3RFIDOGWW-A Figure 21 Programmable Buttons MX3-RFID User’s Guide... -
Page 32: Scan Buttons And The Scnr Led
Scan buttons. Note: Refer to the “MX3-RFID Reference Guide” before programming the Scan / Enter buttons. The Reference Guide also contains instructions for the Key Map Utility for the keypad. -
Page 33: Endcaps And Com Ports
RS-232 Port (Serial Port) USB Client Audio Jack DC Power Jack RFID Module Figure 22 Endcap and COM Ports Caution -- Do Not Use these USB Labeled Endcap Ports for Tethered Figure 23 Labeled Ports and Cables Scanners: MX3-RFID User’s Guide... -
Page 34: Endcap
Tethered scanners are not supported by the MX3-RFID. USB Port The USB port requires a 9-pin to USB cable (available from LXE). The 9-pin port/USB port also supports serial data transfer (using a null modem cable) and non-host USB I/O at 1.5 Mbps. The operating system automatically detects the USB cable configuration. -
Page 35: Ir Port
The IR operating envelope has a distance range of 2 cm (.79 inches) to 1 meter (3.2 feet) with a viewing angle of 30 degrees. See the "MX3-RFID Reference Guide" for complete instructions when sending data through the IR port. -
Page 36: The Keypad
The QWERTY keypad is phosphorescent. A phosphorescent keypad does not use a keypad backlight but glows in dim/dark areas after exposure to a light source. The keypad is installed and configured by LXE. The keymaps (keypress sequences) are located in “Appendix A - Key Maps.”... -
Page 37: Field Exit Key Function (Ibm 5250/Tn5250 Only)
Start | Settings | Control Panel | Keyboard icon. Select the Custom keymap from the keyboard popup menu, and close the control panel with the OK button. To return to the default keymap, select 0409 from the keymap popup and tap OK. Refer to the MX3-RFID Reference Guide for instruction. E-EQ-MX3RFIDOGWW-A >+ <F1>. -
Page 38: Led Functions
Red - Main battery is charging. CHGR • Amber – Fault or temporary standby (Contact LXE Customer Support). • Green - battery charge is complete and the mobile device is connected to external power through the power jack on the endcap. -
Page 39: Batteries
The main battery has a rugged plastic enclosure that is designed to withstand the ordinary rigors of an industrial environment. Exercise care when transporting the main battery making sure it does not come in contact with excessive heat or any power source other than an LXE MultiCharger or the mobile device. -
Page 40: Battery Chargers
LXE Multi-Charger Plus The main battery can be charged in the MX3 Multi-Charger Plus. The main battery charges the backup battery using the mobile device's internal charging circuitry. The battery charger requires an AC power source before charging can begin. -
Page 41: The Passive Vehicle Cradle
MX3-RFID. The passive vehicle cradle does not have LEDs or indicators. The passive vehicle cradle does not require an external power source. The MX3-RFID seated in the passive cradle requires a power source, either from the main battery or from power applied via the power jack on the endcap. -
Page 42: Passive Cradle Assembly Components
Passive Cradle Assembly Components Note: LXE does not supply the bolts or washers needed when mounting the RAM ball to the vehicle chassis. LXE recommends using bolts with a maximum 10/32” (0.3125) diameter. Passive Cradle RAM Ball and Arm Cylinder Mount the RAM ball to the bottom of the cradle with the bolts, washers and nuts supplied by LXE. -
Page 43: Ram Mount Assembly
RAM Mount Assembly Note: LXE does not supply the bolts or washers needed when mounting the RAM ball to the vehicle chassis. LXE recommends using bolts with a maximum 10/32” (0.3125) diameter. Attach the RAM ball to the vehicle, making sure it does not impede safe operation of the vehicle. - Page 44 The Passive Vehicle Cradle MX3-RFID User’s Guide E-EQ-MX3RFIDOGWW-A...
-
Page 45: Appendixa Key Maps
Virtual (or Soft) Keypad used with the stylus. Key Map 101-Key Equivalencies Note: This key mapping is used on mobile devices that are NOT running an LXE Terminal Emulator. When using a sequence of keys that includes the 2 Note: When the computer boots, the default condition of NumLock is On and the default condition of Caps (or CapsLock) is Off. - Page 46 To get this key Down Arrow Right Arrow Left Arrow Insert Delete Home Page Up Page Down ScrollLock MX3-RFID User’s Guide Press These Keys and Then Shift Ctrl CapsLock Key Maps Press this key Down Arrow Right Arrow Left Arrow...
- Page 47 Key Maps To get this key E-EQ-MX3RFIDOGWW-A Press These Keys and Then Shift Ctrl CapsLock Press this key MX3-RFID User’s Guide...
- Page 48 To get this key < > : (colon) ; (semicolon) _ (underscore) , (comma) ‘ (apostrophe) ~ (tilde) MX3-RFID User’s Guide Press These Keys and Then Shift Ctrl CapsLock Key Maps Press this key E-EQ-MX3RFIDOGWW-A...
- Page 49 Key Maps To get this key “ & E-EQ-MX3RFIDOGWW-A Press These Keys and Then Shift Ctrl CapsLock Press this key MX3-RFID User’s Guide...
- Page 50 Key Maps MX3-RFID User’s Guide E-EQ-MX3RFIDOGWW-A...
-
Page 51: Appendixb Regulatory Notices And Safety Information
Operation of this equipment in a residential area is likely to cause harmful interference in which case the user will be required to correct the interference at his own expense. Warning: Changes or modifications to this device not expressly approved by LXE, Inc., could void the user’s authority to operate this equipment. - Page 52 A label on the exterior of the device should resemble one of the labels shown below (the label contains the LXE part number of the installed radio card). The labels shown below and affixed to the device, identify where the device may be used and where its use is restricted. Use of a device is prohibited in countries not listed below or otherwise identified by the label.
-
Page 53: Approvals
Vehicle Cradle EN 55022:1998 Class A EN 55024:1998 Industry Canada Class A Transceiver: Transceiver 6726 (LXE Model No.) [Cisco] 4830 (LXE Model No.) [Summit] 2.4GHz PCMCIA Card E-EQ-MX3RFIDOGWW-A Safety Standards UL 60950; CSA C22.2 No. 60950 EN 60950 IEC 60950... - Page 54 EN 300 328-1 and -2: 2000-7 Safety: EN 60950-2: 1992 + A1..A4 We, LXE Inc., declare that the equipment specified above complies with all Essential Health and Safety Requirements of the above Directives and Standards, as amended. Place Date of issue LXE Inc.
- Page 55 Regulatory Notices and Safety Information The LXE 6726 can be equipped with external antennas. The antennas listed have been evaluated with the LXE 6726 pursuant to ETSI EN 300 328, and therefore meet the definition of ‘dedicated antenna’ per ERC/REC 70-03 Appendix 1 Table 3; thus the requirement set forth in ERC/REC 70-03 , Annex 3 are met by the LXE model 6726 transceiver.
- Page 56 EN 300 328-1 and -2: 2000-7 Safety: EN 60950-2: 1992 + A1..A4 We, LXE Inc., declare that the equipment specified above complies with all Essential Health and Safety Requirements of the above Directives and Standards, as amended. Place: LXE Inc., Norcross GA USA...
- Page 57 EN 300 328, and therefore meet the definition of ‘dedicated antenna’ per ERC/REC 70-03 Appendix 1 Table 3; thus the requirement set forth in ERC/REC 70-03 , Annex 3 are met by the LXE model 4830 transceiver. Dedicated Antennas for use with LXE 4830...
- Page 58 A/C Power Supply Safety Statement – MX3X The LXE-approved AC Power Adapter is only intended for use in a 25ºC (77ºF) maximum ambient temperature environment. Optional A/C Power Supply: Outside North America, this unit is intended for use with an IEC certified ITE power supply with output rated as stated at the top of this page.
-
Page 59: Laser Light Safety Statement
Este producto usa luz de láser. Las etiquetas se proveen en la máquina exploradora. Por favor, lea detenidamente la explicación para las precauciones. (ES) Waarschuwing: Dit product gebruikt laserlicht. Een van de volgende labels is op de scanner aangebracht. Lees a.u.b. de waarschuwing onder Oppassen. (NL) E-EQ-MX3RFIDOGWW-A MX3-RFID User’s Guide... - Page 60 Laser Light Safety Statement Aþaðýdaki etiketlerden bir tanesi tarayýcýnýn üstünde saðlanýr. Lütfen Dikkat ifadesini okuyun. (TR) (KR) (CN) Labels - MX3-RFID Hand Held Computer MX3-RFID User’s Guide Regulatory Notices and Safety Information (JP) Legend: Chinese-CN; Danish-DK; Dutch-NL; English-US; Finnish- FI; French-FR; German-DE; Greek-GR; Italian-IT;...
-
Page 61: Index
Dual Serial Port endcap ...27 Edit the button parameters ...25 Endcaps and COM Ports...27 Enter key function...30 Entering Data ...19 Environmental Specifications ...3 External Power Supplies, MX3-RFID ...10 Features...1 Field Exit key function ...25, 31 Footprint RAM assembly...37 Function 2nd Key...30 Alt Key...30... - Page 62 Infrared Data Access (IrDA)...29 Input Panel and data entry ...19 Insert Main Battery ...12 Install RAM Ball Mounting, Passive Vehicle Cradle ...36 Install Cradle for MX3-RFID ...35 IR operating envelope...29 IR Port bi-directional half-duplex...29 Key Maps, Custom ...31 Keymaps ...39 Keypad and entering data ...19...
- Page 63 Troubleshooting Unsuccessful scan ...20 USB port ...28 User Idle Timer...17 Vehicle Mounting Bracket, RAM Ball Installation Procedure ...36 Vent aperture in battery well ...5 View Display ...23 Volume adjust audio volume ...18 Warnings and Labels Laser Scanner...4 MX3-RFID User’s Guide...
- Page 64 Index MX3-RFID User’s Guide E-EQ-MX3RFIDOGWW-A...
Need help?
Do you have a question about the MX3 and is the answer not in the manual?
Questions and answers