
Subscribe to Our Youtube Channel
Related Manuals for Dish Network Dish ViP722K


Summary of Contents for Dish Network Dish ViP722K
- Page 1 To subscribe to programming, or for assistance with installing or using the system, visit mydish.com or call Customer Service at 1-800-333-DISH (3474) 196828...
-
Page 2: For Your Safety
Warning and Attention Symbols You must be aware of safety when you install and use this system. This User Guide provides various procedures. If you do some of these procedures carelessly, you could injure or kill yourself or damage equipment or property. Some other procedures require special attention. -
Page 3: Table Of Contents
Important Safety Instructions ........ v Introduction ............. 1 ..............2 ELCOME ........2 OW TO SE THIS UIDE DISH A ........4 BOUT CCOUNT TV N ............5 ATCHING ..........7 DDITIONAL ERVICES TV R .......7 BOUT ATELLITE ECEPTION ..8 ONNECT TO A HONE INE OR ROADBAND .........8 OVING... -
Page 4: Finding Programs To Watch
Table of Contents ..........23 SING IELDS ................24 ...............24 UESTIONS Finding Programs to Watch ......... 25 ..........26 HANGING HANNELS ........26 SING THE ROGRAM UIDE ........28 SING THE ROWSE ANNER ........29 SING HEMES AND EARCH ........31 SING ICTURE ICTURE ................32 ...............32 UESTIONS Pay-Per-View ............ -
Page 5: Digital Video Recording
Table of Contents ...............52 UESTIONS Interactive TV ............53 HOME I TV ........54 NTERACTIVE ..........54 USTOMER ERVICE ................54 Digital Video Recording ........55 DVR? ............56 HAT IS ..........56 AUSING A ROGRAM .......57 EVERSE ORWARD ......57 OTION AND RAME RAME ........58 ECORDING A ROGRAM ......58... -
Page 6: Receiver Customization
Table of Contents ...............96 UESTIONS Receiver Customization ........97 ..........98 SING HARED ..........98 ODULATOR ETUP ...........99 SING ULTIMEDIA ID ...........102 SING ALLER ...103 USTOMIZE THE UIDE AND HANNEL ISTS ...........105 HANGING ANGUAGES ........106 SING LOSED APTIONING ..........107 SING UDIO UTPUT ......108 ESETTING TO ACTORY... -
Page 7: Important Safety Instructions
Important Safety Instructions Read these instructions. Keep these instructions. Heed all warnings. Follow all instructions. Do not use this apparatus near water. Clean only with a dry cloth. Do not block any ventilation openings. Install in accordance with the manufacturer’s instructions Do not install near any heat sources such as radiators, heat registers, stoves, or other apparatus (including amplifiers) that produce heat. - Page 8 Safety The receiver is still connected to the AC power whenever it is plugged into a live power outlet, even if it is turned off using the remote control or front panel buttons. No flame sources, such as lit candles, should be placed on the equipment. The apparatus shall not be exposed to dripping or splashing, and no objects filled with liquids, such as vases, shall be placed on the top of it.
- Page 9 Safety Proper Care of Your Equipment • Always handle the satellite receiver carefully. Excessive shock and vibration can damage the hard drive. • Always turn the receiver off, unplug it and let it sit for at least 30 seconds before moving it.
- Page 10 Safety Note to Satellite TV System Installer: This reminder is provided to call the satellite TV system installer’s attention to Article 820-40 of the National Electrical Code (NEC) that provides guidelines for proper grounding and, in particular, specifies that the cable ground shall be connected to the grounding system of the building as close to the point of cable entry as practical.
-
Page 11: Introduction
Introduction Introduction to DISH What you’ll find in this chapter: • ELCOME • OW TO SE THIS UIDE • DISH A BOUT CCOUNT • TV N ATCHING • DDITIONAL ERVICES • TV R BOUT ATELLITE ECEPTION • ONNECT TO A HONE INE OR ROADBAND... -
Page 12: Welcome
Chapter 1 Welcome ELCOME Thank you for choosing DISH. You are about to experience the excitement and convenience of our Direct Broadcast Satellite (DBS) service, which delivers the very best picture and sound quality. DISH consistently provides the latest products and satellite- delivered services—with high performance, ease of operation, and a wide variety of entertainment options. - Page 13 Introduction How to Use this User Guide Guide Conventions • The labels of the remote-control buttons are all in capital letters. Example: Press SAT. • Select means to move the highlight to an on-screen option or choice in a menu list and then press the SELECT button on the remote control.
-
Page 14: About Your Dish Account
Chapter 1 About Your DISH Account DISH A BOUT CCOUNT This section describes how to order your packages and provides information on how to find information about your DISH account. Ordering Your Programming Packages Before you can enjoy your DISH receiver, you must order your programming packages. Call 1-800-333-DISH (3474) Press SYSTEM INFO on Select Done... -
Page 15: Watching Tv Now
Introduction Watching TV Now TV N ATCHING After you have ordered your programming package, you can begin enjoying the features of your new satellite TV receiver. When you complete these simple tours, you’ll be familiar with the remote control and be able to find a program to watch, pause live TV, and record your favorite shows. -
Page 16: Pausing Live Tv
Chapter 1 Watching TV Now Pausing Live TV Here’s something you can’t do with regular old TV: pause live TV because someone’s at the door or calling you on the phone, or there’s something else you have to do right now. For more about the pause feature of your receiver, see Pausing a Program on page 56. -
Page 17: Additional Services
Introduction Additional Services DDITIONAL ERVICES Pay-Per-View Catch all the action on Pay-Per-View. Take a break from regular TV and order the latest movies, sports, and special events. For details on ordering Pay-Per-View events, see page 34. Be sure to connect your receiver to an active phone line or broadband Internet connection before you order a Pay-Per-View event (see the instructions on page 120). -
Page 18: Why Connect To A Phone Line Or Broadband
Chapter 1 Why Connect to a Phone Line or Broadband Solar Interference Twice a year, the sun moves to a position behind the DISH satellites as they orbit the Earth. This event occurs during a few days at the beginning of spring and the beginning of autumn, and lasts only a few minutes. -
Page 19: Tips
Introduction Tips • Always have the latest software—Press POWER to turn off the receiver when you’re not using it. This way, the satellite can send updated software and guide data. • Order Pay-Per-View programs and events with your remote control—Keep an active telephone line connected to the receiver. -
Page 20: Notes
Chapter 1 Notes Notes... -
Page 21: Receiver & Remote Controls
Receiver & Remote Controls About Your Satellite Receiver What you’ll find in this chapter: • ATELLITE ECEIVER VERVIEW • UAL AND INGLE ODES • EMOTE ONTROL • ATELLITE ECEIVER RONT ANEL • ATELLITE ECEIVER ANEL • SING THE SCREEN ENUS •... -
Page 22: Satellite Receiver Overview
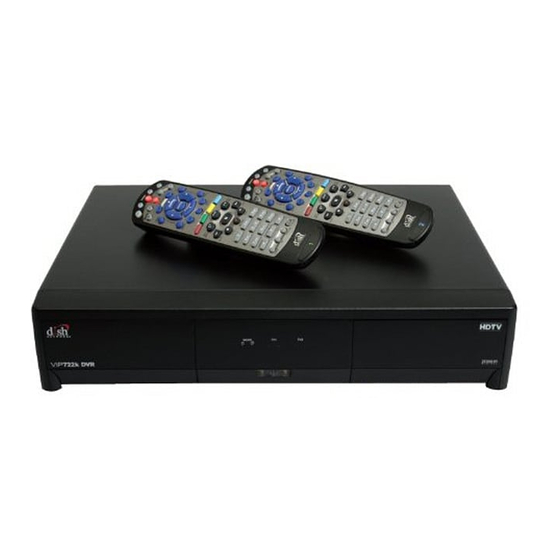
Chapter 2 Satellite Receiver Overview ATELLITE ECEIVER VERVIEW This section gives you an overview of your DISH satellite TV receiver system. Satellite Receiver This dual-tuner satellite receiver with integrated digital video recorder can view/record high-definition (HD) and standard-definition (SD) DISH programming on two TVs, or view/ record over-the-air digital/HD broadcasts on the nearby HDTV. -
Page 23: Dual And Single Modes
Satellite Receiver Dual and Single Modes UAL AND INGLE ODES Your satellite TV receiver includes two modes of operation: Dual and Single. These modes increase your entertainment options because you’ll be able to choose how and where you watch and record your favorite programs. Dual Mode While in Dual Mode, you can use this dual-tuner satellite receiver to watch different programming in two separate locations:... - Page 24 Chapter 2 Dual and Single Modes Single Mode Single Mode provides dual-tuner receiver features—like Picture-in-Picture (PIP) and the ability to watch one live program while recording another—to all connected TVs. Remote SDTV Single Mode delivers the same programming to all of the TVs connected to the receiver and allows control by either remote control.
-
Page 25: Remote Control
Satellite Receiver Remote Control Switching Between Dual and Single Mode Put the satellite receiver in Single or Dual Mode by pressing the front panel MODE button. Keep the following items in mind when switching the satellite receiver between Dual and Single Mode: Dual Mode Single Mode... - Page 26 Chapter 2 Remote Control Types of Remote Controls Remote Control 1 uses infrared (IR) Remote Control 2 uses UHF Pro signals to: (radio-frequency) signals to: • Control the receiver’s TV1 menus • Control TV2 menus for the remote for the nearby TV in Dual Mode. TV(s) in Dual Mode.
- Page 27 Satellite Receiver Remote Control Remote Control Batteries The remote control comes with four AAA batteries. When you replace old batteries, you should replace all of the batteries. Use batteries of the same type together, for example, all alkaline or carbon zinc. Don’t mix batteries of different chemistries.
-
Page 28: Remote Control Buttons
Chapter 2 Remote Control Remote Control Buttons SAT Mode Receiver Power & TV Power Input Top button turns the receiver on/off, Press once for Input Bottom button turns the TV on/off Press and hold for Recover (programming required) Receiver Menu Access features and settings Page Buttons in your satellite receiver... - Page 29 Satellite Receiver Remote Control TV Mode TV/Video TV Power Switch between TV inputs top and bottom button Turn TV on/off TV Menu Access menu features Volume available on some TVs Control TV volume Mute Arrows/Select Buttons Turn TV volume on or off Channel up/down on TV, navigate TV menus/modes and select desired TV option...
-
Page 30: Dvd Mode
Chapter 2 Remote Control DVD Mode To use the features described in this section, make sure your are in DVD mode by pressing the DVD Mode button. You can also use this mode to operate a VCR instead of a DVD or Blu-ray Disc player. Remote programming is required. -
Page 31: Satellite Receiver Front Panel
Satellite Receiver Satellite Receiver Front Panel ATELLITE ECEIVER RONT ANEL Note: Your receiver may look slightly different than the unit shown above. ATELLITE ECEIVER ANEL Audio/Video Remote Home Output USB Port Antenna Ethernet Port Distribution High-quality standard- Connect to Connection to Connect to In-home definition connection... -
Page 32: Using The O N - Screen Menus
Chapter 2 Using the On-screen Menus SING THE SCREEN ENUS The menus make using the receiver and selecting programs quick and easy. Use the menus to control the receiver and to use its features, such as setting parental controls and locks, choosing a program, or creating a favorites list. -
Page 33: Using Text Fields
Satellite Receiver Using Text Fields There are two types of lists: • A single choice list allows you to select only one choice at a time. If you select another choice, your previous choice is deselected. • A multiple choice list allows you to select more than one choice at one time. -
Page 34: Tips
Chapter 2 Tips While in the Text Field When the cursor is in the text field: • Press the LEFT ARROW to delete characters. • Press FORMAT/* to backspace without deleting characters. • Press 0 to enter a blank space character, such as between words. •... -
Page 35: Finding Programs To Watch
Finding Programs to Watch Watching TV What you’ll find in this chapter: • HANGING HANNELS • SING THE ROGRAM UIDE • SING THE ROWSE ANNER • SING HEMES AND EARCH • SING ICTURE ICTURE... -
Page 36: Changing Channels
Chapter 3 Changing Channels HANGING HANNELS There are two basic ways to change the channel on your satellite TV receiver: • Use UP and DOWN ARROWS on your remote control • Enter a channel number with the NUMBER PAD buttons Using the Up and Down Arrows While watching live TV, if you want to change the channels one at a time to see what’s on, press the UP and DOWN ARROWS on your remote... - Page 37 Finding Programs to Watch Using the Program Guide • The Program Guide shows which Favorites List option is active. If All Channels is the active list, the Program Guide displays all the channels. The My Channels displays only the channels included in your current subscription. The My HD Channels displays only the high-definition channels included in your subscription.
-
Page 38: Using The Browse Banner
Chapter 3 Using the Browse Banner SING THE ROWSE ANNER Use the Browse Banner to see what other programs are on or coming on soon, while not missing any of the program you are watching. When the Browse Banner is open, you will see the Program Banner information about the current program displayed at the top of the screen and on the left-hand side of the Browse Banner at the bottom of the screen. -
Page 39: Using Themes And Search
Finding Programs to Watch Using Themes and Search SING HEMES AND EARCH Use the Themes and Search Feature to find exactly what you want to watch. This section shows you how to use Themes to find your favorite programs by type (for example, movies, sports, news), or by keyword (if you’re looking for a particular title or name in a program or event description). - Page 40 Chapter 3 Using Themes and Search Using Search with Keywords Cheers_ A B C D E F G H K L M N O P Q R S T U V W X Y Z & 1 2 3 4 5 6 7 8 9 0 Search by: Title Info...
-
Page 41: Using Picture-In-Picture
Finding Programs to Watch Using Picture-In-Picture SING ICTURE ICTURE Picture-In-Picture (PIP) lets you watch two programs at once on one TV screen while in Single Mode. The following instructions describe how to use the PIP feature (see page 15 for instructions on changing from Dual to Single Mode). Press SWAP to swap Press... -
Page 42: Tips
Chapter 3 Tips • Press INFO to view more information about a program or event you have highlighted. • Press VIEW LIVE TV to cancel almost any menu screen and return to watching TV. • Press SWAP, without pressing the PIP button first, to switch between your receiver’s two tuners while in Single Mode. -
Page 43: Pay-Per-View
Pay-Per-View Ordering Pay-Per-View Programs What you’ll find in this chapter: • • DISH O EMAND • NLINE • RDERING ONSIDERATIONS... -
Page 44: Pay -Per -V
Chapter 4 Pay-Per-View To order Pay-Per-View (PPV) programming using your remote control, you must connect the receiver to an active phone line or broadband Internet connection. After you order a Pay-Per-View program, you can watch it on all of the receivers on your DISH account. Using the remote control, you can order the exact same program for each receiver but you pay for the program only once. -
Page 45: Dish O Ndemand
Pay Per Programs DISH On Demand DISH O EMAND DISH On Demand is DISH’s Video On Demand service. Enjoy movies, TV shows, and other exciting DISH On Demand events. Through DISH Cinema, for example, you have immediate access to the latest movies on DISH. You can even use your remote’s DVR buttons (such as PAUSE, PLAY, FWD, and BACK) to control your viewing experience. -
Page 46: Dish Online Com
Chapter 4 DishOnline.com NLINE DishOnline.com lets you view authorized programming right over the Internet, as long as you’re connected to a broadband (high-speed) Internet connection. For steps to connect your satellite receiver to the Internet, refer to Connecting a Broadband Internet Connection on page 122. -
Page 47: Ordering Considerations
Pay Per Programs Ordering Considerations RDERING ONSIDERATIONS Keep in mind these important considerations about pay-per-view types of programs. • When you confirm an order for a program, you cannot cancel the order and you will be billed for it. • You can use Locks to control the programs your family views. -
Page 48: Tips
Chapter 4 Tips • You can set up the receiver to record Pay-Per-View programs. See page 64 for more details. You cannot record or re-record DISH On Demand programs or events. • You can prevent others from purchasing Pay-Per-View programs by setting parental controls and locking your receiver (see page 50). -
Page 49: Favorites Lists
Favorites Lists Setting Up Your Favorites Lists What you’ll find in this chapter: • HAT ARE AVORITES ISTS • SING AVORITES ISTS • REATING OR HANGING AVORITES ISTS • AMING AVORITES ISTS... -
Page 50: What Are Favorites Lists
Chapter 5 What are Favorites Lists? HAT ARE AVORITES ISTS Favorites Lists are custom lists of your favorite channels. You can create and change the lists yourself, adding and removing channels as you wish. Your favorite channels can be grouped in as many as four lists (for TV1) and four more lists, when in Dual Mode, for TV2. •... -
Page 51: Creating Or Changing Favorites Lists
Favorites Lists Creating or Changing Favorites Lists REATING OR HANGING AVORITES ISTS You can create, add, and remove channels from a Favorites List. When you access Favorites Lists, only the channels in the list are shown in the Program Guide and Browse Banner. -
Page 52: Tips
Chapter 5 Tips Select Done. • Two lists on the same TV cannot have the same name. For example, TV1 cannot have two lists named “Dad’s List.” However, when the receiver is in Dual Mode, TV1 and TV2 can have lists with the same names. •... -
Page 53: Locks
Locks Parental Controls for Your Receiver What you’ll find in this chapter: • HAT ARE OCKS • REATING OR HANGING A ASSWORD • OCKING AND NLOCKING ECEIVER • REATING OR HANGING ATINGS OCKS • REATING OR HANGING HANNEL OCKS • OCKING OR NLOCKING •... -
Page 54: What Are Locks
Chapter 6 What are Locks? HAT ARE OCKS Locks allow you to password-protect programming based on ratings or on a channel-by- channel basis. When you have locked the receiver: • If you try to access a locked item or open the Locks menu, the receiver displays a message asking you to enter the password. -
Page 55: Creating Or Changing A Password
Locks Creating or Changing a Password REATING OR HANGING A ASSWORD You should set up your password before using the receiver locks. Press the MENU button and then select Locks. If the receiver is locked, enter the password using the remote control’s NUMBER PAD. The receiver displays stars (*) as you enter the digits of your password. -
Page 56: Creating Or Changing Ratings Locks
Chapter 6 Creating or Changing Ratings Locks Press the MENU button and then select Locks. If the receiver is locked, enter the password using the remote control’s NUMBER PAD. The receiver displays stars (*) as you enter the digits of your password. Then select OK. If the receiver is unlocked, you will be prompted to enter a password when you lock it. - Page 57 Locks Creating or Changing Ratings Locks PG—Parental Guidance Suggested. Some Material May Not Be Suitable For Children. A PG-rated motion picture should be investigated by parents before they let their younger children attend. The PG rating indicates, in the view of the Rating Board, that parents may consider some material unsuitable for their children, and parents should make that decision.
- Page 58 Chapter 6 Creating or Changing Ratings Locks Audience Ratings of TV Ratings: TV-Y—All Children. This program is designed to be appropriate for all children. Whether animated or live-action, the themes and elements in this program are specifically designed for a very young audience, including children from ages 2-6. This program is not expected to frighten younger children.
-
Page 59: Creating Or Changing Channel Locks
Locks Creating or Changing Channel Locks REATING OR HANGING HANNEL OCKS You can lock any channel, including Pay-Per-View and any over-the-air channels. Press the MENU button and then select Locks. If the receiver is locked, enter the password using the remote control’s NUMBER PAD. The receiver displays stars (*) as you enter the digits of the password. -
Page 60: Locking Or Unlocking Pay -Per -View
Chapter 6 Locking or Unlocking Pay-Per-View OCKING OR NLOCKING This locks all Pay-Per-View channels. You also can lock individual Pay-Per-View channels by using channel locks, as described in the preceding section. Press the MENU button and then select Locks. If the receiver is locked, enter the password using the remote control’s NUMBER PAD. The receiver displays stars (*) as you enter the digits of the password. -
Page 61: Locking Or Unlocking The Front Panel
Locks Locking or Unlocking the Front Panel OCKING OR NLOCKING THE RONT ANEL This lock keeps people from using the front-panel buttons on your receiver unless they enter the correct password, but it does not lock the remote-control buttons. This option is only available on the TV1 menus;... -
Page 62: Tips
Chapter 6 Tips • If the receiver displays a message prompting you to enter a password, then this confirms that the receiver is locked. • If you want to unlock the receiver or undo any specific parental-control lock, use the password for the TV output you’re watching. -
Page 63: Interactive Tv
Interactive TV Interacting With Your TV What you’ll find in this chapter: • HOME I NTERACTIVE • USTOMER ERVICE... -
Page 64: Ish Home Interactive Tv
Chapter 7 DishHOME Interactive TV HOME I NTERACTIVE Press the DISH button on the remote control or go to channel 100 (if available) to view the DishHOME features available with your service. You can order additional channels, check the news and weather, and even play games. Make sure you connect an active phone line or broadband to your receiver to access DishHOME. -
Page 65: Digital Video Recording
Digital Video Recording Recording & Pausing Live Programs What you’ll find in this chapter: • DVR? HAT IS • AUSING A ROGRAM • EVERSE ORWARD • OTION AND RAME RAME • ECORDING A ROGRAM • LAYING A ECORDED ROGRAM • SING ECORD •... -
Page 66: What Is Dvr
Chapter 8 What is DVR? DVR? HAT IS The Digital Video Recorder (DVR) feature lets you watch TV the way that you want. You can pause, reverse, or skip back through a program. Then you can resume watching TV. Also, you can record and play back programs with full digital audio and video quality, without a VCR. -
Page 67: Reverse , Fast Forward , And Skip
Digital Video Recording Reverse, Fast Forward, and Skip EVERSE ORWARD This section describes how to use your remote control’s DVR buttons to move forward and back quickly while you watch TV. Press BACK once to reverse the program 4 times as fast as normal play. Press BACK twice to reverse at 15 times normal speed, three times to reverse at 60 times normal speed, and four times to reverse at 300 times normal speed. -
Page 68: Recording A Live Program
Chapter 8 Recording a Live Program ECORDING A ROGRAM Press the RECORD button. Select OK or Options. If you select Options, select the desired recording options. Select OK. LAYING A ECORDED ROGRAM Start Start Over Resume Select the program from the Select Start, Start Over, or Resume Press DVR twice list of recorded programs... -
Page 69: Recording Options
Digital Video Recording Recording Options ECORDING PTIONS When you set up a new DVR timer, you can choose from the following options: • Stop Recording Manually—The receiver will record until you press STOP. • Extend End Time—You can extend the stop time for the recording. This option is useful for programs that might run overtime, like sporting events or awards shows. -
Page 70: Using Record Plus
Chapter 8 Using Record Plus Make sure the receiver is set to Single Mode by looking at the Mode indicator light on the front panel. See Switching Between Dual and Single Mode on page 15. Press GUIDE to open the Program Guide. Find a current program you want to record now. Highlight and press the SELECT button to tune the receiver to that program. - Page 71 Digital Video Recording Using Record Plus Recording Events with Record Plus When Record Plus is enabled (see page 60) and the receiver is in Dual Mode, you can record two programs from the same location while watching a pre-recorded program, if no one is using the other tuner.
-
Page 72: Tips
Chapter 8 Tips Recording Events without Record Plus While in Dual Mode with Record Plus disabled (see page 60), you can set up the satellite receiver to record one program from both locations (TV1 and TV2) at the same time. Record Remainder of This Event: Record Remainder of This Event: "Cliffhanger"... -
Page 73: Record Future Programs
Record Future Programs Setting Up and Using Timers What you’ll find in this chapter: • IMERS AND ECORDINGS • SING THE IMERS • SING THE AILY CHEDULE • ETTING P AN UTOMATIC IMER • ETTING ANUAL IMER • PASS™ T ETTING IMER •... -
Page 74: Timers And Recordings
Chapter 9 Timers and Recordings IMERS AND ECORDINGS A timer is your instruction telling the satellite TV receiver the programs you want to watch in the future. For most Digital Video Recorder (DVR) timers, you select a specific program on a specific channel, and tell the receiver how often you want to record that program. DVR recordings are listed in the My Recordings screen, which you can find quickly by pressing the remote control’s DVR button twice. -
Page 75: Timer Options
Record Future Programs Timers and Recordings Timer Options The Timer Options screen lets you set the following (not used on all options screens): • Protect Event—to prevent your programs from being erased when the DVR fills up. • Set Resolution—to set the timer to record only HD or only SD programs. Note: When setting DishPASS timers for programs available in both HD and SD, by default, the receiver will automatically select the HD program for recording. - Page 76 Chapter 9 Timers and Recordings Reasons Why Timers are Skipped If a timer is skipped, the reason is stated on the Timers List. • Priority—This timer had a lower priority than other events being recorded at the time. • User—A TV user chose to skip that timer. •...
-
Page 77: Using The Timers List
Record Future Programs Using the Timers List Special Considerations When Using Timers • For Locked Programs—You must enter the receiver password before you can create an automatic timer. You can create a manual timer for a locked program without entering the password. However if you do this, when the timer starts, the receiver may display only an error or password-entry menu screen. -
Page 78: Setting U P An Automatic Timer
Chapter 9 Setting Up an Automatic Timer ETTING P AN UTOMATIC IMER Find a program or event to record that starts in the future using the Program Guide or Browse Banner. The program can be a satellite or over-the-air TV program (see page 125 for information and instructions on connecting an over-the-air antenna to your receiver). -
Page 79: Setting U P A Manual Timer
Record Future Programs Setting Up a Manual Timer ETTING ANUAL IMER Press the MENU button and select Daily Schedule. You can also press the DVR button three times for quick access to the Schedule screen. Select Timers. Select Manual Timer. Select one of the Timer Types (see page 64 for more details). -
Page 80: Ettingp Aish Pass™ Timer
Chapter 9 Setting Up a DishPASS™ Timer PASS™ T ETTING IMER DishPASS lets you create timers to record programs automatically based on results of your search criteria. When the DVR finds programs listed that meet your search criteria, it will automatically set a timer to record that program. As the Program Guide is updated, DishPASS will continue to find and record newly listed programs or events based upon your search criteria. -
Page 81: Deleting A Timer
Record Future Programs Deleting a Timer ELETING A IMER Press the MENU button and then select Daily Schedule. Select Timers and then Edit List. Select the timers you wish to delete. Select Delete. A pop-up window asks you to confirm your choice(s). Select Yes on the pop-up screen. -
Page 82: Tips
Chapter 9 Tips • Make sure the Updates feature is enabled, as described on page 108. By enabling this feature, the Electronic Program Guide (EPG) always will have the most up-to-date information, and your DVR can automatically adjust or create timers accordingly. •... -
Page 83: Remote Control Setup
Remote Control Setup Personalizing Your Remote Controls What you’ll find in this chapter: • MPROVING ECEIVER ONTROL • PERATING THER EVICES • ECOVER UTTON • ENDING ISCRETE OWER N AND... -
Page 84: Improving Receiver Control
Chapter 10 Improving Receiver Control MPROVING ECEIVER ONTROL These instructions help you improve your remote control settings to best operate your satellite receiver. Changing the Address for Remote Control 2 Because UHF radio signals travel longer distances and can pass through walls, a neighbor’s remote may be able control your receiver by mistake. - Page 85 Remote Controls Improving Receiver Control Checking the Remote Control Address Press and hold the SAT mode button a few seconds until all of the mode buttons light up, then release SAT. Press POUND (#) twice. The SAT mode button will flash the same number of times as the address number (for example, three flashes means address 3).
- Page 86 Chapter 10 Improving Receiver Control Adjusting the Remote Control Antenna Be sure to point the remote control antenna (back of the receiver) straight up so you can use the remote control from as far away as possible. Don't let the antenna touch anything. If your UHF Pro Remote Control 2 isn't working well from far away or another room, you may be experiencing interference from objects near your receiver.
- Page 87 Remote Controls Improving Receiver Control Installing a UHF Attenuator Unwanted UHF signals may interfere with signals from the remote control to the receiver. To prevent such interference, you can install a 10 dB attenuator (available from many electronics parts stores). Adding this attenuator will help keep out stray UHF signals, but it will also cut down how far away your remote control can operate the receiver.
-
Page 88: Operating Other Devices
Chapter 10 Operating Other Devices PERATING THER EVICES To use the remote to control other devices (such as a TV, VCR, DVD/Blu-ray Disc player tuner, amplifier, or another compatible DISH receiver), you must first program it to control these other devices. You can do this by any of the following procedures: •... - Page 89 Remote Controls Operating Other Devices SAT Auto-Tune Most snowy, blue, or black screen issues occur because the TV is set to the wrong channel. Using the SAT Auto-Tune feature helps prevent that issue from occurring on TVs connected to the receiver’s modulated output (usually TV2). Use SAT Auto-Tune to program the correct TV channel for satellite viewing into the DISH remote control.
- Page 90 Chapter 10 Operating Other Devices Note: SAT Auto-Tune is enabled by default; however, the channel must be set (see Setting SAT Auto-Tune Channel). Press and hold the SAT mode button for three seconds until all four mode buttons are lit. Press the STAR (*) button on the remote control.
- Page 91 Remote Controls Operating Other Devices Removing SAT Auto-Tune for DVD/VCR Press and hold DVD until it stays lit. Press the STAR (*) button on the remote control. Enter 00 or 000. Press POUND (#). Combination Devices If you are programming the remote to control a combination device, such as a TV/VCR or a TV/DVD, program the remote control in one mode (TV), and then repeat the procedure in the other mode.
-
Page 92: Additional Information
Chapter 10 Operating Other Devices Programming Using Device Code Tables Set up the remote to control other devices using the manufacturer codes listed with your DISH remote. In the instructions below, the column on the left contains basic procedures to perform and the column on the right provides any additional information, if applicable. Instructions Additional Information Use the device’s front panel buttons or its own... - Page 93 Remote Controls Operating Other Devices Programming Using Device Code Scan If the code for your device is not included with your remote list containing the manufacturer codes, or if you could not find a code that worked for your device, use this procedure to scan through the remote control’s memory for the device code.
- Page 94 Chapter 10 Operating Other Devices Checking the Device Codes Use these steps to find the device code you’ve set for each remote control mode (TV, DVD, and AUX) Instructions Additional Information For example, hold the TV button until all of the Press and hold the mode button until other mode buttons light.
- Page 95 Remote Controls Operating Other Devices Learning from Another Device’s Remote Use this procedure if you are unable to find a code that allows your DISH remote to control your device or if some of the commands are not functioning as you expect after programming your DISH remote to control your device (in TV, DVD, or AUX modes).
- Page 96 Chapter 10 Operating Other Devices Instructions Additional Information See Checking the Remote Control Address on Ensure the DISH remote is working with page 75. the receiver. Holding either remote control in your hand may Place both your DISH remote and the cause learning to fail.
- Page 97 Remote Controls Operating Other Devices After a button has learned a command successfully, repeat step 5 and step 6 until all commands you want have been learned. The learning sequence also ends if the remote: Press and release one of the Mode buttons on the DISH remote to end the learning •...
- Page 98 Chapter 10 Operating Other Devices Remote Is Not Recognized The remote control may not be immediately recognized by your receiver. Continue Select Continue Press and hold zero System Wizard screen displays to open the System and says the receiver does not Setup is complete Wizard screen recognize the remote...
- Page 99 Remote Controls Operating Other Devices Back Up Receiver and Remote Settings Select Advanced to back up your receiver and remote control settings including Timers, Favorites, and Locks. Next Next Select from Full Advanced Select Back up my system backup, Back A message appears settings now and From the System Wizard...
- Page 100 Chapter 10 Operating Other Devices Controlling a Tuner or Amplifier Use the following remote control buttons to control a tuner or amplifier. When the remote control is set up, press the AUX device mode button to set the remote to AUX mode. The AUX mode button will stay lit for two seconds to show you’ve set the remote to AUX mode.
- Page 101 Remote Controls Operating Other Devices To Use a Tuner or Amplifier's Volume Control Press and hold the AUX button until all the mode buttons are lit, then release it. Press the POUND (#) button. Press the PLUS side of the VOLUME button. Press ZERO (0).
- Page 102 Chapter 10 Operating Other Devices Programming to Control a Second Satellite Receiver If you have another DISH satellite receiver installed in your home, you can use the remote in AUX mode to control it along with your new receiver. When you program the remote to control another receiver, the remote will send out IR signals to the receiver so the line-of- sight to the second receiver must be unobstructed.
-
Page 103: The Recover Button
Remote Controls The Recover Button ECOVER UTTON Use RECOVER if you have a snowy, all blue, or black screen on your TV and cannot get the picture back from your satellite receiver. When you press RECOVER as described, the remote control sends commands to your TV to change channels or video inputs to get back to watching satellite programming. - Page 104 Chapter 10 The Recover Button Using the Recover Button The following setup is required to use the RECOVER feature: • The remote control must be set up to control the TV and, if installed, the VCR. • If a VCR is installed, then it must be connected as shown on page 124. •...
-
Page 105: Sending Discrete Power On And Off
Remote Controls Sending Discrete Power On and Off Removing the Recover Button Channel Programming The following instructions describe how to reset the RECOVER button to the default, of restoring satellite viewing by tuning your TV (or VCR) to channel 3, 4, and other inputs. Press and hold the TV mode button until all mode buttons light up. -
Page 106: Tips
Chapter 10 Tips • If using a specific channel for TV2 (for example, channel 60), TV2’s remote control must be programmed with a TV2 channel before you can use the RECOVER feature. • Place the channel sticker on the remote TV (TV2) and write down the channel set up to watch DISH satellite programming. -
Page 107: Receiver Customization
Receiver Customization Personalizing Your Satellite Receiver What you’ll find in this chapter: • SING HARED • ODULATOR ETUP • SING ULTIMEDIA • SING ALLER • USTOMIZE THE UIDE AND HANNEL • HANGING ANGUAGES • SING LOSED APTIONING • SING UDIO UTPUT •... -
Page 108: Using Shared View
Chapter 11 Using Shared View SING HARED Shared View is a feature of Single Mode on your receiver that lets you activate the TV2 audio and video outputs to display the same programming as the TV1 outputs. While using this feature, both Remote Control 1 and Remote Control 2 for your satellite receiver can control what is displayed on all TVs connected to the system. -
Page 109: Using Multimedia
Receiver Customization Using Multimedia SING ULTIMEDIA Photos Copy photos from select digital cameras and storage devices to the receiver’s hard-disk drive for viewing on the connected TV (options vary by receiver model). Now you don’t have to pass photos around or have a crowd of people hover around your digital camera. Transferring Photos to Your Receiver MENU Pic01.jpg... - Page 110 Chapter 11 Using Multimedia Viewing Photos on Your Receiver MENU August 31 2005 10:03am September 3 2005 9:03am My DISH Receiver December 2 2005 10:03am Slideshow My Photos January 8 2006 11:00pm Play Select the Select the Select Select Play photo folder My Photos under Slideshow...
- Page 111 Receiver Customization Using Multimedia External Hard-Disk Drive You can expand the storage capacity of your receiver’s DVR by connecting a compatible, external USB 2.0 hard-disk drive (HDD). With the Archiving feature enabled on your account (fees may apply), you can transfer programs from the receiver to your external storage device, and play back programs directly from a connected external drive.
-
Page 112: Sing Aller Id
Chapter 11 Using Caller ID SING ALLER Caller ID displays on your TV if you subscribe to Caller ID from your local phone company. To use this feature, make sure you have a phone line connected to the receiver, Caller ID is enabled on your phone line, and that the Caller ID option is selected on your receiver. -
Page 113: Customize The Guide And Channel Lists
Receiver Customization Customize the Guide and Channel Lists Using Caller ID History Your receiver also stores a history of the incoming calls. Use the following instructions to view and delete numbers from your Caller ID History. MENU System Setup Caller ID History Press MENU and select System Setup. - Page 114 Chapter 11 Customize the Guide and Channel Lists Changing the Guide Display The receiver comes set to display the Program Guide with video in the upper right corner. However, you can change the way the Program Guide displays on your TV screen. MENU Done Select from the...
-
Page 115: Changing Languages
Receiver Customization Changing Languages • HD Only—Displays only HD versions of the local channels below 100 at the local station’s channel number. If an HD local channel is not available, the SD channel is listed. • HD and SD (default)—Displays both HD and SD local channels at the local station’s channel number (This is also referred to as disabling “HD map down”). -
Page 116: Using Closed Captioning
Chapter 11 Using Closed Captioning SING LOSED APTIONING The receiver has many options for Closed Captioning (CC), which allow you to change the feature to suit your needs. Also, you can display captions when you play back programs recorded on the receiver's integrated DVR (Digital Video Recorder), even if you didn't have them turned on at the time the program or event was recorded. -
Page 117: Using Audio Output
Receiver Customization Using Audio Output SING UDIO UTPUT Dolby® Digital gives you the capability to enjoy program audio in surround sound. An external decoder is required to enjoy this feature. Refer to your decoder’s user’s guide. Note: Not all programs or events contain a Dolby Digital sound track. Your new receiver uses an optical port for outputting digital audio. -
Page 118: Resetting To Factory Defaults
Chapter 11 Resetting to Factory Defaults ESETTING TO ACTORY EFAULTS You can reset the receiver to discard any changes you have made to receiver settings, except for remote control addresses and locks. Resetting the receiver to factory default settings also discards all Favorite Lists except for the All Channels, My Channels, and My HD Channels lists. -
Page 119: Inactivity Standby
Receiver Customization Inactivity Standby NACTIVITY TANDBY If your receiver is on for a preset period of time without any activity (for example, no channel changes or use of DVR controls), the Inactivity Standby feature turns off the receiver so that you’ll always have the latest Program Guide and DISH On Demand (if available on your model). -
Page 120: Tips
Chapter 11 Tips • To take full advantage of Dolby Digital 5.1 surround sound, you need a digital optical audio cable and audio equipment that supports this feature. • To use the Caller ID feature on this receiver, be sure to have the receiver connected to an active phone line and have Caller ID service from your phone company. -
Page 121: Connections And Setup
Connections and Setup Connecting Your Satellite Receiver What you’ll find in this chapter: • TV (TV1) ONNECTING TO THE EARBY (TV1 • ONNECTING TO THE EMOTE TV2) • ONNECTING TO NTENNA • ONNECTING THE HONE • ONNECTING A ROADBAND NTERNET ONNECTION •... -
Page 122: Connecting To The Nearby Tv (Tv1)
Chapter 12 Connecting to the Nearby TV (TV1) TV (TV1) ONNECTING TO THE EARBY This section describes how to connect the TV1 output ports on the back of your receiver to a nearby TV. Select one of the following methods. Note: If you would like to put your receiver in a remote location (for example, inside a closet, or a cabinet in another room, etc.), be sure to get the replacement remote control kit that uses UHF Pro signals to control TV1. - Page 123 Connections and Setup Connecting to the Nearby TV (TV1) YPbPr Connections The YP (component) connections provide high-quality video to your HDTV or HD monitor. If an HDMI audio/video connection between your receiver and nearby TV is unavailable or not applicable, then you should use component video with separate audio. AUDIO Connect receiver and Turn monitor...
-
Page 124: Setting Up To Display In Hd
Chapter 12 Connecting to the Nearby TV (TV1) Setting Up to Display in HD Once the receiver has been activated with qualifying DISH programming, you will be able to receive high-definition programs to watch. Use the following steps to select the desired HDTV format to display these programs on your TV. -
Page 125: Connecting To The Remote Tvs (Tv1 Or Tv2)
Connections and Setup Connecting to the Remote TVs (TV1 or TV2) (TV1 TV2) ONNECTING TO THE EMOTE This section describes how to connect the receiver’s H connection to ISTRIBUTION one or more cable-ready remote TV(s) located in another room away from the receiver. You can use these instructions to connect TVs in your home to see programming from TV1 or TV2. - Page 126 Chapter 12 Connecting to the Remote TVs (TV1 or TV2) Note: The remote TV(s) will have to be set to the same channel mode, either air or cable mode, for this installation. See your TV user’s guide for instructions on how to set your TV to air or cable channel modes.
- Page 127 Connections and Setup Connecting to the Remote TVs (TV1 or TV2) For some TVs, you must run an internal channel scan so that the TVs will find and display the selected channel from the receiver. Run the channel scan on all applicable remote TVs, if available.
- Page 128 Chapter 12 Connecting to the Remote TVs (TV1 or TV2) • If you have at least some picture on your TVs, turn on all remote TVs connected to the cabling system. Disconnect and reconnect each cable one-by-one, observing what happens to the picture on the TVs. When all the remote TVs lose the signal, you have disconnected the receiver’s cable.
-
Page 129: Connecting To Your Dish Antenna
Connections and Setup Connecting to Your Dish Antenna ONNECTING TO NTENNA Connect your TV to the receiver using the previous sections before connecting the receiver to the dish antenna. SATELLITE IN SATELLITE IN Connect one RG-6 coaxial cable from the LNBF to a DISH Pro Plus (DPP) Separator or a DISH Pro Plus Triplexer. -
Page 130: Connecting The Phone Line
Chapter 12 Connecting the Phone Line ONNECTING THE HONE You must keep the receiver attached to an active phone line (or broadband Internet connection) to order Pay-Per-View programs or events, access all of the DishHOME Interactive features, or use other services from DISH with your remote control. Note: You may be able to use a wireless modem jack. - Page 131 Connections and Setup Connecting the Phone Line Phone Connection Recommendations for VoIP If you have a VoIP (Voice over Internet Protocol) phone service, the following tips may help improve the chances of the satellite receiver successfully connecting to DISH using the VoIP phone service.
-
Page 132: Connecting A Broadband Internet Connection
Chapter 12 Connecting a Broadband Internet Connection ONNECTING A ROADBAND NTERNET ONNECTION If you have broadband (high-speed) Internet access at home, connect your receiver to your home network. You can use this connection to order Pay-Per-View programming using your remote control if you are not able to connect a telephone line. It also provides access to additional content not usually available through your satellite TV subscription. - Page 133 Connections and Setup Connecting Using DishCOMM If one DishCOMM-compatible receiver is attached to a physical telephone-line connection, then this receiver's modem can be shared with other DishCOMM-compatible receivers in the home, as follows: Connect an active phone line to one receiver. Create the DishCOMM Network (see instructions, above).
-
Page 134: Connecting Avcr To The Remote Tv
Chapter 12 Connecting a VCR to the Remote TV ONNECTING A TO THE EMOTE Below is an example of how to connect a VCR to your satellite TV system. For this installation, always leave your VCR powered on so that the TV can receive satellite programming. -
Page 135: Connecting An Over - The -Air Antenna
Connections and Setup Connecting an Over-the-Air Antenna ONNECTING AN NTENNA If you want to receive digital local channels from an Over-The-Air (OTA) antenna in addition to your satellite-delivered TV programming, then connect the over-the-air antenna to your ViP® series receiver’s optional OTA tuner module, or to your TV distribution equipment. - Page 136 Chapter 12 Connecting an Over-the-Air Antenna Scanning for Over-the-Air Channels With your over-the-air antenna adjusted for best reception, use these instructions to scan for over-the-air channels on the nearby TV. Make sure you have your over-the-air (OTA) antenna connected to the optional module’s connection.
- Page 137 Connections and Setup Connecting an Over-the-Air Antenna Peaking Your Over-the-Air Antenna MENU Channel Select a digital S S elect a digita Select a digita over-the-air channel Adjust and make sure Press MENU and antenna for you have a locked select System Setup best signal signal then Local Channels...
- Page 138 Chapter 12 Connecting an Over-the-Air Antenna Transmit Channel Numbers For information on channel numbers, you can visit the National Association of Broadcasters (NAB) web page at www.nab.org. For a list of digital local broadcast stations and their Transmit Channel numbers, you can go to http://www.broadcastpublicservice.org.
- Page 139 Connections and Setup Connecting an Over-the-Air Antenna To get the best possible reception of digital TV signals, make sure you use the best over- the-air antenna for where you live: • You can receive a limited number of channels using a rabbit ears-type antenna on top of the TV set, or a much larger number via a large UHF/VHF indoor/outdoor antenna.
-
Page 140: Using Troubleshooting Tools
Chapter 12 Using Troubleshooting Tools SING ROUBLESHOOTING OOLS Your receiver and the remote control(s) have troubleshooting tools that a Customer Service Representative may ask you to use if you should ever run into issues while using your equipment. Even though these tools are quite helpful, it is recommended that you only use them when you are speaking on the phone with a DISH representative. - Page 141 Connections and Setup Using Troubleshooting Tools Receiver Diagnostics The Diagnostics screen allows you to check the phone and broadband Internet connection of your receiver. MENU The Diagnostics screen appears System Setup Select Done Diagnostics Press MENU, select System Setup and then select Diagnostics Press the MENU button, select System Setup, and then Diagnostics.
-
Page 142: Point Dish And Check Switch
Chapter 12 Using Troubleshooting Tools Point Dish and Check Switch The Point Dish and Check Switch screens are often helpful to the Customer Service Representatives. You may be asked to display these screens when you call DISH. Remember to have an active phone line or broadband Internet connected to your receiver Warning: Running the Check Switch test while is receiving low or no signal will result in incorrect receiver settings and cause you to lose channels. -
Page 143: Reference
Reference Troubleshooting and Remote Codes What you’ll find in this chapter: • ROUBLESHOOTING ABLES • EMOTE ONTROL EVICE ODES... -
Page 144: Troubleshooting Tables
Reference Troubleshooting Tables ROUBLESHOOTING ABLES Use these tables if you have problems using your DISH system. Look in this section for a description of the problem before calling the Customer Service Center. Some issues may be basic misunderstandings of how the system works, especially when one is just becoming familiar with it. To solve a particular problem, do the following: Review the section in this Guide that relates to the problem. - Page 145 Reference Troubleshooting Tables Message Numbers Message Possible Reason What to Do Number Check the coaxial cables and their connections to and from the multi-dish switch. Make sure that all required cables are in place, There may be a problem with the and check that all the cable connections are tight (and dry, multi-dish switch.
- Page 146 Reference Troubleshooting Tables Message Possible Reason What to Do Number • If you have authorized the receiver, wait a few minutes to see if the message is removed. Make sure that all required cables The receiver may not have received are in place, and check that all cable connections are tight and authorization for programming yet.
-
Page 147: Changing Channels
Reference Troubleshooting Tables Message Possible Reason What to Do Number • Wait a few minutes to see if the message goes away. Make sure that all required cables are in place, and check that all cable connections are tight and dry (for outdoor cables). You may have just plugged in the •... -
Page 148: Remote Control
Reference Troubleshooting Tables Remote Control What Is Happening Possible Reason What to Do Use the receiver front panel Control Buttons to control the receiver until you find the remote. If the remote control is You cannot find the remote control. permanently lost or too damaged to use, call the Customer Service Center to order a replacement. - Page 149 Reference Troubleshooting Tables What Is Happening Possible Reason What to Do • Make sure that the extender that receives the signal from the remote control is facing the right way, so that the IR sensor can receive the remote control signals. •...
- Page 150 Reference Troubleshooting Tables Watching a Program What Is Happening Possible Reason What to Do • Verify the TV is set to the correct input or channel for your setup. • The TV set may not be • Make sure that the TV set is plugged into a working properly.
- Page 151 Reference Troubleshooting Tables Favorites Lists What Is Happening Possible Reason What to Do GUIDE You press the remote If you have not added channels button while the Program Guide to any custom Favorites List, you is displayed. You find that you You must add channels to a custom Favorites List will be able to apply only the All can apply only the All Channels,...
- Page 152 Reference Troubleshooting Tables What Is Happening Possible Reason What to Do Remember that a Once event timer operates just one time. A Mon.-Fri. event timer operates Monday through Friday on the same channel at the same You set up an event timer for a •...
- Page 153 Reference Troubleshooting Tables Caller ID What Is Happening Possible Reason What to Do • You do not have Caller ID • Verify that Caller ID is a service provided by your service from your local phone local phone company and you have subscribed to company.
-
Page 154: Remote Control Device Codes
Reference Remote Control Device Codes Locks What Is Happening Possible Reason What to Do You set a lock (for example, a lock on You may not have locked the You must lock the receiver to apply any lock programs by ratings), but the lock receiver. -
Page 155: Appendix
Appendix What you’ll find in this chapter: • IMITED ARRANTY • ESIDENTIAL USTOMER GREEMENT • FCC C OMPLIANCE... -
Page 156: Limited Warranty
Appendix Limited Warranty IMITED ARRANTY This Limited Warranty is a legal document. Keep it in a safe place. Remember to retain your Bill of Sale for warranty service! Any items returned without a copy of the Proof of Purchase will be considered out of warranty. What the Warranty Covers •... - Page 157 Appendix Limited Warranty If You Need Assistance Call the Customer Service Center at 1-800-333-DISH (3474). Have the date of purchase and either your customer account number, the receiver conditional access number, or the receiver model number ready. Display the Important System Information menu to find these numbers. A Customer Service Representative will assist you.
-
Page 158: Residential Customer Agreement
Services and/or equipment from DISH Network (each, a “Package Plan Agreement”): (i) “you” and “your” refer to you, the DISH Network subscriber; and (ii) "DISH Network", “DISH”, "we," "us" or “our” refer to DISH Network L.L.C. (formerly known as EchoStar Satellite L.L.C.) or, where applicable under the particular circumstances, third party billing agents. - Page 159 Agreement. If your Services are disconnected for non- payment or any other reason, DISH Network may require that you pay, and you agree to pay, before we reconnect your Services, all past due charges, a deposit equal to a minimum of one month of service charges, and all outstanding balances accrued through the date of such disconnection.
- Page 160 C. Disconnection of Services. In addition to all other rights that DISH Network may have to disconnect your Services, DISH Network may disconnect your Services if: (i) you fail to pay any bill in full when it is due; (ii) we receive confirmation that you have received Services, or any part of the Services, without paying for them;...
- Page 161 Equipment. Options to return your Equipment include, but are not limited to, the use of a shipping label and empty box provided by DISH Network by paying a Box Return Fee (as detailed in Exhibit 1) (which price is subject to change at any time) or scheduling a DISH Network in- home service call to remove the Equipment by paying a Service Call Fee (as detailed in Exhibit 1) charge (which price is subject to change at any time).
- Page 162 U.S. patents and/or other intellectual property rights. Use of such copyright protection technology must be authorized by DISH Network or its suppliers or licensors, and is intended for home and other limited pay-per- view uses only, unless otherwise authorized by DISH Network or its suppliers or licensors. Reverse engineering or disassembly is prohibited.
- Page 163 Services; and (iii) other services provided by our third-party billing agents, including without limitation, local telephone service, may need to be restored before DISH Network Services can be restored, and a restoral fee and/or deposit may be required to restore third-party billing agent services. Partial payments on third-party billing agent...
- Page 164 Appendix Residential Customer Agreement EXHIBIT 1 - FEES In addition to any amounts due for your Services and any other amounts due under this Agreement or any applicable Package Plan Agreement, you agree to pay the fees listed in the table below (“Fees”) if and when applicable.
- Page 165 (A $20.00 Extended Delivery Fee also applies to AK, HI, Puerto Rico, or Virgin Islands.) Overnight Delivery Fee $20.00 DISH Network delivers an item to you via overnight delivery (not available in Alaska, Hawaii, Puerto Rico, or the U.S. Virgin Islands). Box Return Fee $17.00...
-
Page 166: Fcc Compliance
Appendix FCC Compliance FCC C OMPLIANCE The following text is extracted from Federal Communications Commission (FCC) regulations, as of the publication date of this Guide. Contact the FCC (see following) or your library for the complete text of the regulations. Telephone Communication This equipment complies with Part 68 of the FCC rules and the requirements adopted by the ACTA. -
Page 167: Index
Dish Antenna DISH Account Account Information Languages, Changing DISH Logo, Moving Address, Remote Limited Mode DISH On Demand Changing Lists Ordering Checking Choices in Menus Reviewing Orders Adult Content, Hiding Customizing Channels DishCOMM All Episodes Local Satellite Channels Considerations Antenna Locks Creating a Network via Adjusting... - Page 168 Antenna Switching AUX Mode Single Mode Password Batteries Picture-In-Picture Creating or Changing Buttons, DVD/VCR Control Recording Pause Button Buttons, Receiver Control Shared View Pausing a Program Buttons, TV Control Skip Back Button Pausing Live TV Changing the Address Skip FWD Button Pay-Per-View Checking Device Codes Skipped Timers...
- Page 169 Watching a Program Tuner/Amplifier Controlling Audio Equipment Using for Volume Adjustment TV Everywhere UHF Attenuator Installation Unlocking Pay-Per-View Channels Unlocking the Front Panel Unlocking Your Receiver Updates Using History Using Keywords Using Menus Using Multimedia Using Number Pad Using Picture-In-Picture Using Search Using Text Fields Using Themes...
-
Page 171: Receiver Information
Receiver Information Write the following information in the spaces provided below. You may need to provide this information if you call the Service Center. To get the Conditional Access Numbers, display the System Info menu (see Ordering Your Programming Packages). Purchase Location Name: Purchase Location Telephone Number: Receiver Serial Number:...
Need help?
Do you have a question about the Dish ViP722K and is the answer not in the manual?
Questions and answers