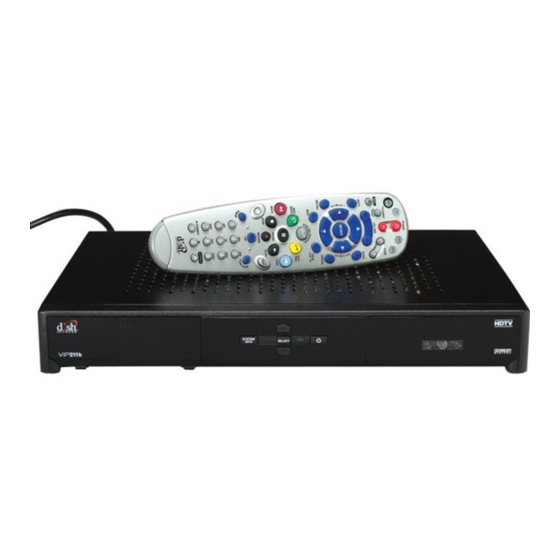
Dish Network ViP211k User Manual
Mpeg4 hdtv satellite receiver/tuner
Hide thumbs
Also See for ViP211k:
- Quick reference manual (2 pages) ,
- User manual (146 pages) ,
- Getting started (2 pages)
Table of Contents
Advertisement
inside_front_cover.fm Page 1 Monday, October 24, 2005 11:50 AM
Warning and Attention Symbols
You must be aware of safety when you install and use this system. This User Guide provides various procedures. If you do
some of these procedures carelessly, you could injure or kill yourself or damage equipment or property. Some other
procedures require special attention.
WARNING!
The
You could injure or kill yourself, or
You could damage equipment or property.
ATTENTION!
The
Important instructions for using the system, or
Important instructions for maintaining the system.
Class II
The
parts in this apparatus.
For Your Safety
Do not try to open the case of the receiver. There is risk of electrical shock, which may cause damage to
the receiver and/or personal injury or death to you. There are no user-serviceable parts inside the
receiver. Opening the receiver case or making unauthorized changes will void the warranty.
To reduce the risk of fire or electric shock, do not expose this appliance to rain or moisture.
Important Software Notice
As with all software controlled products, unexpected behavior could arise if the user tries to perform operations in a non-
routine manner. This product, like almost any other high tech product, is subject to bugs and hence EchoStar CANNOT
AND DOES NOT GUARANTEE OR WARRANT THAT ALL FEATURES, SUCH AS PARENTAL CONTROL, WILL WORK
AS INTENDED UNDER ALL CIRCUMSTANCES. EchoStar endeavors to improve such conditions and will periodically
download improvements.
In compliance with the terms of the GNU Public License (GPL), EchoStar is making some source code available to the
public to download from www.echostar.com.
Equipment and Software Covered by this User's Guide
This User Guide covers the DISH 411 and ViP211 receivers and software models DP411 and VIP211. This Guide may cover
other devices, not listed here.
Copyright Notice
Copyright © 2005 EchoStar Technologies Corporation, Englewood, Colorado 80112. All rights reserved.
The information in this User Guide may change without notice. We may issue revisions to tell you about such changes.
Please send comments or questions about this User Guide to: Technical Publications, EchoStar Technologies Corporation, 94 Inverness
Terrace East, Englewood, Colorado 80112.
Part Number: 143042
Printed in the United States of America.
DISH Network is a registered trademark of EchoStar Satellite L.L.C. For information about DISH Network, please visit our website at
www.dishnetwork.com.
We acknowledge all product names, trade names, or corporate names we mention in this User Guide to be the proprietary property of the
registered owners.
Manufactured under license from Dolby Laboratories. "Dolby" and the double-D symbol are trademarks of Dolby Laboratories. Confidential
unpublished works. © 1992-1997 Dolby Laboratories. All rights reserved.
symbol means that if you are not careful,
symbol means you should pay special attention to:
symbol alerts qualified service personnel to use only identical replacement
Advertisement
Table of Contents
Troubleshooting

Related Manuals for Dish Network ViP211k


Summary of Contents for Dish Network ViP211k
-
Page 1: For Your Safety
Part Number: 143042 Printed in the United States of America. DISH Network is a registered trademark of EchoStar Satellite L.L.C. For information about DISH Network, please visit our website at www.dishnetwork.com. We acknowledge all product names, trade names, or corporate names we mention in this User Guide to be the proprietary property of the registered owners. -
Page 2: Table Of Contents
Important Safety Precautions Introduction ELCOME OW TO SE THIS UIDE DISH N BOUT ETWORK CCOUNT TV N ATCHING DDITIONAL ERVICES TV R BOUT ATELLITE ECEPTION ONNECT TO A HONE OVING SCREEN Satellite Receiver EMOTE ONTROL ATELLITE ECEIVER RONT ANEL ATELLITE ECEIVER ANEL SING THE... - Page 3 table of contents Finding Programs to Watch HANGING HANNELS SING THE ROGRAM UIDE SING THE ROWSE ANNER SING EARCH TO IND A ROGRAM INDING A ROGRAM BY ITS HEME Pay-Per-View UYING A ROGRAM EVIEWING URCHASES Favorites Lists HAT ARE AVORITES ISTS REATING OR HANGING...
- Page 4 table of contents Timers IMERS SING THE IMERS ETTING P AN UTOMATIC IMER ETTING ANUAL IMER ELETING A IMER VERLAPPING IMERS Remote Controls HANGING THE DDRESS HECKING THE EMOTE ONTROL DDRESS ONFIRMING EMOTE ONTROL PERATION ONTROLLING THER OMPONENTS ECOVER UTTON 10 Receiver Customization SING ALLER...
- Page 5 table of contents Reference ROUBLESHOOTING ABLES EMOTE ONTROL EVICE ODES Appendix Index...
-
Page 6: Important Safety Instructions
Important Safety Instructions Read these instructions. Keep these instructions. Heed all warnings. Follow all instructions. Do not use this apparatus near water. Clean only with a dry cloth. Do not block any ventilation openings. Install in accordance with the manufacturer’s instructions. Do not install near any heat sources such as radiators, heat registers, stoves, or other apparatus (including amplifiers) that produce heat. - Page 7 Safety Note to Satellite TV System Installer: This reminder is provided to call the satellite TV system installer’s attention to Article 820-40 of the National Electrical Code (NEC) that provides guidelines for proper grounding and, in particular, specifies that the cable ground shall be connected to the grounding system of the building as close to the point of cable entry as practical.
-
Page 8: Introduction
So you bought yourself a new receiver and you want to know how it works, right? Take a look through this guide and you’ll quickly learn how to use all of the features. This chapter familiarizes you to your DISH Network satellite TV receiver. •... -
Page 9: Welcome
The information in this guide is separated into several chapters to make it easy for you to find exactly what you’re looking for: • Chapter 1 - Introduction gives you a brief overview of DISH Network and your new receiver. •... -
Page 10: About Your Dish Network Account
BOUT ETWORK CCOUNT This section explains how to order your packages and shows you where to find information about your DISH Network account. Ordering Your Programming Packages Before you can enjoy your new receiver, you must order your programming packages. -
Page 11: Watching Tv Now
Watching TV Now Where to Find Information on Your Account If you want to know about charges to your DISH Network account or if you would like to make changes to your programming packages, be sure to have your account information handy and choose one of the following: •... -
Page 12: Additional Services
Introduction Additional Services DDITIONAL ERVICES Pay-Per-View Catch all the action on Pay-Per-View. Take a break from regular TV and order the latest movies, sports, and special events. For details on ordering Pay-Per-View events, see page 23. Be sure to connect an active phone line to your receiver before you order a Pay- Per-View event. -
Page 13: Why Connect To A Phone Line
Keep the receiver connected to an active telephone line so that you will be able to order pay-per-view programs using your remote control, use all of the dish home Interactive TV features, and other services from DISH Network (see page 39). -
Page 14: Satellite Receiver
Satellite Receiver About Your Satellite Receiver This chapter helps you get to know your remote control, which in turn lets you use all of the functions of your receiver. After you read the information here, be sure to practice what you learn so that you can quickly understand what’s presented in later chapters. - Page 15 Chapter 2 Remote Control EMOTE ONTROL The remote control gives you easy access to all the features of your satellite receiver. You can program the remote to control the satellite receiver and up to three other devices (see page 50). These devices can be a TV, a VCR or DVD player, and a third device. This section describes how to use the various features of the remote control delivered with your satellite TV system.
- Page 16 Satellite Receiver Remote Control Remote Control Buttons...
- Page 17 Chapter 2 Remote Control Note: See page 50 for instructions to program the remote to control your TV.
- Page 18 Satellite Receiver Remote Control To use the features as described in this section, make sure you are in VCR mode by pressing the VCR Mode button. You can use this mode to operate your DVD player instead of a VCR. VCR/DVD Power &...
-
Page 19: Satellite Receiver Front Panel
Chapter 2 Satellite Receiver Front Panel ATELLITE ECEIVER RONT ANEL ATELLITE ECEIVER ANEL... -
Page 20: Using The Menus
Satellite Receiver Using the Menus SING THE ENUS The menus make using the receiver and selecting programs quick and easy. Use the menus to control the receiver and to use its features, such as setting locks, choosing a program, or creating a favorites list. Open and Close Menus You can open the menus in either of two ways: •... - Page 21 Chapter 2 Using the Menus List of Choices in the Menus When you make a choice in a list, the receiver does not apply the change until you select Done. If you do not want to save any changes, select Cancel to discard all the changes made in the menu.
-
Page 22: Using Text Fields
Satellite Receiver Using Text Fields SING IELDS When you use features on the receiver, you might be required to enter information, such as the name of a movie when using Search, into areas known as text fields. Your receiver has two basic ways to enter the information: •... - Page 23 Chapter 2 Tips • If you do not do anything in a menu for several minutes, the menu automatically closes. This will discard any changes you made, and display the program you were watching. • Keep from accidentally changing the channel or input on your TV by programming the remote in Limited Mode (see page 50).
-
Page 24: Finding Programs To Watch
Finding Programs to Watch Watching TV The receiver is on channel 414, but you want to change the channel to 210. How do you change the channel? You know your team is playing, but you’re not sure of the channel. How do you find the game? You’re in the mood for a movie, but you don’t know which one. - Page 25 Chapter 3 Changing Channels HANGING HANNELS Using the Up and Down Arrows While watching TV, if you want to change the channels one at a time to see what’s on, press the UP and DOWN ARROWS on your remote control. You can also change the channels the same way using the UP and DOWN ARROWS on the receiver front panel.
- Page 26 Finding Programs to Watch Using the Browse Banner • The Program Guide shows programs on now and coming on within the next two days. The guide does not show programs that have ended. While using the Program Banner, you can: •...
- Page 27 Chapter 3 Using Search to Find a Program If you select a current program, the receiver will tune to that channel. If you choose a future program, the Create Timer screen will display. See Chapter 8 - Timers on page 41 for more information.
-
Page 28: Inding Arogram By Its
Finding Programs to Watch Finding a Program by its Theme Using Search History After you have searched previously for programs or other information, your receiver builds a history. You can use the Search History to re-search programming instead of typing the information again. - Page 29 Chapter 3 Tips • Press INFO to get more information about the program you highlighted. • Press VIEW LIVE TV to cancel almost any screen and return to viewing TV. • Skip forward 24 hours (and then back again) at a time in the Program Guide by press- ing the SKIP FWD (SKIP BACK) button on the remote control.
-
Page 30: Pay-Per-View
Pay-Per-View Order and Watch Pay-Per-Views Is tonight a popcorn and movie night? Why rent videos when you can just watch Pay-Per- Views? This chapter describes how to use these additional services: • UYING A ROGRAM • EVIEWING URCHASES... -
Page 31: Buying A Pay -Per -V
After you buy a Pay-Per-View program, you can watch it on all of the receivers on your DISH Network account. Using the remote control, you can order the exact same program for each receiver but you pay for the program only once. However, replays of programs are separate events. - Page 32 Pay Per Programs Tips • You can set up a VCR to record Pay-Per-View programs. See page 44 for more details. • You can prevent others from purchasing Pay-Per-View programs by using locks (see page 36). • Tune to Channel 103 for a list of what’s playing on Pay-Per-View. UESTIONS •...
- Page 33 Chapter 4 Questions Notes...
-
Page 34: Favorites Lists
Favorites Lists Setting Up Your Favorites Lists One of the benefits of DISH Network is that you have access to many channels. However, the number of channels can make it difficult to find something to watch. When you read this chapter, you’ll learn how to set up and use Favorites Lists. The information in this chapter shows you how to fit your favorite channels into neat, organized lists. -
Page 35: Creating Or Changing
Chapter 5 What are Favorites Lists? HAT ARE AVORITES ISTS Favorites Lists are lists of your favorite channels. You can create and change the lists yourself, adding and removing channels as you wish. Your favorite channels can be grouped in up to four lists. •... -
Page 36: Naming Favorites Lists
Favorites Lists Naming Favorites Lists AMING AVORITES ISTS You can name your Favorites Lists whatever you want, up to eight characters long. SING AVORITES ISTS Press GUIDE to open the Program Guide. Press GUIDE again to select the next Favorites List. Press GUIDE repeatedly to scan through all the available lists. •... - Page 37 Chapter 5 Questions Notes...
- Page 38 Locks Securing Your Receiver and Account An important concern to parents is the ability to protect their children. With high tech television comes greater potential for unwanted programming beamed into your home. Use the safeguards described in this chapter to set up and use locks. •...
-
Page 39: P Assword
Chapter 6 What are Locks? HAT ARE OCKS Locks allow you to password-protect programming based on ratings, or on a channel-by- channel basis. When you have locked the receiver: • If you try to access a locked item or open the Locks menu, the receiver displays a message prompting you to enter the password. -
Page 40: Our R Eceiver
Locks Locking and Unlocking Your Receiver Press SELECT. Enter the new password using the NUMBER PAD. Select OK. Enter the new password again for confirmation, using the NUMBER PAD. The receiver displays stars (*) as you enter the digits of the password. Select OK. Memorize the new password. -
Page 41: Atings L Ocks
Chapter 6 Creating or Changing Ratings Locks REATING OR HANGING ATINGS OCKS You can lock programs based on Motion Picture Association of America (MPAA) ratings (PG, PG 13, etc.) and expanded ratings (violence, language, etc.). Press MENU and select Locks (5). If the receiver is locked, enter the password using the NUMBER PAD. -
Page 42: Hannel L Ocks
Locks Creating or Changing Channel Locks REATING OR HANGING HANNEL OCKS You can lock any channel, including Pay-Per-View and off-air channels. This type of lock keeps anyone from viewing these channels unless they enter the correct password. Press MENU and select Locks (5). If the receiver is locked, enter the password using the NUMBER PAD. - Page 43 Chapter 6 Locking or Unlocking Pay-Per-View Channels OCKING OR NLOCKING HANNELS This locks all Pay-Per-View channels. This type of lock keeps anyone from viewing these channels by using the UP or DOWN ARROWS or the remote control NUMBER PAD. You also can lock individual Pay-Per-View channels by using channel locks.
-
Page 44: Front Panel
Locks Locking or Unlocking the Front Panel OCKING OR NLOCKING THE RONT ANEL This lock keeps anyone from using the front panel buttons unless they enter the correct password, but it does not lock the remote control buttons. Press MENU and select Locks (5). If the receiver is locked, enter the password using the NUMBER PAD. - Page 45 Chapter 6 Tips • If the receiver displays a message prompting you to enter a password, the receiver is locked. • When you lock a rating, you also lock all other more restrictive ratings. For example, if you lock PG 13 rated programs, then all programs with the R, NC-17, and NR/AO ratings are also locked.
- Page 46 Interactive TV Interacting with Your TV Play games, shop, and get help from Customer Service! Use the information in this chapter learn about interactive services available on your satellite receiver. • dish home I NTERACTIVE • USTOMER ERVICE...
- Page 47 An important feature of your satellite TV receiver is Customer Support. This menu provides convenient access to your DISH Network account to review your statement, pay your bill, upgrade programming, and more. Make sure you connect an active phone line to your receiver.
-
Page 48: Timers
Timers Setting Up and Using Timers Have you found yourself having to make a choice between watching your favorite shows and living your life away from television? This chapter shows you how to set up to record future programs on a VCR so that you’ll never miss your favorite shows. •... -
Page 49: Timer Frequency
Chapter 8 Timers IMERS A timer is your instruction telling the satellite receiver the programs you want to view in the future. For most VCR timers, you select a specific program on a specific channel, and tell the satellite receiver how often you want to record that program. Be sure to set up the receiver to control your VCR (see page 77). -
Page 50: Special Considerations When Using Timers
Timers Timers When a Timer Starts a Recording For two minutes before a timer starts a recording, the receiver may display a digital countdown on the TV screen. This symbol disappears when the program begins. While the symbol is displayed, you may do one of the following: •... -
Page 51: Timer List
Chapter 8 Using the Timers List SING THE IMERS Press MENU and select Timers (7). Select Timers. When the Timers screen opens, you can edit or delete the timers you have set. ETTING P AN UTOMATIC IMER You can create an automatic timer for a future event. The following instructions explain the simplest way to set up an automatic timer. -
Page 52: Up A Manual Timer
Timers Setting Up a Manual Timer ETTING ANUAL IMER A manual timer lets you set custom start and stop times for a timer. Press MENU and select Timers (7). Select Create Timer. Select the Timer Frequency (see page 42 for more details). Select a Timer Type (see page 42 for more details). - Page 53 Chapter 8 Overlapping Timers VERLAPPING IMERS If you try to create event timers for overlapping programs, the receiver displays a screen with the dates and times of both programs. The receiver also displays this screen if a program time has changed, causing one timer to overlap another. You must delete or edit one of the timers.
- Page 54 Remote Control Personalizing Your Remote Control Great! Another remote control is the last thing you need, right? Well, this remote could be the last remote you’ll ever need. Use the information in this chapter to learn more about using your remote to control much more than just your receiver. •...
-
Page 55: A Ddress
Chapter 9 Changing the Address HANGING THE DDRESS Use the following procedures to change the remote control address. Press SYSTEM INFO on the receiver's front panel. The System Information screen displays and shows the Remote Address. Write down the address shown: Press and hold SAT on your remote control for about three seconds, until all of the mode buttons light up, and then let go of SAT. -
Page 56: Remote Controls
Remote Controls Checking the Remote Control Address HECKING THE EMOTE ONTROL DDRESS You can see what address is programmed on the remote control by completing the following instructions. Press and hold the SAT mode button for three seconds, until all of the mode buttons light up, and then let go of the SAT button. -
Page 57: O Ther C Omponents
VCR or a DVD player), and AUX (“auxiliary,” for a second TV, a VCR, a tuner, an audio amplifier, or a second DISH Network satellite receiver) to set the remote to the right mode for the device. To change the mode, press the button for the device you want the remote to control. - Page 58 Remote Controls Controlling Other Components Setting Up Using Device Code Tables You can set up the remote to control other devices using the device codes listed on page 98. In the instructions below, the column on the left contains the instructions and the column on the right provides additional information.
- Page 59 Chapter 9 Controlling Other Components Instructions Additional Information Try every code listed for your brand until one If the code doesn’t work, redo steps 3 works for your device. through 9 with another device code from the tables. If you can’t find a code that works try, Setting Up Using Device Codes Scan that follows.
- Page 60 Remote Controls Controlling Other Components Instructions Additional Information As you press the UP or DOWN ARROW, the Press the UP or DOWN ARROW remote tries each code in the memory to see if repeatedly until the device turns off. it can turn off your device. When the device turns off, you have found a code that might work.
-
Page 61: Switching Between Tv And Device Volume Control
Chapter 9 Controlling Other Components Instructions Additional Information For example, if the code is 570, the mode Press POUND (#) twice. button flashes five times, pauses, flashes Watch the mode light to determine your seven times, pauses, and flashes once quickly. code. - Page 62 Remote Controls Controlling Other Components Press and hold AUX for four seconds, and then let go of it. AUX will blink. Press POUND (#). Press the plus (+) side of VOLUME. Press ZERO (0). Press POUND (#). AUX flashes three times. Press SAT.
- Page 63 Controlling Other Components Programming to Control a Second Satellite Receiver If you have another DISH Network satellite receiver installed, you can use this remote in AUX mode to control it along with your new receiver. When you program the remote to control this other receiver, the remote will send out IR signals to the receiver.
-
Page 64: Recover Button
Remote Controls Recover Button ECOVER UTTON Use RECOVER if you accidentally change the channel or video input on your TV and cannot get the picture back from your satellite receiver. When you press RECOVER as described below, the remote control sends commands to your TV to change channels or video inputs to try to get you back to watching satellite programming. - Page 65 Chapter 9 Tips From the History Vault - Robert Adler invented the first wireless TV remote control for Zenith. The "Zenith Space Command" brought the "clicker" into American homes (and vocabularies) in 1956. • If you don’t want to accidentally change channels on your TV or VCR, try programming the remote control in Limited Mode as described on page 50.
-
Page 66: Receiver Customization
Receiver Customization Personalizing Your Satellite Receiver Take a look through this chapter and you’ll find out how to change settings on the receiver to make it just the way you like it. As an added bonus, if you find out that you don’t like how it turned out, you can reset the receiver to the way it was when you got it. -
Page 67: Using Caller
Chapter 10 Using Caller ID SING ALLER Caller ID displays on your TV the names of people and/or telephone numbers as they call you if you subscribe to Caller ID from your local phone company. To use this feature, make sure you have a phone line connected to the receiver and that the Caller ID feature is enabled. -
Page 68: L Anguages
Receiver Customization Changing Languages Using Caller ID History Use the following instructions to view and delete numbers from your Caller ID History. HANGING ANGUAGES You may be able to change the language of some programs. An alternate language may not be available for all programs. Some programs, such as movies, indicate at the beginning whether an alternate language or descriptive video is available. -
Page 69: Using Closed
Dish Network. Therefore, while best efforts are made to provide the most accurate information, DISH Network is not ultimately responsible for the accuracy of Program Guide and Closed Captioning information provided by others. -
Page 70: Olby ® S Urround S Ound
Receiver Customization Using Dolby® Surround Sound ® S SING OLBY URROUND OUND Dolby Digital gives you the capability to enjoy programs in surround sound. An external decoder is required to enjoy this feature. Refer to your decoder user’s guide. Note: Not all programs contain a Dolby Digital sound track. The receiver uses an optical port for outputting digital audio. -
Page 71: Program Guide Order
Chapter 10 Changing the Program Guide Order Note: When both audio signals are present in the program, the receiver defaults to Dolby Digital output unless you have selected PCM Only. Note: If you have selected Dolby Digital Only but there is only PCM audio in the program, you will hear nothing. -
Page 72: Guide Display
Receiver Customization Changing the Guide Display HANGING THE UIDE ISPLAY The receiver comes set to display the Program Guide with video in the upper right corner. However, you can change the way the Program Guide displays. Press MENU, select Preferences (8), and then Guide Display (1). Select one of the following options: •... -
Page 73: Actory Defaults
Chapter 10 Resetting to Factory Defaults ESETTING TO ACTORY EFAULTS You can reset the receiver to discard any changes you have made to the receiver, except for remote control address settings and locks. Resetting the receiver to factory default settings also discards all Favorite Lists except the All Chan and All Sub lists. If you have set any locks on the receiver, and the receiver is locked, these locks will be kept. - Page 74 Receiver Customization Tips • To take full advantage of Dolby Digital 5.1 surround sound, you need an optical cable and a stereo that supports this feature. • Be sure to have the receiver connected to an active phone line and have Caller ID service from your phone company to use the Caller ID feature on this receiver.
- Page 75 Chapter 10 Questions Notes...
- Page 76 Connections and Setup How to Connect Your Satellite Receiver Do you have a handful of cables and a head full of questions? This chapter is the perfect place to find out how to connect the receiver to all kinds of equipment. You’ll find this chapter particularly helpful if you decide to move your receiver or if you get a new TV, VCR, or DVD player.
- Page 77 Chapter 11 Connecting to a TV ONNECTING TO A This section describes how to connect receiver output ports to a TV. You can connect the receiver to a standard definition (SD) TV or a high definition TV (HDTV). Select one of the following methods.
- Page 78 Connections and Setup Connecting to a TV Connections The YPbPr connections provide high-quality audio and video to your HDTV or HD monitor. Connect between the YPbPr component connections on the receiver and the HDTV using component video cables. Connect audio (red and white) RCA-type cables between the receiver Audio Outputs and audio input connections that go with the YPbPr connectors on your HDTV or monitor.
-
Page 79: Setting Up To Display In Hd
Connecting to a TV Setting Up to Display in HD Once the receiver has been activated with qualifying DISH Network programming, you will be able to receive HD programs to watch. Use the following steps to select the desired HDTV format. -
Page 80: Your Dish Antenna
Connections and Setup Connecting to Your Dish Antenna Standard Definition TV Connections You can connect the receiver to a standard definition TV in two ways: • RCA Audio/Video connections • TV SET OUT Connect the receiver to the TV using one of the following: •... - Page 81 2150 MHz. Some cables may say “Swept tested for 2150 MHz.” If you have any doubt about this, ask your DISH Network retailer, or look on the container the cable came in. Do not use cable company TV cables or cables from other satellite TV systems not rated up to at least 2150 MHz.
-
Page 82: Phone Line
Connections and Setup Connecting the Phone Line Phone Line Connection Run a telephone cable with a standard RJ-11 connector from the receiver’s back panel Phone Jack to an active telephone connection. Phone System Setup You must also set up the receiver for your telephone system (touch tone or rotary), and set a telephone number prefix, if you need a prefix to make an outside call. -
Page 83: Vcr
Chapter 11 Connecting a VCR ONNECTING A Use this section to connect your VCR and set up the receiver for VCR Timers. VCR Connections The diagram below provides example of how to connect VCRs to your satellite TV system. Coaxial Cable Coaxial Cable Connect the tuner input of the VCR to the receiver TV SET OUT. -
Page 84: Off-Air Antenna/Cable Tv
Connections and Setup Connecting Off-Air Antenna/Cable TV Setting Up the Receiver to Control Your VCR Use this section to set up the receiver to control your VCR so that you can use VCR timers. The receiver’s front panel IR BLASTER sends a signal to control the VCR. This signal can bounce off walls and other objects on its way from the receiver. - Page 85 TV antenna you use. If you have questions about off- air channels, contact the broadcaster, not DISH Network. Scanning for Off-Air Channels Use these instructions to scan for off-air channels for the TV.
-
Page 86: Using Local Satellite Channels
Connections and Setup Connecting Off-Air Antenna/Cable TV Peaking Your Off-Air Antenna Press MENU, select System Setup (6), and then Local Channels (8) to open the Local Channels screen. Select Add Locals. Highlight the Transmit Number and use the UP and DOWN ARROWS to select a digital off-air channel. -
Page 87: Watching Off-Air Channels/Transmit Channel Numbers
TV signals are broadcast and received in the same way. Digital off-air TV broadcasting uses advanced technology like that of the DISH Network to deliver superb picture quality and CD quality sound. However, digital off-air signal reception (like analog off-air signal reception) depends on several things: •... - Page 88 If you have questions about off-air channels, contact the broadcasters, not DISH Network. DISH Network does not broadcast off-air signals and so cannot do anything to change off- air signal quality. However, the receiver's digital channel setup menus provide a signal strength bar that can help you in aiming the off-air TV antenna for the strongest possible signal.
-
Page 89: Resetting Your Receiver
Even though these tools are quite helpful, it is recommended that you only use them when on the phone with a DISH Network representative. Resetting Your Receiver Reset your receiver as directed by the Customer Service Representative as follows: Press and hold the front panel POWER until the green indicator blinks once and the TV screen goes blank. -
Page 90: Point Dish And Check Switch
Connections and Setup Using Troubleshooting Tools Point Dish and Check Switch The Point Dish and Check Switch screens are helpful to the Customer Service Representatives. You may be asked to display these screens when you call DISH Network. Even though there are items that can be changed, only change them when specifically directed by a Customer Service Representative. - Page 91 Chapter 11 Using Troubleshooting Tools Notes...
-
Page 92: Roubleshooting Tools
Troubleshooting and Device Codes • ROUBLESHOOTING ABLES • EMOTE ONTROL EVICE ODES... -
Page 93: T Roubleshooting T Ables
Reference Troubleshooting Tables ROUBLESHOOTING ABLES Use these tables if you have problems using the system. Look in this section for a description of the problem before calling the Customer Service Center. Many problems arise from basic misunderstandings of how the system works, especially when you are just becoming familiar with it. -
Page 94: Troubleshooting Tables
Reference Troubleshooting Tables Message Numbers Number Possible Reason What to Do • There may be a problem with the • Check the coaxial cables and their connections to and from multi-dish switch. the multi-dish switch. Make sure that all required cables are in place, and check that all cable connections are tight and dry (for outdoor cables). - Page 95 Reference Troubleshooting Tables Message Numbers Number Possible Reason What to Do • You may have just plugged in the • Wait a few minutes to see if the message is removed. Make receiver, and it is acquiring the sure that all required cables are in place, and check that all satellite signal.
- Page 96 Reference Troubleshooting Tables Message Numbers Number Possible Reason What to Do • The receiver gives you three • Wait a few minutes and then try again to enter the password. chances to enter the correct Note: The “time out” feature is designed to prevent someone password.
-
Page 97: Troubleshooting Remote Control
Reference Troubleshooting Tables Remote Control What Is Happening Possible Reason What to Do You cannot find the remote control. • N/A • Use the receiver front panel Control Buttons to control the receiver until you find the remote. If the remote control is permanently lost or too damaged to use, call the Customer Service Center to order a... - Page 98 Reference Troubleshooting Tables Program Guide or the Browse Banner What Is Happening Possible Reason What to Do In the Program Guide, some • Red means that you have not • If you want to buy a channel, call the channels have a red background. subscribed to that channel.
- Page 99 Reference Troubleshooting Tables Watching A Program What Is Happening Possible Reason What to Do The receiver front panel Power light • The TV set may not be • Make sure that the TV set is plugged into an is on, but the TV image: working properly electrical outlet.
-
Page 100: Caller Id
Reference Troubleshooting Tables Watching A Program What Is Happening Possible Reason What to Do • There may be interference • Check other nearby electrical devices as from other nearby electrical possible sources of interference. devices (such as radio towers, • Check that all required coaxial cables are in cellular telephones, place. - Page 101 Reference Troubleshooting Tables Timers What Is Happening Possible Reason What to Do You try to set up an event timer • You must enter the password • To be able to set up an event timer for the and the receiver displays a before you can create an program, first enter the password.
-
Page 102: Hearing A Program
Reference Troubleshooting Tables Hearing A Program What Is Happening Possible Reason What to Do The receiver front panel Power light is • You may have muted the • Check the volume level on the TV or audio on and there is a good picture on the sound, or set the volume so device. - Page 103 Reference Troubleshooting Tables Telephone for Voice/Data/FAX What Is Happening Possible Reason What to Do Your computer or FAX • The receiver may have tried to • Have the sender resend the FAX or modem machine was receiving a FAX call the Customer Service transmission.
- Page 104 Reference Troubleshooting Tables Buying a Pay-Per-View Program What Is Happening Possible Reason What to Do Someone orders a Pay-Per- • You may have been away • Lock the purchase of Pay-Per-View programs. View program without your from the receiver, and Remember that you are responsible for all Pay- permission.
-
Page 105: Remote Control Device Code
656 659 661 668 670 682 683 688 691 Dimensia 645 650 653 654 656 660 728 703 725 726 DISH Network 742 763 Mitsui 769 Sharp 521 526 585 605 607 628 629 652 Dixi 566 620 Mitsubishi 504 505 542 570 571 572 573... -
Page 106: Remote Control Device Codes
Reference Remote Control Device Codes Symphonic 632 657 662 677 692 694 Garrard 588 Samsung 515 517 534 579 591 675 755 Tandy 521 605 GE 550 551 552 554 572 591 605 607 675 Sansui 544 562 600 674 682 685 Tatung 509 651 663 698 678 679 Sanyo 549 581 582 583 608 675... - Page 107 Reference Remote Control Device Codes DVD/VCR Combo RCA 635 638 704 727 Techwood 664 Sansui 753 Toshiba 616 646 647 672 735 736 750 Sanyo 741 Yamaha 737 738 739 Codes Sharp 712 713 714 715 749 Zenith 648 673 Sherwood 646 670 736 738 744 Sony 639 645 650 687 728 729 730 Programming for...
- Page 108 Reference Remote Control Device Codes Notes...
- Page 109 Reference Remote Control Device Codes Notes...
- Page 110 • IMITED ARRANTY • ESIDENTIAL USTOMER GREEMENT • TAYING EGAL • FCC C OMPLIANCE...
-
Page 111: Appendix
Appendix IMITED ARRANTY This Limited Warranty is a legal document. Keep it in a safe place. Remember to retain your Bill of Sale for warranty service! Any items returned without a copy of the Proof of Purchase will be considered out of warranty. - Page 112 USTOMER GREEMENT Thank you for choosing DISH Network for your television service provider. DISH Network is happy to answer any questions you may have and to provide you with technical and other customer support. You may contact us 24 hours a day, any day of the year, by any of the following means: Phone: 1 (800) 333-DISH (3474) Email: Feedback@customermail.dishnetwork.com...
- Page 113 ("Change of Service Fee"). In addition (and without limitation), you may be charged a fee ("Service Access Fee") if you fail to subscribe to one of the following DISH Network basic programming packages: America's Top 60, America's Top 120, America's Top 180, Great Wall TV Package, DISH Latino, DISH Latino Dos or DISH Latino Max, or any of their successor packages.
- Page 114 Services at any time thereafter, in our sole discretion. If your Services are disconnected for non- payment or for any other reason, DISH Network may require you to pay, and you agree to pay, all past due charges, a fee for reconnection ("Reconnect Fee"), a deposit equal to a minimum of one month's service charges and all...
- Page 115 C. DISH Network has the right to disconnect your Services at any time without providing notice to you if: (i) you fail to pay any bill when it is due; (ii) we receive confirmation that you have received Services, or any part of Services without paying for them;...
- Page 116 Residential Customer Agreement the property of DISH Network at all times and any tampering or other unauthorized modification to any Smart Card is strictly prohibited and may result in, and subject you to, legal action. You agree to return Smart Cards to us upon our request.
- Page 117 6. TRANSFER OF ACCOUNT, SERVICES OR EQUIPMENT DISH Network may sell, assign or transfer your account to a third party without notice to you. You may not assign or transfer your Services without our written consent which will not be unreasonably withheld. We may, however, refuse to allow you to assign or transfer your Services if you lease your Equipment or if your account has an outstanding balance.
- Page 118 Under the Fair Credit Reporting Act, you have the right to notify DISH Network if you believe we have reported inaccurate information about your account to any Consumer Reporting Agency. Please include the specific item of dispute and why you believe the information reported is in error in any such notice.
- Page 119 Appendix FCC Compliance The REN is used to determine the number of devices that may be connected to a telephone line. Excessive RENs on a telephone line may result in the devices not ringing in response to an incoming call. In most but not all areas, the sum of RENs should not exceed five (5.0).
-
Page 120: R Eceiver U Pdates
Dish Antenna 73 Off-Air TV Broadcasts 80 dish home Interactive TV 5 Opening Menus 13 Account Information 4 DISH Network Account 3 Ordering Your Program Packages 3 Adult Content, Hiding 36 Dolby Surround Sound 63 Amplifier Codes page 99 Automatic Timer 44... -
Page 121: Index
index Satellite TV Reception 5 Scanning for Off-Air Antennas 78 Scheduling Receiver Updates 66 Search 20 Second Satellite Receiver 56 Selecting Menu Options 13 Solar Interference 6 Themes 21 Timers 42, 43 Deleting a Timer 45 Setting Up an Automatic Timer 44 Timer Frequency 42 Timer Options 42 Timer Types 42... -
Page 122: Receiver Information
Receiver Information Write the following information in the spaces provided below. You may need to provide this information if you call the Service Center. To get the Conditional Access Numbers, display the Important System Information menu (see Ordering Your Program Packages). Purchase Location Name: Purchase Location Telephone Number: Receiver Serial Number:...
Need help?
Do you have a question about the ViP211k and is the answer not in the manual?
Questions and answers