
Related Manuals for Avtech avn212


Summary of Contents for Avtech avn212
-
Page 1: Network Camera
293Z H.264 DAY & NIGHT NETWORK CAMERA INSTALLATION GUIDE Please read instructions thoroughly before operation and retain it for future reference. N204_212_V1.0... -
Page 2: Table Of Contents
TABLE OF CONTENT 1. OVERVIEW............................1 1.1 Package Content ........................1 1.2 Hardware Overview ........................1 1.3 Rear Panel..........................2 2. INSTALLATION & CONNECTION....................... 3 2.1 Install the Hardware ........................3 2.2 Connect an Audio Device (Optional) ..................5 2.3 Connect a USB Device (Optional) ..................... 5 2.4 Connect to Power ........................ -
Page 3: Overview
1. OVERVIEW 1.1 Package Content □ Network camera □ RJ45 network cable □ Installation Guide □ Alarm cable □ Bracket □ CD-ROM disc (including user manuals & □ Adapter CMS software “Video Viewer”) 1.2 Hardware Overview... -
Page 4: Rear Panel
1.3 Rear Panel CONNECTOR / BUTTON DESCRIPTION Reset Default This button is hidden in the pinhole. Press and hold the reset button until the network camera rebooted. This will reset all parameters, including the IP address to factory default settings. Power Indicator When the camera is power-supplied, this indicator will be on as red. -
Page 5: Installation & Connection
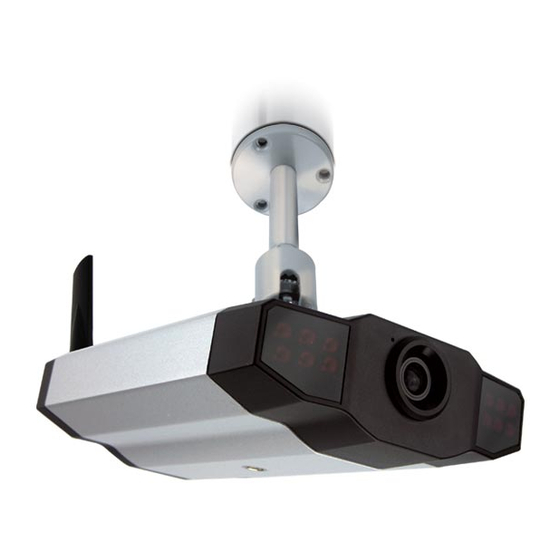
2. INSTALLATION & CONNECTION 2.1 Install the Hardware This camera can be installed in two ways: ceiling-mounted and desktop. During the installation, please make sure the upper side of the camera is always facing up, as shown in Figure 1 below (Regardless of which installation way you’re using). - Page 6 2. Assemble the bracket: a). Align the stem with the central hole of the base, and rotate it to secure, as shown in Figure 3. b). Connect the joint lock to the stem and rotate it to secure, as shown in Figure 4. Figure 3: Connect the stem to the base Figure 4: Connect the joint lock to the stem 3.
-
Page 7: Connect An Audio Device (Optional)
2.2 Connect an Audio Device (Optional) This camera supports connection to an audio device (such as a microphone or a speaker) and an alarm device. Note: The audio device is optional and needs to be purchased separately. For connection details, please refer to “1.3 Rear Panel” at page 2 and the user manual of the connected external device. -
Page 8: Ethernet Connection
3. ETHERNET CONNECTION Before using this network camera, please follow the instructions below to finish the network connection setting based on your installation environment: To configure the network settings, you must connect the camera to your PC by LAN. For details, please refer to “3.1 Network Connection via LAN”... - Page 9 e) Click “OK” to close the “Internet Protocol (TCP/IP) Properties” dialog box. Then, click “Close” to close the “Local Area Connection Properties” dialog box. For Windows XP users: a) Select “start” “Control Panel” “Network and Internet Connections” “Network Connections” (If you’re in “Category View”).
- Page 10 For Windows Vista users: a) Select “ ” (start) “Control Panel” “Network and Internet” to enter the “Network and Sharing Center”. Then, click “Manage network connections” (If you’re in “Category View”). b) Right-click on “Local Area Connection”, and select “Properties”. c) In the “Networking”...
-
Page 11: Ethernet Configurations
3.2 Ethernet Configurations A quick installation wizard is available via your web browser for password change, date & time settings, and network configurations. For details about the wizard, please refer to “3.2.1 Setting in Wizard” at page 9. For details about DDNS setting for PPPoE and DHCP, please refer to “3.2.2 DDNS Setting” at page 11. - Page 12 Step6: In “Network”, select the network type based on your network environment (Static IP / PPPoE / DHCP), and key in the information needed. Note: This camera doesn’t support POE router or hub. For Static IP: a) Enter the information of “Server IP”, “Gateway” and “Net Mask” obtained from your ISP (Internet Service Provider).
-
Page 13: Ddns Setting
Step8: You will be prompted to restart your web browser for network setting changes. ‧ For PPPoE and DHCP, continue as instructed in “3.2.2 DDNS Setting”. ‧ For Static IP, disconnect your camera and your PC, and connect them to Internet separately. Next, enter the IP address of the camera in the URL address box of the web browser, and see if you can access the camera successfully. - Page 14 Note: You can also create a DDNS account from a website which provides free DDNS service. For details, please refer to “APPENDIX 1 CREATING ACCOUNT FOR DDNS SERVICE” at page 16. Step5: Click “Save” and log out. Then, disconnect your camera and your PC, and connect them to Internet separately.
-
Page 15: Wireless Connection
4. WIRELESS CONNECTION Before configuring wireless setting to your network camera, make sure the following things are ready: There’s a wireless access point or router. You have connected one wireless dongle to the camera USB port. Note: The wireless dongle is optional and you need to purchase it separately. 4.1 Wireless Network Configurations Step1: Connect this network camera and your PC via a RJ45 network cable. - Page 16 Step6: In “Date and Time”, check if the date and time setting are correct and modify if necessary. Step7: Skip “Network” and click “Next” to “Wireless”. In “Wireless”, click “Scan Profile” to search all available wireless access points / routers, and double-click the one your camera is intended to configure for.
- Page 17 Step8: You will be prompted to restart your web browser for network setting changes. Click “Yes” and re-log into the camera. Step9: When the login is successful, click “Configuration” on the top-left corner to enter the system setting page. Then, select “Network” “Wireless”...
-
Page 18: Appendix 1 Creating Account For Ddns Service
APPENDIX 1 CREATING ACCOUNT FOR DDNS SERVICE For PPPOE or DHCP, you should enter the host name which points to the IP address of your network camera for login first. There are many websites for free DDNS service application, and below shows an example of DDNS account application from the website http://www.dyndns.com. - Page 19 Step4: Click “login”, and enter the user name and password you preset before to log in. Step5: Click “Add Host Services”. ‧Input a meaningful host name. ‧Choose a host system name. ‧Enter the IP address you want to redirect. Note down the whole host name, for example, headoffice523.dyndns.org. Then, click “Add To Cart”...
-
Page 20: Appendix 2 Adding Wireless Profile
APPENDIX 2 ADDING WIRELESS PROFILE You can also add the wireless profile manually or via the scan function in the system configuration page from the web browser. A2.1 Via Scan Note: This method is available only when the signal strength of the wireless access point / router your camera is intended to configure for is not too weak, and it’s set to open for searching. -
Page 21: A2.2 Manually
A2.2 Manually Step1: Click “Add” to create a profile manually. Step2: In “Profile Detail”, enter all the necessary information for access the wireless network, and click “Save”. The selected wireless access point / router will be added to “Profile Name List”. Note: The setting items shown below may vary based on each option selected. -
Page 22: A2.3 Activate & Connect
A2.3 Activate & Connect Step1: Select the profile you just added in “Profile Name List”, and check the network type of the profile. Then, in “Wireless Settings”, check the IP address of your camera (Server IP) as described below and note it down. When the network type is “Infrastructure”... -
Page 23: Appendix 3 Compatible Usb Flash Drive List
APPENDIX 3 COMPATIBLE USB FLASH DRIVE LIST The recorded data is saved on EXT3 file system, and can’t be read directly from your PC. To read, play and download the recorded data, please refer to “5.3 Video recording directly to USB flash drive”...
Need help?
Do you have a question about the avn212 and is the answer not in the manual?
Questions and answers