Table of Contents
Advertisement
Available languages
Available languages
Quick Links
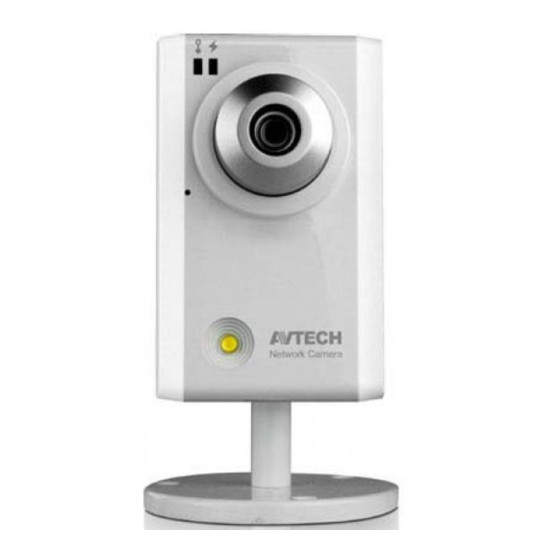
AVN314 (ONVIF) / 314A (ONVIF) / 304
MEGAPIXEL NETWORK CAMERA SERIES
Please read instructions thoroughly before operation and retain it for future reference.
AVN314 (ONVIF) / 314A (ONVIF) / 304
MEGAPIXEL NETWORK CAMERA SERIES
Please read instructions thoroughly before operation and retain it for future reference.
INSTALLATION GUIDE
INSTALLATION GUIDE
373Z
N30x_V1.2
373Z
N30x_V1.2
Advertisement
Chapters
Table of Contents

Related Manuals for Avtech AVN314


Summary of Contents for Avtech AVN314
- Page 1 373Z AVN314 (ONVIF) / 314A (ONVIF) / 304 MEGAPIXEL NETWORK CAMERA SERIES INSTALLATION GUIDE Please read instructions thoroughly before operation and retain it for future reference. N30x_V1.2 373Z AVN314 (ONVIF) / 314A (ONVIF) / 304 MEGAPIXEL NETWORK CAMERA SERIES INSTALLATION GUIDE Please read instructions thoroughly before operation and retain it for future reference.
- Page 3 IMPORTANT SAFEGUARD All lead-free products offered by the company comply with the requirements of the European law on the Restriction of Hazardous Substances (RoHS) directive, which means our manufacture processes and products are strictly “lead-free” and without the hazardous substances cited in the directive. The crossed-out wheeled bin mark symbolizes that within the European Union the product must be collected separately at the product end-of-life.
- Page 4 This device complies with Part 15 of the FCC Rules. Operation is subject to the following two conditions: (1) This device mat not cause harmful interference, and (2) This device must accept any interference received, including interference that may cause undesired operation. FCC Caution: Any changes or modifications not expressly approved by the party responsible for compliance could void the user's authority to operate this equipment.
- Page 5 MPEG4 Licensing THIS PRODUCT IS LICENSED UNDER THE MPEG4 VISUAL PATENT PORTFOLIO LICENSE FOR THE PERSONAL AND NON-COMMERCIAL USE OF A CONSUMER FOR (i) ENCODING VIDEO IN COMPLIANCE WITH THE MPEG4 VISUAL STANDARD (“MPEG-4 VIDEO”) AND/OR (ii) DECODING MPEG4 VIDEO THAT WAS ENCODED BY A CONSUMER ENGAGED IN A PERSONAL AND NON-COMMERCIAL ACTIVITY AND/OR WAS OBTAINED FROM A VIDEO PROVIDER LICENSED BY MPEG LA TO PROVIDE MPEG4 VIDEO.
-
Page 7: Table Of Contents
TABLE OF CONTENTS 1. OVERVIEW ..........................1 1.1 Package content........................1 1.2 Hardware Overview ......................1 1.3 Rear Panel........................... 2 1.4 Status Indicator........................3 2. INSTALLATION & CONNECTION ..................... 5 2.1 Install the camera ........................ 5 2.2 Connect to power ........................ 6 3. - Page 8 APPENDIX 1 CREATING AN ACCOUNT FOR DDNS SERVICE ..........21 APPENDIX 2 MOBILE SURVEILLANCE VIA EAGLEEYES ............27 A2.1 Prerequisites ........................27 A2.2 Where to download ......................28 APPENDIX 3 POE CONNECTION (AVN314A Only) ..............31 APPENDIX 1 CREATING AN ACCOUNT FOR DDNS SERVICE ..........21 APPENDIX 2 MOBILE SURVEILLANCE VIA EAGLEEYES ............
-
Page 9: Overview
1. OVERVIEW 1.1 Package content □ Network camera □ Camera Bracket □ Installation Guide □ Adapter □ CD-ROM disc (including user manuals & CMS software “Video Viewer”) 1.2 Hardware Overview 1. OVERVIEW 1.1 Package content □ Network camera □ Camera Bracket □... -
Page 10: Rear Panel
1.3 Rear Panel Ethernet: Connect your network cable. DC 5V: Connect the supplied regulated power supply. Reset: With the power connected, press and hold for a few seconds to reset all parameters, including the IP address to factory default settings. The camera will reboot after default reset. -
Page 11: Status Indicator
1.4 Status Indicator ICON LAN connection status Internet connection status System Status During powering on Always on Always on Reset default Blinking (on 250 ms, off 250 ms) Always off Upgrade Blinking (on 250 ms, off 250 ms) Blinking (on 250 ms, off 250 ms) Connection Status LAN connected Always on... -
Page 13: Installation & Connection
2. INSTALLATION & CONNECTION 2.1 Install the camera 1. Find the bracket and its accessories supplied with the camera. 2. Attached the base of the bracket (the round one) to where you want to install this camera, and fasten it with the supplied screws. 3. -
Page 14: Connect To Power
2.2 Connect to power Connect the supplied power adapter to the camera’s power jack (DC 5V / 2A) on the rear panel and the power outlet. AVN314A also supports PoE (Power-over-Ethernet) to eliminate the use of the power cable. For connection examples, please refer to “APPENDIX 3 POE CONNECTION” at page 31. 2.2 Connect to power Connect the supplied power adapter to the camera’s power jack (DC 5V / 2A) on the rear panel and the power outlet. -
Page 15: Camera Access And Network Configuration
3. CAMERA ACCESS AND NETWORK CONFIGURATION Before using this network camera, please follow the instructions below to finish the network connection settings based on your installation environment: To configure the network settings, you must connect the camera to your PC by LAN. For details, please refer to “3.1 Network connection via LAN”... - Page 16 For Windows XP users: a) Select “start” “Control Panel” “Network and Internet Connections” “Network Connections” (If you’re in “Category View”). For Windows XP users: a) Select “start” “Control Panel” “Network and Internet Connections” “Network Connections” (If you’re in “Category View”).
- Page 17 b) In “LAN or High-Speed Internet”, right-click on “Local Area Connection”, and select “Properties”. Note: If your local area connection is not enabled, please also enable it. c) In the “General” tab, select “Internet Protocol (TCP/IP)”, and select “Properties”. d) In the “General” tab, select “Use the following IP address”, and set the IP address to “192.168.1.XXX”...
- Page 18 For Windows Vista users: a) Select “ ” (start) “Control Panel” “Network and Internet” to enter the “Network and Sharing Center”. Then, click “Manage network connections” (If you’re in “Category View”). b) Right-click on “Local Area Connection”, and select “Properties”. Note: If your local area connection is not enabled, please also enable it.
- Page 19 c) In the “Networking” tab, select “Internet Protocol Version 4 (TCP/IPv4)”, and select “Properties”. d) In the “General” tab, select “Use the following IP address”, and set the IP address as described below. Note: It’s recommended to note down the current settings first and then change as instructed.
- Page 20 For Windows 7 users: a) Select “ ” (start) “Control Panel” “Network and Internet” to enter the “Network and Sharing Center”. Then, click “Change adapter settings”. b) Right-click on “Local Area Connection”, and select “Properties”. Note: If your local area connection is not enabled, please also enable it. For Windows 7 users: a) Select “...
- Page 21 c) In the “Networking” tab, select “Internet Protocol Version 4 (TCP/IPv4)”, and select “Properties”. d) In the “General” tab, select “Use the following IP address”, and set the IP address as described below. Note: It’s recommended to note down the current settings first and then change as instructed.
-
Page 22: Camera Access Via Web Browser
3.2 Camera access via web browser Step1: Open your web browser, for example, Microsoft Internet Explorer, and enter “http://192.168.1.10” in the URL address box. Step2: In the login page, key in the default user name (admin) and password (admin), and enter the security code from the image below. -
Page 23: Video Adjustment
3.3 Video adjustment When you’ve accessed the camera successfully, it’s recommended to adjust the video images if needed. To adjust the clearness of the video, rotate the camera lens manually as shown in Figure 1. To slightly adjust the color of the video, in the live page of your web browser, click “Config”... -
Page 24: Network Configurations
3.4 Network configurations 3.4.1 Network environment setting Step1: Click “Config” in the live view page of your browser to enter the configuration page. Then, click “Camera” “Camera”. Step2: In this page, define your installation environment as indoor or outdoor, and set other parameters related to your network environment. - Page 25 Item Description Environment Select the current environment for the camera to automatically adjust itself to produce the images suitable for the selected environment. Frame Rate The frame rate allowed to each viewer can be adjusted to adapt to the bandwidth on the network. Set the desired image frequency to the maximum (FULL) or to a specified frame rate (1/2;...
-
Page 26: Internet Access Setting
3.4.2 Internet access setting Step1: Click “Network” “Network” to select the connection type: Static IP / PPPoE / DHCP. For Static IP: a) Enter the information of “Server IP”, “Gateway” and “Net Mask” obtained from your ISP (Internet Service Provider). b) Enter the port number. -
Page 27: Ddns Setting
For PPPOE: a) Enter the user name and password obtained from your ISP, and click “Save”. b) Continue the DDNS setting as instructed in “3.4.3 DDNS Setting”. For DHCP: a) Before selecting this option, you need to finish the DHCP router settings first. b) Get a router and connect it to the Internet via your PC (with Static IP or PPPoE setting). - Page 28 Step3: Click “Save” and log out. Then, disconnect your camera and your PC, and connect them to Internet separately. Step4: Enter the host name you just note down in the URL address box of the web browser, and see if you can access the camera successfully. Step3: Click “Save”...
-
Page 29: Appendix 1 Creating An Account For Ddns Service
APPENDIX 1 CREATING AN ACCOUNT FOR DDNS SERVICE For PPPOE or DHCP, you should enter the host name which points to the IP address of your network camera for login first. There are many websites for free DDNS service application, and below shows an example of DDNS account application from the website http://www.dyndns.com. - Page 30 Step2: Enter all the information necessary for signing up an account according to the website instructions. ‧Key in a user name for login, for example, headoffice523. ‧Set the password and input it again to confirm. ‧Key in your E-mail address and input it again to confirm. Then, click “Create Account”.
- Page 31 Step3: The system will automatically send a confirmation email to your email account. Please read this email within 48 hours and complete the procedure to activate your account according to the instructions in the email. When the account is confirmed, you will see “Account Confirmed”. Your account is created successfully now.
- Page 32 Step5: Click “Add Host Services”. ‧Input a meaningful host name. ‧Choose a host system name. ‧Enter the IP address you want to redirect. Step5: Click “Add Host Services”. ‧Input a meaningful host name. ‧Choose a host system name. ‧Enter the IP address you want to redirect.
- Page 33 Note down the whole host name, for example, headoffice523.dyndns.org. Then, click “Add To Cart” for billing. Note: This service is free. Just finish the billing process, and NO paying information is required. Step6: Click “Activate Services” after checkout, and you’re ready to use DDNS services now.
- Page 34 Step7: Return to your web browser, and go to “Network” “DDNS”. Follow the description in “3.4.3 DDNS setting” at page 19. Step7: Return to your web browser, and go to “Network” “DDNS”. Follow the description in “3.4.3 DDNS setting” at page 19.
-
Page 35: Appendix 2 Mobile Surveillance Via Eagleeyes
APPENDIX 2 MOBILE SURVEILLANCE VIA EAGLEEYES EagleEyes is a mobile phone program used with our surveillance system for remote surveillance. It has several advantages: It’s free (Except EagleEyes Plus for iPhone). It’s compatible with several popular mobile platforms, such as iPhone, BlackBerry, Symbian, Windows Mobile and Android. -
Page 36: A2.2 Where To Download
You have noted down the IP address, port number, user name and password used to access your network camera from Internet. A2.2 Where to download Connect to www.eagleeyescctv.com from your mobile phone, and sign in. Note: Please DO NOT try to download EagleEyes from your computer. Then, select “Software”... - Page 37 When the download is completed, EagleEyes will be installed automatically to the location where all applications are saved in your phone by default, or where you specify. Note: For more details about configuring and operating this program, please visit our official website www.eagleeyescctv.com.
-
Page 39: Appendix 3 Poe Connection (Avn314A Only)
APPENDIX 3 POE CONNECTION (AVN314A Only) AVN314A supports PoE (Power-over-Ethernet), developed by the IEEE802.3af task force, and power can be supplied over the same network (Ethernet) cable as the one used to connect to Internet. No power cable is needed. Below shows two examples of POE application for reference. - Page 40 When you do not have a POE router / hub When you do not have a POE router / hub...
- Page 41 373Z AVN314 (ONVIF) / 304 Megapixel-Netzwerkkameraserie Installationsanleitung Bitte lesen Sie die Anweisungen vor der Inbetriebnahme aufmerksam durch und bewahren sie zum zukünftigen Nachschlagen auf. N30x_V1.1 373Z AVN314 (ONVIF) / 304 Megapixel-Netzwerkkameraserie Installationsanleitung Bitte lesen Sie die Anweisungen vor der Inbetriebnahme aufmerksam durch und bewahren sie zum zukünftigen Nachschlagen auf.
- Page 43 Wichtige Sicherheitshinweise Sämtliche von unserem Unternehmen angebotenen bleifreien Produkte erfüllen die Anforderungen der europäischen Richtlinie zur Beschränkung der Verwendung gefährlicher Substanzen (RoHS). Dies bedeutet, dass sowohl der Herstellungsprozess als auch die Produkte absolut ohne Blei und sämtliche in der Richtlinie aufgeführten gefährlichen Substanzen auskommen.
- Page 44 Haftungsausschluss Wir behalten uns das Recht vor, die Inhalte dieser Anleitung jederzeit zu überarbeiten oder Teile daraus zu entfernen. Wir geben keinerlei Zusicherungen und übernehmen keine rechtsgültige Haftung hinsichtlich Exaktheit, Vollständigkeit oder Nutzbarkeit dieser Anleitung. Die Inhalte dieser Anleitung können ohne Vorankündigung geändert werden.
- Page 45 MPEG 4-Lizenzierung Dieses Produkt ist durch die „MPEG4 Visual Patent Portfolio“-Lizenz für den persönlichen und nichtkommerziellen Einsatz durch den Endkunden zur (I) Codierung von Videodaten in Übereinstimmung mit dem MPEG4-Standard („MPEG-4 Video“) und/oder (II) zur Decodierung von MPEG4-Videodaten, die von einem Endverbraucher zu persönlichen und nichtkommerziellen Zwecken codiert und/oder von einem Videoanbieter, der über eine Lizenz von MPEG LA TO für MPEG4-Videos verfügt, bezogen wurden, lizenziert.
- Page 46 Inhaltsverzeichnis 1. Übersicht..............................1 1.1 Lieferumfang ..............................1 1.2 Rückseite ..............................1 1.3 Statusanzeige ............................... 2 2. Installation & Verbindung..........................3 2.1 Kamera installieren ............................3 2.2 Stromversorgung herstellen.......................... 3 3. Kamerazugriff und Netzwerkkonfiguration ....................4 3.1 Netzwerkverbindung via LAN ........................4 3.2 Kamerazugang via Webbrowser........................11 3.3 Videoeinstellungen............................
- Page 47 Anhang 2 – Mobile Überwachung via EagleEyes ..................26 A2.1 Voraussetzungen............................26 A2.2 Download-Optionen..........................27 Anhang 2 – Mobile Überwachung via EagleEyes ..................26 A2.1 Voraussetzungen............................26 A2.2 Download-Optionen..........................27...
-
Page 49: Übersicht
1. Übersicht 1.1 Lieferumfang □ Netzwerkkamera □ Kamerahalterung □ Installationsanleitung □ Netzteil □ CD-ROM (inklusive Bedienungsanleitungen & der CMS-Software „Video Viewer“) 1.2 Rückseite Ethernet: Hier schließen Sie Ihr Netzwerkkabel an. DC 5V: Hier schließen Sie das mitgelieferte regulierte Netzteil an. Reset: Wenn die Stromversorgung hergestellt ist, halten Sie diese Taste zum Zurücksetzen aller Parameter (inklusive IP-Adresse) auf die werkseitigen... -
Page 50: Statusanzeige
1.3 Statusanzeige Statusanzeige Kameraobjektiv Symbol LAN-Verbindungsstatus Internetverbindungsstatus Systemstatus Während des Immer ein Immer ein Hochfahrens Rücksetzung auf Blinkt Immer aus (250 ms ein, 250 ms aus) Standardwerte Aktualisierung Blinkt Blinkt (250 ms ein, 250 ms aus) (250 ms ein, 250 ms aus) Verbindungsstatus LAN verbunden Immer ein... -
Page 51: Installation & Verbindung
2. Installation & Verbindung 2.1 Kamera installieren 1. Nehmen Sie die bei der Kamera mitgelieferte Halterung und deren Zubehör. 2. Bringen Sie die Basis der Halterung (das runde Ende) dort an, wo Sie diese Kamera installieren möchten; befestigen Sie sie mit den mitgelieferten Schrauben. 3. -
Page 52: Kamerazugriff Und Netzwerkkonfiguration
3. Kamerazugriff und Netzwerkkonfiguration Bitte befolgen Sie vor der Inbetriebnahme dieser Netzwerkkamera die nachstehenden Anweisungen zum Abschließen der Netzwerkverbindungseinstellungen basierend auf Ihrer Installationsumgebung: Zur Konfiguration der Netzwerkeinstellungen müssen Sie die Kamera an Ihrem PC oder Notebook anschließen. Einzelheiten dazu finden Sie im Abschnitt „3.1 Netzwerkverbindung via LAN“... - Page 53 Windows XP-Benutzer: a) Wählen Sie „Start“ „Control Panel“ (Systemsteuerung) „Network and Internet Connections“ (Netzwerk- und Internetverbindungen) „Network Connections“ (Netzwerkverbindungen) (in der „Category View“ (Kategorieansicht)). Netzwerk- und Internetverbindungen Netzwerkverbindungen Windows XP-Benutzer: Wählen Sie „Start“ „Control Panel“ (Systemsteuerung) „Network and Internet Connections“ (Netzwerk- und Internetverbindungen) „Network Connections“...
- Page 54 b) Rechtsklicken Sie unter „LAN or High-Speed Internet“ (LAN oder Hochgeschwindigkeitsinternet) auf „Local Area Connection“ (LAN-Verbindung) und wählen „Properties“ (Eigenschaften). Eigenschaften Hinweis: Bitte aktivieren Sie Ihre LAN-Verbindung, falls sie nicht aktiviert ist. c) Wählen Sie im „General“ (Allgemein)-Register die Option „Internet Protocol (TCP/IP)“...
- Page 55 Windows Vista-Benutzer: a) Wählen Sie „ “ (Start) „Control Panel“ (Systemsteuerung) „Network and Internet“ (Netzwerk und Internet) und rufen das „Network and Sharing Center“ (Netzwerk- und Freigabecenter) auf. Klicken Sie dann auf „Manage network connections“ (Netzwerkverbindungen verwalten) (in der „Category View“ (Kategorieansicht)). Netzwerkverbindungen verwalten b) Rechtsklicken Sie auf „Local Area Connection“...
- Page 56 c) Wählen Sie im „Networking“ (Netzwerk)-Register die Option „Internet Protocol Version 4 (TCP/IPv4)“ (Internetprotokoll Version 4 (TCP/IPv4)) und anschließend „Properties“ (Eigenschaften). d) Wählen Sie im „General“ (Allgemein)-Register die Option „Use the following IP address“ (Folgende IP-Adresse verwenden) und stellen die IP-Adresse wie nachstehend beschrieben ein. Hinweis: Wir empfehlen, zuerst die aktuellen Einstellungen zu notieren und anschließend die angegebenen Änderungen vorzunehmen.
- Page 57 Windows 7-Benutzer: a) Wählen Sie „ “ (Start) „Contorl Panel“ (Systemsteuerung) „Network and Internet“ (Netzwerk und Internet) und rufen das „Network and Sharing Center“ (Netzwerk- und Freigabecenter) auf. Klicken Sie dann auf „Change adapter settings“ (Adaptereinstellungen ändern). Adaptereinstellungen b) Rechtsklicken Sie auf „Local Area Connection“ (LAN-Verbindung) und wählen „Properties“...
- Page 58 c) Wählen Sie im „Networking“ (Netzwerk)-Register die Option „Internet Protocol Version 4 (TCP/IPv4)“ (Internetprotokoll Version 4 (TCP/IPv4)) und anschließend „Properties“ (Eigenschaften). d) Wählen Sie im „General“ (Allgemein)-Register die Option „Use the following IP address“ (Folgende IP-Adresse verwenden) und stellen die IP-Adresse wie nachstehend beschrieben ein. Hinweis: Wir empfehlen, zuerst die aktuellen Einstellungen zu notieren und anschließend die angegebenen Änderungen vorzunehmen.
-
Page 59: Kamerazugang Via Webbrowser
3.2 Kamerazugang via Webbrowser Schritt 1: Öffnen Sie Ihren Webbrowser (bspw. Microsoft Internet Explorer) und geben „http://192.168.1.10“ in das URL-Adressfeld ein. Schritt 2: Geben Sie auf der Anmeldungsseite den Standardbenutzernamen (admin) und das Kennwort (admin) an; tragen Sie den Sicherheitscode aus dem nachstehenden Bild ein. -
Page 60: Videoeinstellungen
3.3 Videoeinstellungen Sobald Sie Zugriff auf Ihre Kamera haben, empfehlen wir, das Bild bei Bedarf anzupassen. Drehen Sie das Kameraobjektiv zum Anpassen der Bildschärfe von Hand (vgl. Abbildung 1). Sie können die Farbe des Videos leicht anpassen, indem Sie rechts oben auf der Echtzeitseite Ihres Webbrowsers auf „Config (Konfiguration)“... -
Page 61: Netzwerkkonfiguration
3.4 Netzwerkkonfiguration 3.4.1 Einstellungen der Netzwerkumgebung Schritt 1: Klicken Sie auf der Echtzeitanzeigeseite Ihres Browsers zum Aufrufen der Konfigurationsseite auf „Config“ (Konfiguration). Klicken Sie dann auf „Camera“ (Kamera) „Camera“ (Kamera). Schritt 2: Legen Sie auf dieser Seite Ihre Installationsumgebung – Indoor (Innenraum) oder Outdoor (im Freien) –... - Page 62 Element Beschreibung Environment (Umgebung) Wählen Sie die aktuelle Umgebung der Kamera zur automatischen Anpassung und Erzeugung von auf die ausgewählte Umgebung angepassten Bildern. Frame Rate Die Bildwiederholfrequenz ermöglicht jedem Betrachter die Anpassung an die Bandbreite des (Bildwiederholfrequenz) Netzwerks. Stellen Sie die gewünschte Bildfrequenz auf das Maximum (FULL (Voll)) oder eine spezifische Bildwiederholfrequenz (1/2;...
-
Page 63: Einstellungen Des Internetzugangs
3.4.2 Einstellungen des Internetzugangs Schritt 1: Klicken Sie zur Auswahl des Verbindungstyps auf „Network“ (Netzwerk) „Network“ (Netzwerk): Static IP (Statische IP) / PPPoE / DHCP. Hinweis: Diese Kamera unterstützt keine POE-Router oder -Hubs. Bei Static IP (Statische IP): a) Geben Sie die von Ihrem Internetanbieter bezogenen Informationen zu „Server IP“ (Server-IP), „Gateway“... -
Page 64: Ddns-Einstellungen
Bei PPPoE: a) Geben Sie den vom Internetanbieter bezogenen Benutzernamen und das Kennwort ein; klicken Sie auf „Save“ (Speichern). b) Fahren Sie mit den DDNS-Einstellungen, wie in „3.4.3 DDNS-Einstellungen“ beschrieben, fort. Bei DHCP: a) Vor Auswahl dieser Option müssen Sie zuerst die Einstellungen des DHCP-Routers abschließen. Nehmen Sie einen Router und verbinden ihn über Ihren PC mit dem Internet (mit der Static IP(Statische IP)- oder PPPoE-Einstellung). - Page 65 Geben Sie Benutzernamen und Kennwort ein, die Sie zur Anmeldung am DDNS-Dienst verwendet haben. Geben Sie dann den Hostnamen ein, den Sie beim Abonnieren des DDNS-Dienstes eingerichtet haben, z. B. headoffice523. Geben Sie Benutzernamen und Kennwort ein, die Sie zur Anmeldung am DDNS-Dienst verwendet haben.
- Page 66 Benutzername zur Anmeldung am DDNS-Dienst Kennwort zur Anmeldung am DDNS-Dienst Schritt 3: Klicken Sie auf „Save“ (Speichern) und melden sich ab. Dann trennen Sie Kamera und PC; verbinden Sie sie separat mit dem Internet. Schritt 4: Geben Sie den gerade notierten Hostnamen in die URL-Adressleiste des Webbrowsers ein;...
-
Page 68: Anhang 1 - Konto Bei Ddns-Dienstanbieter Erstellen
Anhang 1 – Konto bei DDNS-Dienstanbieter erstellen Bei PPPoE oder DHCP: Melden Sie sich zuerst über den Hostnamen an, der auf die IP-Adresse Ihrer Netzwerkkamera verweist. Es gibt viele Webseiten zu kostenlosen DDNS-Dienstanwendungen; nachstehend finden Sie ein Beispiel der DDNS-Kontoeröffnung von der Webseite http://www.dyndns.com. Schritt 1: Rufen Sie http://www.dyndns.com auf und klicken zur Registrierung eines DDNS-Kontos... - Page 69 Schritt 2: Geben Sie sämtliche Daten ein, die zum Einrichten eines Kontos erforderlich sind. Halten Sie sich dabei an die Anweisungen auf der Webseite. ‧ Geben Sie einen Benutzernamen zur Anmeldung ein, z. B. headoffice523. ‧ Richten Sie das Kennwort ein und wiederholen es zur Bestätigung. ‧...
- Page 70 Schritt 3: Das System sendet automatisch eine Bestätigungs-eMail an Ihr eMail-Konto. Bitte lesen Sie diese eMail innerhalb von 48 Stunden und schließen das Verfahren zur Aktivierung Ihres Kontos entsprechend den Anweisungen in der eMail ab. Wenn das Konto bestätigt ist, erscheint „Account Confirmed“ (Konto bestätigt). Ihr Konto ist nun erfolgreich eingerichtet.
- Page 71 Schritt 5: Klicken Sie auf „Add Host Services“ (Hostdienste hinzufügen). Add Host Services (Hostdienste hinzufügen) ‧ Geben Sie einen aussagefähigen Hostnamen ein. ‧ Wählen Sie einen Hostsystemnamen. ‧ Geben Sie die IP-Adresse ein, auf die Sie umleiten möchten. Schritt 5: Klicken Sie auf „Add Host Services“ (Hostdienste hinzufügen). Add Host Services (Hostdienste hinzufügen) ‧...
- Page 72 Notieren Sie den vollständigen Hostnamen, z. B. headoffice523.dyndns.org. Klicken Sie dann zur Abrechnung auf „Add To Cart“ (Zu Warenkorb hinzufügen). Add To Cart (Zu Warenkorb hinzufügen) Hinweis: Dieser Dienst ist kostenlos. Schließen Sie einfach den Abrechnungsvorgang ab; es werden KEINE Zahlungsinformationen angefordert. Schritt 6: Klicken Sie anschließend auf „Activate Services“...
- Page 73 Schritt 7: Kehren Sie zu Ihrem Webbrowser zurück und wählen „Network“ (Netzwerk) „DDNS“. Folgen Sie der Beschreibung unter „3.4.3 DDNS-Einstellungen“ auf Seite 16. Schritt 7: Kehren Sie zu Ihrem Webbrowser zurück und wählen „Network“ (Netzwerk) „DDNS“. Folgen Sie der Beschreibung unter „3.4.3 DDNS-Einstellungen“ auf Seite 16.
- Page 74 Anhang 2 – Mobile Überwachung via EagleEyes EagleEyes ist ein Mobiltelefonprogramm zur Fernüberwachung, das in Verbindung mit unserem Überwachungssystem (DVRs oder Netzwerkkameras) genutzt wird. Es bietet verschiedene Vorteile: Es ist kostenlos (mit Ausnahme von EagleEyes Plus für das iPhone). Es ist mit verschiedenen beliebten mobilen Plattformen, wie iPhone, BlackBerry, Symbian, Windows Mobile und Android, kompatibel.
- Page 75 A2.2 Download-Optionen Besuchen Sie mit Ihrem Mobiltelefon www.eagleeyescctv.com und melden sich an. Hinweis: Bitte versuchen Sie NICHT, EagleEyes von Ihrem Computer herunterzuladen. Wählen Sie anschließend „Software“ und die mobile Plattform Ihres Telefons; EagleEyes wird auf Ihr Telefon heruntergeladen. Bei BlackBerry, Symbian, Windows Mobile & Android: Wählen Sie zum Start des Downloads den Download-Link von der Webseite.
- Page 76 Sobald der Download abgeschlossen ist, wird EagleEyes automatisch dorthin installiert, wo alle Anwendungen standardmäßig auf Ihrem Telefon gespeichert werden (bzw. im angegebenen Verzeichnis). Hinweis: Weitere Informationen zur Konfiguration und Bedienung dieses Programms finden Sie auf unserer offiziellen Webseite www.eagleeyescctv.com. Sobald der Download abgeschlossen ist, wird EagleEyes automatisch dorthin installiert, wo alle Anwendungen standardmäßig auf Ihrem Telefon gespeichert werden (bzw.
Need help?
Do you have a question about the AVN314 and is the answer not in the manual?
Questions and answers