
Related Manuals for Avtech AVN211


Summary of Contents for Avtech AVN211
- Page 1 318Z H.264 NETWORK CAMERA INSTALLATION GUIDE Please read instructions thoroughly before operation and retain it for future reference. N211_211V_quick_V1.0...
- Page 3 IMPORTANT SAFEGUARD All lead-free products offered by the company comply with the requirements of the European law on the Restriction of Hazardous Substances (RoHS) directive, which means our manufacture processes and products are strictly “lead-free” and without the hazardous substances cited in the directive. The crossed-out wheeled bin mark symbolizes that within the European Union the product must be collected separately at the product end-of-life.
-
Page 4: Table Of Contents
TABLE OF CONTENTS 1. OVERVIEW............................1 1.1 Package Content .................................1 1.2 Hardware Overview ..............................1 1.3 Rear Panel ...................................2 2. INSTALLATION & CONNECTION......................3 2.1 Install the Hardware ..............................3 2.2 Connect to power.................................5 3. CAMERA CONNECTION TO INTERNET ....................6 3.1 Camera Access via LAN ..............................6 3.2 Network Configurations via Wizard..........................9 APPENDIX 1 CREATING AN ACCOUNT FOR DDNS SERVICE ............12 APPENDIX 2 API ID APPLICATION FOR SMS MESSAGING...............15... -
Page 5: Overview
1. OVERVIEW 1.1 Package Content □ Network camera □ RJ45 network cable □ Installation Guide □ Adapter □ CD-ROM disc (including user manuals & CMS □ Bracket software “Video Viewer”) 1.2 Hardware Overview... -
Page 6: Rear Panel
1.3 Rear Panel CONNECTOR / BUTTON DESCRIPTION Reset Default This button is hidden in the pinhole. Press and hold the reset button until the network camera rebooted. This will reset all parameters, including the IP address to factory default settings. Power Indicator When the camera is power-supplied, this indicator will be on as red. -
Page 7: Installation & Connection
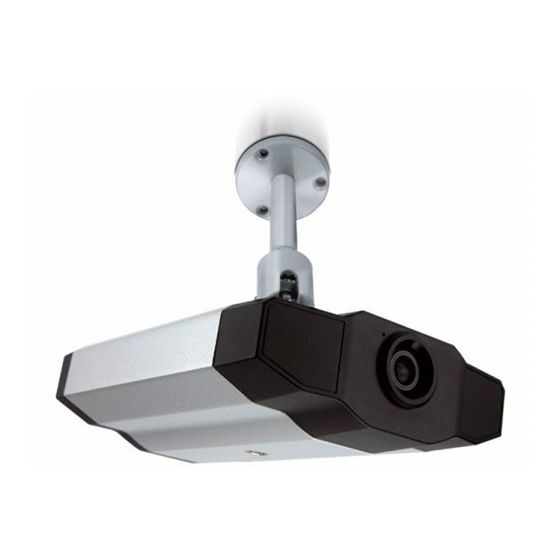
2. INSTALLATION & CONNECTION 2.1 Install the Hardware This camera can be installed in two ways: ceiling-mounted and desktop. During the installation, please make sure the upper side of the camera is always facing up, as shown in Figure 1 below (Regardless of which installation way you’re using). - Page 8 2. Assemble the bracket: a). Align the stem with the central hole of the base, and rotate it to secure, as shown in Figure 3. b). Connect the joint lock to the stem and rotate it to secure, as shown in Figure 4. Figure 3: Connect the stem to the base Figure 4: Connect the joint lock to the stem 3.
-
Page 9: Connect To Power
2.2 Connect to power Plug the supplied power adapter to the camera’s power connector and power outlet. Note: The regulated power adapter is DC12V 1A to operate this device. -
Page 10: Camera Connection To Internet
3. CAMERA CONNECTION TO INTERNET Before using this network camera, please follow the instructions below to finish the network connection settings based on your installation environment: To configure the network settings, you must connect the camera to your PC by LAN. For details, please refer to “3.1 Camera Access via LAN”... - Page 11 For Windows Vista users: a) Select “ ” (start) “Control Panel” “Network and Internet” to enter the “Network and Sharing Center”. Then, click “Manage network connections” (If you’re in “Category View”). b) Right-click on “Local Area Connection”, and select “Properties”. c) In the “General”...
- Page 12 For Windows 7 users: a) Select “ ” (start) “Control Panel” “Network and Internet” to enter the “Network and Sharing Center”. Then, click “Change adapter settings”. b) Right-click on “Local Area Connection”, and select “Properties”. Note: If your local area connection is not enabled, please also enable it. c) In the “Networking”...
-
Page 13: Network Configurations Via Wizard
3.2 Network Configurations via Wizard A quick installation wizard is available via your web browser for password change, date & time settings, and network configurations. Note: You can also change the settings in the system configuration page via your web browser later. - Page 14 Step6: In “Network”, select the network type based on your network environment (Static IP / PPPoE / DHCP), and key in the information needed. Note: This camera doesn’t support POE router or hub. For Static IP: a) Enter the information of “Server IP”, “Gateway” and “Net Mask” obtained from your ISP (Internet Service Provider).
- Page 15 For DHCP: a) Before selecting this option, you need to finish the DHCP router settings first. Get a router and connect it to the Internet via your computer (with Static IP or PPPoE setting). There are different setting methods for different routers. Please refer to their respective user manuals. b) Continue the DDNS setting by clicking the “DDNS”...
-
Page 16: Appendix 1 Creating An Account For Ddns Service
APPENDIX 1 CREATING AN ACCOUNT FOR DDNS SERVICE For PPPOE or DHCP, you should enter the host name which points to the IP address of your network camera for login first. Besides using the default DDNS service, you can also apply for new DNS services. - Page 17 Step4: Click “login”, and enter the user name and password you preset before to log in. Step5: Click “Add Host Services”. ‧Input a meaningful host name. ‧Choose a host name. ‧Enter the IP address you want to redirect. Note down the whole host name, for example, headoffice523.dyndns.org. Then, click “Add To Cart”...
-
Page 19: Appendix 2 Api Id Application For Sms Messaging
APPENDIX 2 API ID APPLICATION FOR SMS MESSAGING To allow the camera automatically sending a text message when an event happens, you need to apply an API ID from Clickatell, one mobile messaging company, first. Note: The SMS messaging is not totally free. You will be charged starting from the 11 message. - Page 20 Email address and ask you to activate your account. Click the link in the Email to complete account activation, and enter the login page as follows. Enter the password you set, and click “Login”. Step3: Enter the mobile phone number (including your country code) you want the text message to be sent, and click “SEND ACTIVATION CODE”.
-
Page 21: Appendix 3 Mobile Surveillance Via Eagleeyes
APPENDIX 3 MOBILE SURVEILLANCE VIA EAGLEEYES EagleEyes is a mobile phone program used with our surveillance system (DVRs or network cameras) for remote surveillance. It has several advantages: It’s free (Except EagleEyes Plus for iPhone). It’s compatible with several popular mobile platforms, such as iPhone, BlackBerry, Symbian, Windows Mobile and Android. - Page 22 Note: For more details about configuring and operating this program, please visit our official website www.eagleeyescctv.com.
Need help?
Do you have a question about the AVN211 and is the answer not in the manual?
Questions and answers