Table of Contents
Advertisement
Quick Links
Advertisement
Table of Contents

Related Manuals for Hughes 9202


Summary of Contents for Hughes 9202
- Page 1 Hughes 9202 User Guide 3004149-0001 Revision C 8 November 2012...
- Page 2 Copyright © 2012 Hughes Network Systems, LLC All rights reserved. This publication and its contents are proprietary to Hughes Network Systems, LLC. No part of this publication may be reproduced in any form or by any means without the written permission of Hughes Network Systems, LLC, 11717 Exploration Lane, Germantown, Maryland 20876.
-
Page 3: Table Of Contents
About this User Guide ..........................2 Package Contents ............................2 Minimum System Requirements for Laptop/PC ..................3 Getting Started ............................3 Using the Hughes 9202........................4 Setup ................................4 Quick start ..............................5 Web UI quick start ..........................6 Connecting the terminal to the computer ....................7 Connecting by Ethernet .......................... - Page 4 Globe ICON ............................18 SIM PIN entry ............................18 Multiple Users ............................19 Information Messages ..........................19 Using the Web UI ........................21 Accessing the Web UI ..........................21 Home page ............................... 22 Connections.............................. 24 Manage Contexts..........................25 Automatic Contexts..........................27 Manage APNs ............................
-
Page 5: Understanding Safety Alert Messages
Understanding safety alert messages Safety alert messages call attention to potential safety hazards and tell you how to avoid them. These messages are identified by the signal words DANGER, WARNING, CAUTION, or NOTICE, as illustrated below. To avoid possible property damage, personal injury or in some cases possible death, read and comply with all safety alert messages. -
Page 6: Safety Symbols
Safety symbols The generic safety alert symbol calls attention to a potential personal injury hazard. It appears next to the DANGER, WARNING, and CAUTION signal words as part of the signal word label. Other symbols may appear next to DANGER, WARNING, or CAUTION to indicate a specific type of hazard (for example, fire or electric shock). - Page 7 Use of non-approved accessories may result in loss of performance, damage to the Satellite Terminal, fire, electric shock or injury. Battery Use only a battery approved by Hughes. Risk of explosion if battery is replaced by an incorrect type. Dispose of used batteries according to the instructions.
- Page 8 Pacemakers The various brands and models of cardiac pacemakers available exhibit a wide range of immunity levels to radio signals. Therefore, people who wear a cardiac pacemaker and who want to use a Satellite Terminal should seek the advice of their cardiologist. If, as a pacemaker user, you are still concerned about interaction with the Satellite Terminal, we suggest you follow these guidelines:...
-
Page 9: Introduction
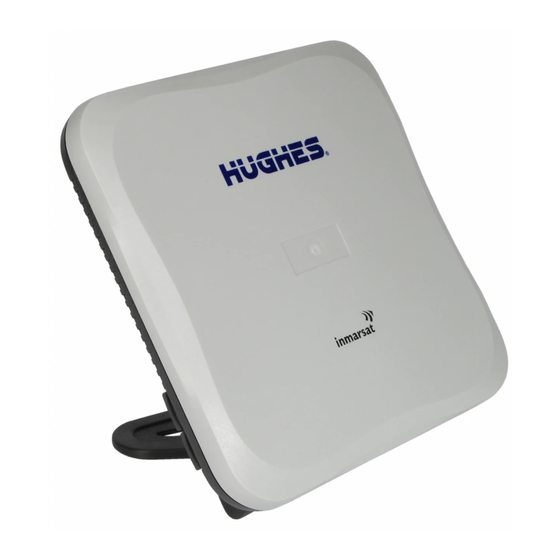
Introduction Overview The Hughes 9202 Land Portable Terminal is the latest Hughes BGAN product to provide reliable satellite connectivity over the Inmarsat BGAN satellite network. The Hughes 9202 comes in a very small and portable package, and it allows the user to send and receive IP packets via Ethernet and WLAN interfaces. -
Page 10: About This User Guide
Inmarsat website where a copy of the ‘Inmarsat LaunchPad Guide’ can be downloaded: http://www.inmarsat.com/Support/BGAN/LaunchPad.aspx?l anguage=EN&textonly=False Package Contents When you unpack the Hughes 9202 Land Portable Terminal Kit package, you will find the following: Hughes 9202 terminal Introduction 3004149-0001 Revision C... -
Page 11: Minimum System Requirements For Laptop/Pc
PC Support for Ethernet or WLAN (802.11b or b/g). 100 MB of free hard disk space if using LaunchPad. Only LaunchPad version 5.0.1 or newer supports the 9202. Getting Started This guide is the simplest and quickest way to connect to the BGAN network. -
Page 12: Using The Hughes 9202
Using the Hughes 9202 Setup Install the USIM card supplied by your service provider in the battery compartment. Install the battery in the terminal unit and then charge using the supplied AC/DC converter. Using the Hughes 9202 3004149-0001 Revision C... -
Page 13: Quick Start
Power on the unit by pressing the power button for at least 2 seconds. Since the Hughes 9202 terminal is a portable device, you must first obtain a GPS fix and point the terminal to the satellite before setting up a data connection with the network. -
Page 14: Web Ui Quick Start
9202’s internal web server. From your terminal equipment (e.g. PC), enter 192.168.128.100 as the URL to access the Hughes 9202’s home page. (See Using the Web UI starting on page 21 for more details.) The Terminal Status page gives you all the information you need to point and register with the network. -
Page 15: Connecting The Terminal To The Computer
Connecting the terminal to the computer You can connect your computer to the 9202 with one or more of the following interfaces Ethernet WLAN Integrated Services Digital Network (ISDN) During initial setup, the terminal can only be configured using an Ethernet connection. -
Page 16: Wep Security
Wireless Encryption Protocol (WEP), MAC address filtering, and no SSID broadcast features for added security. Once the WLAN is “Enabled” and configured, any device with a WLAN interface can detect the 9202’s WLAN SSID, and connect to it automatically. WEP Security ... -
Page 17: Connecting By Isdn
You can do this from the menu or the Telephony page of the Web UI. You can connect an analog phone directly to the RJ-14 port with an RJ-11 cable to make voice calls. Using the Hughes 9202 3004149-0001 Revision C... -
Page 18: Coverage Map
#. For example, to dial a number in the USA, enter: 0018005551234# (00 + Country code + phone number+ #) RJ-11 and ISDN handsets cannot be used at the same time. You must configure the 9202 to ISDN or analog telephony mode. When switching between ISDN and analog telephony modes, the 9202 must be rebooted. -
Page 19: Using The Lcd And Keypad
Using the LCD and Keypad LCD Display and Keypad The 9202 terminal has an LCD display that provides status information about the terminal. It has a four button keypad that allows you to control the operational features of the terminal without the need of a PC or a browser. -
Page 20: Lcd Status Display
An “extra long press” of more than five seconds of the power button will cause a hardware enforced power down. All buttons start or restart the backlight time period, even if they have no function in the current context. LCD Status Display Pointing mode display By default, at power up the LCD shows the pointing display. -
Page 21: Idle Mode Display
unit to attempt to register with the BGAN network (note: if audible pointing tones were enabled during pointing, they will automatically turn off once you attempt to register). Idle mode display Once the unit exits pointing, it will automatically attempt to register with the network. -
Page 22: Status Messages
Description HUGHES 9202 On screen during power up Powering Off Displayed while the 9202 is powering down Too Hot Unit is too hot; if not corrected, a temporary thermal shutdown may occur Battery Hot Battery is too hot; reduce temperature or turn off unit to avoid damage to the battery... -
Page 23: Menu Navigation
Menu Navigation From the status display, a short press of the Accept button takes the display to menu mode and displays the first of a circular list of menu items. The menu structure is shown in Table 2 below. Use the scroll button to scroll between options and the accept button to select options. - Page 24 Level 1 Level 2 Level 3 Level 4 Comment Connection Starts display with the Standard current setting 32 Kbps 64 Kbps 128 Kbps Disconnect Information New message count # New Msgs or No New Msgs 13.32861° N format {Latitude} or Blocked 23.45833°...
-
Page 25: Display Icons
Display Icons Battery Icon The battery icon displays the estimated life of the battery while under battery power. The battery icon also displays the charging state while under external power. Three segments: 75% to full Two segments: 50% to 74% One segment: 25% to 49% Zero segments: 10% to 24% Zero segments, flashing: 0% to 9%... -
Page 26: Wireless Lan Icon
Wireless LAN Icon The wireless LAN icon displays the state of the WLAN feature. Off if Wireless LAN operation is turned off. On if Wireless LAN is on. Wireless LAN Lock Icon The lock icon displays the state of encryption for the WLAN feature. -
Page 27: Multiple Users
Multiple Users Multiple TEs can be connected to the 9202, e.g. via the wireless LAN interface or if an external hub or switch is used. To use the menu and keypad to control connections for all the TEs, press the User button and the display will cycle through the IP addresses of the connected TEs. - Page 28 Reboot Req'd The change to the telephony settings will not take effect until the UT is rebooted At any time during operation, this message is possible on the LCD: Battery Low! The battery is extremely low. Plug in the DC cord to avoid automatic power off when the battery level becomes critical.
-
Page 29: Using The Web Ui
Using the Web UI Accessing the Web UI The Hughes 9202 UT includes its own internal Web User Interface (Web UI). To access the Web UI, open your favorite Web Browser and type in the internal IP address of the UT e.g. -
Page 30: Home Page
Home page The Home page shows the current terminal status and allows you to setup your initial data connection. On the left side of the page is the Status bar. These items are updated automatically when the status of any item changes. 1. - Page 31 Details shows the status of the connection for this TE. Visible Satellites shows the satellites visible from your current location and the pointing information. The following figure shows how the UI looks if you activate a Standard connection. Use the Disconnect button to deactivate your connection.
-
Page 32: Connections
Connections Along the top of all 9202 Web UI pages are icons representing the categories of available sub-pages. The Connections icon has three main configuration areas (sub-pages) to select from: Manage Contexts, Automatic Contexts, and Manage APNs. The following section reviews each of these pages. -
Page 33: Manage Contexts
Manage Contexts The Manage Contexts page under the Connections icon allows the user to setup and configure PDP contexts (data connections) for any TE that is connected to the UT. It also shows you all current Active Connections. Open a New Connection field - To open a new connection, select the row and enter the required data: Owner –... - Page 34 APN - The APN is read from the SIM card, but if you have other APNs defined (go to the Manage APNs page), you can use the down arrow to select a different APN. Username/Password: Some Service Providers require a username and password to be used when setting up a connection.
-
Page 35: Automatic Contexts
Automatic Contexts This web page allows you to use Automatic Context Activation (ACA) in two different ways; One way is to use a static IP addresses in the TE device so you can establish an automatic PDP context with any QoS that is offered by the network (upper half of the web page). - Page 36 If you want to setup additional ranges of addresses, please follow the same instructions as above. You cannot overlap the IP address ranges. If you do, an error message will pop-up telling you that you have an overlap region. Check all of the ranges for overlaps and try again. When you are finished, click on Update Static Settings and you should see a message saying “Operation Successful”.
- Page 37 To activate this feature, select “On” or “Data” from the drop down list under DHCP Automatic Contexts section, select the DHCP range of addresses to use if you don’t want to use the default (.101 -.199). The APN will be the default APN configured on the Manage APNs page.
-
Page 38: Manage Apns
Manage APNs Some SIM cards are provisioned with multiple APNs, so you can use this page to pre-configure those additional APNs if needed. Once the APN is defined, you can select it from the drop down list without having to put in the username and password every time. - Page 39 parenthesis. This APN will now be available to use from any APN drop down menu. User Name /Password: Some Service Providers require a username and/or password to be used when setting up a connection. This is often required when using Static Global IP addresses assigned by the Service provider.
-
Page 40: Sms
You can manage SMS text messages from the SMS pages. You must have a valid Service Center number configured in order to send SMS messages – see the SMS Settings Page. Send/Receive The Send/Receive page allows you to view your Inbox messages and Compose a new message. -
Page 41: Saved Drafts
Saved Drafts The Saved Drafts page allows you to view previously saved messages. After editing a message you can resave (Save) or send the message (Send). You can also compose a message from this page. Using the Web UI 3004149-0001 Revision C... -
Page 42: Sent Messages
Sent Messages The Sent Messages page allows you to view previously sent messages. Again, you may need to periodically delete messages to prevent the SIM from filling up. You can also compose a new message from this page. Using the Web UI 3004149-0001 Revision C... -
Page 43: Sms Settings
SMS Settings On the SMS Settings page you can configure the default settings for messages. You must have a valid Service Center number configured in order to send messages. The default Service Center number is +870772001799. In the Remote SMS Feature section you can enable the unit to receive and act on special remote control SMS messages. - Page 44 this feature and do not change the password, it is possible that other people may be able to send control messages to your unit. Remote control messages will be deleted after they are received and will not be stored in the SIM. The Default SMS destination is the SMS address that is used when sending any of the pre-defined text messages from the keypad.
-
Page 45: Settings Page
Settings page General Setup This page allows the user to configure various parameters of the UT. A description of each item follows: Terminal Startup – by default Bypass Antenna pointing is not selected but if the terminal is permanently mounted you can select this option to bypass antenna pointing on subsequent power ups. -
Page 46: Ip Address/Dhcp Settings
IP Address/DHCP Settings Terminal Local IP Address: This section allows the user to change the local IP address of the terminal from the default 192.168.128.100 IP address. All four octets are available to change. Once the local IP address is changed on this page and applied, the IP address ranges for the DHCP server, the Manage Context page and ACA page will also be changed automatically. -
Page 47: Nat Mode
Lease Time when idle: Idle-mode DHCP Lease Time refers to the DHCP lease time when the UT is not connected to the network. This parameter allows the user to change the default time (60 seconds) that the DHCP lease to the TE is good for. This parameter was introduced because problems with some devices that will not accept a short DHCP lease time. -
Page 48: Wireless Lan
LaunchPad and the Web UI will lose and reestablish their connections to the terminal as the IP address is changed. To make the IP address change happen quickly a short DHCP lease should be used. The terminal defaults the DHCP lease time to 60 seconds in idle and connected mode. -
Page 49: Wireless Lan Security
Enable Wireless LAN Interface: Turns the Wireless LAN interface on/off. The default is off (unchecked). Network Name (SSID): The default is “Hughes 9202”, but you can change it to whatever you want. You can “hide”/prevent the SSID broadcast on the WLAN Security page Network Region: There is only one region for all countries. - Page 50 To add the detected MAC address, click on the address to highlight it and then click Add. It will now show up in the Allowed MAC Address field. Using the Web UI 3004149-0001 Revision C...
-
Page 51: Telephony
Telephony Telephony Settings: The Telephony port field controls whether the terminal is enabled for Analog or ISDN telephony. By default, this field is set to Analog only. After changing this field the terminal must be rebooted to activate the change. If neither telephony mode is required, select “Analog only”... - Page 52 With the Telephony port set to ISDN, you can establish ISDN data communication by connecting your ISDN equipment directly to the BGAN Terminal’s ISDN port with an ISDN cable (which is the same as the Ethernet cable). The Telephony page allows you to configure Device MSN Settings.
-
Page 53: Security
General Telephony Settings: Call Progress Tones: Two options are provided for call progress tones. Option 1 is the default tones used in the USA. Option 2 provides an alternative set of tones that are used in Brazil and some European countries. With Option 2 the ringing voltage changes to 36V rms on 48V DC rather than just 48V rms AC. - Page 54 The Enter Administrator Password pop down screen appears the first time the user tries to edit a parameter if the Administrator password is enabled. Using the Web UI 3004149-0001 Revision C...
-
Page 55: Features
Features You can enable special features from this page. SMS Remote Management allows the unit to receive and act on special remote control SMS messages. Before this feature can be used you must obtain the feature activation code from your service provider and activate the feature by entering the UT specific code in the Feature Activation Code field. -
Page 56: Usage Page
Usage Page This web page provides an estimate of the amount of Packet Switched data that was sent and received, along with time spent on streaming connections and CS calls. The data is broken up into two types: Trip Usage Statistics: The trip counter is similar to the trip counter on your vehicle. -
Page 57: Support Page
Support Page This web page allows you to display technical and support information about the terminal and retrieve logs. Using the Web UI 3004149-0001 Revision C... - Page 58 System Log Event Log Packet Log Circuit Log These files can be e-mailed to Hughes directly for fault analysis if the user experiences any problems. Using the Web UI 3004149-0001 Revision C...
- Page 59 UT. Hughes highly recommends that the user exhaust all possible troubleshooting procedures before using this feature Reboot terminal: Clicking this button reboots the terminal so...
- Page 60 Using the Web UI 3004149-0001 Revision C...
-
Page 61: Troubleshooting
Troubleshooting Problem Possible Cause Possible Solution Terminal will not turn on Battery not connected properly Check battery is correctly installed Connect AC/DC converter to Battery not charged charge the battery Cannot get SIM card to lock SIM is not correctly oriented for insertion Ensure the SIM is pressed into position firmly into the SIM slot... - Page 62 Problem Possible Cause Possible Solution ISDN device connected to The calling party is using the main MS-ISDN Make sure that the calling terminal will not ring on in- phone number to call the ISDN device. party is using the correct MS- coming calls Device may need the 3.1KHz audio or the ISDN number for the...
- Page 63 Problem Possible Cause Possible Solution Terminal’s location limits visibility of 3 or Terminal does not obtain a Move the terminal to a GPS fix more GPS satellites. location where there are few obstructions such as trees or tall buildings, so that as much as possible of the sky is visible.
-
Page 64: Technology Overview
Technology Overview The Global Positioning System (GPS) uses 24 orbital satellites to determine the position of the Terminal anywhere on the globe. Obtaining a GPS Fix In normal operation, a GPS receiver, such as that built in to the terminal, needs to be able to receive signals from at least four satellites so that it can then calculate a latitude, a longitude and an altitude –... -
Page 65: Gps And Bgan Registration
GPS and BGAN Registration BGAN uses the accurate position and timing information obtained from GPS to help ensure efficient registration of a BGAN Terminal with the BGAN network. ISDN The Satellite Terminal provides an ISDN (Integrated Services Digital Network) interface to connect devices for Circuit Switched voice and data services. - Page 66 1. After registration with the network, the user activates a PDP Context using an application on the computer or Terminal, and requests sufficient radio resources (that is, power and bandwidth) to support the context activation procedure. 2. Once the resources are allocated, the Terminal sends the Activate PDP Context request to the Core Network.
-
Page 67: Technical Specifications
1. Performance may be affected by a wide range of factors. 2. The Hughes 9202 broadband satellite terminal operates on DC power which can be supplied by an AC or DC power source. To comply with safety requirements, the terminal must be powered with only an AC/DC adapter or DC power adapter supplied or approved by Hughes. -
Page 68: Declaration Of Conformity
The equipment will also carry the Class 2 equipment identifier: The technical documentation relevant to the above equipment will be held at: Hughes Network Systems, 9605 Scranton Road, Suite 500, San Diego, CA 92121, USA (name and address of EU representative) -
Page 69: Eu Rohs (Restriction Of Hazardous Substances) Directive
Unless otherwise noted, all products, assemblies, and sub- assemblies manufactured by Hughes and its sub-contractors will be compliant with this directive and any subsequent revisions or amendments. EU WEEE (Waste... -
Page 70: Glossary
Glossary APN: An Access Point Name (APN) provides access to an external network. By default, the SIM Card in your terminal is configured with the APN of your Service Provider. You may want to configure further APN’s if you have arranged with your Service Provider to use more than one SIM Card. - Page 71 IP Address: An Internet Protocol address, or IP address, is a number that uniquely identifies the computer accessible over a TCP/IP-based LAN or the Internet that is sending or receiving information. An IP address is a 32-bit numeric address written as four numbers, separated by periods and each number is between 0 and 255.
- Page 72 Flow Template allows multiple PDP Contexts to be associated with the same PDP address. UT (User Terminal): The user terminal is the BGAN modem device, i.e. the Hughes 9202. SIM Card: Your BGAN Service Provider supplies you with a Universal Mobile Telecommunications System Subscriber SIM (SIM) Card.
-
Page 73: Application Note - Phone/Fax
Application Note – Phone/Fax 1. The Hughes 9202 RJ14 port allows the connection of both a telephone and a fax or modem at the same time (BGAN circuit switched network restrictions mandate that only one is in use at any given time). - Page 74 Hughes suggests one of the following splitters for applications requiring both voice and fax/modem. No splitter is needed when accessing the Hughes 9202 RJ11 connector for voice services only. Two line splitter from Calradstore http://www.calradstore.com/70-489.html Omnicron Electronics MTJ-S2 http://www.omnicronelectronics.com/digital/mtj-s2.htm Radio Shack 2-Line 4–conductor Splitter/Adapter http://www.radioshack.com/product/index.jsp?productId=3900035...
Need help?
Do you have a question about the 9202 and is the answer not in the manual?
Questions and answers