Table of Contents
Advertisement
Quick Links
Advertisement
Table of Contents

Subscribe to Our Youtube Channel
Related Manuals for Ultratec CapTel 840i


Summary of Contents for Ultratec CapTel 840i
-
Page 1: Setup Guide
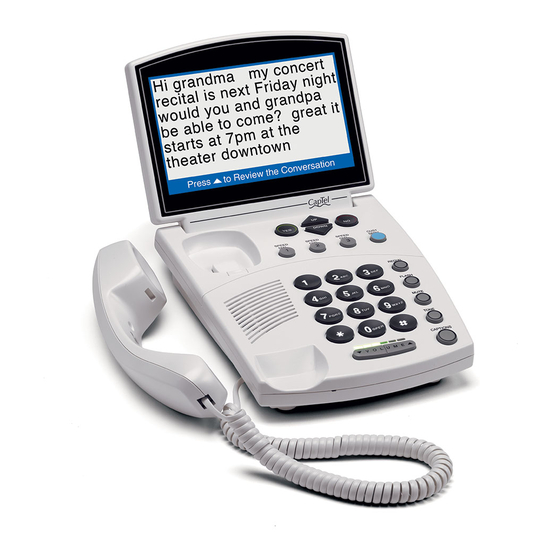
Setup Guide CapTel 840i ® 305-018200 2/12... - Page 2 CapTel 840i ® Your new CapTel 840i is like any other telephone in many ways: it connects to a telephone line, you talk and listen to your callers, and you place/answer calls the same way you use any other telephone.
- Page 3 If someone else installed your home computer or your Internet connection, you may want to consult with that person as you set up the CapTel 840i. You can also try the Troubleshooting suggestions at the end of this guide to help with any problems.
-
Page 4: Table Of Contents
Step 6 Setting the Time and Date ......18 Step 7 Record Personal Greeting Message ...19 (Optional) Troubleshooting .............21 How CapTel 840i Works You talk back and Captions of the call forth with callers over the are provided over the Telephone Connection. -
Page 5: Step 1 Requirements
Before you set up your phone, make sure you already have: Telephone Service Connects to the CapTel 840i via a telephone cord using a standard RJ11 connection. Your telephone service can be any of the following: • Standard analog service •... -
Page 6: Step 2 Choosing A Location
• Power Adapter – Guide and CapTel to plug into a How-to Guide wall outlet • Warranty Important! Use only the power adapter that came in the box with your CapTel 840i Card • CHOOSING A LOCATION Installation Help: 888-269-7477... -
Page 7: Step 3 Connect The Telephone Line
Plug one end of the telephone cord into the telephone jack labeled “Line 1” Located on the back (top) edge of the CapTel 840i. Be sure to use the telephone cord that came with your new CapTel 840i phone. Plug the other end of the telephone cord into a... -
Page 8: Step 4 Connect To A Power Outlet
Plug the power adapter cord into the power socket labeled “Power” Located on the back (top) edge of the CapTel 840i. Be sure to use the power adapter that came with your new CapTel 840i. Plug the power adapter into a wall outlet or power strip The CapTel display screen will light up to let you know power is connected. -
Page 9: Step 5 Connect To Your Internet Service
For Wired Installations 1. Plug one end of the Ethernet cable into the jack labeled “Ethernet”, located on the back (top) edge of the CapTel 840i. Be sure to use the Ethernet cable that came with your new CapTel 840i phone. - Page 10 Example 1: All of the connection outlets (telephone, Internet, and power) are available in the same room that you are planning to use the CapTel 840i. Example 2: If there is not an available Ethernet jack in your DSL or Cable Modem, you will need a router or switch that lets you connect more than one device to the Internet.
- Page 11 Case 2: Outlets Located in Separate Rooms If your Internet connection is located in a different room from where you plan to use your CapTel phone, choose one of the following examples that best matches your setting. Example 1: Use a wireless "WiFi" router (See page 13 for set up instructions). Installation Help: 888-269-7477 CONNECT TO YOUR INTERNET SERVICE •...
- Page 12 Example 2: Use Powerline Network Adapters Outlet should not have other devices plugged in. * Powerline Network Adapters (sold separately) are available from a computer electronics store or online from WCI (www.weitbrecht.com) at an additional cost. IMPORTANT: The Powerline Network Adapters cannot be plugged into a power strip, surge protector, extension cord or GFI-type outlet.
- Page 13 Example 3: Install an Ethernet Wall Jack Some newly-constructed homes are wired for Internet connectivity by having Ethernet cable jacks built right into a wall outlet (similar to how an electrical outlet or a telephone outlet would work). For approximately the same cost as buying Powerline Network Adapters, your telephone company or Internet Service Provider can install Ethernet jacks/wiring in your home or office directly in the room that you plan to use your new CapTel telephone.
- Page 14 Example 4: Extra Long Ethernet Cable You can use an extra long Ethernet cable (longer than the standard Ethernet cable that came with your CapTel telephone) to bridge the distance between your phone location and your Ethernet jack. Extra long Ethernet cables (sold separately) are available from a computer electronics store or online from WCI (www.weitbrecht.com) at an additional cost.
- Page 15 For Wireless/WiFi Installations If you have a wireless (“WiFi”) network in your home or office, your CapTel phone can connect to the Internet using the WiFi network. You do not need to plug in an Ethernet cable. To set up your CapTel for WiFi use, you will need to know the name of your wireless network (also called the SSID) as well as any passwords that may be necessary to access the network.
- Page 16 NOTE: If someone helped install the wireless network in your home or office, it may be helpful to consult with them as you set up your CapTel phone. 1. The display asks, Press SETUP - CONNECT TO INTERNET YES for WiFi Setup. Press the YES button.
- Page 17 4. If required, CapTel asks for the password to access your WiFi network. NOTE: Where to find your WiFi password? This is the same password you need to access the WiFi network from any computer or mobile device. The password (sometimes called a “pass phrase” or “network key”) is assigned by your Internet Service Provider or by whomever set up your wireless network.
- Page 18 Entering a Network Manually If you do not see your network name in the list of available WiFi networks, you can manually enter the name of the network you want to use. 1. Use the DOWN arrows to SSID Security Channel Signal highlight Enter Network...
- Page 19 4. If required, CapTel asks for the password to access your WiFi network. Use the Please Enter WPA Password: dialing pad to enter the letters or 7547534933_ numbers of your password (see TIPs on page 16 for help entering your password from the dialing pad).
-
Page 20: Step 6 Setting The Time And Date
TIP: To change the time from AM to PM, press the 2 key for “AM” and the 7 key for “PM”. You are now ready to make/receive calls. Make a test call to check that your CapTel 840i is working properly. • SETTING THE DATE AND TIME... -
Page 21: Step 7 Record Personal Greeting Message (Optional)
(Optional) Before you begin making/receiving calls, you may want to record a personal greeting message for the CapTel 840i Answering Machine. If you do not want to record a personal greeting, the Answering Machine will use a pre-recorded greeting that says, “Hello. No one is available to take your call. Please leave a message after the tone.”... - Page 22 CapTel will send out your personal greeting whenever the Answering Machine picks up an incoming call. NOTE: For more information about the Answering Machine, please see the CapTel 840i How-to Guide. • RECORD A GREETING MESSAGE Installation Help: 888-269-7477...
-
Page 23: Troubleshooting
Confirm that the power adapter is plugged completely into the socket on the back (top) edge of the CapTel 840i phone and into a working wall outlet or power strip/surge protector. If plugged into a power strip, confirm that the power strip is turned “on”. - Page 24 NOTE: The Ethernet connection with the CapTel 840i ONLY provides the captions. The CapTel 840i still requires telephone service to work. Connecting your CapTel 840i to the Internet via the Ethernet jack or via WiFi does not give you Internet phone service. Whatever type of telephone service you use is still needed to make and answer calls.
- Page 25 Internet? If so, you may need to connect a router to your DSL or cable modem, and then connect the CapTel 840i to the router. If you’ve plugged the CapTel 840i into a router, does your router support DHCP? Check the specifications in the instruction manual that came with your router.
- Page 26 This may take up to five minutes to fully reset. Next, turn on the router, making sure it is fully reset. Then plug in the CapTel 840i AC adapter, all in that order. Wait for the logo screen to appear. The Captions button should be lit (press the Captions button to turn it on if needed).
- Page 27 If your network SSID is not included in the list of networks available, try moving your CapTel 840i to an area closer to your wireless router. As you try new locations, use the UP/DOWN arrow to highlight “Refresh Network List” and press the YES key to select.
- Page 28 Press the DOWN arrow until Change Network Connection is highlighted. Press the YES button to accept. CapTel asks if you are sure you want to leave this Network? Press YES to confirm. CapTel will scan for available WiFi networks, and display of list of networks within range.
- Page 29 CapTel shows information CURRENT NETWORK INFORMATION about the current WiFi setup. SSID: 2WIRE269 Check the signal strength Security: WPA-PERSONAL Channel: 8 diagram next to the “Power” Power: -48dBm setting. This indicates how strong the signal strength is between the CapTel and your Press NO to exit wireless router.
- Page 30 N O T E S • NOTES Installation Help: 888-269-7477...
- Page 32 CapTel 840i Installation Help Line: 888-269-7477...
Need help?
Do you have a question about the CapTel 840i and is the answer not in the manual?
Questions and answers