Table of Contents
Advertisement
Dear Correct Craft Owner:
Congratulations on your purchase of a Ski Nautique 206. You have chosen a
very special boat. This boat was designed not only by our talented team of
engineers, but by Andy Mapple, the world's greatest slalom skier of all time.
Since 1925, we have manufactured some of the finest products boat builders
can produce.
Your boat was manufactured with the latest marine technology and materials.
You have bought into a legacy handed down by W. C. Meloon over 78 years
ago. His dedication to building boats to the glory of God remains true today as
the cornerstone of our commitment in bringing to you the finest in water sports
boats. We continue to lead this industry in technology and design innovation.
Our heritage is a source of pride. Years of experience, including that of four
generations of Meloons have gone into the building of your boat. We hope
that you will enjoy it to the fullest.
Take a moment to review this owners manual for your boat. We have
assembled this manual to inform you about your boat and educate you further
on boating. There are many tips and tricks on care and maintenance sprinkled
throughout the manual, along with some cautions that will apply to your boat.
Boating is very important to us and we would like you to enjoy many years of
boating in your boat.
Welcome into the Nautique family.
Sincerely,
Walter N. Meloon
President/Chief Executive Officer
Trust in the Lord with all thine heart;
and lean not unto thine own understanding.
In all thy ways acknowledge him,
and he shall direct thy paths.
Proverbs 3: 5-6
i
Advertisement
Table of Contents

Related Manuals for CORRECT CRAFT Ski Nautique 206


Summary of Contents for CORRECT CRAFT Ski Nautique 206
- Page 1 Dear Correct Craft Owner: Congratulations on your purchase of a Ski Nautique 206. You have chosen a very special boat. This boat was designed not only by our talented team of engineers, but by Andy Mapple, the world’s greatest slalom skier of all time.
-
Page 2: Table Of Contents
A B L E O F O N T E N T S Chapter 1. Overview ..........Chapter . Page Dash Pod and Console Layout........1.1 Specifications..............1.1 Keyless Ignition and Serial Switching .......1.2 Multiple Keyless Ignition Codes........1.3 Primary User Code............1.3 Erasing the User Codes ..........1.4 Key Functions.............1.5 Dash Pod Switches .............1.6 Bilge Pump ..............1.6... - Page 3 Wiring .................7.1 Long Trips ..............7.2 Chapter 8. Warranty and Owner Responsibility..8.1 Chapter 9. Service Records & Order Forms Warranty Transfer Application ........9.1 Nautique Friend Program ...........9.2 Nautique Service Center locations......9.3 NOA Membership Application........9.4 Dash Plaque Order Form ..........9.6 Glossary ..............9.7...
-
Page 5: Dash Pod And Console Layout
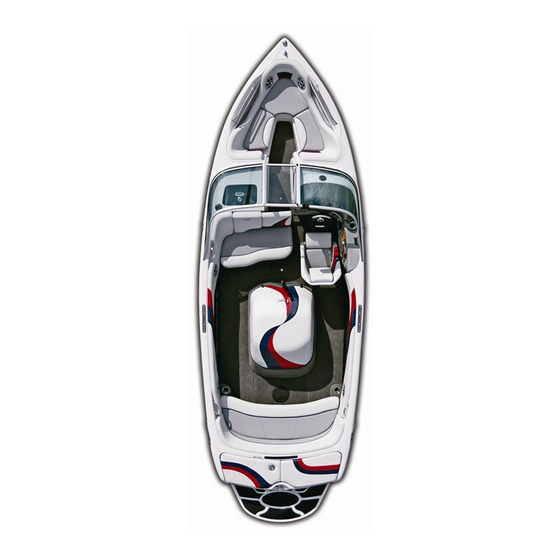
Let’s start by taking a look at the dash pod to familiarize yourself with the locations of the gauges and switches. For 2003 Correct Craft offers three different packages of options for your Nautique. These packages feature equipment or gauges. Based on your purchase package, these may be standard on your boat. -
Page 6: Keyless Ignition And Serial Switching
CAUTION: The keypad and switch control box will be damaged beyond repair if the boat battery cables or the main power leads to the keypad and switch control box are reversed. Be sure to use caution and avoid reversing these connections. Keyless Ignition and Serial Switching The ignition switch system is keyless and has three modes of operation. -
Page 7: Multiple Keyless Ignition Codes
the user presses and holds the start button, power is supplied to the ignition and starter for as long as the user holds the start button down. All accessory buttons are operational in this mode as well. Pressing the stop button will shut off the engine and the unit is then put back in unlocked mode. -
Page 8: Erasing The User Codes
putting the system in code programming mode. The system indicator light will be flashing. Enter a code from two to eight characters long and press start. For verification, re-enter the code and press start again. The system indicator light should stop flashing and stay on. -
Page 9: Key Functions
will lock it without entering a code. To program a primary user code, make sure the system indicator light is off and then press the 1/2 button and the 7/8 button at the same time. This puts the system in code programming mode. The system indicator light will be flashing. -
Page 10: Dash Pod Switches
Heater The heater key controls four different heater functions. Pushing and releasing the “heater” key scrolls from “off” to “low speed” to “medium speed” to “high speed” and back to “off.” The indicator light for this key is on if the heater is running at any of the three speeds. -
Page 11: Bilge Pump Only Mode
push the bilge pump key on the keypad, the pumps will come on and run for several moments to “sense” if there is water in the bilge. If there is water in the bilge, it will remain on until the water is pumped out. If there is no water in the bilge, it will turn off. -
Page 12: Navigation Lights
• Speedometer Your Nautique is equipped with a speedometer by Faria. For a detailed analysis of your speedometer, refer to the Faria speedometer section at the end of this chapter or in Chapter 2. -
Page 13: Emergency Cut-Off Switch
• Emergency Cut-off Switch There is an emergency cut-off switch for the protection of you and your passengers. The clip at the end of the cord must be attached securely to the driver. Check the system by attaching the clip to the switch, start the boat and then pull the clip off the switch. - Page 14 It is very important to read and be familiar with the information contained in these labels and to always adhere to the boat operation practices described on them. The United States Coast Guard issued a SAFETY ALERT on August 28, 2001 that covers some of the issues of improper use of the boarding platform.
-
Page 15: Pylon
then noted, “As I explained in the previous advisory, “Teak/Drag Surfing” entails individuals taking hold of the swim platform of a vessel while it is underway. After a large wake builds up, they let go of the platform and body surf. -
Page 16: Lifting Rings
THEREFORE DOES NOT INFLUENCE MAXIMUM CAPACITY, UNLIKE PORTABLE BALLAST TANKS OR WEIGHTS, WHICH MUST BE INCLUDED AS PART OF THE GEAR WEIGHT. CAUTION: A FULLY LOADED NAUTIQUE WILL HANDLE DIFFERENTLY THAN A LIGHTLY LOADED ONE. DRIVE AND TURN YOUR NAUTIQUE WITH THIS IN MIND. 1.12... -
Page 17: Hull Identification Number
OPERATION OF THE BOAT, POSSIBLY RESULTING IN INJURY TO PERSONS INSIDE AND/OR OUTSIDE OF THE BOAT. AVOID PERSONAL INJURY. DO NOT OVERLOAD YOUR NAUTIQUE. Hull Identification Number The hull identification number is a requirement of the U.S. Coast Guard for boat manufacturers. -
Page 18: Fueling
Fueling Your Nautique features a port and starboard fuel fill cap. You may fill from either side. Remove the slotted fuel fill cap to put gas in the boat. There is a special “key” for this cap. Use caution when fueling your boat. -
Page 19: Stereo Option
Clarion speakers or a Kicker upgrade speaker system. Correct Craft mounts all of its stereos in the glove box on the dash of your Nautique. A standard or digital remote control is mounted on the lower left side of the dash pod. -
Page 20: Flight Control Tower
Ballast Tanks Two tank options are available in your Ski Nautique 206. The trick tank option, which is a single tank of approximately 220 pounds and the large tank (wakeboard) option, which is two tanks of approximately 400 pounds. The... -
Page 21: Flight Clips
3. Re-install all hoses, put the caps back on the drains hoses, and put the rest of the boat together. Flight Clips One set (4) of flight clips will hold a maximum of 4 wakeboards. Do not attempt to overload Flight Clips with more than one piece of equipment per slot. - Page 22 User tips: Always return to neutral and let the engine idle for two or three seconds before turning the engine off Regularly check the black servo knob on the control unit to make sure it is turned snugly in a clockwise direction. To do this, turn the engine off and lift the top half of the engine box.
- Page 23 Serial Bus for CorrectCraft ® Pleasurecraft GM Engines Owner’s Manual Visual /Audible Alert Messages Easy Installation Waterproof Connections Easy to Read Digital Displays Easy to use Depth Sounder Multiple Interfaces IS0151 ISO151A ECR#2370 05/10/02...
- Page 24 Initial Setup Selecting the Fuel Tank Size Page 2 Operation General Page 2 Speedometer/Depth Sounder Speedometer Calibration Page 3 Dual Pitot Operation Page 4 Depth Sounder Page 4 Canceling Depth Alarms Page 4 Shallow Alarm Page 5 Deep Alarm Page 5 Keel Offset Page 6 Units...
- Page 25 System Select from one of the following fuel tank capacity options: The system consists of: • One Gateway box to interface with 29 gallon MEFI IV ECU and external senders 30 gallon (default) and sensors. 35 gallon • One 5” Tachometer with Fuel 39 gallon Monitor 50 gallon...
- Page 26 measured by the GPS or radar. Adjust the Speedometer / Depth Sounder speedometer pointer by pressing the “Up” The Serial Bus Speedometer / Depth or “Down” buttons until the speedometer Sounder provides both the functions of a matches the GPS or radar speed. speedometer and a depth sounder.
- Page 27 The speedometer also measures the water Depth Sounder pressure in the pitot tubes when power is The depth sounder is turned on and off first turned on. This measurement is with the ignition switch. The depth subtracted from later readings to correct sounder can also be turned off at any time, for the pressure caused by the weight of while in depth display mode, by pressing...
- Page 28 The display will show “S X.X” Down Button Button alarm will resume if the condition that caused the alarm is not corrected. The which is the current setting for the shallow operator can cancel the alarm as many alarm. Pressing the “Up” or “Down” times as necessary, until the condition is buttons will change the shallow setting.
- Page 29 Holding the “mode M” button in for 2 seconds will save the new deep setting and change the display back to the normal depth mode. Set to zero to disable alarm. Down Button Button Mode buttons will cycle through the choices. Button Pressing and holding the “mode M”...
-
Page 30: Depth Sounder
Speedometer Display Sequence Quick Quick Press Press Pitot Status Air Temperature Hold (optional) Adjust Save Quick Press Water Temperature No Save (optional) Quick Press Depth Sounder Hold Shallow Alarm Set Deep Alarm Set Keel Offset Select Units Figure 1 Page 7... - Page 31 Tachometer / Fuel Monitor RPM limit Knock sensing system malfunction The Serial Bus Tachometer / Fuel Monitor Ignition system malfunction instrument provides both the functions of a Manifold pressure sensor (MAP) tachometer and a fuel - engine monitoring malfunction system. The analog tachometer is a stepper Manifold temperature sensor motor instrument which looks like a malfunction...
- Page 32 Hours Remaining Instrument Lights The “time remaining” display shows how The navigation light switch must be on for many hours the boat can operate based on the instrument lights to function. The “Up” the fuel remaining in the tank and the and “Down”...
- Page 33 Tachometer Display Sequence Quick Quick Press Press Hourmeter Voltmeter Quick Quick Press Press Hours Remaining Oil Pressure Quick Press Engine Temperature Figure 2 LCD Alarm Condition Displays. messages, simultaneously press both the Alarm messages will be displayed on the “Up” and “Down” buttons on the Tachometer LCD display.
- Page 34 Severe Conditions- Includes a Flashing Red Light Low Battery Voltage (Flashing Red Light) High Engine Temperature (Flashing Red Light) Low Oil Pressure (Flashing Red Light) Low Fuel Level (Flashing Red Light) RPM Reduction in Progress (Flashing Red Light) Warnings Engine Speed Limiter Active Knock Detection System Malfunction Spark Delivery System Malfunction Manifold Pressure System Malfunction...
- Page 35 Faria Serial Bus Installation and Wiring Guide (Pleasurecraft Engines) The system consists of: • One Gateway box to interface with MEFI IV ECU and external senders and sensors. • One 5” Tachometer with Fuel Monitor • One 5” Speedometer with Depth Sounder •...
- Page 36 Faria Serial Bus Gateway Typical Power Connections Black Purple Switched Power Battery Figure 3 Typical Instrument Connections PJ0018 Note: To help reduce moisture in the gauges be sure to install plug PJ0018 in all open connectors. Figure 4 Page 14...
- Page 37 Faria Serial Bus Gateway Pleasurecraft GM Engine ECU Connection MEFI IV Engine ECU Figure 5 Transducer and Pitot Tubes Connections Blue Blue Black Black(shield) Airmar Depth Sounder Black (shield) Blue Port Pitot Starboard Pitot SN0020 Figure 6 Page 15...
- Page 38 Faria Serial Bus Gateway Miscellaneous Connections 1 3 5 Brown Brown (Bare) Lt. Blue White White Dk. Blue Pink Water Fuel Nav. Instrument Temp. Pressure Surface Tank Light Backlight Sender Temp. Sender Sender Switch Control Sender Figure 7 Page 16...
- Page 39 Table1 Connector Contacts Pin Function Wire Color Not used Battery Positive (always on)* Switched Power from Ignition Purple switch circuit Ground Black Faria® Bus Data and Instrument Power Not Used (PJ0015) Not Used (PJ0016) MEFI IV Engine ECU Not Used Starboard Pitot Not Used Port Pitot...
- Page 40 Notes...
- Page 41 Copyright 2002 by the Thomas G. Faria Corporation, Uncasville, CT USA No part of this publication may by reproduced in any form, in an electronic retrieval system or otherwise, without the prior written permission of the company. Faria® is the trademark of the Thomas G. Faria Corporation...
- Page 43 Chapter 3 E N G I N E V E R V I E W It is the owners responsibility to check all of the items below to be certain all preparation steps have been completed before you use your boat. Checking these items periodically will soon become habitual.
- Page 44 boat care section. • Check to make sure there are no ropes, gear bags, arms/legs near the belts and pulleys of the motor. Severe injury can result by becoming entangled in the belts of the engine while it is running. Make sure the boat is deep enough in the water to supply the water intake with water to cool the engine.
-
Page 45: Fuel Injected Engine Does Not Start
If the fuel injected engine does not start: • If the fuel filter has just been changed or if the fuel system has been run dry, it will be necessary to cycle the ignition start button from the “stop” position to the “start”position several times until the fuel pumps build adequate pressure. -
Page 46: Break In Procedure
After your initial run: • Check oil level in the engine • Check the transmission oil level • Check for leaks (water, fuel and oil) • Engine frame bolts and mounts are tight • Throttle and shift control operates correctly WARNING: If the engine backfires when you try to start it, the problem may be more serious than flooding. -
Page 47: General Notes
E N E R A L N O T E S The maximum RPM of the engine at full throttle under normal load conditions can be controlled by propeller pitch, diameter and design. It is essential that the propeller does not underload or overload the engine. Propeller Overloading, resulting in low RPM’s at wide open throttle will give poor performance, poor fuel economy and eventually result in engine damage. -
Page 49: Chapter 4. Cautions And Warning Labels
Chapter 4 C A U T I O N S A N D A R N I N G A B E L S Cautions and Warning Labels The following are the warning/information labels that should be on your boat. It is your responsibility to maintain the readability of these labels and to follow their warnings. - Page 50 Inside Engine Box & on Fuel Tank Water Strainer Fuel Fill Throttle Control...
- Page 51 Transom Warning Cross Member/Boarding Platform Engine...
- Page 52 Flame Arrestor Flight Clips Walk Thru Windshield Dash Pod...
- Page 53 Fuel Control Cell...
- Page 54 Side Console...
- Page 55 Flight Conrol Tower...
- Page 56 Ski Nautique 206 Capacity Plate...
- Page 57 Chapter 5 O A T H A N D L I N G G U I D E L I N E S A F E T Y R E G U L A T I O N S • Always observe the rules of the road and use common sense and courtesy on the water.
- Page 58 • There are no brakes to help you stop your boat. Boat speed, water current and wind can affect your ability to stop safely. The driver must use caution and sound judgment at all times to maintain control of the boat, especially to maintain a reasonable distance from all potential areas of danger.
-
Page 59: Bilge Pump
Ski Nautique Open Bows and Air 196’s. To keep the pump from getting clogged, remove any debris that you find in the bilge. Wash the bilge with a good biodegradable household detergent or a bilge cleaner available at a marine supply store. -
Page 60: Propeller
PROPELLER Here are a few tips for the installation of the propeller. CAUTION: A propeller can be very sharp so be careful when you handle it. It’s a good idea to wear a pair of protective gloves when handling any propeller. - Page 61 3. When the castle nut is tight, look for the cotter pin hole and insert the stainless steel cotter pin through the shaft. (see illustration). With a light tap, drive the cotter pin down through the slot and hole so that its rounded top rests snugly against the hole.
-
Page 62: Stuffing Box
PROPELLER SHAFT STUFFING BOX The stuffing box is designed to prevent water from coming through the through-hull fittings. These are found on the propeller shaft where the shaft goes through the hull and also where the rudder comes up through the bottom of the boat. -
Page 63: Through-Hull Fittings
5. Using wrenches as in step three, re-tighten the locking nut against the gland nut. Make sure that it is VERY TIGHT. If you still experience leakage, consult your dealer. 6. Loosen one of the hose clamps at the rear of the assembly. Rotate the assembly until the safety wire eyelet is on top, and retighten the hose clamps. -
Page 64: Salt Water Boating
Salt Water Boating IF YOU USE YOUR BOAT IN SALT WATER, FLUSHING YOUR ENGINE WITH FRESH WATER AFTER EVERY USE IS A MUST. Flushing the system by running the boat in fresh water is a good way to flush the engine, but it must be done immediately. If this is not possible, Correct Craft offers a optional fresh water flush kit. -
Page 65: Winterizing Your Boat
Winterizing Your Boat Winter storage procedures vary depending on climate, type of storage and length of storage. Check with your dealer/storage facility manager for their advice on what works best in your climate. When storing your boat up on a rack system, it is important that the racks adequately support the hull bottom. -
Page 66: Gelcoat Care
This minimizes overflow of fuel from the fuel vent. Not only can this overflow be hazardous, but it will also adversely affect decals and pin striping on the boat. Always allow room in the tank for fuel expansion caused by temperature differences. -
Page 67: Teak Care
Teak Care Teak is a unique wood used for marine applications. It is an open cell wood that is highly resistant to the dry-rot associated with many other woods and is also highly resistant to marine organisms. We do not recommend coating the teak on your boat with any kind of varnish or polyurethane coatings. -
Page 68: Vinyl Care
Vinyl Care and Cleaning Correct Craft has selected the finest marine grade vinyl for your Nautique. It is important to keep it clean at all times. There are some substances that will stain the vinyl if you leave them on for even a short period of time. Remove any contaminant and clean the area immediately. -
Page 69: Tunable Rudder
TUNABLE RUDDER The Tunable Rudder is designed to offer easy adjustment of steering. This system utilizes a composite tuning foil which is located at the upper aft corner of the rudder blade. To adjust the foil a Phillips head screwdriver will be needed. - Page 70 6.12...
-
Page 71: Hitch
Chapter 7 R A I L E R R A I L E R I N G Hitch If you don’t already have a trailer hitch installed on your vehicle, you should go to a reputable installer to have the proper size hitch installed. Always use a hitch rated with the appropriate capacity to match the trailer and boats gross weight. -
Page 72: Long Trips
trailer. Your boat is not designed to carry exceptionally heavy loads. This can adversely effect the proper balance of the boat/trailer combination and cause tire failure and/or loss of control. • If your boat is equipped with a bow winch, make sure that the boat is properly located on the trailer and the winch strap/cable is tight. - Page 73 Chapter 8 ORRECT CRAFT LIMITED WARRANTY OATS AND NGINES AS ORIGINALLY MANUFACTURED INSTALLED BY ORRECT RAFT The Correct Craft warranty is backed by a family tradition of boat building experience since 1925. Lifetime Limited Warranty Correct Craft, Inc. warrants to the original purchaser of each new Correct Craft boat that, under normal authorized use, the deck, hull and stringer system shall remain free from structural defect in material and workmanship for as long as the boat is owned by the original purchaser.
- Page 74 program, ski school or ski show. • Normal maintenance of boat or engine, or any part thereof, including but not limited to alignment, adjustments, connectors, tune-up and parts, saltwater/brackish water corrosion, and wear items including, but not limited to, non-skid material, battery, bushings, packing material, belts, bulbs, filters, seals, gaskets, o-rings, water pump impellers.
- Page 75 you also have other rights which may vary from state to state. To the extent that your state does not allow any exclusion or limitation expressed herein, such exclusion or limitation will not apply to you. All other allowable limitations or exclusions shall apply to you. Note: This warranty is expressly conditioned upon the completion and return of the warranty registration card to Correct Craft, Inc.
- Page 76 Chapter 9 REQUEST FOR WARRANTY TRANSFER OF CORRECT CRAFT, INC. BOATS ** A COPY OF THE PURCHASE RECEIPT MUST BE INCLUDED ** Correct Craft's Lifetime Limited Warranty against structural defects in the hull, deck and stringer of model 2003 boats can be transferred, for a nominal fee, to the second purchaser within five (5) years from the date of sale to the first purchaser.
-
Page 77: Nautique Friend Program
“NEW OWNER SATISFACTION SURVEY”. For the completion and return of this form, we offer a first anniversary gift of a Nautique Gear T-shirt. It is our desire to keep in touch with our Correct Craft family of boat owners. We value our owners’... -
Page 78: Nautique Service Centers
If you find that the information contained in this owners manual does not answer your specific question, then we invite you to contact your nearest dealer or your Nautique Service Center for answers or necessary service. A list of the Nautique Service Centers is given below, with the areas that they service. - Page 79 T-shirt, Hat, Decals and Patches, Lapel Pin, Certificate and Membership Card, and subscription to our Nautique News and NOA Newsletter. The Nautique News, Correct Craft’s own magazine, is a great source for latest news about the company, our products, activities and current Nautique Gear wear.
- Page 80 Membership Application (Owner)Name__________________________________________________ T-shirt ___S ___M ___L ___XL Address_______________________________________________________ City ________________________________ State _______ Zip __________ Phone # (H) __________________________ (W)________________________________ Boat Model __________________________ Hull Number__________________________ Family Member #1: ________________________ T-shirt ___S ___M ___L ___XL Family Member #2: ________________________ T-shirt ___S ___M ___L ___XL Family Member #3: ________________________ T-shirt ___S ___M ___L ___XL Please upgrade my free Individual Membership to:...
-
Page 82: Glossary
Glossary Aft Toward, at, or near the stern Anode An electrode carrying a positive charge Athwartship Across the boat, at right angles to the fore and aft centerline Ballast Any solid or liquid weight placed in a boat to increase the draft, to change the trim. - Page 83 Line All rope in a boat or on the dock is referred to as “line”. Load waterline The waterline on the boat’s hull where it is designed to float Mid ship (amidship) In the vicinity of the mid-length of a boat, technically the exact half way between the bow and the stern Port The left hand side of the boat when looking forward Opposite to starboard...
Need help?
Do you have a question about the Ski Nautique 206 and is the answer not in the manual?
Questions and answers
What are the specifications for a replacement battery for my 2007 Air Team Ski Nautique?
@Shawn McArdle This is an Air Team 206 Ski Nautique. The year is 2007.
A suitable replacement battery for a 2007 Correct Craft Ski Nautique 206 should be a starting battery, as the original used was an automotive starting battery. Since the boat is primarily used for skiing and occasional stereo use (stock 4-speaker system for 1–2 hours), a high-quality marine starting battery with sufficient cold cranking amps (CCA) to start the GT-40 engine is recommended.
Although exact battery specifications are not listed, choose a 12-volt marine starting battery with:
- Cold Cranking Amps (CCA): Around 600–800 CCA
- Group size suitable for the battery compartment
- Maintenance access to check and refill distilled water
- Corrosion-resistant terminals
Ensure the battery fits securely in the existing tray and matches the boat’s electrical system.
This answer is automatically generated