Table of Contents
Advertisement
Quick Links
Quick Guide
XX264-20-00
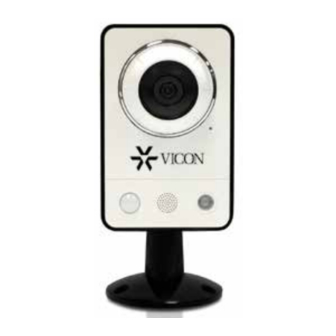
V905-CUBE HD Mini-Cube
Network Camera
Vicon Industries Inc., 89 Arkay Drive, Hauppauge, New York 11788
Tel: 631-952-2288 Fax: 631-951-2288 Toll Free: 800-645-9116
24-Hour Technical Support: 800-34-VICON (800-348-4266) UK: 44/(0) 1489-566300
Vicon Industries Inc. does not warrant that the functions contained in this equipment will meet your requirements or that the
operation will be entirely error free or perform precisely as described in the documentation. This system has not been designed
to be used in life-critical situations and must not be used for this purpose.
www.vicon-security.com
Document Number: 8009-8264-20-00
Issued: 413
Product specifications subject to change without notice.
Copyright © 2013 Vicon Industries Inc. All rights reserved.
Advertisement
Table of Contents

Summary of Contents for Vicon XX264-20-00
-
Page 1: Network Camera
24-Hour Technical Support: 800-34-VICON (800-348-4266) UK: 44/(0) 1489-566300 Vicon Industries Inc. does not warrant that the functions contained in this equipment will meet your requirements or that the operation will be entirely error free or perform precisely as described in the documentation. This system has not been designed to be used in life-critical situations and must not be used for this purpose. - Page 2 These units should only be installed by a qualified technician using approved materials in conformance with federal, state, and local codes. Read these instructions thoroughly before beginning an installation. Always refer to Vicon’s website to assure you have the most up-to-date manual, www.vicon-security.com.
-
Page 3: Camera Dimension
• Rear View Name Description The camera is equipped with a PIR sensor that has a maximum range of PIR Sensor 16 ft (5 m) for detecting movement in the dark. The camera is equipped with a microphone and speaker. Two-way audio Microphone/Speaker support allows for remote users to listen in on an area and communicate with visitors or intruders. -
Page 4: Installation
2. Installation The network camera is ready for desk-top installation with the stand provided. The stand screws into the hole provided on the back of the camera. 2.1 Connection • Connecting to the RJ-45 Connect a standard RJ-45 cable to the network port of the network camera. Generally a cross-over cable is used for direct connection to PC, while a direct cable is used for connection to a hub. - Page 5 Connect the network camera / device to the network and power up. Start SmartManager utility (Start>All programs>SmartManager>SmartManager); the main window will display. After a short while any network devices connected to the network will be displayed in the list. Select the camera on the list and click right button of the mouse. The pop-up menu displays as below.
-
Page 6: Operation
3. Operation The network camera can be used with Windows® operating system and browsers. The recommended browsers are Internet Explorer®, Safari®, Firefox®, Opera® and Google® Chrome® with Windows. Note: To view streaming video in Microsoft® Internet Explorer, set your browser to allow ActiveX controls. -
Page 7: Access From The Internet
3.2. Access from the Internet Once connected, the network camera is accessible on your local network (LAN). To access the network camera from the Internet you must configure your broadband router to allow incoming data traffic to the network camera. To do this, enable the NAT-traversal feature, which will attempt to automatically configure the router to allow access to the network camera. -
Page 8: Control Toolbar
The resolution drop-down list allows the selection of the most suitable video resolution to be displayed on live view page. The protocol drop-down list allows the selection of the combination of protocols and methods to use depending on your viewing requirements and on the properties of your network. -
Page 9: Resetting To The Factory Default Settings
When accessing the network camera for the first time, the “Admin Password” dialog appears. Enter your admin name and password, set by the administrator. Note: If the password is lost, the network camera must be reset to the factory default settings. See “3.6 Resetting to the Factory Default Settings”. - Page 12 Vicon Industries Inc. Corporate Headquarters 89 Arkay Drive Hauppauge, New York 11788 631-952-2288 800-645-9116 Fax: 631-951-2288 Vicon Europe Headquarters Brunel Way Fareham, PO15 5TX United Kingdom +44 (0) 1489 566300 Fax: +44 (0) 1489 566322 Vicon Germany Kornstieg 3 D-24537 Neumuenster...

Need help?
Do you have a question about the XX264-20-00 and is the answer not in the manual?
Questions and answers