Table of Contents
Advertisement
Advertisement
Table of Contents

Subscribe to Our Youtube Channel
Related Manuals for Douwe Egberts Cafitesse 700


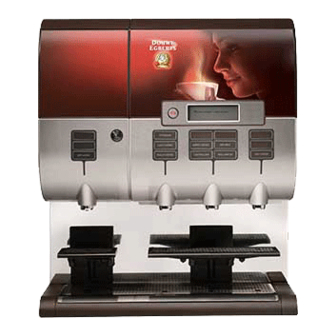
Summary of Contents for Douwe Egberts Cafitesse 700
- Page 1 Operator Manual Cafitesse 700 36172400 02.2010...
- Page 2 01.2006...
-
Page 3: Table Of Contents
Contents CONTENTS INTRODUCTION ............................. 4 SAFETY INSTRUCTIONS ........................5 HACCP Guidelines ..........................7 TECHNICAL DATA ..........................8 DISPENSER COMPONENTS ......................... 9 OPERATION ............................10 Putting into Operation ........................... 10 Switching the Dispenser off ........................10 Delivery of Beverages ........................... 10 Delivery Options ............................ -
Page 4: Introduction
Introduction INTRODUCTION • The dispenser has especially been developed • The dispenser must be placed on a table or for commercial applications. a counter. The dispenser is excellently suited for the quick and easy delivery of high quality coffee • On customer’s demand, different dispenser and other hot drinks. -
Page 5: Safety Instructions
Safety Instructions SAFETY INSTRUCTIONS General notes • The dispenser may not be subject to frost duri- ng operation, storage and transport: • Before putting the dispenser into operation, the - In order to prevent damage due to frost, the operator manual must be carefully read and service technician must completely drain the fully understood. - Page 6 Safety Instructions Hygiene Electrical connection / Water connection • Observe the instructions given on the packs • If the power supply cable of the dispenser is damaged it may only be replaced by a work- regarding correct handling and storing of the shop approved by the manufacturer, as special product packs (BIB).
-
Page 7: Haccp Guidelines
Safety Instructions HACCP Guidelines Guidelines • For correct operation of the dispenser, at least the guidelines mentioned below must be observed. The operator is held responsible for the correct operation. Storage of the Cafitesse products +6 °C • Refer to the Cafitesse pack for storage instructions (fig. 1). •... -
Page 8: Technical Data
Technical Data TECHNICAL DATA Dimensions: Version Version Version for cup for pot for large pot Height: 707 mm/27.8 in 808 mm/31.8 in 915 mm/36.0 in Width: 692 mm/27.2 in 692 mm/27.2 in 692 mm/27.2 in Depth: 450 mm/17.7 in 450 mm/17.7 in 450 mm/17.7 in Weight: Version for cup: ~ 62.5 kg/137.8 lbs empty, ~ 84.0 kg/185.2 lbs filled... -
Page 9: Dispenser Components
Dispenser Components DISPENSER COMPONENTS FRONT/REAR SIDE 1 - Housing cover, tiltable 9 - Stop button 14 - Water connection for 2 - Touch screen 10 - Cup carrier café cool (option) 3 - Drink selection buttons (Version for pot) 15 - Dispenser door 4 - Outlet spout (left-hand side, 11 - Dispenser foot (Option) 16 - Mechanical lock... -
Page 10: Operation
Operation OPERATION PUTTING INTO OPERATION • Open the water tap and plug in the mains plug. • Wait until the correct ingredient storage temperature is reached. The display indicates a corresponding message. T e a • Insert the product packs (1). Please observe the M i l product stickers (2) when doing so (fig. -
Page 11: Delivery Options
Operation DELIVERY OF BEVERAGES Delivery of beverages by directly actuating drink selection buttons • Depending on the dispenser model and programming, drink delivery is triggered by Please make your selection 1) - making a corresponding pre-selection (e.g. portion size or drink strength) on the touch screen (fig. -
Page 12: Adjusting The Cup Stop
Operation ADJUSTING THE CUP STOP • Open the dispenser door and use the ON/STANDBY/CLEAR switch to activate the STANDBY mode. • Insert the stop (1) in the openings of the cup carrier or the drip grid (fig. 15). • Adjust the stop (1) according to the size of the vessel, so that its centre is positioned exactly underneath the outlet (fig. -
Page 13: Entering And Exiting The Operator Mode
• The user is prompted through the different menus by pressing the corresponding fields on the touch screen. Cleaning and flushing is required within 4 h 0 min Please make your selection Please make your selection Douwe Egberts Coffee Systems small medium large small medium large... -
Page 14: Operating The Touch Screen
Operation LCD screen MAIN OPERATOR MENU: select sub menu xxxxxxxxx xxxxxxxxx xxxxxxxxx xxxxxxxxx xxxxxxxxx xxxxxxxxx xxxxxxxxx xxxxxxxxx xxxxxxxxx xxxxxxxxx xxxxxxxxx xxxxxxxxx DRINK CNTRS DRNK PRICES CLEANING xxxxxxxxx xxxxxxxxx xxxxxxxxx xxxxxxxxx BLOCK KEYS STRENGTH DATE&TIME Shifting the displayed area on the LCD screen HAPPY HOUR ENERGY SVNG CLEAN.MMNTS... -
Page 15: Cleaning And Maintenance
Cleaning and Maintenance CLEANING AND MAINTENANCE GENERAL NOTES • A special cleaning agent must be used for • For hygienic and technical reasons, the cleaning, which is approved by the food dispenser must be cleaned regularly. The intervals are defined in the program settings. industry. -
Page 16: When Is Cleaning Required
Cleaning and Maintenance WHEN IS CLEANING REQUIRED? Cleaning is due When 'flushing' or 'cleaning and flushing' is required, the symbol will be indicated on the display (fig. 21). Please make your selection small medium large • Touch the symbol on the screen. The time Cleaning and flushing is required remaining for the cleaning process will be within 4 h 0 min... -
Page 17: Starting The Cleaning Programs Without Operator Tag
Cleaning and Maintenance STARTING THE CLEANING PROGRAMS WITHOUT OPERATOR TAG Start • Simultaneously touch the upper two corners of the screen for more than 2 seconds (fig. 24). Please make your selection small large Due or overdue FLUSHING: If 'cleaning' or 'flushing & cleaning' is due or Please place an empty 3 l/0.75 gal bin overdue, the corresponding program will start under all 3 product outlets and FLUSH. -
Page 18: Cleaning And Flushing
Cleaning and Maintenance CLEANING & FLUSHING (4 STEPS) If the 'cleaning & flushing' program is started, step 1 is indicated on the display (fig. 27). CLEANING&FLUSHING Step 1 of 4 Please remove all product packs from the ingredient storage. • Open the dispenser door. •... - Page 19 Cleaning and Maintenance When all product packs are reinserted, step 3 is indicated on the display (fig. 31). CLEANING&FLUSHING Step 3 of 4 Please remove trough and lid and clean them or use an exchange kit. • Remove trough and lid from the dispenser. Clean the removed parts (see chapter "Cleaning Trough and Lid") or us an already cleaned exchange kit (hygiene kit) (fig.
-
Page 20: Flushing
Cleaning and Maintenance FLUSHING When the 'FLUSHING' program was started FLUSHING: - „FLUSH WATER SIDE“ can be selected to flush Please place an empty 3 l/0.75 gal bin the hot water outlet under all 3 product outlets and FLUSH. STATUS: last flushing was successful - „FLUSH PRODUCT SIDE“... -
Page 21: Cleaning Trough And Lid
Cleaning and Maintenance During the flushing process the display indicates Flushing all 3 product outlets..the following message (fig. 40): CAUTION: HOT LIQUIDS The program automatically returns to the delivery mode after the flushing process. • Proceed a test delivery for each hot drink (fig. -
Page 22: Options
Options OPTIONS MAGNETIC ADAPTERS FOR SMALLER DRAINAGE FOOT PRODUCT PACKS • The dispenser can be equipped with a • For the use of 1.25 l/0.33 gal product special foot to drain off liquids from the drip packs, special magnetic adapters (1) are tray.
Need help?
Do you have a question about the Cafitesse 700 and is the answer not in the manual?
Questions and answers