
Related Manuals for Douwe Egberts CAFITESSE 500


Summary of Contents for Douwe Egberts CAFITESSE 500
- Page 1 CAFITESSE 500/014 SERVICE MANUAL s t o I N G te r h o t www.coffeefast.com...
- Page 2 Copyright © All Rights Reserved. This manual may not be translated or copied or reproduced in any form or by any means in whole or in part without the prior written consent of Douwe Egberts Coffee Systems. This manual is intended for internal use only.
- Page 3 Service Manual Cafitesse 500 This Service Manual is valid for machines of the type CFT014 Cafitesse 500/A2. January 2001...
- Page 5 Fault Diagnosis Programming Functions Water System Brewing System Dosing System Product Delivery Cooling System Housing Power Supply and Control System External Options Payment Systems Preventive Maintenance Service Procedures Service Information Modification Instructions Spare Parts List © 2001 Douwe Egberts Coffee Systems...
-
Page 6: Table Of Contents
Service Manual Cafitesse 500 Preface and Safety Instructions Preface and Safety Instructions Contents Preface/ How to use the manual ............. 2 1.1.1 General ...................... 2 1.1.2 Structure of the Manual ................3 1.1.3 Definition of Options and Accessories ............4 Safety Instructions ................... -
Page 7: Preface/ How To Use The Manual
Service Manual Cafitesse 500 Preface and Safety Instructions Preface and Safety Instructions 1.1 Preface/ How to use the Manual 1.1.1 General This service manual is intended for trained This service manual is not to teach service technicians who have attended the technical details about this dispenser, but it training courses for this dispenser. -
Page 8: Structure Of The Manual
Service Manual Cafitesse 500 Preface and Safety Instructions 1.1.2 Structure of the Manual Chapter The service manual is divided into 10 sections numbered from 1 to 10. Subsections Sections can be divided into subsections. Section 5 is therefore divided into 9 subsections (A, B, etc.), each describing a... -
Page 9: Definition Of Options And Accessories
Service Manual Cafitesse 500 Preface and Safety Instructions When the dispenser is subject to changes, General information: consecutively numbered Service Information sheets will inform you on these changes. The concept of this manual has been These are to be filed in chapter 8 in the structured in order to be applicable for Service Manual. -
Page 10: Safety Instructions
Service Manual Cafitesse 500 Preface and Safety Instructions 1.2 Safety Instructions Hazard intensity levels This subsection is intended as an overview of the warnings and instructions used in There are three different levels of hazard this manual that must always be observed. - Page 11 Service Manual Cafitesse 500 Preface and Safety Instructions DANGER: Never insert the power supply WARNING: The dispenser must be plug of the dispenser into a connected to the drinking wet or damp socket. The plug water supply and to the...
- Page 12 Service Manual Cafitesse 500 Preface and Safety Instructions WARNING: The dispenser must be cleaned CAUTION: The dispenser must not be regularly for hygiene reasons used when the water supply is and to guarantee perfect interrupted because the boiler operation. Take care of sharp will not be refilled.
- Page 13 Service Manual Cafitesse 500 Preface and Safety Instructions Preface and Safety Instructions Contents Preface/ How to use the manual ............. 2 1.1.1 General ...................... 2 1.1.2 Structure of the Manual ................3 1.1.3 Definition of Options and Accessories ............4 Safety Instructions ...................
-
Page 14: Preface And Safety Instructions
Service Manual Cafitesse 500 Preface and Safety Instructions Preface and Safety Instructions 1.1 Preface/ How to use the Manual 1.1.1 General This service manual is intended for trained This service manual is not to teach service technicians who have attended the technical details about this dispenser, but it training courses for this dispenser. -
Page 15: Structure Of The Manual
Service Manual Cafitesse 500 Preface and Safety Instructions 1.1.2 Structure of the Manual Chapter The service manual is divided into 10 sections numbered from 1 to 10. Subsections Sections can be divided into subsections. Section 5 is therefore divided into 9 subsections (A, B, etc.), each describing a... -
Page 16: Definition Of Options And Accessories
Service Manual Cafitesse 500 Preface and Safety Instructions When the dispenser is subject to changes, General information: consecutively numbered Service Information sheets will inform you on these changes. The concept of this manual has been These are to be filed in chapter 8 in the structured in order to be applicable for Service Manual. - Page 17 Service Manual Cafitesse 500 Preface and Safety Instructions 1.2 Safety Instructions Hazard intensity levels This subsection is intended as an overview of the warnings and instructions used in There are three different levels of hazard this manual that must always be observed.
- Page 18 Service Manual Cafitesse 500 Preface and Safety Instructions DANGER: Never insert the power supply WARNING: The dispenser must be plug of the dispenser into a connected to the drinking wet or damp socket. The plug water supply and to the...
- Page 19 Service Manual Cafitesse 500 Preface and Safety Instructions WARNING: The dispenser must be cleaned CAUTION: The dispenser must not be regularly for hygiene reasons used when the water supply is and to guarantee perfect interrupted because the boiler operation. Take care of sharp will not be refilled.
- Page 20 Service Manual Cafitesse 500 Installation / Putting into Operation Installation / Putting into Operation Contents Transport / Handling of the dispenser during transport ...... 2 Installation Requirements ............... 4 2.2.1 Tools ......................4 2.2.2 Water Supply ....................5 2.2.3 Electrical Supply ..................6 2.2.4...
-
Page 21: Transport / Handling Of The Dispenser During Transport
Service Manual Cafitesse 500 Installation / Putting into Operation Installation / Putting into Operation 2.1 Transport / Handling of the dispenser during transport Dimensions of the dispenser incl. packaging: Height: 34.8 in (885 mm) Width: 15.5 in (395 mm) Depth: 24.6 in (625 mm) - Page 22 Service Manual Cafitesse 500 Installation / Putting into Operation Transport due to location change When transporting single dispensers, use the handles supplied in the package. When transporting a used dispenser to a new location: Complete a FLUSH and Sanitize circle.
-
Page 23: Installation Requirements
Service Manual Cafitesse 500 Installation / Putting into Operation 2.2 Installation Requirements 2.2.1 Tools The following tools are required for installation. Tool: required for: 1. Service device Programming 2. Pressure gauge Measuring the water pressure 3. Several e.g. screw drivers... -
Page 24: Water Supply
Service Manual Cafitesse 500 Installation / Putting into Operation 2.2.2 Water Supply Customer Dispenser Recommendation: Connections for hoses: Water supply line with shut off valve and 3/8 o.d. flare non-return valve. Connection to hot water line only with Connecting pieces are included. -
Page 25: Electrical Supply
Service Manual Cafitesse 500 Installation / Putting into Operation 2.2.3 Electrical Supply The dispenser must be connected to a correctly fused electric circuit. Connection to a supply with a ground fault current safety switch is recommended. The connection must be made using a plug and socket grounded and sized according to local regulations. -
Page 26: Space Requirements
Service Manual Cafitesse 500 Installation / Putting into Operation 2.2.4 Space Requirements Space requirements, when the cooling compartment lid is closed: 1.9 in 20.2 in Space requirements, when the cooling compartment lid is open: Flexi- Pack 20.2 in Plan view:... -
Page 27: External Options
Service Manual Cafitesse 500 Installation / Putting into Operation 2.2.5 External Options (to be used by Opcos and distributors for national information (e.g. on external filters)) 2 - 8 January 2001... -
Page 28: Unpacking
Service Manual Cafitesse 500 Installation / Putting into Operation 2.3 Unpacking 2.3.1 Unpacking the Dispenser Remove the banding from the cardboard box carefully. Do not use sharp objects, or cut the carton to avoid scratching the dispenser. Remove the upper half of the box by lifting straight up. -
Page 29: Disposal Of Packaging And Dispenser At The End Of Their Service Life
Service Manual Cafitesse 500 Installation / Putting into Operation 2.3.3 Disposal of Packaging and Dispenser at the End of their Service Life Used packaging: Packaging Material* Outer cardboard box Cardboard ** Inner packaging Corrugated board Disposal of material must always be done in accordance with... - Page 30 Service Manual Cafitesse 500 Installation / Putting into Operation DAGMA C F T 0 1 4 C A F I T E S S E 5 0 0 / A 2 1 0 0 0 0 1 1 2 1 1 8 5...
- Page 31 Service Manual Cafitesse 500 Installation / Putting into Operation Measuring the water pressure Static and dynamic pressure can be Close the tap and read the static line checked by using a water pressure pressure on the pressure gauge. The value measuring gauge which is available locally.
- Page 32 Service Manual Cafitesse 500 Installation / Putting into Operation Installation of the dispenser WARNING: The dispenser weighs 110 lb when installed. A strong, stable surface should be provided. The dispenser is suitable for installation on a flat horizontal counter, table, base stand or a table at a wall.
- Page 33 Service Manual Cafitesse 500 Installation / Putting into Operation Adjusting the heating capacity s t o As a standard the heating capacity of the IN G dispenser is set to 30 A, 208 V. If necessa- te r h o t ry adjust the heating capacity switch to the required position.
- Page 34 Service Manual Cafitesse 500 Installation / Putting into Operation Overview wiring Standard delivery: power supply cable 3x10AWG, 30 A Heating capacity (kW) / Mains fuse (A) Switch Heat. element for mains supply (V) Required power cable/ position configuration 120 V...
- Page 35 Service Manual Cafitesse 500 Installation / Putting into Operation Overview sticker for the rating plate (Fig. 4) Place correct sticker on rating plate (9) 208/240 208/240 208/240 208/240 2.9/3.8 4.4/5.8 2.4/3.1 6.8/8.9 2.7/3.6 4.2/5.6 2.2/2.9 6.6/8.7 Rating plate CFT 014, CFT 500/AX, UL...
- Page 36 Service Manual Cafitesse 500 Installation / Putting into Operation Connecting the dispenser Install the water connection and test it for leaks. s t o Put the dispenser plug into the socket. I N G t e r h o t Put on the push button cover (1) (press it slightly) (Fig.
- Page 37 Service Manual Cafitesse 500 Installation / Putting into Operation Degrease the housing wall thoroughly at which the document holder is to be installed. For degreasing, it is recommended to use a mixture of 50 % isopropanol and 50 % water.
- Page 38 Service Manual Cafitesse 500 Installation / Putting into Operation Switching the dispenser on/off Open the water supply shut off valve. Plug in the power supply plug. Open the cooling compartment lid. (Fig. 8) Switch on the dispenser with the ON/OFF button (1).
-
Page 39: Checklist: Instructions For The Customer
Service Manual Cafitesse 500 Installation / Putting into Operation 2.5 Checklist: Instructions for the Customer 2 - 20 January 2001... -
Page 40: Transfer Of The Dispenser To The Customer
Service Manual Cafitesse 500 Installation / Putting into Operation 2.6 Transfer of the Dispenser to the Customer (incl. HACCP= Hazard and Critical Control Points) 2 - 21 January 2001... -
Page 41: Technical Data (Total Overview)
Service Manual Cafitesse 500 Installation / Putting into Operation 2.7 Technical Data (Total Overview) Dimensions: Height: 30.7 in Width: 12.60 in Depth: 20.28 in Weight: 75.5 lbs empty, 110 lbs filled Water connection*: 1/2'' or 3/8'' supply line with 3/4'' BSP connecting piece (provided). - Page 42 Service Manual Cafitesse 500 Installation / Putting into Operation Electric connection: Only by power cable and plug. Never hardwire. The dispenser is radio-shielded acc. to EN 55014/VDE 0875, T14 The dispenser is marked with the CE label. (Directive about electrical equipment of low voltage, directive about electromagnetic...
- Page 43 Service Manual Cafitesse 500 Installation / Putting into Operation Dosing systems: 2 pulsed dosing systems, electronically controlled dosing coil, pulse driven pump, integrated into the flexi-packs, electronic "concentrate empty" indicator. Speed of beverage delivery: with installed mixer: 1 cup (150 cc) 5 floz in 10 sec.
-
Page 44: Technical Specifications Of Components
Service Manual Cafitesse 500 Installation / Putting into Operation 2.7.1 Technical Specifications of Components WHAT: HOW: Inlet valve Voltage: 24 V DC Flow rate: 2.6 gal/min Temperature: 194 °F Pressure: 1.45–145 psi Duty cycle: 100 % Inlet valve with café cool... - Page 45 Service Manual Cafitesse 500 Installation / Putting into Operation WHAT: HOW: B2 coil Voltage: 19.75 V DC Mixer unit Voltage: 24 V DC Current: 0.9 A Motor auto-diaphragm Voltage: 18 V DC Impeller Material: Motor sealing Material: silicone Shaft sealing...
- Page 46 Service Manual Cafitesse 500 Installation / Putting into Operation WHAT: HOW: Housing/front part Material: stainless steel, powder coating Coating: RAL 9005 Cover Material: plexiglass Operating panel Material: Control unit/operating panel Operating voltage: 24 V/5V Peltier circuit Operating voltage: 13.5 V...
-
Page 47: Fault Diagnosis
Service Manual Cafitesse 500 Trouble Shooting, Error Codes and Fault Diagnosis Trouble Shooting, Error Codes and Fault Diagnosis Contents Fault Diagnosis ..................... 2 Error Codes ....................3 Notes ......................13 3 - 1 January 2001... - Page 48 Service Manual Cafitesse 500 Trouble Shooting, Error Codes and Fault Diagnosis 3.1 Fault Diagnosis Step if yes if no 1 Ask customer for detailed information about malfunction and backgrounds 2 Are the error codes displayed on the see 3.2 see 3.2 or...
-
Page 49: Error Codes
Service Manual Cafitesse 500 Trouble Shooting, Error Codes and Fault Diagnosis 3.2 Error Codes General: When a malfunction occurs there is an alternating display of the error number and ON/OFF. (Fig. 1) Malfunctions can be reset by unplugging the power cable and plugging it back in after approx. - Page 50 Service Manual Cafitesse 500 Trouble Shooting, Error Codes and Fault Diagnosis Note: Refer to diagram on 5.K-16/17 for the correct numbers and location of harnesses. Display Malfunction Cause Remedy Product dosing error 1. Wires P14 defective. 1. Check the wires P14...
- Page 51 Service Manual Cafitesse 500 Trouble Shooting, Error Codes and Fault Diagnosis Display Malfunction Cause Remedy 1. Temperature sensor ERR4 Temperature sensor in 1. Replace the temperature defective boiler detects T is higher sensor (pg. 5.A-15) than 214 °F The LEDs for "EMPTY"...
- Page 52 Service Manual Cafitesse 500 Trouble Shooting, Error Codes and Fault Diagnosis Display Malfunction Cause Remedy 1. Heat sink dirty ERR7 Peltier current is lower 1. Clean heat sink than the lower limit (I is 2. Air filter dirty lower than 1.7 A) 2.
- Page 53 Service Manual Cafitesse 500 Trouble Shooting, Error Codes and Fault Diagnosis Display Malfunction Cause Remedy ERR9 Cooling compartment 1. Ambient temperature too 1. The error is automatically temperature is less than low (less than 33.8 °F) reset when the temperature 33.8 °F...
- Page 54 Service Manual Cafitesse 500 Trouble Shooting, Error Codes and Fault Diagnosis Display Malfunction Cause Remedy ERR13 Error in internal 1. Wires PIN 13-16 (BU21- 1. Check the wires, replace communication. C) between control them if necessary. "ON/OFF" LED flashes. board box and inter- connection board are Dispenser remains on.
- Page 55 Service Manual Cafitesse 500 Trouble Shooting, Error Codes and Fault Diagnosis Display Error Cause Remedy ERR16 24 V error 1. The water in the boiler 1.Check temperature sensor, 24 V-supply or safety has boiled. Boil over reset boil over protection (see circuit is interrupted.
- Page 56 Service Manual Cafitesse 500 Trouble Shooting, Error Codes and Fault Diagnosis Display Error Cause Remedy ERR19 Left mixer motor current 1. Mixer motor moves 1. Flush the dispenser on the is higher than 2.3 A sluggishly. left side. mixer after 200 msec.
- Page 57 Service Manual Cafitesse 500 Trouble Shooting, Error Codes and Fault Diagnosis Display Error Cause Remedy ERR21 Rright mixer motorcurrent 1. Mixer motor moves 1. Flush the dispenser on the is higher than 2.3 A sluggishly. right side. mixer after 200 msec.
- Page 58 Service Manual Cafitesse 500 Trouble Shooting, Error Codes and Fault Diagnosis Display Error Cause Remedy FLUSH The ON/OFF LED is 1. The dispenser has not 1. Carry out daily cleaning of flashing. been flushed. the combi-trough Dispenser remains on. If the dispenser is not flushed at the set FLUSH time, the "EMPTY"...
- Page 59 Service Manual Cafitesse 500 Trouble Shooting, Error Codes and Fault Diagnosis 3.3 Notes 3 - 13 January 2001...
- Page 60 Service Manual Cafitesse 500 Programming Programming Contents Program Structure ................... 2 4.1.1 Flow Charts ....................2 4.1.2 Programming Description ................7 4.1.2.1 General Notes .................... 7 4.1.2.2 Service Device ................... 8 4.1.2.3 Programming Type 460................10 Explanation of the Main Menu Functions ..........11 4.1.2.3.1...
-
Page 61: Program Structure
Service Manual Cafitesse 500 Programming Programming 4.1 Program Structure 4.1.1 Flow Charts CAFITESSE V2.20 U Counter readings Timeout Input Input 10 seconds Timeout ! Total machine Programming end RTD pr =###### l All keys Down Error readings Input Input Concentrate... - Page 62 Service Manual Cafitesse 500 Programming Machine settings Down Input Input Concentrate right 2=###### l Machine version= keys Down Down RTD product Down right 2=###### l Are you sure ? Type code: #### Down Code=1402 followed by input Concentrate right 3=###### l...
- Page 63 Service Manual Cafitesse 500 Programming Programming the delivery buttons 1, 2 and 3 on the left-hand side Settings for Left button 1, 2, 3 Down Input Input Mixerdelay=#.#s Button enable=## Only when Min:0 Max:9.9 0=dis,1=enable cappuccino Down Down Only when Mixertime=#.#s...
- Page 64 Service Manual Cafitesse 500 Programming Programming the delivery buttons 1, 2 and 3 on the right-hand side Settings for Settings for Water button Right button 1, 2, 3 Input Input Input Input Button enable=## Button enable=## 0=dis,1=enable 0=dis,1=enable Down Down...
- Page 65 Service Manual Cafitesse 500 Programming Down Down Use on/off when Energy saving empty ## 0=n, 1=y start #### Down Down Display temp ?## Energy saving 0=no, 1=yes Down end #### Clock settings Down Input Input Not when V440, Flush = ##...
-
Page 66: Programming Description
Service Manual Cafitesse 500 Programming 4.1.2 Programming Description 4.1.2.1 General Notes An outlet is provided on both sides of the For milk, lactiferous beverages and dispenser. By means of the auto-diaphragm deactivated buttons the ratio cannot be the beverage from the right side can be changed by means of the service panel. -
Page 67: Service Device
Service Manual Cafitesse 500 Programming 4.1.2.2 Service Device DANGER: The service device is equipped with a 9 V Alkaline block battery as a buffer for the clock function. - - - - - - - - - - - - - - - -... - Page 68 Service Manual Cafitesse 500 Programming Setting the clock of the service device Calling up the date and the time: To switch the service device on, press Press the activating button to switch the the activating button. service device on. Display on the Service Device 2 Press "Clock".
-
Page 69: Programming Type 460
Service Manual Cafitesse 500 Programming 4.1.2.3 Programming Type 460 ↓ ↑ To program this dispenser a service Press until the required device 2 is necessary. It must be a menu is shown on the service device. service device that is equipped with an These are the menus: E-Eprom V1.4 or higher. -
Page 70: Explanation Of The Main Menu Functions
Service Manual Cafitesse 500 Programming 4.1.2.3.1 Explanation of the Main Menu Functions ERROR READINGS COUNTER READINGS Total machine Input The service device displays the last 5 Input RTD pr = XXXXX l malfunctions (except for Code 8 and ERR 23) and the date and time of their Display in litres of the ready to drink occurrence. - Page 71 Service Manual Cafitesse 500 Programming MACHINE SETTINGS If the entry was correct: Machine version= Input Machine preset to version 60 The programming and display on the All manufacturer's settings are automa- service device is only done with the tically set for the new type 460. All re- last two digits of the dispenser version levant original settings are erased.
- Page 72 Service Manual Cafitesse 500 Programming Saving the changes Programming Call up the main menu Stop programming The following line will occur in the indi- vidual programming steps: Stop programming It is possible to change values. ---------------------------- The following procedure has to be car-...
-
Page 73: Programming The Individual Main Menus
Service Manual Cafitesse 500 Programming 4.1.2.3.2 Programming the individual Main Menus FLOW SETTINGS Test flow is also possible when the Measure whether 88cc have been combi-trough has been removed. The delivered, if necessary readjust the solenoid splash panel must be installed. - Page 74 Service Manual Cafitesse 500 Programming BUTTON SETTINGS To enter changes for each To start a test run: programming step: At the programming step Press Test dosing ? ↓ Enter the new values. Push 0 If necessary press to return to the...
- Page 75 Service Manual Cafitesse 500 Programming BUTTON SETTINGS FOR LEFT BUTTONS Main menu: e.g. select settings for left Volume=150cc ↓ button 2 Min:40 Max:9999 Settings for For the beverage volume values between Left button 2 40 cc and 9999cc can be entered.
- Page 76 Service Manual Cafitesse 500 Programming Programming for 'cappuccino' delivery Café cool ? 00 Volume=100cc ↓ ↓ 0=no, 1=yes Min:40 Max:300 Select 0 to program for 'cappuccino' delivery For the beverage volume values between Select 1 to program for 'iced cappuccino' 40 cc and 300cc can be entered.
- Page 77 Service Manual Cafitesse 500 Programming BUTTON SETTINGS FOR RIGHT BUTTONS Main menu: e.g. select settings for right Programming for 'espresso' delivery button 1 Ratio=1:12 ↓ Settings for Min:5 Max:99 Right button 1 For the beverage strength values between Button enable = 01 0=dis, 1=enable 5 and 99 can be entered.
- Page 78 Service Manual Cafitesse 500 Programming BUTTON SETTINGS FOR WATER BUTTON Main menu: e.g. select settings for water button Settings for Water button Button enable = 01 0=dis, 1=enable Input Select 0 to disable the button Select 1 to enable the button Volume=100cc ↓...
- Page 79 Service Manual Cafitesse 500 Programming PROGRAMMING OPTIONS Left hand side Right hand side Button: enabled/disabled Button: enabled/disabled Beverage strength (ratio) Beverage strength (ratio) for milk: for coffee and espresso: milk ratio 0=normal (1:2.6) Ratio 1:5 - 1:99 (steps of 1) 1=over (1:3.2)
- Page 80 Service Manual Cafitesse 500 Programming OTHER SETTINGS BOILER SETTINGS Main menu: Select Boiler settings Main menu: Select Other settings Ratio adjust=0X Boiler temp=XX Input Input 0=dis, 1=enable Min:75 Max:95 It is possible to change values. It is possible to change values.
- Page 81 Service Manual Cafitesse 500 Programming CLOCK SETTINGS (these adjustments can also be done on the service Setting the energy saving program, starting panel, except for 'Flush' and 'Flush time') time: Main menu: Select Clock settings Energy saving ↓ start XX:XX Setting the time: It is possible to change values.
-
Page 82: Manufacturer Settings/Customer Specific Settings
Service Manual Cafitesse 500 Programming 4.1.3 Manufacturer Settings/Customer specific Settings Dispenser Version Code - Special Version Type 460 Temperature Blocking beverage deli- Water flow rate Ratio ± 5% on Resetting the counter/ at low temperature left side right side Hot water... - Page 83 Service Manual Cafitesse 500 Programming Dispenser Version Code - Special Version Type 460 Temperature Blocking beverage deli- Water flow rate Ratio ± 5% on Resetting the counter/ Boiler at low temperature left side right side Hot water Service Panel display on Service Panel °C...
-
Page 84: Programming For The Customer
Service Manual Cafitesse 500 Programming Programming for the Customer 4.2.1 Components of the Service Panel 10 11 Fig. 1 1 - Display 12 - Compartment for the key 2 - LED: CAUTION: Make sure that the cover is shines = the dispenser is ready for... -
Page 85: Counter Display
Service Manual Cafitesse 500 Programming 4.2.2 Counter Display (if this function has been programmed by the service technician) If an accounting system is connected the display shows "PAY" or "FREE". (Fig. 1) The counter displays the number of delivered portions for each delivery button and for the hot water delivery button separately. -
Page 86: Reading The Counters
Service Manual Cafitesse 500 Programming 4.2.5 Reading the Counters (if this function has been programmed by the service technician) Leave the key switch in position 1. Actuate the 'Mode' button (1). The display indicates "Cnt F". (Fig. 1) Press the corresponding delivery button and the number of delivered free portions for this button will be displayed. -
Page 87: Blocking The Delivery Of Beverages
Service Manual Cafitesse 500 Programming 4.2.7 Blocking the Delivery of Beverages Turn the key switch to position 2. The display will indicate the present adjustment 'bloc' or 'No bl'. (Fig. 1) 'bloc' = Delivery is blocked. Dispenser remains switched on. -
Page 88: Programming The Time And The Date
Service Manual Cafitesse 500 Programming 4.2.9 Programming the Time and the Date Programming the Time Turn the key switch to position 2. Press the 'mode' button (1) until the next programmable function, which is the time will be displayed. Display: "CLOC"... -
Page 89: Programming 'Happy Hours
Service Manual Cafitesse 500 Programming 4.2.10 Programming 'Happy Hours' If an accounting system is installed, it is possible to program 3 different happy hours, i. e. periods during which all beverages are delivered free. Turn the key switch to position 2. -
Page 90: Programming The Energy Saving Program
Service Manual Cafitesse 500 Programming 4.2.11 Programming the Energy Saving Program During the energy saving program the heating of the boiler is switched off (e. g. during longer idle periods). The cooling system remains on. Keep in mind that the boiler needs a certain time for heating up after the energy saving program has ended. -
Page 91: Finishing The Programming
Service Manual Cafitesse 500 Programming 4.2.12 Finishing the Programming The key switch is in position 2 (Fig. 1) Turn the key switch to the neutral position. Remove the key only in the neutral position. CAUTION: Take care to change all... -
Page 92: Reading Further Data
Service Manual Cafitesse 500 Programming 4.3 Reading further Data Not included 4 - 33 January 2001... - Page 93 Service Manual Cafitesse 500 Functions Functions Contents Total Overview - Components of the Dispenser ........5 General Safety Instructions ..............8 Water System 5.A.1 Adjustments ..................... 2 5.A.2 Disassemblies ..................3 5.A.2.1 Disassembly of the Boiler ................3 5.A.2.2 Disassembly of the Boiler Cover ..............7 5.A.2.3...
- Page 94 Service Manual Cafitesse 500 Functions Brewing System Not applicable to this equipment Dosing System 5.C.1 Adjustments ..................... 2 5.C.2 Disassemblies ..................3 5.C.2.1 Disassembly of the B2 Coil and the Diode Carrier ........3 5.C.2.2 Disassembly of the Motor for the Auto-Diaphragm ........5 5.C.2.3...
- Page 95 Service Manual Cafitesse 500 Functions Cooling System 5.F.1 Adjustments ..................... 2 Not available 5.F.2 Disassemblies ..................2 5.F.2.1 Disassembly of the Fan................2 5.F.2.2 Disassembly of the Peltier Element ............3 5.F.2.3 Disassembly of the Temperature Sensor in the Cooling Compartment ..7 5.F.3...
- Page 96 Service Manual Cafitesse 500 Functions Power Supply and Control 5.K.1 Adjustments ..................... 2 5.K.2 Disassemblies ..................3 5.K.2.1 Total Overview ................... 3 5.K.2.2 Disassembly of the Control Board including Housing ........ 4 5.K.2.3 Disassembly of the Switched Mode Power Supply including Housing..5 5.K.2.4...
-
Page 97: Total Overview - Components Of The Dispenser
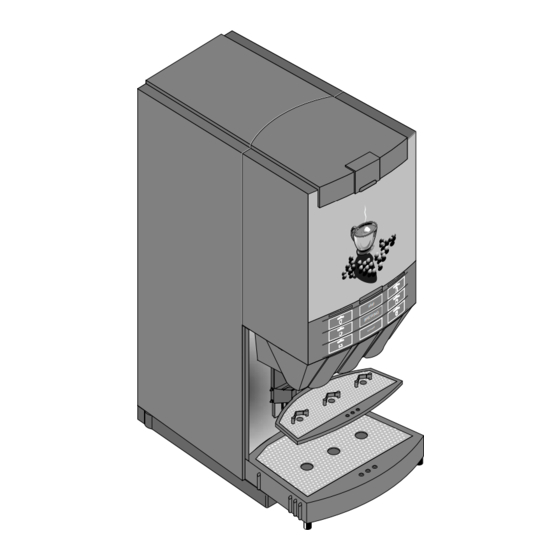
Service Manual Cafitesse 500 Functions 5.1 Total Overview - Components of the Dispenser Dispenser components/ front side (fig. 1) 1 - Cooling compartment 2 - Service Panel 3 - Plexi glass panel 4 - Operating Panel 5 - Brew basket... - Page 98 Service Manual Cafitesse 500 Functions Dispenser components / back side (fig. 2) 1, 3 - LEDs shines red = empty flexi-pack or no flexi-pack flashes = serious malfunction or the dispenser must be cleaned - LED (green) = button ON/OFF...
- Page 99 Service Manual Cafitesse 500 Functions Inner Components Fig. 3 Legend for figure 3: 1 Heat sink, see pg. 5.F-11 7 Housing cover 12 Solenoid valve, 16 Power supply unit 2 Fan 8 Boiler cover right delivery side 17 Foot 3 Cooling compartment...
-
Page 100: General Safety Instructions
Service Manual Cafitesse 500 Functions 5.2 General Safety Instructions WARNING: Make sure that for all service work the overflow hose (1) is correctly installed in the base strut (2). Two ribs of the hose must protude from the bottom (Fig. 1) - Page 101 Service Manual Cafitesse 500 Functions Housing Fig. 4 WARNING: When carrying out repairs make sure: that the cable harness (9) is plugged correctly to the housing of the control board (Fig. 4), that the cable harnesses (9, 6) are plugged correctly to the interconnector board (7) (Fig.
- Page 102 Service Manual Cafitesse 500 Functions Cooling compartment/cooling compart- ment insulation The bottom of the cooling compartment is higher on the left-hand side. On the right side an insulating ring (1) is introduced. (Fig. 1) When mounting, the cables must be placed in the cable harness (2) of the cooling compartment insulation.
- Page 103 Service Manual Cafitesse 500 Functions DANGER: The work described in this chapter may only be carried out by trained Service Technicians. Safety devices may not be changed or bridged. Only use original spare parts, otherwise the manufacturer cannot be held responsible.
- Page 104 Service Manual Cafitesse 500 Functions Fig. 8 5 - 12 January 2001...
-
Page 105: A Water System
Service Manual Cafitesse 500 Functions - Water System 5.A Water System Contents Adjustments ..................... 2 Disassemblies ..................3 A.2.1 Disassembly of the Boiler ................3 A.2.2 Disassembly of the Boiler Cover ..............7 A.2.3 Disassembly of the Dry Running Protection ..........9 A.2.4... -
Page 106: Adjustments
Service Manual Cafitesse 500 Functions - Water System Adjustments Product valves Completely close the adjusting screw at the product valve. Then screw it backwards by approx. 3.5–3.75 turns using an internal hexagon (SW 6). Hot water valves New dispensers are adjusted by the factory. -
Page 107: Disassemblies
Service Manual Cafitesse 500 Functions - Water System A.2 Disassemblies A.2.1 Disassembly of the Boiler Legend for fig. 1: 1 Optical sensor 2 Boil over sensor 3 Heating element (S), left R = 19.96 Ohm 4 Heating element (R), centre R = 25.80 Ohm... - Page 108 Service Manual Cafitesse 500 Functions - Water System Instructions for dismounting components of 15° the boiler: DANGER: Warning: There is the danger of being scalded by hot water! Before starting to work on the boiler, the water must be drained from the boiler.
- Page 109 Service Manual Cafitesse 500 Functions - Water System Disconnect the dispenser from the mains supply and close the water supply valve. Remove the dispenser cover. (see Fig. 5) Remove the air chute (see pg. 5.G-5). Loosen the screw at the splash panel and open the splash panel by pressing it downwards.
- Page 110 Service Manual Cafitesse 500 Functions - Water System Disconnect the ground connection (5). (Fig. 8) Remove the suspension plates for the boiler (6) underneath the dispenser cover on all dispenser sides. (Fig. 9) Remove the plates (7) on all dispenser sides.
-
Page 111: Disassembly Of The Boiler Cover
Service Manual Cafitesse 500 Functions - Water System A.2.2 Disassembly of the Boiler Cover DANGER: The following must be observed for safety reasons, when dismounting the boiler cover (1): The contacts (2) of the heating cable harness (3) must never be loosened at the heating elements. - Page 112 Service Manual Cafitesse 500 Functions - Water System Remove the housing cover (1). (Fig. 2) Withdraw the inserts (2) on the left and on the right. (Fig. 2) Remove the air duct. Remove the boiler cover (3) towards the top. (Fig. 3)
-
Page 113: Disassembly Of The Dry Running Protection
Service Manual Cafitesse 500 Functions - Water System A.2.3 Disassembly of the Dry Running Protection Fig. 1 5A - 9 January 2001... - Page 114 Service Manual Cafitesse 500 Functions - Water System Disconnect the dispenser from the mains supply and close the water supply valve. Loosen the screw at the splash panel and open the splash panel by pressing it downwards. Drain the water from the boiler.
- Page 115 Service Manual Cafitesse 500 Functions - Water System Dip the silicone hose (length approx. 3.5 in) (10) into an accepted cleaning agent which must be neutral with respect to taste. (Fig. 4) Additionally, apply some cleaning agent on the capillary tube so that the hose can be moved easier.
-
Page 116: Disassembly Of The Boil Over Sensor
Service Manual Cafitesse 500 Functions - Water System A.2.4 Disassembly of the Boil Over Sensor Fig. 1 Disconnect the dispenser from the mains Remove the boil over sensor (1) from the supply and close the water supply valve. overflow cover. (Fig. 1) Remove the housing cover (see pg. -
Page 117: Disassembly Of The Float
Service Manual Cafitesse 500 Functions - Water System A.2.5 Disassembly of the Float Preparation: Disconnect the dispenser from the mains supply and close the water supply valve. Drain the water from the boiler (pg. 5.A-5). Fig. 1a WARNING: The drained water is hot. -
Page 118: Disassembly Of The Optical Sensor
Service Manual Cafitesse 500 Functions - Water System A.2.6 Disassembly of the Optical Sensor Preparation: Disconnect the dispenser from the mains supply and close the water supply valve. Remove the housing cover (see pg. 5.G-2). Remove the air chute (see pg. 5.G-5). -
Page 119: Disassembly Of The Temperature Sensor
Service Manual Cafitesse 500 Functions - Water System A.2.7 Disassembly of the Temperature Sensor Preparation: Disconnect the dispenser from the mains supply and open the water supply valve. Remove the front part (see pg. 5.G-3). Loosen the screw at the splash panel and open the splash panel by pressing it downwards. -
Page 120: Disassembly Of The Solenoid Valves At The Boiler
Service Manual Cafitesse 500 Functions - Water System A.2.8 Disassembly of the Solenoid Valves at the Boiler CAUTION: The components are only pushed into the boiler and can be pulled out. There is a high risk of being scalded. Disconnect the dispenser from the mains supply and close the water supply valve. - Page 121 Service Manual Cafitesse 500 Functions - Water System Pull the hot water pipe (3) off the solenoid valve. (Fig. 2) Disconnect the electrical connections from the solenoid valve. DANGER: There is a risk of being burnt and of short circuits, because there is still some hot water left in the pipe bends.
- Page 122 Service Manual Cafitesse 500 Functions - Water System When the valves are replaced, the Product valve parts indicated in fig. 3 and 4 should also be replaced. For this purpose order the kits 'Spare parts for the product valve' and 'Spare parts for the hot water valve' (see spare parts list).
-
Page 123: Disassembly Of The Sealing Bush Boiler/Hot Water Valve
Service Manual Cafitesse 500 Functions - Water System A.2.9 Disassembly of the Sealing Bush Boiler/Hot Water Valve Disconnect the dispenser from the mains supply and close the water supply valve. Remove the boiler cover. (see pg. 5.A-7) Remove the front part. -
Page 124: Disassembly Of The Sealing Bush Boiler/Product Valve
Service Manual Cafitesse 500 Functions - Water System A.2.10 Disassembly of the Sealing Bush Boiler/Product Valve Disconnect the dispenser from the mains supply and close the water supply valve. Remove the boiler cover. (see pg. 5.A-7) Remove the front part. -
Page 125: Disassembly Of The Inlet Valve
Service Manual Cafitesse 500 Functions - Water System A.2.11 Disassembly of the Inlet Valve Disconnect the dispenser from the mains supply and close the water supply valve. Remove the filter grid (1) and the grid plate (2). (Fig. 1) Drain the water from the boiler. (see pg. 5A-5) WARNING: The drained water is hot. - Page 126 Service Manual Cafitesse 500 Functions - Water System Pull off the cable (1) from the inlet valve. P13-2 (Fig. 3) P13-1 Place a cloth underneath the inlet valve and make sure that there is no water running out of the valve or inlet hose into the switching power console.
-
Page 127: Functional Descriptions
Service Manual Cafitesse 500 Functions - Water System A.3 Functional Descriptions Max. capacity (max. delivery): A.3.1 Function: Boiler and Dry Running Protection 4 pots (50 oz) can be delivered directly one after the other. Boiler Specification: at a starting temperature of 197 °F in the... -
Page 128: Function: Overflow
Service Manual Cafitesse 500 Functions - Water System A.3.3 Function: Overflow If a malfunction occurs (e.g. the inlet valve does not close in time) water is discharged into the overflow trap between boiler and boiler insulation. The water is led from the drain adaptor to the drip tray. - Page 129 Service Manual Cafitesse 500 Functions - Water System Opening and closing the valve Water pressure is on both sides of the The pressure on the upper side of the diaphragm. A compensation of the pressure diaphragm decreases in contrast to the is affected by a very small opening in the water pressure on the lower side.
-
Page 130: Function: Level Regulation
Service Manual Cafitesse 500 Functions - Water System Flow rate controller The flow rate controller is installed on the inlet side of the valve. It reduces the flow rate of the incoming water to approx. 2.6 gal/min. This ensures that the boiler overflow can take the amount of incoming water if the water inlet control fails. -
Page 131: Function: Water Supply
Service Manual Cafitesse 500 Functions - Water System A.3.6 Function: Water Supply A.3.8 Function: Temperature Regulation for the Boiler In the standard version the inlet valve is connected to the water supply system. The The heating is switched on and off by water supply system must provide a relays. -
Page 132: Function: Temperature Sensor
Service Manual Cafitesse 500 Functions - Water System A.3.9 Function: Temperature Sensor The sensor is of the NTC define type. Its Checking the resistance of the temperature resistance is reduced when the temperature sensor: increases. The electronic control applies a constant voltage to the sensor. -
Page 133: Function: Safety System
Service Manual Cafitesse 500 Functions - Water System A.3.10 Function: Safety System Flexi coils 24 V DC 24 V DC Solenoid valves left Mixers 24 V DC 24 V DC Motor for auto-diaphragm right Electronics Control 10.5V DC Mains voltage Fig. - Page 134 Service Manual Cafitesse 500 Functions - Water System The watchdog relay on the control circuit The float serves as a dry running protection board interrupts the safety circuit if it detects a dangerous condition. The relay switches the heating off when the...
-
Page 135: Electrical Diagrams
Service Manual Cafitesse 500 Functions - Water System Electrical Diagrams A.4.1 Circuit - Water Inlet Valve See also chap. 5.A.3 Functional float holder Descriptions optical sensor service panel boiler ON/OFF switching transistor +24V inlet valve Fig. 1 A.4.2 Circuit - Water Coil... -
Page 136: Circuit - Heating And Temperature Regulation
Service Manual Cafitesse 500 Functions - Water System A.4.3 Circuit - Heating and Temperature Regulation See also chap. 5.A.3 Functional service panel Descriptions boil over sensor ON/Off dry running heating protection elements safety contactor selection heating mains contactor measuring resistor... -
Page 137: Technical Specifications
Service Manual Cafitesse 500 Functions - Water System Technical Specifications WHAT: HOW: Inlet valve Voltage: 24 V DC Flow rate: 2.6 gal/min Temperature: 194 °F Pressure: 1.45–145 psi Duty cycle: 100 % Inlet valve with café cool Voltage: 24 V DC Pressure: 0–145 psi... -
Page 138: Options
Service Manual Cafitesse 500 Functions - Water System Options* Overview water system options WHAT: FOR: REQUIRED FOR: Café cool, iced cappuccino Delivery of cold beverages Kit café cool iced choco A.6.1 Café Cool When the kit "Café Cool" has been installed The kit "Café... - Page 139 Service Manual Cafitesse 500 Functions - Water System Installation of the kit café cool Disconnect the dispenser from the mains supply and close the water supply valve. Loosen the screws at the splash panel and open the splash panel by pressing it downwards.
- Page 140 Service Manual Cafitesse 500 Functions - Water System Remove the valve outlet (1) from the support of the nozzler (2) from the product valve on the right side. (Fig. 4) Remove the bent water outlet (3) from the valve outlet. (Fig. 4)
- Page 141 Service Manual Cafitesse 500 Functions - Water System Rinse the dispenser once in order to remo- ve residue water from the water lines before delivering "café cool". This is especially important when the dispenser has not been in use for a longer period of time (e.g.
- Page 142 Service Manual Cafitesse 500 Functions - Water System A.7 Accessories* * definition options, accessories see pg. 1-4 5A - 38 January 2001...
-
Page 143: B Brewing System
Service Manual Cafitesse 500 Functions - Brewing System 5.B Brewing System Not applicable to this equipment 5B - 1 January 2001... -
Page 144: C Dosing System
Service Manual Cafitesse 500 Functions - Dosing System 5.C Dosing System Contents Adjustments ..................... 2 Disassemblies ..................3 C.2.1 Disassembly of the B2 Coil and the Diode Carrier ........3 C.2.2 Disassembly of the Motor for the Auto-Diaphragm ........5 C.2.3... -
Page 145: Adjustments
Service Manual Cafitesse 500 Functions - Dosing System C.1 Adjustments WHAT: HOW: Mixer time adjustment via service device, see pg. 4-18 Mixer delay adjustment via service device, see pg. 4-18 Test dosing of beverage or concentrate adjustment via service device, see pg. 4-15... -
Page 146: Disassemblies
Service Manual Cafitesse 500 Functions - Dosing System Disassemblies C.2.1 Disassembly of the B2 Coil and the Diode Carrier Remove and dismount the front part (see pg. 5.G-3). Disconnect all cable connections that lead to the console for screened coil (disconnect the corresponding plugs). - Page 147 Service Manual Cafitesse 500 Functions - Dosing System The B2 coils must be dismounted in the following order: Loosen the console for screened coil Loosen the three outer screws (9) from the mounting ring (6) through the slots in the cooling compartment insulation and completely remove the coil.
-
Page 148: Disassembly Of The Motor For The Auto-Diaphragm
Service Manual Cafitesse 500 Functions - Dosing System C.2.2 Disassembly of the Motor for the Auto-Diaphragm Fig. 1 Disconnect the dispenser from the power supply and close the water supply valve. Remove the brew basket, the combi- 0.24 trough and the trough box. -
Page 149: Disassembly Of The Sensor Board (2 Hall-Sensors)
Service Manual Cafitesse 500 Functions - Dosing System C.2.3 Disassembly of the Sensor Board (2 Hall-Sensors) Fig. 1 Disconnect the dispenser from the power Pull the motor housing a little forwards out supply and close the water supply valve. of the housing. -
Page 150: Disassembly Of The Auto-Diaphragm
Service Manual Cafitesse 500 Functions - Dosing System C.2.4 Disassembly of the Auto-Diaphragm Remove the combi-trough (1). (Fig. 1) Remove the 2 screws (2) of the sealing key (3). (Fig. 1) Remove the sealing key (3) downwards. (Fig. 1) Guide the lever wire (4) on both sides and pull it out of the combi-trough (1). -
Page 151: Disassembly Of The Mixing Units
Service Manual Cafitesse 500 Functions - Dosing System C.2.5 Disassembly of the Mixing Units P6-1 (+) P6-2 (-) P6-3 (+) P6-4 (-) Fig. 1 Disconnect the dispenser from the mains supply and close the water supply valve. Remove the brew basket, the combitrough and the trough box. - Page 152 Service Manual Cafitesse 500 Functions - Dosing System Remove the PTFE shaft seal (2) and the mixer motor sealing (3). (Fig. 1, 3) Loosen the two screws (4). (Fig. 1, 3) Remove the mixer motor (5) with centrifugal disc (6). (Fig. 1, 4) Assembly is done in the reverse order.
-
Page 153: Functional Descriptions
Service Manual Cafitesse 500 Functions - Dosing System Functional Descriptions C.3.1 Total Overview of the Dosing System water water Legend: 1 Right flexi-pack 2 Right "empty indicator" 3 Right dosing coil 4 Right water supply left right 5 Trough box... -
Page 154: Function: Flexi Dosing System
Service Manual Cafitesse 500 Functions - Dosing System C.3.2 Function: Flexi Dosing System Every flexi-pack is a non-returnable pack. It consists of a cardboard box (1) and a unit containing the concentrate bag ( 2) and the dosing pump (3). (Fig. 2) The dosing pump cannot be taken apart. - Page 155 Service Manual Cafitesse 500 Functions - Dosing System An infrared optical sensor (2, fig. 1) is installed above every dosing coil, which acts together with the black float for coffee and tea (2, fig. 3) as an "empty indicator" for the flexi-pack. For milk and cocoa containing beverages the IR transparency of the product serves as an "empty...
-
Page 156: Function: Mixer Unit
Service Manual Cafitesse 500 Functions - Dosing System C.3.3 Function: Mixer Unit For the delivery of certain beverages (e.g. Mixer time and mixer delay can be adjusted espresso, cappuccino, cocoa-containing via the service device for espresso, beverage, iced cappuccino or iced choco) a cappuccino and iced cappuccino. -
Page 157: Function: Switching-Over Of The Auto-Diaphragm
Service Manual Cafitesse 500 Functions - Dosing System C.3.4 Function: Switching-over of the Auto-Diaphragm Fig. 1 The console for screened coil contains a Every time the dispenser is switched on an motor for the auto-diaphragm (1) with a initialising cycle is carried out. If the auto- lever arm (2). -
Page 158: Function: Cappuccino-Espresso Version
Service Manual Cafitesse 500 Functions - Dosing System C.3.5 Function: Cappuccino-Espresso Version According to the programming café au lait, Process for preparing café au lait milk or cappuccino can be delivered on the 1. Switching over the auto-diaphragm is left side. -
Page 159: Electrical Diagrams
Service Manual Cafitesse 500 Functions - Dosing System Electrical Diagrams C.4.1 Circuit - Concentrate Coil The 24 V dc of the switched mode power service panel supply is controlled by a voltage regulator which supplies the right and left concentrate On/Off coil with 19.75 V dc. -
Page 160: Circuit - Mixer Motor
Service Manual Cafitesse 500 Functions - Dosing System C.4.2 Circuit - Mixer Motor The mixer motor is supplied with 24 V dc service panel by the switched mode power supply. When a delivery button is actuated (e.g. On/Off espresso), the mixer motor is selected by the microprocessor via a switching transistor. -
Page 161: Technical Specifications
Service Manual Cafitesse 500 Functions - Dosing System Technical Specifications WHAT: HOW: B2 coil Voltage: 19.75 V DC Mixer unit Voltage: 24 V DC Current: 0.9 A Motor auto-diaphragm Voltage: 18 V DC Impeller Material: Motor sealing Material: silicone Shaft sealing... -
Page 162: D Product Delivery
Service Manual Cafitesse 500 Functions - Product Delivery 5.D Product Delivery Contents Adjustments ..................... 2 Disassemblies ..................3 D.2.1 Installation and Disassembly of the Buttons ..........3 D.2.2 Disassembly of the Cup Carrier and the Splash Panel ......4 Functional Descriptions ................6 D.3.1... -
Page 163: Adjustments
Service Manual Cafitesse 500 Functions - Product Delivery Adjustments WHAT Volumes Programming via service device see pg. 4-16 Product coffee, decaffeinated coffee, tea, milk, café au lait, espresso, cappuccino, café cool, iced cappuccino Programming via service device see pg. 4-16... -
Page 164: Disassemblies
Service Manual Cafitesse 500 Functions - Product Delivery D.2 Disassemblies D.2.1 Installation and Disassembly of the Buttons Disconnect the dispenser from the mains supply and close the water supply valve. Slide dismounting tool for the push buttons s t o (1) behind the push button covers and pull them out. -
Page 165: Disassembly Of The Cup Carrier And The Splash Panel
Service Manual Cafitesse 500 Functions - Product Delivery D.2.2 Disassembly of the Cup Carrier and the Splash Panel Disconnect the dispenser from the mains supply and close the water supply valve. Remove the brew basket, the combi- trough and the trough box. - Page 166 Service Manual Cafitesse 500 Functions - Product Delivery If necessary the cup carrier and the support can now be replaced as follows: Remove the cup carrier support (6) towards the top. (Fig. 3) Unscrew the support (7) from the splash panel (2).
-
Page 167: Functional Descriptions
Service Manual Cafitesse 500 Functions - Product Delivery Functional Descriptions D.3.1 Total Overview - Product Delivery Dispenser components/ front side (fig. 1) 1 - Operating panel with buttons 2 - Brew basket 3 - Beverage outlet 4 - Hot water outlet 5 - Cup resp. -
Page 168: Function: Push Buttons
Service Manual Cafitesse 500 Functions - Product Delivery D.3.2 Function: Push Buttons Depending on how the dispenser has been adjusted during installation, the mode for the delivery of beverages and hot water will be one of the following: low temperature... -
Page 169: Function: Cup Carrier With Drip Grid, Drip Tray And Drip Grid
Service Manual Cafitesse 500 Functions - Product Delivery D.3.3 Function: Cup Carrier with Drip Grid, Drip Tray and Drip Grid The containers (glas, cup, mug) for the te r h o t beverage to be delivered are positioned on the cup carrier (1). (Fig. 1) -
Page 170: Electrical Diagrams
Service Manual Cafitesse 500 Functions - Product Delivery D.4 Electrical Diagrams Not available Technical Specifications WHAT: HOW: Cup carrier Material: PC Drip grid of the cup carrier Material: stainless steel Cup stop Material: PC Drip tray Material: PC Drip grid... -
Page 171: Options
Service Manual Cafitesse 500 Functions - Product Delivery D.6 Options* Not available * definition options see pg. 1-4 5D - 10 January 2001... - Page 172 Service Manual Cafitesse 500 Functions - Cooling System 5.F Cooling System Contents Adjustments ..................... 2 Not available Disassemblies ..................2 F.2.1 Disassembly of the Fan................2 F.2.2 Disassembly of the Peltier Element ............3 F.2.3 Disassembly of the Temperature Sensor in the Cooling Compartment ..7 Functional Descriptions ................
- Page 173 Service Manual Cafitesse Functions - Cooling System F.1 Adjustments Not available F.2 Disassemblies F.2.1 Disassembly of the Fan Disconnect the dispenser from the mains supply and close the water supply valve. Remove the front part (see pg. 5.G-3). Two fans (1) are attached to the special air chute (3) by means of two screws respectively (2).
-
Page 174: Disassembly Of The Peltier Element
Service Manual Cafitesse 500 Functions - Cooling System F.2.2 Disassembly of the Peltier Element Complete overview of the cooling unit Legend Cooling compartment insulation, upper part Cooling compartment Peltier sealing Peltier element Heat sink Air chute Cooling compartment insulation, bottom part... - Page 175 Service Manual Cafitesse Functions - Cooling System Dismount the front part (see pg. 5.G-3). The heat sink (1) is covered with an air chute (2) to guarantee a better air circulati- on. (Fig. 1) When mounting or dismounting the Peltier element, the following must be observed: Remove the fan plate (3).
- Page 176 Service Manual Cafitesse 500 Functions - Cooling System Apply a thin film of the thermal compound uniformly on that side of the Peltier ele- ment (2) that is positioned on the heat sink. (Fig. 4) CAUTION: Only apply a thin film of the...
- Page 177 Service Manual Cafitesse Functions - Cooling System Mount the heat sink (2). (Fig. 5) Fasten the screws (3) with tension washers (4), o-ring (5) and bush (6) on the top and on the bottom until the bushes are placed on the heat sink. Fasten the screws alternatingly on the top and on the bottom.
-
Page 178: Disassembly Of The Temperature Sensor In The Cooling Compartment
Service Manual Cafitesse 500 Functions - Cooling System F.2.3 Disassembly of the Temperature Sensor in the Cooling Compartment Disconnect the dispenser and close the wa- ter supply valve. Remove the brew basket, the combi- trough and the trough box. Remove the dummy cap (2) (4 screws (3)). -
Page 179: Functional Descriptions
Service Manual Cafitesse Functions - Cooling System F.3 Functional Descriptions F.3.1 Total Overview Cooling System Basic illustration Fig. 1 Legend 5 Temperature sensor 1 Peltier element 2 Cooling compartment 6 Aluminium container 3 Heat sink 7 Insulation 4 Fan 5F - 8 January 2001... -
Page 180: Function: Cooling System
Service Manual Cafitesse 500 Functions - Cooling System F.3.2 Function: Cooling System The principle of thermoelectric cooling Design of the cooling system For cooling of the flexi-packs the dispenser The design of the cooling system is shown is equipped with a thermoelectric cooling in fig. - Page 181 Service Manual Cafitesse Functions - Cooling System Basic illustration Fig. 1 Legend 1 Peltier element 2 Cooling compartment 3 Heat sink 4 Fan 5 Temperature sensor 6 Aluminium container 7 Insulation 5F - 10 January 2001...
- Page 182 Service Manual Cafitesse 500 Functions - Cooling System Sealing of the Peltier element Temperature regulation cooling system The development of condensation water on On/off regulation: the cold side in the Peltier element could lead to corrosion which could drastically Without regulating the temperature of the cooling compartment the system would reduce the durability of the element.
- Page 183 Service Manual Cafitesse Functions - Cooling System Max. admissable ambient temperature: Error indications cooling compartment temperature: When the ambient temperature exceeds 90 °F a sufficient cooling cannot be For cooling compartment temperatures that guaranted any more. are outside the admissable range the electronic control generates the follwing Important is the average ambient error indications:...
- Page 184 Service Manual Cafitesse 500 Functions - Cooling System Temperature sensor (5) The sensor is of the NTC-type. Its resistance The "NTC" properties can be used to check is reduced when the temperature rises. the cooling function. If both inputs of the...
- Page 185 Service Manual Cafitesse Functions - Cooling System Supervision Peltier current The value of the Peltier current is detected by the voltage difference. It is measured by means of a test resistor (0.1 Ohm, on the control board). The cooling is switched off in order to protect the Peltier element from damage due to a short-circuit when: for 1 sec.
-
Page 186: Electrical Diagrams
Service Manual Cafitesse 500 Functions - Cooling System F.4 Electrical Diagrams F.4.1 Circuit - Cooling System +13.5 V Peltier element switching transistor 10.5 V DC measurement resistor temperature sensor Fig. 1 See also chap. F.3 - Functional Descriptions 5F - 15... -
Page 187: Technical Specifications
Service Manual Cafitesse Functions - Cooling System F.5 Technical Specifications WHAT: HOW: Temperature sensor Connecting temperature Cooling compartment: 40 °F Cut-off temperature Cooling compartment: 35.5 °F Temperature fault indication/LED High temperature: above 44 °F Low temperature: below 33.5 °F Voltage: 2 x 24 V DC Power: 2 x 2.5 W... - Page 188 Service Manual Cafitesse 500 Functions - Housing 5.G Housing Contents Adjustments ..................... 2 Not available Disassemblies ..................2 G.2.1 Disassembly of the Housing Cover ............2 G.2.2 Disassembly of the Front Part ..............3 G.2.3 Disassembly of the Exhaust Grid ............... 5 G.2.4...
-
Page 189: Adjustments
Service Manual Cafitesse 500 Functions - Housing G Housing G.1 Adjustments Not available G.2 Disassemblies G.2.1 Disassembly of the Housing Cover Disconnect the dispenser from the mains supply and close the water supply valve. Loosen the locking rail (3) by turning the screws (1) and remove the housing cover (2) towards the top. -
Page 190: Disassembly Of The Front Part
Service Manual Cafitesse 500 Functions - Housing G.2.2 Disassembly of the Front Part Disconnect the dispenser from the mains supply and close the water supply valve. Remove the brew basket, the combi- trough and the trough box. Remove the flexi-packs. - Page 191 Service Manual Cafitesse 500 Functions - Housing Lift the front part (Fig. 5) and remove it. Pull the cable carefully out. The mounting is done in the reverse order. When mounting the front part make sure that the front part is hooked first at the...
-
Page 192: Disassembly Of The Exhaust Grid
Service Manual Cafitesse 500 Functions - Housing G.2.3 Disassembly of the Exhaust Grid Do not use force to remove the exhaust grid from the outside of the dispenser, but: Remove the boiler (see pg. 5.A-3) Pull the sheet metal bracket slightly for- wards (1). -
Page 193: Disassembly Of The Filter Grid
Service Manual Cafitesse 500 Functions - Housing G.2.5 Disassembly of the Filter Grid Loosen the filter grid (1) from the grid plate (2) (arrow A) and remove it by pulling it upwards (arrow B). (Fig. 1) Remove the sheet metal bracket (3) and the filter cloth (4) from the filter grid (1). -
Page 194: Functional Descriptions
Service Manual Cafitesse 500 Functions - Housing Functional Descriptions Not available G.4 Electrical Diagrams Not available G.5 Technical Specifications WHAT: HOW: Housing/front part Material: stainless steel, powder coating Coating: RAL 9005 Cover Material: plexiglass Operating panel Material: 5G - 7... -
Page 195: Options
Service Manual Cafitesse 500 Functions - Housing Options* Not available G.7 Accessories* WHAT: FOR: REQUIRED FOR: Advertising panel, front Branding specific for the corresponding photo Advertising panel, rear customer if required (see spare parts list) Advertising panel on the rear... - Page 196 Service Manual Cafitesse 500 Functions - Housing G.7.1 Advertising Panel on the Rear Side Installation of the Kit 'Advertising Panel on the Rear Side' Disconnect the dispenser from the mains supply and close the water supply valve. Remove the filter grid (1) with sheet metal bracket and filter cloth as well as the grid plate (2).
- Page 197 Service Manual Cafitesse 500 Functions - Housing G.7.2 Wall Spacer Installation of the Kit 'Wall Spacer' The wall spacer (1) is self sealing. (Fig. 1) When mounted on the dispenser it makes sure that there is a distance to the wall which is necessary for the cooling by circulating air.
- Page 198 Service Manual Cafitesse 500 Functions - Housing G.7.3 Filter Grid with Cover Technically not yet released 5G - 11 January 2001...
- Page 199 Service Manual Cafitesse 500 Functions - Power Supply and Control 5.K Power Supply and Control Contents Adjustments ..................... 2 Disassemblies ..................3 K.2.1 Total Overview ................... 3 K.2.2 Disassembly of the Control Board including Housing ........ 4 K.2.3 Disassembly of the Switched Mode Power Supply including Housing..5 K.2.4...
- Page 200 Service Manual Cafitesse 500 Functions - Power Supply and Control Power Supply and Control Adjustments WHAT: HOW: Power supply console Heating capacity: mains voltage see chap. 2.7 5K - 2 January 2001...
- Page 201 Service Manual Cafitesse 500 Functions - Power Supply and Control Disassemblies K.2.1 Total Overview Fig. 1 Electronic control (1) Switching mode console (2) Power supply console (3) 5K - 3 January 2001...
- Page 202 Service Manual Cafitesse 500 Functions - Power Supply and Control K.2.2 Disassembly of the Control Board including Housing DANGER: The electronic control board is equipped with a Lithium battery as a buffer for the clock function. There is a danger of an explosion due to mishandling.
- Page 203 Service Manual Cafitesse 500 Functions - Power Supply and Control K.2.3 Disassembly of the Switched Mode Power Supply including Housing Disconnect the dispenser from the mains supply and close the water supply valve. Loosen the screw (1) at the splash panel (2) and open the splash panel by pressing it downwards.
- Page 204 Service Manual Cafitesse 500 Functions - Power Supply and Control K.2.4 Disassembly of the Power Supply Unit Disconnect the dispenser from the mains supply and close the water supply valve. Loosen the screw (1) at the splash panel (2) and open the splash panel by pressing it downwards.
- Page 205 Service Manual Cafitesse 500 Functions - Power Supply and Control Guide the power supply console with the heating capacity change-over switch and carefully pull it upwards. (Fig. 3) Turn the sash fastener (7) at the inlet valve clockwise. Pull the plate (8) and the inlet valve (9) upwards out of the guide.
- Page 206 Service Manual Cafitesse 500 Functions - Power Supply and Control K.2.5 Disassembly of the Circuit Board of the Service Panel Disconnect the dispenser from the mains supply and close the water supply valve. Remove the front part. (see pg. 5.G-3).
- Page 207 Service Manual Cafitesse 500 Functions - Power Supply and Control The service board (6) is coated against humidity. Therefore, the plug (7) at the service board must not be unplugged. (Fig. 4) Open the control board box (8) and remove the corresponding plug (9) from the interconnector board (10).
- Page 208 Service Manual Cafitesse 500 Functions - Power Supply and Control K.2.6 Disassembly of the Operating Panel and the Operating Panel Board CAUTION: In order to prevent damaging of the pc boards and their components due to electrostatic charge, first touch a metal table or a metal cupboard before touching the pc boards.
- Page 209 Service Manual Cafitesse 500 Functions - Power Supply and Control K.2.7 Disassembly of the rear LEDs Remove the exhaust grid. (see pg. 5.G-5) Pull the cable harness with the LEDs out of the exaust grid. Replace the defective LED. Instructions for reinstallation: The LED depends on the polarity.
-
Page 210: Functional Descriptions
Service Manual Cafitesse 500 Functions - Power Supply and Control Service Manual Cafitesse 500 Functions - Power Supply and Control K.3 Functional Descriptions K.3.1 Schematic Illustration of the Cable Harnesses MOTOR F.AUTOMATIC DIAPHRAGM SERVICEPANEL INTERCONNECTOR PUSHBUTTONPANEL MAINS VOLTAGE USA/CANADA BU 21... -
Page 211: Function: Switched Mode Power Supply
Service Manual Cafitesse 500 Functions - Power Supply and Control K.3.2 Function: Switched Mode Power Supply Fig. 1 The switched mode power supply (1) is supplied with ac voltage that can be adjusted via the selector switch on the power supply console. (Fig. 1) (see pg. 2-14) - Page 212 Service Manual Cafitesse 500 Functions - Power Supply and Control K.3.3 Function: Control Unit 7 6 5 Fig. 1 The control unit (1) completely controls and The following components are situated on monitors the dispenser. (Fig. 1) the control unit (Fig. 1):...
- Page 213 Service Manual Cafitesse 500 Functions - Power Supply and Control K.3.4 Function: Operating Panel Board - Service Panel The operating panel board (1) is connected to The following components are situated on the service panel board (4) via two cable...
-
Page 214: Electrical Diagrams
Service Manual Cafitesse 500 Functions - Power Supply and Control K.4 Electrical Diagrams 5K - 17 January 2001... - Page 215 Service Manual Cafitesse 500 Functions - Power Supply and Control Service Manual Cafitesse 500 Functions - Power Supply and Control P13-5 ye CONNECT FOR WATERPUMP ICE INLET P1-2 bk P1-1 rd SERVICEPANEL INTERCONNECTOR P13-2 gr WATER INLET PUSHBUTTONPANEL P1-2 bk...
-
Page 216: Technical Specifications
Service Manual Cafitesse 500 Functions - Power Supply and Control K.5 Technical Specifications WHAT: HOW: Control unit/operating panel Operating voltage: 24 V/5V Peltier circuit Operating voltage: 13.5 V Fuse power supplies Switched mode power supply: 4 AT Control unit: 3x5 AT K.6 Options*... - Page 217 Service Manual Cafitesse 500 Functions - External Options 5.L External Options Depending on the different Nationalities, to be completed by the OPCOs and the Distributors. 5L - 1 January 2001...
- Page 218 Service Manual Cafitesse 500 Functions - Payment Systems 5.P Payment Systems Not applicable to this equipment 5P - 1 January 2001...
- Page 219 Service Manual Cafitesse 500 Preventive Maintenance Preventive Maintenance Contents Preventive Maintenance Program for the Service ........2 6.1.1 Cleaning the Filter Cloth ................. 3 6.1.2 Cleaning the Plexi Glass Cover ..............3 6.1.3 Cleaning the Heat Sink ................... 3 Additional preventive Maintenance Instructions by the OPCOs and the Distributors ..............
-
Page 220: Preventive Maintenance
Service Manual Cafitesse 500 Preventive Maintenance Preventive Maintenance 6.1 Preventive Maintenance Program for the Service Item Action Interval (months) Interval (others) 1. Heat sink remove dust 2. Boiler decalcify depending on the local hardness of water 3. Air filter and... -
Page 221: Cleaning The Filter Cloth
Service Manual Cafitesse 500 Preventive Maintenance 6.1.1 Cleaning the Filter Cloth Loosen the filter grid (1) from the grid plate (2) (arrow A) and remove it upwards (arrow B). (Fig. 1) Remove the support plate (3) and the filter cloth (4) from the filter grid. (Fig. 2) Remove and clean the filter cloth (4), replace it if necessary. -
Page 222: Cleaning The Plexi Glass Cover
Service Manual Cafitesse 500 Preventive Maintenance 6.1.2 Cleaning the Plexi Glass Cover (When extremely dirty) Open the cooling compartment cover. Press the two hooks (1) carefully to the top. (Fig. 1) Slightly incline the cover to the front (A), hold it firmly, remove it by pulling it up- wards and clean it (B). -
Page 223: Additional Preventive Maintenance Instructions By The Opcos And The Distributors
Service Manual Cafitesse 500 Preventive Maintenance 6.2 Additional preventive Maintenance Instructions by the OPCOs and the Distributors 6 - 5 January 2001... - Page 224 Service Manual Cafitesse 500 Service Procedures Service Procedures Contents Dispenser SIS Code List ................2 Warranty and Parts Return ................3 Handling of Modifications ................4 Miscellaneous (e.g. Service Contracts of OPCOs and Distributors) ..5 7 - 1 January 2001...
-
Page 225: Service Procedures
Service Manual Cafitesse 500 Service Procedures Service Procedures 7.1 Dispenser SIS Code List 7 - 2 January 2001... -
Page 226: Warranty And Parts Return
Service Manual Cafitesse 500 Service Procedures 7.2 Warranty and Parts Return 7 - 3 January 2001... -
Page 227: Handling Of Modifications
Service Manual Cafitesse 500 Service Procedures 7.3 Handling of Modifications DECS International / Technical Support Service Information Modification Instruction OPCO/Distributor: - Operations Manager - Service Manager - Technical Coordinator Service Information & Modification Instruction Service Information Modification Instruction Service Service Technician... -
Page 228: Miscellaneous (E.g. Service Contracts Of Opcos And Distributors)
Service Manual Cafitesse 500 Service Procedures 7.4 Miscellaneous (e.g. Service Contracts of OPCOs and Distributors) 7 - 5 January 2001... - Page 229 Service Manual Cafitesse 500 Service Information Service Information 8 - 1 January 2001...
- Page 230 Service Manual Cafitesse 500 Modification Instructions Modification Instructions 9 - 1 January 2001...
Need help?
Do you have a question about the CAFITESSE 500 and is the answer not in the manual?
Questions and answers