Table of Contents
Advertisement
Advertisement
Table of Contents

Related Manuals for Douwe Egberts Cafitesse NG300


Summary of Contents for Douwe Egberts Cafitesse NG300
- Page 1 Cafitesse 300 Next Generation Operator manual 36416008 2011 - 01...
- Page 2 Copyright 2011 © Sara Lee International Foodservice, Netherlands The English version is the original version of the operator manual. Other languages are translations of the original operator manual.
-
Page 3: Table Of Contents
TABLE.OF.CONTENTS Introduction........4 Programming.the.dispenser..25 About the dispenser ......4 Starting the operator mode ..25 About this operator manual ...4 Counter readings ......27 Changing cup volumes ....29 Safety.instructions.......5 Changing drink strength ....30 General ..........5 Setting date and time ....31 Installation ........6 Setting the cleaning days ....32 Transport, storage and operation ..7 ECO settings .......33... -
Page 4: Introduction
1.INTRODUCTION About.the.dispenser About.this.operator.manual • with a door lock to prevent unauthorized access to the The Cafitesse 300 is a dispenser for This operator manual describes the dispenser. the delivery of coffee, tea and only hot main applications and functions of •... -
Page 5: Safety.instructions
2.SAFETY.INSTRUCTIONS General Please read the instructions in this • The dispenser is not suitable for Warning: This.dispenser.is.not.intended. operator manual carefully before using, outdoor use. for.use.by.persons.(including. cleaning or moving the dispenser. • The dispenser must be installed children).with.limited.physical,. Ensure that you and all other persons where it can be supervised by sensory.and.mental.faculties,. -
Page 6: Installation
l.2 S A F E T Y I N S T RUCT I O NS Installation The installation and programming of • Ensure that there is sufficient space If you connect the dispenser to a plug the dispenser may only be carried out around the dispenser for ventilation. -
Page 7: Transport, Storage And Operation
2 S AFETY INSTRUCTION S l Transport,.storage.and. Servicing.the.dispenser operation The servicing, repair and programming of the dispenser may only be carried Always store and transport the out by authorised and appropriately dispenser in the original packaging. trained service technicians assigned Before storing or transporting the by your Cafitesse system supplier. -
Page 8: Food Safety Instructions (Haccp)
l.2 S A F E T Y I N S T RUCT I O NS c o f f la t t e t t e e e la c o f f c o f f la t t e t t e e e la c o f f... - Page 9 2 S AFETY INSTRUCTION S l Fig. 4 Fig. 5 Follow the instructions on the Caution: Do not touch the tip of the doser product pack. Write at least the with your hands or the cleaning expiry date on the product pack. cloth.
- Page 10 l.2 S A F E T Y I N S T RUCT I O NS Cleaning.the.dispenser Training Danger: DO.NOT.SPRAY.OR.SPLASH. Clean the dispenser regularly Train new staff regarding food safety THE.DISPENSER.WITH.WATER.. instructions (HACCP). Clean the surface around the DO.NOT.USE.A.WATER.JET. dispenser. • Inform new staff about schedules FOR.CLEANING..
-
Page 11: Components.of.the.dispenser
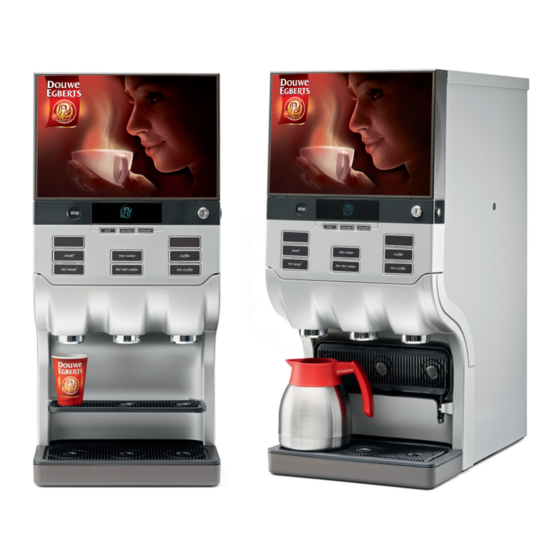
3.COMPONENTS.OF.THE.DISPENSER Fig. 6 Fig. 7 Fig. 8 Front.of.the.dispenser: 7 - Port for USB key Rear.of.the.dispenser: 8 - Door release button 1 - Dispenser door 14 - Condensate grid 9 - LOCK/Clear-Error switch 2 - Display 15 - Water supply hose 10 - Cooling compartment 3 - STOP-button 16 - Power cord... -
Page 12: Icons On The Display
l.3 C O M P O N E N T S O F T H E D I SP E N SE R Fig. 9 Icons.on.the.display: OPERATOR.MODE LOCK STRENGTH-preselection the USB operator stick is inserted the dispenser is locked an cannot select a mild, normal or strong drink and the operator mode is active dispense drinks... -
Page 13: Operating.the.dispenser
4.OPERATING.THE.DISPENSER Fig. 10 Fig. 11 Fig. 12 Place.cups.and.pots.correctly The dispenser has three product A special dispenser foot may be To.deliver.a.drink: outlets: required for larger pots. Place your cup on the cup tray. (Fig. 10) • Left: for coffee or tea Press the drink button of your •... -
Page 14: Portioned Or Continuous Drink Delivery
l.4 O P E R AT I N G T H E D I S P E N SE R Fig. 13 Fig. 14 Portioned.or.continuous.drink. delivery During installation, the service • Continuous.delivery: Caution: Press the STOP button if the technician programs the dispenser The drink button must be kept cup or pot is too small for the to operate with one of the following... -
Page 15: Drink Delivery With Preselections
4 OPERATING THE DIS PEN S E R l ICED VOLUME STRENGTH Fig. 15 Drink.delivery.with.preselections ICED-preselection (option) VOLUME-preselection Place your cup on the cup tray. Place your cup on the cup tray. Your dispenser supports preselection Press the preselection button Press the preselection button options. - Page 16 l.4 O P E R AT I N G T H E D I S P E N SE R ICED VOLUME STRENGTH Fig. 16 STRENGTH-preselection Press a drink button. The drink Note: If you press a preselection will be delivered with the selected Place your cup on the cup tray.
-
Page 17: Inserting And Removing Product Packs
4 OPERATING THE DIS PEN S E R l Fig. 17 Inserting.and.removing.product. If the operator menu «OPERATOR NR» shows the setting «SHOW packs OPERATOR NR» set to «YES», the entered telephone number will be Empty.product.pack.detection shown on the display. (Fig. 17) If you select a drink and the The following text will scroll in the corresponding product pack is empty,... - Page 18 l.4 O P E R AT I N G T H E D I S P E N SE R c o f f la t t e t t e e e la c o f f c o f f la t t e t t e e e la...
-
Page 19: Switching On The Dispenser
4 OPERATING THE DIS PEN S E R l Switching.on.the.dispenser Switching.off.the.dispenser Note: Caution: Please take the following preparations If the dispenser has been shut Ensure, that the dispenser is when the dispenser is not to be used down for longer periods, the date connected to the water supply. -
Page 20: Locking/Unlocking The Dispenser
l.4 O P E R AT I N G T H E D I S P E N SE R Fig. 21 Fig. 22 Fig. 23 Locking/unlocking.the.dispenser Drink.delivery.in.locked.mode (option) Open the dispenser door. (Fig. 21) To unlock the dispenser, press the LOCK/Clear-Error switch switch •... -
Page 21: Cleaning.the.dispenser
5.CLEANING.THE.DISPENSER Cleaning.procedures When.is.cleaning.due? It is recommended, that you clean your • You must clean the dispenser when dispenser at regular intervals. There the display indicates that cleaning is are two optional procedures: required. • ‚Clean & Flush‘ the cooling The cleaning icon appears in the compartment and the drink outlets. - Page 22 l.5 C L E A N I N G T H E D I S P E N SE R Fig. 25 Fig. 26 The following message appears on The following message appears on The following message appears on the the display: the display: display:...
-
Page 23: Flush
5 CLEA NING THE DISPE N S E R l Flush Start.the.‚Flush‘.procedure Warning: The.liquids.dispensed.by. According to your own needs, you can Press first the STOP button and the.dispenser.are.hot!.Avoid. optionally set weekdays for ‚Flush‘ then the enter button and hold scalding!.Keep.hands.and. in the operator menu «CLEANING them pressed simultaneously for other.body.parts.away.from.the. -
Page 24: Manual Daily Cleaning
l.5 C L E A N I N G T H E D I S P E N SE R Fig. 27 Fig. 28 Manual.daily.cleaning.of. external.parts Open the dispenser door and press Empty the drip tray. Note: The parts can also be cleaned in the ‚CLEAR/ERROR‘-switch to set Note: a dishwasher. -
Page 25: Programming.the.dispenser
6.PROGRAMMING.THE.DISPENSER Down Enter Fig. 29 Fig. 30 Starting.the.operator.mode. Operation.in.the.operator.mode.. (fig. 30):. • Insert the supplied USB key into the Display USB port on the dispenser. (Fig. 29) Three.preselection.buttons Arrow.button.‚UP‘. .-. This immediately starts the operator scroll up or increase input values mode which offers a series of Arrow.button.‚DOWN‘. - Page 26 l.6 P R O G R A M M I N G T H E D I S P E NS E R . COUNTERS COUNTERS . VOLUME . STRENGTH . DATE/TIME . CLEANING.DAYS . ECO.SETTING . TELEPHONE.# Fig. 31 Fig.
-
Page 27: Counter Readings
6 PROGRAM MING THE DIS PEN S E R l Total.number.of.drinks Subtotals.per.drink.button . COUNTERS. • In the operator mode, press the • In the «COUNTERS» menu, press a . VOLUME enter button to access the drink button, e.g. ‚coffee‘. «COUNTERS» menu. (Fig. 33) . - Page 28 l.6 P R O G R A M M I N G T H E D I S P E NS E R Subtotals.„VOLUME“.and.„ICED“. Press the preselection button Total.number.of.iced.and.hot.drinks. (option).per.drink.button „ICED“ (only if the cold drinks (only if the cold drinks option is option is installed) installed) In the «COUNTERS»...
-
Page 29: Changing Cup Volumes
6 PROGRAM MING THE DIS PEN S E R l . COUNTERS. . VOLUME. . STRENGTH . DATE/TIME . CLEANING.DAYS . ECO.SETTING . TELEPHONE.# Fig. 34 Changing.cup.volumes In the «VOLUME» menu, you can The following message appears on the Note: If you would like to modify the increase or decrease the drink display:... -
Page 30: Changing Drink Strength
l.6 P R O G R A M M I N G T H E D I S P E NS E R . COUNTERS. . VOLUME. . STRENGTH. . DATE/TIME . CLEANING.DAYS . ECO.SETTING . TELEPHONE.# Fig. 35 Changing.drink.strength In the «STRENGTH»... -
Page 31: Setting Date And Time
6 PROGRAM MING THE DIS PEN S E R l The date and time settings are shown The option «YEAR» stays lit and the on the display. The option «MONTH» option «HOUR» starts to flash: . COUNTERS. is active and flashing: JUL.06.2009 . -
Page 32: Setting The Cleaning Days
l.6 P R O G R A M M I N G T H E D I S P E NS E R Set.the.day(s).for.„CLEAN“ Note: Several days for cleaning can be . COUNTERS. Use the arrow buttons defined in sequence. navigate to submenu«CLEAN». - Page 33 6 PROGRAM MING THE DIS PEN S E R l Set.the.day(s).for.„.FLUSH“ Note: Several days for flushing can be Use the arrow buttons defined in sequence. navigate to submenu«FLUSH». Select additional weekday(s) if requested by repeating steps 3. On the display, the status icon and 4.
-
Page 34: Eco Settings
l.6 P R O G R A M M I N G T H E D I S P E NS E R • Press the enter button to access Setting.the.START.time. the «ECO SETTING» menu. (when.status:.«ECO.ENABLED») . COUNTERS. (Fig. 38) . - Page 35 6 PROGRAM MING THE DIS PEN S E R l Setting.the.END.time. Setting.the.TEMPERATURE. Note: When the energy saving mode is (when.status..«ECO.ENABLED») (when.status..«ECO.ENABLED») active, the «ECO» icon is shown Use the arrow buttons Use the arrow buttons on the display of the dispenser. navigate to submenu «ECO END».
-
Page 36: Setting Telephone Numbers
l.6 P R O G R A M M I N G T H E D I S P E NS E R In the «TELEPHONE #» main menu, Activate/deactivate.operator.number four sub-menus can be selected using . COUNTERS. Use the arrow buttons the arrow buttons navitate to the sub menu «SHOW SHOW... - Page 37 6 PROGRAM MING THE DIS PEN S E R l Activate/deactivate.service.number Enter.the.operator.number Enter.the.service.number Use the arrow buttons Use the arrow buttons Use the arrow buttons navigate to the sub-menu navigate to the sub-menu navigate to the sub menu «SHOW SHOW «OPERATOR NR».
-
Page 38: Display.messages.and.trouble.shooting
7.DISPLAY.MESSAGES.AND.TROUBLE.SHOOTING Display.messages Cause Action One or two product packs are: Call the operator when the number is shown on the display. • empty • Replace the empty product pack(s), see page 18. • incorrectly positioned • Check whether the product pack(s) are inserted correctly, see page 18. - Page 39 7 DIS PLAY ME SSA GES A ND TROUBL E SHOOTIN G l Display.messages Cause Action The dispenser must be cleaned. • Call the operator when the number is shown on the display. • Start the cleaning program on the same day, see Page 21.
- Page 40 l.7 D I S P L AY M E SSA G ES A ND T R O UB L E SH OOT ING Display.messages Cause Action Error water system: Check the water supply line to the dispenser is blocked, open the water tap completely. Err.19 Press the LOCK/Clear-Error switch.
-
Page 41: Technical Specification
8.TECHNICAL.SPECIFICATION Technical Specifications Cafitesse 300 Dispenser versions Standard version hot drinks - cup & pot delivery Café Cool version hot and cold drinks - cup & pot delivery Dimensions Height 770 mm / 30.3 in Width 350 mm / 13.8 in Depth 522 mm / 20.6 in Weight... - Page 42 l.8 T E C H N I C A L SP E CI F I C AT I O N Technical Specifications Cafitesse 300 Dynamic pressure Min. 0.8 bar at 10 l/min - 11 psi at 2.6 USgal/min Static pressure Max.
-
Page 43: Options
9.OPTIONS The features and options listed in this section may not apply in each country. Please consult your Cafitesse system supplier for more information. Software.options. On customer demand the service technician can enable or disable specific functions of your dispenser. For example: •... - Page 44 l.9 O P T I O N S High flow Air.pot.Extension. To increase the delivery speed of To allow the use of large pots like air the dispenser the service technician pots, the service technician can install can install the high flow option. Two a special dispenser foot to increase the product packs of the same sort of delivery height of the dispenser outlets...
-
Page 45: Index
10.INDEX Ambient temperature, 42 Filter (water filter), 12, 39 Safety instructions, 4, 5, 8, 10, 18, 24 Arrow button, 25 First in - First out principle, 8 Service mode, 12 Flushing, 22, 23, 32, 33, 40 Setting cleaning days, 32, 33 Front of the dispenser, 6, 12 Setting date / time, 31 ‚Best before‘... -
Page 46: Cleaning.procedure
CLEANING.PROCEDURE CLEANING.(weekly) FLUSHING optional 2011 - 01...
Need help?
Do you have a question about the Cafitesse NG300 and is the answer not in the manual?
Questions and answers
coffee concentrate freezes solid