Kantech KT-300 Installation Manual
Door controller
Hide thumbs
Also See for KT-300:
- Specifications (2 pages) ,
- Installation manual (28 pages) ,
- Installation manual (15 pages)
Table of Contents
Advertisement
Advertisement
Table of Contents

Related Manuals for Kantech KT-300


Summary of Contents for Kantech KT-300
- Page 1 KT-300 Door Controller Installation Manual DN1315-1007 V01.02...
-
Page 3: Table Of Contents
Table of Contents Pre-Installation Information ........................1 Copyright Information ........................1 Safety Instructions ........................1 Components Required to Install KT-300 ..................1 Technical Support ........................1 KT-300 Compliance Specifications ......................2 FCC & IC Compliance ......................... 2 CE Compliance Notice ........................ 2 CE &... - Page 4 Installation and Wiring ....................... 14 Applying Power .........................15 Assigning the KT-PC4216 Module .................... 15 KT3-LCD - Kantech LCD Time & Date Display Module ................. 15 KT3-LCD Introduction ........................ 15 KT3-LCD Specifications ......................15 Unpacking the KT3-LCD ......................15 Mounting the KT3-LCD ......................15 Wiring the KT3-LCD ........................
- Page 5 Customer and a Return Merchandise Authorization number (RMA) is issued by KANTECH’s Customer Serv- ice. Kantech’s liability for failure to repair the product under this warranty after a reasonable number of attempts will be limited to a replacement of the product, as the exclusive remedy for breach of warranty.
- Page 6 Kantech must first obtain an authorization number. Kantech will not accept any shipment whatsoever for which prior authoriza- tion has not been obtained. Products which Kantech determines to be repairable will be repaired and returned. A set fee which Kantech has pre- determined and which may be revised from time to time will be charged for each unit repaired.
- Page 7 and installed correctly. If a device operates only by AC power, any interruption, however brief, will render that device inoperative while it does not have power. Power interruptions of any length are often accompanied by voltage fluctuations which may damage electronic equipment such as an access control system.
-
Page 8: Pre-Installation Information
Copyright © 2010 Tyco International Ltd. and its Respective Companies. All Rights Reserved. All specifications were current as of publication date and are subject to change without notice. EntraPass, Kantech and the Kantech logo are trademarks of Tyco International Ltd. and its Respective Companies. -
Page 9: Kt-300 Compliance Specifications
Backup battery provides operation of up to 12 hours but has been tested only 4 hours per Section 33 of UL294, fifth edition. NOTE: All circuits are power limited. UL 1076 Standard: The following Kantech readers were validated by UL for the UL 1076 standard: P225W26, P225KPW26, P225KPXSF, P225XSF, P325W26, P325KPW26, P325XSF, P325KPXSF, and P600. DN1315-1007... -
Page 10: Overview
Power outputs are supervised and individually protected against short-circuits and surges by self-resetting PTC. Locking devices are also supervised for short and open circuits. Built-in Combus Expansion The KT-300 supports expansion modules to add inputs, outputs and an LCD time and date display for Time & Attendance purposes. KT-PC4108 - 8-Zone Input... -
Page 11: Technical Specifications
120/16VAC, 40VA, class 2 transformer (North America) 230/16VAC, 100VA, fused transformer (Europe) Battery Back-up 1battery 12VDC, 7Ah, supervised, provides up to 12 hours of operation, Kantech BD7-12 battery tested for 4 hours standby for UL294 Operating From 2°C to 40°C (35°F to 110°F) -
Page 12: Electrical Specifications
4-Relay and Combus additional power supply module for KT-300 KT-PC4216 16-Output expansion module for KT-300 KT-RM1 External isolation relay SPDT for KT-300 output (RL1/RL2) (not UL listed) KT3-LCD Time & date LCD display unit for KT-300 KT-300CAB KT-300 black metal cabinet including KT- LOCK... -
Page 13: Kt-300 Door Controller Installation Manual
KT-300 Door Controller Installation Manual Kantech Model Description VC-485 or USB-485 Multi-function communication interface DN1315-1007... -
Page 14: Installing The Kt-300
The KT-300 uses high performance communication, proper grounding must be provided to ensure proper operation. Make an earth ground connection to the cabinet of the KT-300 as per the requirements of your local electrical code. Wire the E- GND terminal on the KT-300 printed circuit board directly to that connection point. -
Page 15: Hooking Up Inputs
Can be expanded up to 16 controlled outputs when using a KT-PC4216 module. This module allows a maximum of 16 outputs and a maximum of up to 50 mA per output. Since the KT-300 only supports 500 mA, a power supply module can be used to provide an additional 1 A to the Combus. -
Page 16: Auxiliary Outputs
Connect RS-485 cable to X1+, X1- and GND. Controllers are linked together through their RS-485 connectors. The maximum communication loop length is 1.2 kilometers (4,000 feet) using appropriate cabling. Connecting several KT-300 controllers at a single point is not acceptable nor are splitters or “spider web networks.”... -
Page 17: Connecting The Master Controller To The Host Pc
Over Corporate Network (LAN) If the master controller is used in a LAN-enabled corporate setting, use TCP/IP-to-RS-232 converter (such as the Kantech IP Link or the Lantronix UDS-1100 communication interface) to connect the controller to the corporate network. This method uses existing wiring for data exchange between EntraPass and the controllers. -
Page 18: Powering The Kt-300
Introduction to Combus Modules The Combus terminals on the KT-300 Controller are used to connect expansion modules to add inputs, outputs, relays and LCD time and date display. The four Combus terminals of the main panel must be connected to the four Combus terminals or wires of all modules. -
Page 19: Combus Repower (If Required)
Do not use any power supply other than the KT-PC4204 to repower the Combus. In the event of a power surge or transient, a module may lock up and cease to communicate with the controller. If the KT-300 loses communication with the module, it will initiate a module reset and will power down the Combus for five seconds in an attempt to reset the problem module. -
Page 20: Kt-Pc4108 - 8-Zone Input Expansion Module
One (1) installation instructions sheet Mounting the KT-PC4108 Module The KT-PC4108 module should be located inside a compatible cabinet (Kantech part no. KT-4105 CAB), mounted in a dry, secure location. Preferably, it should be placed at a convenient distance from the connected devices. -
Page 21: Kt-Pc4204 - 4-Relay And Additional Power Supply Module
4. Connect the external tamper switch, if used. Applying Power After wiring is completed, apply power to the KT-300. Connect the battery leads to the battery, and connect the AC transformer. Then, connect power to the KT-PC4204; the battery leads followed by the AC transformer. -
Page 22: Kt-Pc4216 - 16-Zone Output Expansion Module
Combus (since Combus can handle a maximum of 500 mA, a KT-PC4204 module in “repower” mode can be used to increase the current of the Combus of 1A). • Connects to KT-300 via 4-wire Combus • Nominal current draw of 15 mA •... -
Page 23: Applying Power
Combus. Applying Power 1. After all wiring is completed, apply power to the KT-300. 2. Connect the battery leads to the battery. 3. Then, connect the AC transformer. NOTE: Do not connect the power until all wiring is completed. -
Page 24: Wiring The Kt3-Lcd
The KT-300 was communicating via the RS-232 port and you installed a VC-485 to communicate via the RS-485 port; c You were using the KT-300 at a local site and now want to configure it for remote operation. How to Use the Default Initialization (Hard Reset) 1. -
Page 25: Visual Status Indicators (Leds)
2.5 seconds ON Modem confirm Visual Status Indicators (LEDs) The KT-300 controller has multiple status indicators such as for troubleshooting, network activity, power status and outputs activity. Please refer to the graphic below for a detailed view of their location. •... -
Page 26: Kt-300 Controller Maintenance Recommendations
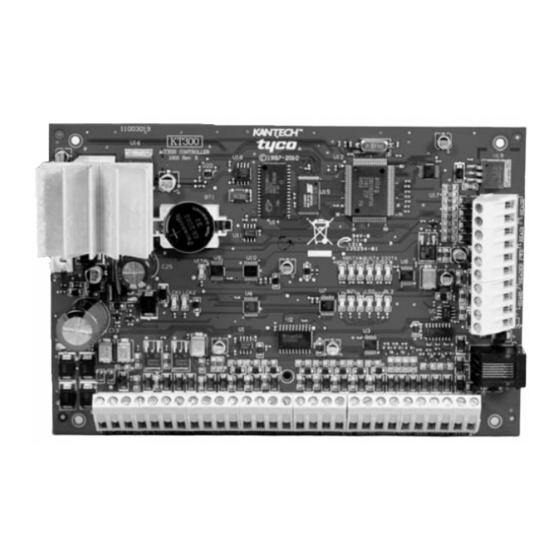
The KT-300 circuit board includes a lithium battery (see the KT-300 Controller Wiring Diagram on page 20). This battery must be replaced by a Kantech technician to avoid any risk of explosion. If the lithium battery stops working, return the circuit board to Kantech. -
Page 27: Kt-300 Wiring Diagram (North American Version)
KT-300 Door Controller Installation Manual KT-300 Wiring Diagram (North American Version) DN1315-1007... -
Page 28: Kt-300 Wiring Diagram (Ue Version)
KT-300 Door Controller Installation Manual KT-300 Wiring Diagram (EU Version) DN1315-1007...
Need help?
Do you have a question about the KT-300 and is the answer not in the manual?
Questions and answers