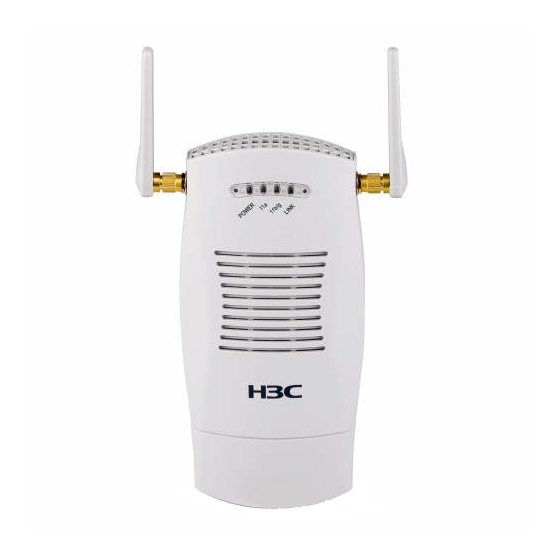
H3C WA2110-AG Installation Manual
Wlan access point
Hide thumbs
Also See for WA2110-AG:
- Quick start manual (8 pages) ,
- Quick start manual (31 pages) ,
- Quick start-up (34 pages)
Summary of Contents for H3C WA2110-AG
-
Page 1: Installation Guide
H3C WA2110-AG WLAN Access Point Installation Guide Abstract This document details the installation procedures for the WA2110-AG WLAN access point. Hangzhou H3C Technologies Co., Ltd. http://www.h3c.com... - Page 2 However, the statements, information, and recommendations in this document do not constitute a warranty of any kind, express or implied. Hangzhou H3C Technologies Co., Ltd. and its licensors shall not be liable for technical or editorial errors or omissions contained herein.
-
Page 3: Table Of Contents
Wall or ceiling mounting ··········································································································· 6 Tabletop mounting ·················································································································· 9 4 Support and other resources ······························································································11 Related documentation ············································································································· 11 Contacting H3C ························································································································· 11 Obtaining documentation ····································································································· 11 Obtaining documentation ····································································································· 11 Technical support ·················································································································· 12 Documentation feedback ····································································································· 12 Document conventions and symbols ···························································································... -
Page 4: Product Overview
Product overview The H3C WA2110-AG is a managed wireless LAN access point designed for use with an H3C WX series access controller/unified switch and requires only hardware installation. All configurations for the access point take place on the access controller/unified switch. - Page 5 Figure 2 LEDs on a WA2110-AG (1) POWER: Power LED (2) 11a: 802.11a LED (3) 11b/g: 802.11b/g LED (4) LINK: Ethernet status LED Table 1 LED Descriptions Meaning Indicates the working status of the power supply: POWER On: The device is working properly.
-
Page 6: Installation Preparations
WARNING: Do not use or manipulate your WA2110-AG near any uncovered exploders or in any other explosive environments, unless otherwise authorized by related functionaries. Unpacking and inspection Before unpacking the AP, ensure that the package is not damaged and that it does not show signs of water damage. -
Page 7: Installation Tools
Before mounting the WA2110-AG, connect it to the power adapter (if applicable) and the Ethernet, and check the status of the LEDs to ensure that the WA2110-AG works properly. In addition, record the MAC address of the access point for future use. -
Page 8: Installation
This is to ensure that you can verify whether the access point works normally immediately after you connect it. For instructions on configuring the access controller or unified switch, see H3C WX Series Access Controllers Configuration Guides and H3C WX Series Access Controllers Command References. - Page 9 For easy installation and removal of the access point from the mounting bracket, ensure that there is sufficient flexibility with the cable and that the cable is long enough. H3C recommends using flexible cables. If not enough cable is routed through the back of the mounting bracket, or the cable is inflexible, it can be difficult to install or remove the access point from the mounting bracket.
- Page 10 Figure 4 Mount the bracket (unit: mm) 70.00 4.50 6.00 78.80 Connect the Ethernet cable and the power cable (if using a power adapter) to the corresponding port(s) on the access point. CAUTION: To avoid connection interference caused by dust, clean the pins of the cable connector before connecting the cable to the access point.
-
Page 11: Tabletop Mounting
WARNING: In case of lightning, do not plug/unplug the cable to/from the access point. When the LEDs of the access point are blinking, do not plug/unplug the cable to/from the access point or perform any operation that may affect the normal running of the access point. Align the bottom of the access point with the mounting bracket, and press against the access point until it is securely mounted in the mounting bracket. - Page 12 Connect the Ethernet cable and power cable (if you are using a power adapter) to the corresponding port(s) on the access point.
-
Page 13: Support And Other Resources
WX series access controllers. Contacting H3C Obtaining documentation Obtaining documentation You can access the most up-to-date H3C product documentation on the World Wide Web at http://www.h3c.com. Click the links on the top navigation bar to obtain different categories of product documentation:... -
Page 14: Technical Support
Technical Support & Documents > Software Download– Provides the documentation released with the software version. Technical support customer_service@h3c.com http://www.h3c.com Documentation feedback You can e-mail your comments about product documentation to info@h3c.com. We appreciate your comments. Document conventions and symbols Conventions ○ ○ Convention Element ○... -
Page 15: Symbols
○ ○ • Monospace, italic text Code variables ○ • Command variables ○ ○ Monospace, bold text Emphasized monospace text ○ ○ Indication that example continues ○ ○ Symbols WARNING! Indicates that failure to follow directions could result in bodily harm or death. CAUTION: Indicates that failure to follow directions could result in damage to equipment or data. -
Page 16: A Technical Specifications
A Technical Specifications The WA2110-AG can be powered through 802.3af-compliant power over Ethernet (PoE). The WA2110-AG also can be powered through an external power adaptor. For details see 4Table 1 Table 1 Technical specifications Index Value Maximum power consumption Ethernet interface standard 802.3af... - Page 17 Ethernet can accept power from a product catalogs (PoE, IEEE PoE power source. for a range of 802.3af 802.3af compatible No DC power adapter is standard) power sources. required. Connect the PoE power cable directly to the 10/100 source Base-TX Ethernet connector...


Need help?
Do you have a question about the WA2110-AG and is the answer not in the manual?
Questions and answers