
Subscribe to Our Youtube Channel
Related Manuals for Harvia C150VKK


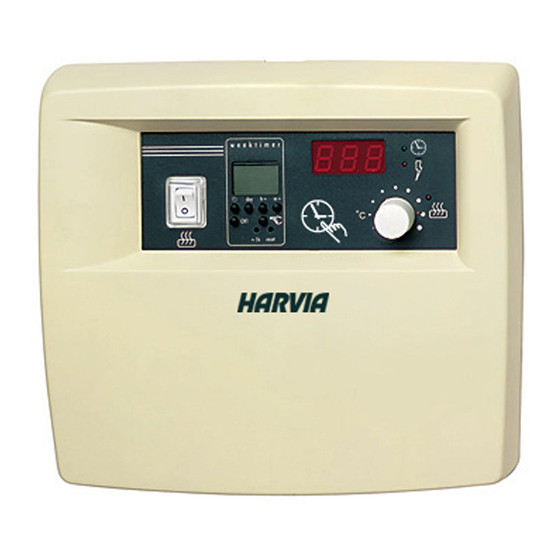
Summary of Contents for Harvia C150VKK
- Page 1 C150VKK Control unit Steuergerät Harvia Oy PL 12 40951 Muurame Finland www.harvia.fi 20022007...
-
Page 2: Table Of Contents
CONTENTS INHALT 1. CONTROL UNIT C150VKK ......3 1. STEUERGERÄT C150VKK ......3 1.2. Technical data ........ 3 1.2. Technische Daten C150VKK ..... 3 2. C150VKK CONTROL UNIT: 2. BEDIENUNGSANLEITUNG DES INSTRUCTIONS FOR USE ......4 STEUERGERÄTS C150VKK ....... 4 2.1. -
Page 3: Control Unit C150Vkk
1. CONTROL UNIT C150VKK 1. STEUERGERÄT C150VKK Control unit C150VKK is intended for the control Das C150VKK--Steuergerät ist zur Steuerung von of electric heaters fitted with 2 series parallel Saunaöfen bis 16,5 kW gedacht, die in 2 Gruppen connectors for use in saunas with heater output up geschaltet sind. -
Page 4: C150Vkk Control Unit: Instructions For Use
2. C150VKK CONTROL UNIT: 2. BEDIENUNGSANLEITUNG DES INSTRUCTIONS FOR USE STEUERGERÄTS C150VKK Before you switch the heater on check always that Bevor Sie den Ofen anschalten, bitte überprüfen, there aren’t any things over the heater or in the near dass keine Gegenstände auf dem Ofen oder in der distance of the heater. -
Page 5: Weekly Timer (Weektimer) (2)
The main switch functions like an allerdings mit der Reset-Taste die Wochen- emergency OFF switch as power to the Zeitschaltuhr zurücksetzen und dann den heater can be disconnected by selecting manuellen Schalter drücken, bis Fehlercode position “0“ whether the heater has been “ER8“... -
Page 6: Setting The Weekly Timer To Real Time
2.2.2.Setting the Weekly Timer to Real 2.2.2. Programmierung der Wochen- Time Zeitschaltuhr in Echtzeit keep the [clock] -button in the down Drücken Sie die [Uhr] -Taste • • position the whole time. kontinuierlich press the hours button [h+] to set Stellen Sie mit der [h+] -Taste die •... - Page 7 sie den Ofen einschaltet. (Abb. 9) 1 2 3 4 5 6 7= • Der [day] -Schalter bietet die (Mon, Tues, Wed, Thurs, Fri, Sat and • folgenden Alternativen: Sun) selected 1 2 3 4 5 6 7= 1 2 3 4 5 6= •...
-
Page 8: Manual Control Operations
ACHTUNG! Das Einschalten des Saunaofens by means of the manual switch (3) on the außerhalb der gespeicherten Programm- control unit (C150VKK), as it is very easy zeiten hat mit dem eigenen manuellen to do so and it also avoids the above- Schalter (3) des Steuergeräts (C150VKK) - Page 9 Changing Program Timings Änderung der Programmzeiten using the [Ch] -program button scan Lassen Sie mit der [Ch] -Programmtaste • • the screen for the program timing auf der Anzeige die zu verändernde to be changed. The time and day Programmzeit erscheinen. Die in der settings that appear in the screen Anzeige erscheinenden Zeit- und can be altered using the appropriate...
-
Page 10: Manual Switch (3)
2.3. Manual Switch (3) 2.3. Manueller Schalter (3) 2.3.1. Heater On Instantly 2.3.1. Ofen sofort einschalten If you press the manual switch (3) once briefly (while Wenn Sie den manuellen Schalter (3) (bei the control unit is switched on), the heater comes stromführender Steuereinheit) einmal kurz drücken, on immediately for half an hour;... -
Page 11: Indicator Light, Green (7)
Betriebsschulung für das Servicepersonal leaving the installed device in his/her care! des Ofens und des Steuergeräts zu geben! 3.1. Installation of the Control Unit C150VKK 3.1. Installation des Steuergerät C150VKK The control unit should be mounted outside the Das Steuergerät wird außerhalb des Saunaraums in... -
Page 12: Fastening The Device To The Wall
3.1.2. Fastening the Device to the Wall 3.1.2. Wandbefestigung There are holes for three (3) screws in the base plate, Am Boden der Steuereinheit befinden sich Bohrungen for fastening the centre to the wall. If necessary, für drei (3) Schrauben, mit denen die Steuereinheit drill a hole in the wooden wall using a 2.5 mm bit. -
Page 13: Electrical Connections
3.1.3. Electrical Connections 3.1.3. Elektrische Anschlüsse Diagram 27 shows how the connections are Die elektrischen Anschlüsse werden nach dem made. beiliegenden Schaltbild 27 vorgenommen. CABLES/KABEL Type Output For control unit Fuses Connecting cable for heater For sensor Leistung Zum Steuer- Sicherungen Anschlusscabel zum Ofen Zum Fühler... -
Page 14: Altering The Basic Settings Of The Control Unit
3.1.4. Altering the Basic Settings of the Control 3.1.4. Änderung der Voreinstellungen der Unit Steuereinheit The maximum times you can set the heater to come Die maximale Einschaltzeit für den von der on from the control unit are 6 h, 12 h, 18 h or Steuereinheit aus zu steuernden Saunaofen ist: 6 h, continuously. -
Page 15: Indicator Lamp
3.1.6. Indicator Lamp 3.1.6. Kontrollampe The control unit shows heater setting times by Von der Steuereinheit erfolgt wird die Information means of an indicator lamp (24 V DC), which comes über den eingeschalteten Ofen mit einer Kontrollampe on in the place from which the heater is remotely (24 V DC) and den Ort der Fernsteuerung controlled. - Page 16 Lage des Fühlergehäuses des Steuergeräts bei Saunaöfen mit Wandmontage. Figure 31. The position of the sensor box of the control unit C150VKK in connection with heaters attached to the floor. Abbildung 31. Lage des Fühlergehäuses des Steuergeräts C150VKK bei Saunaofen-Standmodellen. Figure 32. Reset button for overheating limiter Abbildung 32.
-
Page 17: Installation Of Sensor Box
To control heaters fixed to the floor of the sauna by Zur Steuerung von Saunaofen-Standmodellen means of the control unit C150VKK, the sensor box mit dem Steuergerät C150VKK muß der an das connected to the centre should be installed on the Steuergerät anzuschließende Fühlerkasten an der...
Need help?
Do you have a question about the C150VKK and is the answer not in the manual?
Questions and answers