
Related Manuals for Juniper STRM 5000


Summary of Contents for Juniper STRM 5000
- Page 1 Security Threat Response Manager STRM 5000 Hardware Installation Guide NEBS Level 3 Compliant Juniper Networks, Inc. 1194 North Mathilda Avenue Sunnyvale, CA 94089 408-745-2000 www.juniper.net Part Number: 530-032977...
- Page 2 Juniper Networks or their respective owners. All specifications are subject to change without notice. Juniper Networks assumes no responsibility for any inaccuracies in this document or for any obligation to update information in this document. Juniper Networks reserves the right to change, modify, transfer, or otherwise revise this publication without notice.
-
Page 3: Table Of Contents
ONTENTS BOUT UIDE Objectives Conventions Technical Documentation Contacting Customer Support STRM O VERVIEW ARDWARE VERVIEW Front Panel Indicators Back Panel Features STRM H NSTALLING AND ONNECTING THE ARDWARE Additional Hardware Requirements Safety Considerations Installing the Hardware LED Behavior Chassis Console Port Pinouts Connecting a Laptop or Keyboard and a Monitor STRM S REPARING YOUR... - Page 4 ARDWARE PECIFICATIONS AINTAINING AND ERVICING THE ARDWARE RAID Array Power Supply Cooling Fans Fan Filter...
- Page 5 Table 1: Text Conventions ........1 Table 2: STRM 5000 NEBS Front Panel LEDs ..... . . 6 Table 3: STRM 5000 NEBS Front Panel Ports .
- Page 7 IGURES Figure 1: STRM 5000 NEBS Front Panel ......5 Figure 2: STRM 5000 NEBS Front Panel ......6 Figure 3: STRM 5000 NEBS Back Panel .
-
Page 9: About This Guide
• Objectives This document describes how to install the Network Equipment-Building System (NEBS) Level 3 compialnt STRM 5000 and run the STRM software on the appliance. NEBS sets a standard for telecommunication devices at three distinct functional levels. Each level has established requirements also known as the NEBS criteria. -
Page 10: Technical Documentation
Please send your e-mail comments about this guide or any of the Juniper Networks documentation to: techpubs-comments@juniper.net. Include the following information with your comments: Document title •... -
Page 11: Strm Overview
SEM improves security incident response capabilities by processing data from security devices and network devices. It helps network administrators to provide effective responses to external and internal threats. STRM 5000 NEBS Hardware Guide... - Page 12 STRM O VERVIEW STRM 5000 NEBS Hardware Guide...
-
Page 13: Hardware Overview
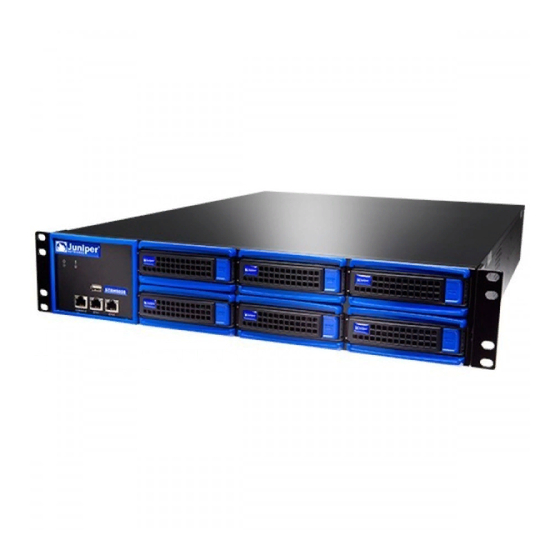
ARDWARE VERVIEW This chapter gives an overview of the STRM 5000 NEBS appliance. It contains the following sections: Front Panel Indicators • Back Panel Features • Front Panel The STRM 5000 NEBS appliance has a 2U rack-mountable chassis with dual... -
Page 14: Table 2 Strm 5000 Nebs Front Panel Leds
ARDWARE VERVIEW Figure 2 STRM 5000 NEBS Front Panel Table 2 STRM 5000 NEBS Front Panel LEDs LEDs Description Chassis LEDs Power (green) - Indicates that the • appliance is powered on Hardware (red) - Indicates that a • fan, power supply, or temperature... -
Page 15: Back Panel Features
Features panel features. Figure 3 STRM 5000 NEBS Back Panel Table 4 STRM 5000 NEBS Back Panel Components Components Description Cooling fans Draws air through vents of the chassis... - Page 16 ARDWARE VERVIEW STRM 5000 NEBS Hardware Guide...
-
Page 17: Additional Hardware Requirements
NSTALLING AND ONNECTING THE STRM H ARDWARE This chapter explains how to install and connect the STRM 5000 NEBS hardware. This chapter contains the following section: • Additional Hardware Requirements Safety Considerations • Installing the Hardware • Connecting a Laptop or Keyboard and a Monitor •... -
Page 18: Safety Considerations
Network Time Protocol (NTP) time synchronization Safety The STRM 5000 NEBS appliance is suitable for Common Bonding Network (CBN) Considerations and can be installed in a Network telecommunication facilities. Consider the following safety guidelines while installing a STRM 5000 NEBS appliance: Install a star lock washer between the ground rail and the lug using a #8 •... -
Page 19: Installing The Hardware
Installing the Hardware Installing the The STRM 5000 NEBS is a DC Isolated return (DC-I) installation. The DC Power Hardware return conductor will be isolated from the equipment chassis or frame when connected to the power supply. Consider the following guidelines before installing the STRM 5000 NEBS appliance: The working voltage range for STRM 5000 NEBS is from -40v to -58v. -
Page 20: Led Behavior
Plug the Ethernet cable into the port labeled ETH0 on the front panel. See Step 5 Figure 5 Front Panel of STRM 5000 NEBS When you turn on the power, the internal port uses two LEDs to indicate the LAN... -
Page 21: Connecting A Laptop Or Keyboard And A Monitor
Connect a laptop to the RJ-45 serial port on the front panel of the appliance. • Connect a keyboard and monitor to their respective ports on the front panel. • Table 2 Table 3 for the location of the ports. STRM 5000 NEBS Hardware Guide... - Page 22 STRM H NSTALLING AND ONNECTING THE ARDWARE STRM 5000 NEBS Hardware Guide...
-
Page 23: Preparing Your System For Strm Software Instalation
Flow Writer - Stores the flow and asset profile data. • Event Collector - Gathers events from local and remote device sources. The • Event Collector normalizes events and sends the information to the Event STRM 5000 NEBS Hardware Guide... -
Page 24: Browser Support
Table 8 to indicate each component in your network map. At a minimum, we recommend that you define objects in the network hierarchy for: Internal/external demilitarized zone (DMZ) STRM 5000 NEBS Hardware Guide... -
Page 25: Identifying Network Settings
- window logs. Device Support Modules (DSMs) and Flow Sources Collectors allow you to integrate STRM with this external data. STRM automatically discovers sensor devices that are sending system log (syslog) messages to an Event Collector. The sensor devices that are automatically STRM 5000 NEBS Hardware Guide... -
Page 26: Identifying Network Assets
Credibility increases as multiple sources report the same event. Identifying Network STRM can learn about your network and server infrastructure based on flow data. Assets The Server Discovery function uses the STRM Asset Profile database to discover many types of servers. STRM 5000 NEBS Hardware Guide... -
Page 27: Table 10 Asset Identification
Table 10 Asset Identification Server IP Address(es) Name NAT Address Range Vulnerability Scanners Network Management Servers Proxy Servers Virus definition and Other Update Servers Windows Server Networks, such as, domain controllers or exchange servers STRM 5000 NEBS Hardware Guide... - Page 28 STRM S REPARING YOUR YSTEM FOR OFTWARE NSTALATION STRM 5000 NEBS Hardware Guide...
-
Page 29: Setting U Pstrm Software And Configuring Network Settings
Logging Into STRM To log into STRM for the first time: for the First Time Connect your laptop or keyboard and monitor to the STRM 5000 NEBS appliance, Step 1 as described in Chapter 2. Note: When using a laptop to connect to the system, you must use a terminal program, such as HyperTerminal. -
Page 30: Figure 5: System Console Window
- Manual - Allows you to manually input the time and date. Use the Spacebar to select the option and then use the Tab key to select the Next option. Press Enter. The Current Date and Time window appears. Go to Step STRM 5000 NEBS Hardware Guide... -
Page 31: Figure 7: Time Zone Continent Window
Using the up or down arrow keys, or the PageUp or PageDown keys, select your time zone continent or area. Using the left or right arrow keys, select Next, then press Enter. The Time Zone Region window appears. See Figure STRM 5000 NEBS Hardware Guide... -
Page 32: Figure 8: Time Zone Region Window
- IP Address - Specify the IP address of the system. - Netmask - Specify the network mask address for the system. - Gateway - Specify the default gateway of the system. - Primary DNS - Specify the primary DNS server. STRM 5000 NEBS Hardware Guide... -
Page 33: Figure 10: New Root Password Window
STRM continues with the installation. This is typically a three to five minute process. The Configuration is Complete window appears. Press Enter to select OK. Step 15 Accessing You are now ready to access STRM. For more information, see the section STRM STRM 5000 NEBS Hardware Guide... - Page 34 Note: You will need a permanent license for the STRM appliance to upgrade to a higher version. If you have a temporary license, the upgrade will fail; re-run the installer to upgrade to a higher version. STRM 5000 NEBS Hardware Guide...
-
Page 35: Table 11 Strm 5000 Nebs Hardware Specifications
ARDWARE PECIFICATIONS Table 11 for hardware specifications of the STRM 5000 NEBS appliance. Table 11 STRM 5000 NEBS Hardware Specifications STRM 5000 NEBS Physical Specification Depth 609.5 mm 24 in. Width 438.4 mm 17.25 in. Height 88 mm 3.5 in. - Page 36 Emissions FCC Class A, certification EN 55022 Class A, (FCC Class A with EN 55024 Immunity, -6dB EN 61000-3-2, margin is a VCCI Class A minimum requirement) NEBS NEBS Level 3/Verizon NEBS certified by METLABS STRM 5000 NEBS Hardware Guide...
- Page 37 STRM 5000 NEBS Hardware Guide...
- Page 38 ARDWARE PECIFICATIONS STRM 5000 NEBS Hardware Guide...
-
Page 39: Maintaining And Servicing The Hardware
• Error correction - redundant data storage to detect and resolve problems • The STRM 5000 NEBS RAID10 drives are striped for performance, and all striped drives are mirrored for fault tolerance. Power Supply The STRM appliances has dual redundant DC power supply modules. If one power supply fails, the second power supply assumes responsibility for the entire power load. -
Page 40: Cooling Fans
Figure 13 Unlocking the power supply tab Figure 14 Removing the power supply Cooling Fans The STRM 5000 NEBS appliance has three cooling fans that are hot-swappable. The fan should be replaced in not less than 5 years of accumulated use. To replace the fan: Move to the rear of the chassis. -
Page 41: Fan Filter
Note: Turn on the fan to check if it is inserted correctly. Fan Filter The fan filter should be replaced after 9000 hours of accumulated use. To replace the air inlet filter in STRM 5000 NEBS appliance: Unfasten the 2 thumbscrews on the left of the front access cover. Step 1 Open the access door. - Page 42 AINTAINING AND ERVICING THE ARDWARE Make sure the filter covers up the front panel holes. Step 8 Close the access door and refasten the 2 thumbscrews. Step 9 STRM 5000 NEBS Hardware Guide...
- Page 43 Fan Filter STRM 5000 NEBS Hardware Guide...
- Page 44 AINTAINING AND ERVICING THE ARDWARE STRM 5000 NEBS Hardware Guide...
Need help?
Do you have a question about the STRM 5000 and is the answer not in the manual?
Questions and answers