Juniper Cloud-Ready SSR1300 Quick Start Manual
Hide thumbs
Also See for Cloud-Ready SSR1300:
- Hardware manual (87 pages) ,
- Quick start manual (16 pages)
Advertisement
Quick Start
Cloud-Ready SSR1300
IN THIS GUIDE
Step 1: Begin | 1
Step 2: Up and Running | 5
Step 3: Keep Going | 8
Step 1: Begin
IN THIS SECTION
Meet the Cloud-Ready SSR1300 | 2
Claim Your Appliance | 2
In this guide, we provide a simple, three-step path, to quickly get the Juniper Networks® SSR1300 appliance up and
running on Juniper Mist
™
using your computer. Once on-board, we'll walk you through the steps to create a basic configuration. You'll need your
Juniper Mist WAN Assurance subscription and your login credentials for the Juniper Mist portal.
NOTE: Before you begin, you must set up your organization and sites, and activate your subscriptions. For more
information, see
Quick Start:
cloud. You can on-board a single device using your mobile phone, or one or more devices
Mist.
Advertisement
Table of Contents

Related Manuals for Juniper Cloud-Ready SSR1300


Summary of Contents for Juniper Cloud-Ready SSR1300
- Page 1 IN THIS SECTION Meet the Cloud-Ready SSR1300 | 2 Claim Your Appliance | 2 In this guide, we provide a simple, three-step path, to quickly get the Juniper Networks® SSR1300 appliance up and running on Juniper Mist ™ cloud. You can on-board a single device using your mobile phone, or one or more devices using your computer.
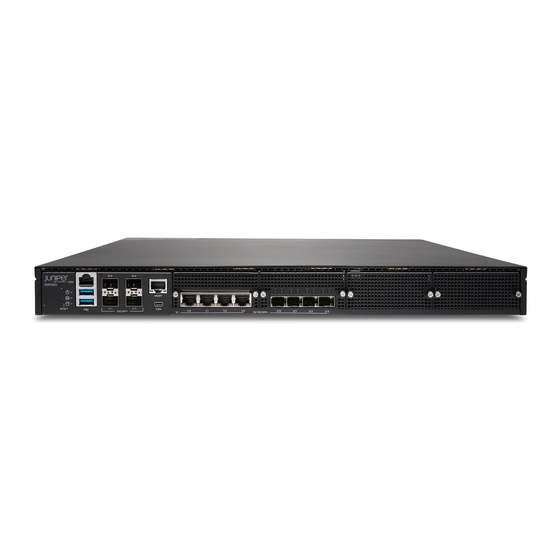
- Page 2 Meet the Cloud-Ready SSR1300 The SSR1300 is a 1 U fixed configuration appliance that's ideal for medium data center or campus deployments. Powered by the Juniper® Session Smart Router (SSR) software, the SSR1300 provides secure and resilient WAN connectivity. The SSR1300 has four 1 GbE ports, four 1/10 GbE SFP+ ports, four 10 GbE SFP+ ports, a management port (for Mist operations), 128 GB of memory, and a 256 GB enterprise-grade solid-state drive (SSD) for storage.
- Page 3 Claiming single device—Locate the QR code on your device and make a note of the alphanumeric claim code directly above it. 1. Open the Juniper Mist ™ Cloud portal and log in to your account. If you do not have an account, see...
- Page 4 2. Select Organization > Inventory from the menu on the left, then select the WAN Edges tab at the top. 3. Click Claim WAN Edges in the upper right portion of the inventory screen. 4. Enter the SSR1300 Activation code or claim code and click Add. 5.
-
Page 5: Table Of Contents
Step 2: Up and Running IN THIS SECTION SUMMARY Create a WAN Edge Template | 5 Juniper Mist ™ Cloud The SSR1300 is onboarded to the . To provision the SSR1300 with ZTP, log in to your Mist portal Assign the Template to a Site | 6 and begin the WAN configuration. -
Page 6: Assign The Template To A Site
7. Scroll down through the template to see the preconfigured WAN interfaces, LAN interfaces, TRAFFIC STEERING, and APPLICATION POLICIES. Video: Create a Template Great job! You now have a working WAN Edge template you can apply to many sites and devices across your organization. -
Page 7: Install The Ssr1300 In A Rack
Do not change the Mist management port once your appliance is powered on and connected to the Mist Cloud instance. 2. Connect port 0/3 to your LAN devices, such as • Mist-managed Juniper EX switches • Mist APs • User devices 3. - Page 8 Upgrading the SSR Networking Platform General Information If you want to Then See all documentation available for the SSR1300 See the SSR1300 Documentation in the Juniper Networks TechLibrary See all documentation available for SSR software Visit Session Smart Router (formerly 128T)
- Page 9 Juniper Learning Portal Juniper Juniper Networks, the Juniper Networks logo, Juniper, and Junos are registered trademarks of Juniper Networks, Inc. in the United States and other countries. All other trademarks, service marks, registered marks, or registered service marks are the property of their respective owners.
Need help?
Do you have a question about the Cloud-Ready SSR1300 and is the answer not in the manual?
Questions and answers