Table of Contents
Advertisement
Installation Manual for the
ACCESS
SYSTEMS
PROFESSIONAL RESIDENTIAL
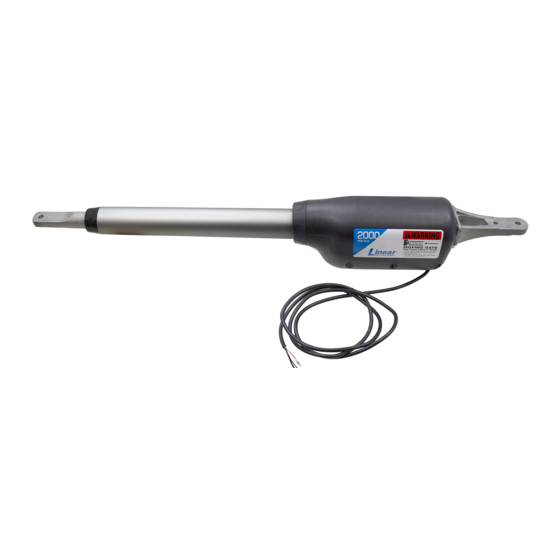
2000XLS
2000XLS
SINGLE Gate Operator System
PROFESSIONAL INSTALLATION RECOMMENDED!
WARNING!
This equipment is similar to other gate or door equipment and meets or exceeds
Underwriters Laboratory Standard 325 (UL 325). However, gate equipment has
hazards associated with its use and therefore by installing this product the installer
and user accept full responsibility for following and noting the installation and
safety instructions. Failure to follow installation and safety instructions can result
in hazards developing due to improper assembly. You agree to properly install this
product and that if you fail to do so Gates That Open, LLC, ("GTO") shall in no event
be liable for direct, indirect, incidental, special or consequential damages or loss of
profits whether based in contract tort or any other legal theory during the course
of the warranty or at any time thereafter. The installer and/or user agree to assume
responsibility for all liability and use of this product releasing Gates That Open, LLC,
from any and all liability. If you are not in agreement with this disclaimer or do not
feel capable of properly following all installation and safety instructions you may
return this product for full replacement value.
READ ALL INSTRUCTIONS CAREFULLY AND COMPLETELY before attempting to
install and use this automatic gate operator. This gate operator produces a high level
of force. Stay clear of the unit while it is operating and exercise caution at all times.
All automatic gate operators are intended for use on vehicular gates only.
This product meets and exceeds the requirements of UL 325, the standard which
regulates gate operator safety, as established and made effective March 1, 2000, by
Underwriters Laboratories Inc.
®
, LLC
For more information on the GTO/ACCESS SYSTEMS full line of automatic gate
operators and access controls visit our website at www.gtoaccess.com.
©2011 Gates That Open, LLC
Printed in China for Gates That Open, LLC.
R4717 02.07.12
Advertisement
Table of Contents

Related Manuals for GTO 2000XLS


Summary of Contents for GTO 2000XLS
- Page 1 You agree to properly install this product and that if you fail to do so Gates That Open, LLC, (“GTO”) shall in no event be liable for direct, indirect, incidental, special or consequential damages or loss of profits whether based in contract tort or any other legal theory during the course of the warranty or at any time thereafter.
- Page 2 Class Rating The GTO 2000XLS Gate Operator is intended for use with vehicular swing gates in single family residential applications. The operator is system certified to be in compliance with UL 325, current edition, as of publication date. Vehicular Gate Operator Class Categories: Residential Vehicular Gate Operator—Class I: A vehicular gate operator (or system) intended for use in a...
-
Page 3: Table Of Contents
Solar Panel and Gate Activity Chart ..............2 Check Direction of Gate Swing ...............3 Prepare the Gate .....................3 Gate Grounding .....................3 2000XLS Parts List ..................4 Tools Needed ....................5 Materials You may Need for the Installation: ..........5 Installation Overview ..................6 Install the Operator ....................8 Install the Post Bracket Assembly ..............8... -
Page 4: Please Read This First
16 feet in length nor weigh more than 500 pounds* (please see Technical Specifications on page 1). The 2000XLS operator can be used on vinyl, aluminum, chain link, farm tube, and wrought iron gates. Use on solid (wood) gates is not recommended. Solid surface gates have a high resistance to the wind. -
Page 5: Important Safety Instructions
Because GTO automatic gate operators are only part of the total gate operating system, it is the responsibility of the installer/consumer to ensure that the total system is safe for its intended use. - Page 6 Zone 3 – the path of the gate. Zone 4 – the space between the gate in the open position and any object such as a wall, fence, etc. Zone 5 – pinch points between the operator and gate. GTO 2000XLS Instruction Manual © 02.07.12...
- Page 7 If any of these signs or warning decals become damaged, illegible or missing, replace them immediately. Contact GTO for free replacements. 2. The gate is automatic and could move at any time, posing a serious risk of entrapment. No one should be in contact with an activated gate when it is moving or stationary.
-
Page 8: Required Safety Precautions For Gates
7. To operate this equipment safely, YOU must know how to disconnect the operator for manual gate operation (page iii). If you have read the instructions and still do not understand how to disconnect the operator, contact the GTO Service Department. -
Page 9: Secondary Means Of Protection Against Entrapment
The 2000XLS utilizes Type A, an inherent (i.e., built-in) entrapment sensing system as the primary type of entrapment protection. Also, the 2000XLS has provisions for the connection of Type B1 or B2 protection to be used as the secondary type of entrapment protection, if desired. - Page 10 2. Do not allow children to operate gate or play in gate area. 3. This gate is for vehicles only. Pedestrians must 1-800-543-GATE (4283) • www.gtoaccess.com use separate entrance. Logo and warning labels (2) installed on each side of operator housing. viii GTO 2000XLS Instruction Manual © 02.07.12...
-
Page 11: Technical Specifications
Technical Specifications GTO/ACCESS SYSTEMS 2000XLS AUTOMATIC GATE OPERATOR DRIVE • Low friction screw drive (linear actuator) rated for -5˚F to +160˚F (-21˚C to +71˚C). Use of GTO battery heater FM316 (Not solar compatible) is recommended in extreme cold temperatures • Powered by a 12 V motor with integral case hardened steel gear reducer. Motor speed reduced to 395 rpm. • Maximum opening arc of 110˚. Approximate opening time (90˚): 15-19 seconds, depending on weight of gate. POWER • The system is powered by a 12 Vdc, 7.0 Ah, sealed, rechargeable acid battery. • Battery charge is maintained by a 120 Vac, 14 Vac output transformer. NOTE: The transformer should not be directly connected to any battery. Do not replace fuses with higher ampere rated fuses;... -
Page 12: Before You Begin
The figures shown are for winter (minimum sunlight). Accessories connected to your system will draw additional power from the battery. 10 Watt Solar Panel [FM123] 5 Watt Solar Panel [FM122] GTO 2000XLS Instruction Manual © 02.07.12... -
Page 13: Check Direction Of Gate Swing
2. Check Direction of Gate Swing The 2000XLS is designed for PULL-TO-OPEN installations. PUSH-TO-OPEN installations require a Push-To-Open Bracket [3471H]. Please refer to specific Push-To-Open Installation Information on page 19. Your Property Your Property Pull-To-Open Push-To-Open 3. Prepare the Gate... -
Page 14: 2000Xls Parts List
3/8" Lock Washer (7) 3/8" Nut (7) 3/8" x 2" Bolt (1) 5/16" Washer (1) 5/16" x 1-3/4" Bolt (1) 5/16" Nut (1) 3/8" x 1-1/2" Clevis Pin (2) Hairpin Clip (2) 3/8" x 3/16" Bushing (2) GTO 2000XLS Instruction Manual © 02.07.12... -
Page 15: Tools Needed
[FM122] to trickle charge the battery. (Page 2) • PVC Conduit. (Page 6) • The diameter of the post should be at least 6” in order to mount the post bracket. (Page 7) • Depending upon the diameter of the post, you may need longer bolts than those provided. Bolts should be at least 1” longer than the diameter of the post. (Page 7) • Metal plate for wooden posts. (Page 10) • A horizontal or vertical cross member or mounting plate may be needed to mount the operator to the gate. (Page 3) • Some types of installations require U-Bolts. (Page 11) • Surge protection for transformer. (Page 16) • Weatherproof cover for transformer if installed outside. (Page 16) • For push-to-open applications you must have PTO Bracket [347IH). (Page 19) GTO 2000XLS Instruction Manual © 02.07.12... -
Page 16: Installation Overview
If the gate post is larger than 6" the 2" minimum Post Pivot Bracket can be removed and the center hole of the Post Bracket can be the mounting point for the gate opener. Center hole of post bracket GTO 2000XLS Instruction Manual © 02.07.12... - Page 17 Muffler Clamp for Gate Bracket Thin Walled Tube Gate Gate Bracket 1" x 6" Wood Wood or Metal Gate Reinforcement Bracket Reinforcement Wood or Metal Reinforcement Panel (not supplied) Gate 1" x 6" Wood Reinforcement GTO 2000XLS Instruction Manual © 02.07.12...
-
Page 18: Install The Operator
While holding the opener level, use C-clamps to temporarily secure the post bracket assembly and gate bracket to the post and gate. Post Bracket Assembly Level Operator Gate Bracket Gate In Open Position Fence Post GTO 2000XLS Instruction Manual © 02.07.12... -
Page 19: Check Clearance
3/8" holes the fence and gate. Gate In Open Position Post Bracket Mark cross member through middle of Assembly gate bracket slots and drill 3/8" holes GTO 2000XLS Instruction Manual © 02.07.12... -
Page 20: Install Gate Bracket
Post Bracket Assembly bolted to gate post Level Operator Gate Bracket bolted to gate cross member Clevis Pin, Bushing and Hairpin Clip Clevis Pin, Bushing, Gate In Open Position Gate Post and Hairpin Clip GTO 2000XLS Instruction Manual © 02.07.12... -
Page 21: Installation Of The Closed Position Stop Plate
Installation of the Closed Position Stop Plate The 2000XLS Gate Operator firmly holds the gate in the closed position using the closed position stop plate. The closed position stop plate helps stabilize the gate leaf in the closed position. To further enhance the stability and security of your gate, install the optional GTO Automatic Gate Lock (see Accessory Catalog). -
Page 22: Mount The Battery Box / Control Box
2. This device must accept an interference that may cause undesired operation. Transmitter distance may vary due to circumstances beyond our control. NOTE: The manufacturer is not responsible for any radio or TV interference caused by unauthorized modifications to this equipment. Such modifications could void the user’s authority to operate the equipment. GTO 2000XLS Instruction Manual © 02.07.12... -
Page 23: Connecting The Battery
(labeled ANT) from the control box cover. Place one end of the antenna Control Box Cover coil over the antenna plug (antenna wire will fit into groove). Tighten the Phillips screw to secure antenna. GTO 2000XLS Instruction Manual © 02.07.12... -
Page 24: Connect Operator Power Cable
Select the electrical outlet where you will plug the transformer. ON/OFF Measure the distance from this outlet to the control box following the path where the wire will be laid. (Allow for an additional 6” to be pulled into the control box.) GTO 2000XLS Instruction Manual © 02.07.12... - Page 25 Attach these stripped ends to the 14 VAC transformer terminals. SOLAR Low Voltage Wire Make sure the exposed wires VAR6 from Transformer do not touch each other! or Solar Panel ON OFF GTO 2000XLS Instruction Manual © 02.07.12...
-
Page 26: Control Board Settings
The alarm will beep once when the gate reaches the OPEN LIMIT. This indicates the limits for the arm is programmed in memory. Step 5 Press the transmitter button and allow the gate to fully close to verify that it stops at the desired position. Repeat Steps 2-4 if correction is needed. GTO 2000XLS Instruction Manual © 02.07.12... -
Page 27: Adjust The Stall Force Setting
NOTE: The Auto-Close timer will only funtion if the gate is in the CYCLE VAR3 EDGE VAR4 fully open position. SENSOR COMMON VAR5 LOCK+ LOCK– BATT + BATT – 14 VAC SOLAR VAR6 ON OFF GTO 2000XLS Instruction Manual © 02.07.12... -
Page 28: Personal Transmitter Setting
Personal Transmitter Setting All GTO transmitters have a standard setting and are ready to operate your Mighty Mule Gate Opener. For your safety and security, we strongly recommend that you replace the factory setting with your own personal setting. NOTE: If you have multiple transmitters, you should adjust all of them at this time. -
Page 29: Push-To-Open Installation Information
In a Push-To-Open installation the operator is installed while the gate is in the CLOSED POSITION. Install the Operator Gate In Closed Position Follow directions for installing the 2000XLS beginning on page 8. The Push- To-Open installation differs from the Pull-To- Level Operator Open installation in the following ways: 1. -
Page 30: Setting The Open Position Limit (Push-To-Open Installations)
E. Press the transmitter button and allow the gate to fully open to verify that it stops at the desired positions. Repeat Steps B – D if correction is needed. Note: Must have a transmitter that operates the gate. If not, see Personalize Your Transmitter Setting on page 18. GTO 2000XLS Instruction Manual © 02.07.12... -
Page 31: Solar Panel Instructions
ON OFF NOTE: For multiple panels, wire the panels in parallel as shown in this diagram. Low Voltage Wire from Transformer or Solar Solar Panels connect in PARALLEL 24/7 Troubleshooting Wizard: http://support.gtoinc.com BLACK BLACK GTO 2000XLS Instruction Manual © 02.07.12... -
Page 32: Connecting Accessories
Connecting Accessories Although GTO strongly recommends the use of additional safety devices, we do not endorse any specific brands. Only use products that are certified and listed to be in compliance with any applicable UL standards (Underwriters Laboratories) and national and regional safety codes. -
Page 33: Connecting Other Auxiliary Devices
COMMMON: Common/Negative terminal for accessory devices. 12 Volt Power (Maximum Current: 100 mA) COM: Common/Negative terminal for accessory power source. LOCK +: Power source for GTO/Mighty Mule accessories, i.e. Gate Opening Sensor [FM139]. Lock Outputs LOCK +: Positive terminal to connect Automatic Gate Lock [FM144]. -
Page 34: Column Installation
Gate Column Column Mount Example (A + B can not exceed 15 inches) Pivot Bracket Example: If A is 6" then B cannot exceed 9" *The Troubleshooting Wizard has detailed information on column mounting. GTO 2000XLS Instruction Manual © 02.07.12... -
Page 35: Troubleshooting Guide
Troubleshooting Guide If your gate opener does not function properly, use this guide or use the online troubleshooter at http://support.gtoinc.com before calling the GTO Service Department. VISUAL AND AUDIBLE DIAGNOSTIC INDICATORS 1. Visual iNdicaTOrs: a. Power lEd (Green): • ON: AC power or Solar power is present. • OFF: There is no input power. -
Page 36: Voltage Readings
On gates over 250 lbs, grease ball bearing hinges at least 4 times annually (more if in a coastal area). 2. Service the gate opener regularly (make sure control box is OFF). Apply silicone spray to a soft, dry cloth and clean the push-pull tube at least once a month. GTO 2000XLS Instruction Manual © 02.07.12... -
Page 37: Repair Service
2. Use the 24/7 Troubleshooting Wizard at http://support.gtoinc.com. 3. If you are unable to solve the problem, call the GTO Service Department at (800) 543-1236, or (850) 575-4144. Refer to the serial number (located on the right side of the battery box) and date of purchase when calling for assistance. -
Page 38: Accessories
This specially designed wire is UV treated, PVC coated, and ready for direct burial. Solar Panel Kits [FM122/FM123] If your gate operator is more than 1000 ft. away from an AC power outlet, you can choose to maintain the battery charge with the GTO Solar Panel Kit. • 10 Watt Solar Panel Charging Kit [FM123] • 5 Watt Solar Panel Charging Kit [FM122] Additional/Replacement Battery [RB500] For additional battery power or replacement. - Page 39 Automatic Gate Lock [FM144] The #1 Accessory For Swing Gate Operators! Designed for added security in conjunction with GTO Automatic Gate Operators. The gate lock unlocks and locks automatically when the gate opens and closes. The perfect solution for high wind conditions.
- Page 40 HARDWARE ACCESSORIES Push To Open Brackets [347IH] Required when the 2000XLS must push a gate open (arm extends to open), such as away from a sloping driveway or where space prevents gate from opening into the property (pull to open). Order two brackets for a dual swing gate installation.
- Page 41 Notes...
- Page 42 Notes...
- Page 43 Notes...
- Page 44 ACCESS SYSTEMS PROFESSIONAL RESIDENTIAL 3121 Hartsfield Road • Tallahassee, Florida, USA 32303 (850) 575-0176 • Fax (850) 575-8912 Web site www.gtoaccess.com 24/7 Troubleshooting Wizard: http://support.gtoinc.com...
Need help?
Do you have a question about the 2000XLS and is the answer not in the manual?
Questions and answers