Table of Contents
Advertisement
A S S E M B LY- A N D I N S T R U C T I O N S M A N U A L
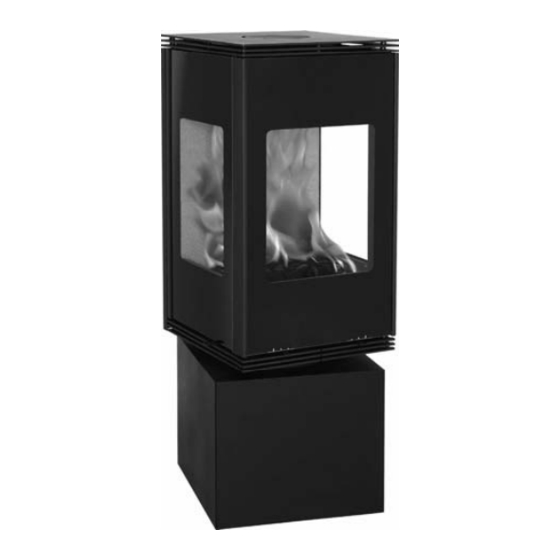
Scan 56-1
Congratulations on your new Scan wood-burning stove
You have purchased a product by one of Europe's leading manufacturer's of wood-burning stoves, and we are sure that you will have years of
pleasure with your purchase. To make the best possible use of your stove, it is important that you follow our advice and instructions.
Please read this Assembly- and instructions manual before you start to assemble your stove.
Make a note of your stove's product
registration number here so that you
have it available if you need to contact
us.
Scan 56-2
Test in compliance with
EN 13240
The EC declaration of conformity is available from www.scan.dk
Scan 56-3
Version:
GB 90056500-5
15.04.2010
Advertisement
Table of Contents

Related Manuals for SCAN 56-1


Summary of Contents for SCAN 56-1
- Page 1 Test in compliance with EN 13240 Make a note of your stove’s product registration number here so that you Version: have it available if you need to contact GB 90056500-5 15.04.2010 The EC declaration of conformity is available from www.scan.dk...
-
Page 2: Table Of Contents
Flue collar top outlet Preparing the stove for a rear outlet Fresh air intake Closed combustion system Chimney connection for the Scan 56-2 ........12 Solution with elbow pipe for brick chimneys Top mounted steel chimney Instruction for use ................ 14... -
Page 3: Installation
Flue outlet flow: 8 g/sek To ensure best-possible functionality and safety for your installa- tion, we advise you to call a professional fitter. Our Scan Dealer will Recommended vacuum in flue collar: 20 Pa be able to recommend a qualified fitter in your area. For information... -
Page 4: Dimension Sketch
D I M E N S I O N S K E TC H Dimension sketch for the Scan 56 range Scan 56-1 (fixed plinth) og Scan 56-2 (rotating plinth) * Centre rear outlet ** Height to the beginning of the flue pipe at top... -
Page 5: Assembly
Fuel type: Wood Operation type: Intermittent • Small shaped floor plate in glass (Scan 56-1 and Scan 56-3) The appliance can be operated in a shared flue. • Large shaped floor plate in glass (Scan 56-1 and Scan 56-3) Country... -
Page 6: Positioning Your Wood-Burning Stove
A S S E M B LY Positioning your wood-burning stove The wood-burning stove must be set up so that the stove itself, the flue pipe, and the chimney can all be cleaned. Position near to non-flammable walls When positioning near a non-flammable wall, we recommend you keep a minimum distance of 50 mm between the rear of the product and the wall for cleaning purposes. -
Page 7: Load Bearing Underlay
If you opt for the Scan 56-2 (revolving plinth) note the size of the Adjusting screws floor plate. The distance between the front of the stove and the edge of the floor plate must be 300mm in any position you can rotate the stove through. -
Page 8: Connection Between Stove And Steel Chimney
Lift the stove off the plinth. Connection with 90° elbow pipe If you intend to use an elbow pipe with the Scan 56, we recommend the use of a curved elbow pipe to improve the draft. The cleansing lid on the elbow pipe must be located in the verti- cal section of the pipe to allow cleaning of the horizontal section through the access cover. -
Page 9: Flue Collar Top Outlet
Preparing the stove for a rear outlet Your wood-burning stove has been prepared for a top outlet by the If you decided on a Scan 56-2 (rotating plinth), you cannot use the manufacturer. Remove the cover plate from the top plate, and fit rear outlet. - Page 10 A S S E M B LY Use pliers to cut the anchor points on the heat shield baffle and Fit the blanking plate in the smoke outlet. Place the top plate on remove the shield. the stove. Anchor points Loosen the blanking plate from the inside and remove.
-
Page 11: Fresh Air Intake
Scan 56-3 (profile plinth) In a well-insulated house, the air used up by the burning process has Never cover the opening at the rear of the Scan 56-3 plinth, unless to be replaced. This particularly applies to houses with mechanical you intend to provide an external air supply to the wood-burning ventilation. -
Page 12: Chimney Connection For The Scan 56-2
C H I M N E Y C O N N E C T I O N F O R T H E S C A N 5 6 - 2 Best-possible working of your wood-burning stove with revolving plinth, will depend to a great extent on having the stove carefully instal- led by a properly trained fitter. - Page 13 C H I M N E Y C O N N E C T I O N F O R T H E S C A N 5 6 - 2 13 Fig. 1 Max. Fig. 2...
-
Page 14: Instruction For Use
I N S T R U C T I O N F O R U S E CB Technology (Clean Burning) Smoke deflector plates Your wood-burning stove is fitted with CB technology. To ensure The smoke deflector plates are located in the upper part of the com- optimum burning of the gases released by the burning process, air bustion chamber. -
Page 15: Instructions For Heating
We recommend the use of fire starters, or similar products, which Note! The wood must catch fire quickly; this is why we recommend are available from your Scan dealer. Using fire starters helps to light setting the primary airflow to full power. Running the stove at too the wood quicker, and keeps the burning process clean. -
Page 16: Handling Fuels
I N S T R U C T I O N S F O R H E AT I N G General Notes Understanding units for measuring wood Your wood stove is not designed for continual heating for periods Various units of measurement are used for wood. Before you buy of over 24 hours. -
Page 17: Maintenance
Even if you follow all of our instructions, a slight film of soot can build up on the glass. You can easily remove this build up by cleaning with a dry cloth and glass cleaner. Your authorised Scan dealer stocks a special glass cleaner for this purpose. -
Page 18: Troubleshooting
• In case of repairs that do not comply with our instructions or The surface of the stove is turning grey instructions by an authorised Scan dealer. • In case of any manipulation of the original state of this Scan • Overheating (see instructions for heating) product or its accessories. - Page 20 Scan A/S - DK-5492 Vissenbjerg...
Need help?
Do you have a question about the 56-1 and is the answer not in the manual?
Questions and answers