Table of Contents
Advertisement
Advertisement
Table of Contents

Related Manuals for Magellan ProMark3 RTK


Summary of Contents for Magellan ProMark3 RTK
- Page 1 ProMark ™ 3 / ProMark3 RTK Getting Started Guide...
- Page 2 Copyright Notice In the event of a defect, Magellan Navigation will, at Copyright 2005-2007 Magellan Navigation, Inc. All its option, repair or replace the hardware product rights reserved. with no charge to the purchaser for parts or labor. The repaired or replaced product will be warranted for 90...
- Page 3 Examples of such conditions in- In the event of a defect, Magellan Navigation will, at clude but are not limited to changes in the GPS or its option, repair or replace the hardware product GLONASS transmission.) Opening, dismantling or...
- Page 4 Magellan Navigation SAS - ZAC La Fleuriaye - BP the receiver that may be required due to any change 433 - 44474 Carquefou Cedex - France.
-
Page 5: Table Of Contents
Table of Contents Introduction ................1 What is ProMark3? .............. 1 What is ProMark3 RTK? ............1 System Components Overview..........1 ProMark3 Controls............... 3 Keyboard ..............3 Using the Stylus ............3 Press vs. Tap - Key vs. Button......... 3 On-Screen Keypad ............3 Preparing For First-Time Use ............4... - Page 6 Logging RTK Points in Continuous Mode ......35 Staking out RTK Points............36 Post-Processing Surveying ............39 Reminder on Surveying Techniques........39 Static ................. 39 “Stop & Go”..............40 Kinematic ..............41 Initialization Methods........... 42 Running a Static Survey............. 43 Equipment Setup............43 Static Survey Setup .............
-
Page 7: Introduction
”RTK Setup”, ”Standard RTK: “Surveying”” and To perform your surveys with ProMark3 RTK, you can use ei- ”Advanced RTK: FAST ther the built-in Surveying function or, as an option, the Ma- Survey Option” are gellan FAST Survey software. - Page 8 Depending on your purchase, based on the type of survey you wish to perform, you may only have part of the listed items. Please refer to the delivered packing list for an accurate description of the equipment that has been delivered to you. Basic Supply: ProMark3 CD Initializer Bar...
-
Page 9: Promark3 Controls
ProMark3 Controls Keyboard In addition to the 8 specific keys (LOG, NAV, ESC, IN, OUT, ENTER, MENU and Power), ProMark3 is fitted with an alpha- numeric keypad. The cursor keys are used to move the cursor left, right, up and down on the screen. Buttons 2-9 contain al- phanumeric characters. -
Page 10: Preparing For First-Time Use
2. Preparing For First-Time Use Charging the ProMark3 Battery Pack The ProMark3 includes a rechargeable, replaceable battery Battery Life Whether used as a rover or pack. Before using the receiver, you must first charge the bat- a base, ProMark3 will run tery pack: for 8 hours with its inter- nal battery in typical con-... -
Page 11: Turning On/Off The Receiver
Mobile Mapping icons. ProMark3 Start-up Screen ProMark3 Workspace For a ProMark3 RTK with the FAST Survey software option installed and unlocked, you will also see the FAST Survey icon. - DGPS Configuration icon, for a quick access to the DGPS configuration options. -
Page 12: Calibrating The Screen
Calibrating the Screen For the first-time use, you need to align your display screen so the cursor on the touch screen align with the tip of your stylus. Use the stylus pen to tap the center of each target that ap- pears on the Calibration screen with the tip of the stylus. -
Page 13: Initializing Gps
Initializing GPS Take the receiver to a location where there is a clear view of the sky, then: - From the ProMark3 workspace, tap successively the Utili- Please Go Outside to Per- ties icon and then the GPSInit icon. form Initialization! - Initialize the receiver using one of the two methods below: Initialization is required when 1) the receiver is... -
Page 14: Preliminary Settings
MENU key and tap Setup (see screen opposite). There are many options to select among, and all are explained in full in the ProMark3 RTK / ProMark3 Reference Manual available from the documentation CD. For the purposes of get- ting started, however, we will concentrate on just a few of these options. -
Page 15: Entering The Receiver Id
Entering the Receiver ID (From within Surveying function only) The Receiver ID screen provides you with the ability to enter the 4-character receiver ID which is used in naming the raw data files. Each raw data file from this receiver will include this 4-character receiver ID. -
Page 16: Checking That Promark3 Receives Satellites
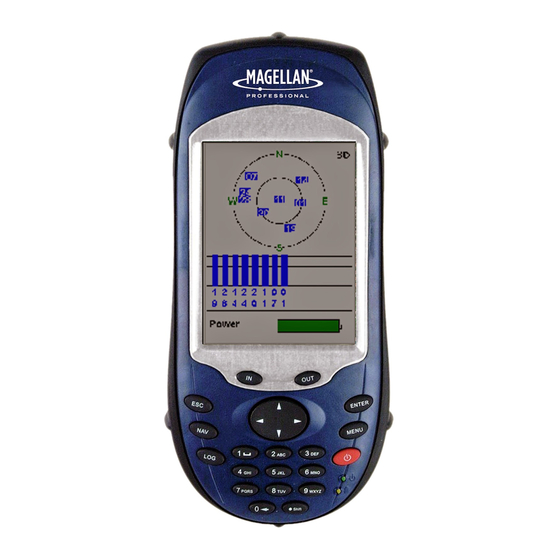
Checking that ProMark3 Receives Satellites Press NAV repeatedly until the Satellite Status screen is dis- played. This screen shows which satellites the receiver is tracking and where they are located in the sky. If you are not tracking 3 or more satellites you may have to move to a more open area. -
Page 17: Rtk Setup
“Surveying”, pressing MENU, selecting Receiver Mode and then Real-Time or Real-Time & Raw Data Recording. From this time on, the ProMark3 RTK will operate to deliver fixed position solutions, provided the operating requirements are met. Selecting Real-Time & Raw Data Recording is a safe way to perform a real-time survey. - Page 18 4. ProMark3 RTK Configurations Base Radio Data Link Rover Rover Internet GPRS Data Link + Cell Phone Base/Rover Rover-Only (Base/rover System) (Network Connection) 5. Rover Initialization. Before starting a survey, the rover must be initialized. There are three possible methods: “On The Fly”, “Known Point”...
-
Page 19: Base/Rover Configuration
Base/Rover Configuration You are using your own ProMark3 RTK base to generate the RTCM corrections needed by the rover. A pair of Magellan li- cense-free, plug-and-play radios is used for the data link. In the Base/Rover Configuration example described in this guide: - “Surveying”... -
Page 20: Setting Up The Base
Setting Up the Base The installation site should offer the best possible GPS recep- tion conditions. The antenna should have a clear view of the sky in all directions. There should be no, or a minimum of sat- ellite obstructions in the vicinity. H Vertical H Slant 1. -
Page 21: Configuring The Base
8. Connect the other end of the external antenna cable to the ProMark3 RTK. Lift the flap on the side on the unit to access the antenna input connector. 9. Connect the radio cable to the back of the receiver. The... - Page 22 • Power indicator (all green: fully charged) • Free memory indicator (all green: maximum) Later, after you have finished your survey and you come back to the base to switch it off, first tap Stop. The ProMark3 RTK will instantly stop transmitting RTCM corrections.
-
Page 23: Setting Up The Rover
5. Connect the radio cable to the back of the ProMark3 RTK. 6. Attach the field bracket onto the pole 7. Place the ProMark3 RTK into the field bracket 8. Measure the antenna height. Configuring the Rover 1. Turn on the ProMark3 RTK. - Page 24 6. Keep an eye on the displayed parameters while the receiver initializes: • Baseline: Baseline length. Should stay 0.0 km in the case of a bar initialization. • Elapsed: Counts the time since you started initializa- tion. • # Sats: Should be 6 or more for fast initialization. •...
-
Page 25: Rover-Only Configuration (Network)
Rover-Only Configuration (Network) Two types of connections are possible: NTRIP and Direct IP. Both rely on the use of a Bluetooth-enabled, GPRS-enabled cell phone within range of the ProMark3 RTK. No user-owned base needs to be deployed in this configura- tion. -
Page 26: Configuring The Rover
• Double-tap the Dial-Up Networking icon. As a result, a con- able to proceed. nection is automatically implemented using the first Blue- tooth virtual port available on ProMark3 RTK. The message “Connection succeeded on communication port COMx:” is displayed. • Tap OK to close the message window. Note the presence of a plug in a green circle on the Dial-Up Networking icon showing that the connection is effective. - Page 27 • In the Select a modem field, select the port used on Please ask your phone ProMark3 RTK (i.e. the port assigned previously) to commu- operator and/or GPRS pro- vider if you don’t know nicate with the Bluetooth modem of the cell phone (the these parameters.
- Page 28 7. To choose a station from which to receive RTCM correc- tions: For step 7, you need to • Tap on the NTRIP Settings window. The NtripCaster Con- know your NTRIP connec- nection window opens in which you can store several NTRIP tion profile (host, port, configurations.
-
Page 29: Initializing The Rover
Initializing the Rover Remember in this example that the position of the point used for initializing the system is stored in the ProMark3 RTK as a control point (see page 19). Follow the instructions below: 1. Hold the pole in vertical position over the known point. -
Page 30: Standard Rtk: "Surveying
4. Standard RTK: “Surveying” It is assumed that RTK has been implemented according to the instructions provided in chapter RTK Setup on page 11. Once the rover has been initialized (see page 17 or page 23, depending on whether you are in base/rover or rover-only con- figuration), you can move on to the survey as such. - Page 31 3. Tap the OK button. This opens a new screen on which you can see the following parameters: • The name of the opened log file is shown in the title bar between brackets. • Baseline: Baseline length in km •...
-
Page 32: Logging Trajectories In Real Time
6. Move to the next point you want to log. 7. Resume steps 3 through 6 as many times as necessary. 8. When all points have been logged, tap DONE on the screen. This closes the open log file, which now contains the positions of all the logged points, and takes you back to the last displayed navigation screen. - Page 33 3. Tap the OK button. This opens a new screen on which you can see the following parameters: • The name of the opened log file is shown in the title bar between brackets. • Baseline: Baseline length • Solution: Solution status. Check that is “Fixed” (for centimeter accuracy).
-
Page 34: Staking Out
Staking Out 1. Press the LOG key and then enter the following parame- ters: • Survey Mode: Stakeout. • Antenna Height: From the reference point. • Units: Antenna height unit (meters, US feet or Int feet). • Height Type: Slant or Vertical. •... - Page 35 3. After you have selected a point from the list or entered coordinates manually, the ProMark3 RTK switches to the last selected navigation screen. 4. Follow the instructions on the screen to get closer to the stakeout point. When the distance to the point is only...
-
Page 36: Quitting The Surveying Function
If you have also logged the positions where you placed your stakes, tapping Done also closes the log file contain- ing the measured positions of all these points. Quitting The Surveying Function Press the MENU key and tap Exit. This takes you back to the ProMark3 RTK workspace. -
Page 37: Advanced Rtk: Fast Survey Option
5. Advanced RTK: FAST Survey Option Introduction The two requirements for running FAST Survey are: 1) You are using a ProMark3 RTK and 2) FAST Survey has been un- locked. Launching FAST Survey From the ProMark3 RTK workspace, double-tap the FAST Sur- vey icon to launch FAST Survey. -
Page 38: Configuring A Base
Configuring a Base It is assumed that the ProMark3 RTK base has been set up as explained in RTK Setup on page 11. If you want to use the Bar method to initialize the rover, don’t forget the kinematic bar between the antenna and the tribrach. -
Page 39: Initializing The Rover
If you intend to log rover raw data, check on the Data Recording option, set the recording interval in seconds, define the media where to store the data (SD Card or Internal memory) and enter a Unit ID. Reminder: This parameter is used as the header in raw data filenames. -
Page 40: Logging Rtk Points
Logging RTK Points 1. Tap on the Surv tab and then on Store Points. The screen now displayed allows you to log all your points. The figure below summarizes all the functions available from that screen. Logging point with position averaging Logging point Configures general with offset... -
Page 41: Logging Rtk Points In Continuous Mode
6. After logging all your points, tap MENU in the upper-right corner of the screen to return to the menu. Logging RTK Points in Continuous Mode 1. On the Surv tab, select the Auto by Interval function. Two different modes are possible: Time or Distance. 2. -
Page 42: Staking Out Rtk Points
Tap the X button again (changed into a right arrow during pause) to resume data logging in continuous mode. If you come back to the main menu by tapping on MENU, then data logging in continuous mode is automatically stopped. Staking out RTK Points 1. - Page 43 3. Once you have chosen a point, tapping on the OK button will display a graphic screen from which you can easily stake out your point: Takes you back to the point selection screen Configures general Stakeout screen case of point logging Next point Provides access to monitor screen...
- Page 44 The number of measurements will depend on the value entered earlier through the File tab>Configure Readings function. Once the position has been determined, FAST Survey displays the results of the computation so that you can check them (see below right). 5.
-
Page 45: Post-Processing Surveying
6. Post-Processing Surveying Reminder on Surveying Techniques Static Typical Use: Surveying a New Control Point. Base Rover Equipment Involved - Field Organization Make sure the base is sited in a clear area giving the best possible view of the sky! Baseline (Range) Known Point... -
Page 46: Stop & Go
“Stop & Go” Typical Use: Surveying Several Points within a Relatively Small Area. Base Rover Equipment Make sure the base is sited in a clear area giving the best possible view of the sky! Known Point Survey Point When this is possible, avoid trees, buildings or any high obstacles in the Field Execution... -
Page 47: Kinematic
Kinematic Typical Use: Surveying Trajectories. Base Rover Equipment Make sure the base is sited in a clear area giving the best possible view of the sky! Known Point Survey Point When this is possible, avoid trees, buildings or 0001... Field Execution any high obstacles in the Rover vicinity of the base. -
Page 48: Initialization Methods
Initialization Methods Three possible methods, from fastest to slowest: The initialization phase is required to ensure that • Known: Initialization on Known point. your kinematic surveys, whether continuous or Stop Initialization achieved Base Rover & Go, will reach centime- in 15 seconds ter-level accuracies through Init point can be several kilo- post-processing. -
Page 49: Running A Static Survey
Running a Static Survey Equipment Setup The equipment setup instructions are the same for both the base and the rover. Install and run the base first. In both cases, the installation site should offer the best pos- sible GPS reception conditions. The antenna should have a clear view of the sky in all directions. -
Page 50: Static Survey Setup
1. Turn on the receiver by pressing the red key. 2. Double-tap the Surveying icon. 3. If you have a ProMark3 RTK, press MENU, tap Receiver Mode and then Post-processing. 4. Press the NAV key until you see the Satellite Status screen (see opposite). -
Page 51: Data Collection
• Units: Antenna height unit (meters, US feet or Int feet) • Height Type: Slant or Vertical. Slant Vertical • Recording Interval: Time in seconds between any two consecutive acquisitions of GPS data. Make sure the same recording interval is used at the base and in the rover. -
Page 52: Running A "Stop & Go" Survey
This chapter describes a typical Stop & Go survey in which ini- tialization is performed using the initializer bar. (This is the initialization method recommended by Magellan.) It is assumed that you have already run all the instructions de- tailed in Chapter 2. Preparing For First-Time Use on page 4. -
Page 53: Base Setup And Operation
Base Setup and Operation The base is setup and operated in the same way as it is in stat- ic surveys (see page 43). The only difference is the use of the initializer bar at the base station. The base antenna should be centered and levelled above the known point. -
Page 54: Stop & Go Survey Rover Setup
1. Turn on the receiver by pressing the red key. 2. Double-tap the Surveying icon. 3. If you have a ProMark3 RTK, press MENU, tap Receiver Mode and then Post-processing. 4. Press the NAV key until you see the Satellite Status screen (see opposite). -
Page 55: Initialization Phase
Initialization Phase 7. Tap the Log button at the bottom of the screen. A screen is displayed showing the counting-down of the initialization phase (see screen opposite). The Remain field will count down beginning from the value of the Time on site field set on the Survey Settings screen. -
Page 56: Data Collection
Data Collection 9. Walk to the 1st point you want to survey. Be careful not to mask the antenna as this might cause loss of satellite sig- nals. 10.Press the LOG key (not the on-screen Log button). The Survey Settings screen is displayed allowing you to change the following parameters: •... -
Page 57: Running A Kinematic Survey
Note that the content of the Site ID field is incremented by 0001 1 after ending static occupation on a point (increment: 0 0002 Rover to 9, then A to Z, then 0.. again, etc.). You can however change the Site ID between any two occupation times by 0003 pressing the LOG key (not the on-screen Log button) and 0004... -
Page 58: Kinematic Survey Rover Setup
1. Turn on the receiver by pressing the red key. 2. Double-tap the Surveying icon. 3. If you have a ProMark3 RTK, press MENU, tap Receiver Mode and then Post-processing. 4. Press the NAV key until you see the Satellite Status screen (see opposite). -
Page 59: Initialization Phase
After selecting a point from the prompted list (see fig- ures below), the unit will set the Site ID and Site Description fields accordingly. • Time on Site (sec): Occupation time on known point (default: 15 seconds). Initialization Phase 7. Tap the Log button at the bottom of the screen. A screen is displayed showing the counting-down of the initialization phase (see screen opposite). -
Page 60: Quitting The Surveying Function
9. Tap the on-screen Log button and then walk along the tra- jectory. The screen then looks like this: Make sure the rover antenna has the best pos- sible view of the sky at all times during the survey. This should result in #Sats continuously greater than 4 and PDOP continuously less than 4. -
Page 61: Mobile Mapping
Once you know how to perform RTK surveys with ProMark3 RTK (see RTK Setup on page 11), it’s easy to understand how you can extend the use of RTK to Mobile Mapping. However, the current position status (“Float”, “Fixed”, etc.) can only be seen on the Position screen (see... -
Page 62: Logging New Gps/Gis Data
Logging New GPS/GIS Data 1. Creating a Job and Selecting a Feature Library - Press the LOG button. - Tap Create New Job. - Enter the job name and press ENTER - Tap the “TUTORIAL.MMF” feature library (or as required). - Tap the “Real-Time”... - Page 63 - To stop logging the feature, tap Done. This takes you back to the Feature List screen - Move to the next feature and resume the above instructions to log this feature. 3. Logging and Describing a Line Feature Basically, you use the same procedure as when you log a point feature (see 2.
- Page 64 - As you would for a point feature, describe the feature by describing the different attributes pertaining to the feature. - When the description is finished, you can start walking along the road. - When you arrive at the end of the road, with ProMark3 still displaying the Logging screen, tap Done to stop logging the feature.
-
Page 65: Revisiting And Updating Existing Gps/Gis Jobs
Revisiting and Updating Existing GPS/GIS Jobs You can use ProMark3 not only to position and describe new GIS features but also to update information gathered previ- ously. This is particularly useful when collecting data on things that change over time: streetlight bulbs burn out, new roads are added to housing developments, new crops are planted, etc. - Page 66 - Tap Goto to ask ProMark3 to guide you to this feature. By doing this, you will make the selected feature your desti- nation and all the navigation screens will be set to help you reach that feature. The Map screen will also be auto- matically displayed showing a straight line connecting your current position to the selected feature.
- Page 67 2. Repositioning a Point Feature If a point feature appears to be mislocated on the Map screen, do the following after you have arrived at the feature: - Press the LOG key and tap the on-screen Log button. Let the ProMark3 recompute the point position and then tap the Done button to close the feature.
-
Page 68: Office Work
8. Office Work Download Procedures The easiest way to download ProMark3 data to your PC is to remove the SD card from the ProMark3 and insert it into your PC card reader. This implies the following: 1. All your field data should have been saved on the SD card (see setting on page 8). - Page 69 3. Connect the USB cable between the ProMark3 unit and your PC. The first time you connect ProMark3 to the office PC, you may be asked to install a USB driver on the PC (although this driver should normally have been installed when installing GNSS Solutions).
-
Page 70: Downloading Rtk Data
Download Utility on the PC. The left side of the Download window then lists the files present in the ProMark3 RTK. - Select the O-files you want to download - Press the F5 key to start the file transfer. -
Page 71: Post-Processing Raw Data
Post-Processing Raw Data 1. On your office computer, launch GNSS Solutions 2. Click Create a New Project, enter a project name and then click OK. 3. Click Import Raw Data from Files. 4. Browse your computer to change to the folder containing the data files you have just downloaded. -
Page 72: Downloading Rtk Data Collected With Fast Survey
Collected With FAST Survey 1. On the ProMark3 RTK: - Clip the I/O module as shown opposite. - Turn on the ProMark3 RTK. - Connect the USB cable between the ProMark3 unit and your PC. The first time you connect ProMark3 to the office... -
Page 73: Working On Field Data Collected With "Mobile Mapping
- Click OK. This opens the Data Transfer dialog box. - Select the PC port connected to the ProMark3 RTK (USBx) and then click OK. A new dialog appears listing the .crd job files stored in the ProMark3 RTK. -
Page 74: Exporting Data To A Gis
Exporting Data to a GIS The most important processing of your field data is its export to a GIS. Exporting field data has two processes: conversion of the data files to a standard format a GIS can read and then the actual transfer of the file. -
Page 75: Navigation Tools
9. Navigation Tools Whether you are performing survey or GIS jobs, you can always rely on ProMark3’s integrated navigation screens to help you find your working area of the day or find more easily some par- ticular locations you need to go to. NAV Key As shown in the diagram below, you simply have to press the NAV key repeatedly until the screen displays the navigation... -
Page 76: Turning Off Unused Screens
The Position screen shows the current position solution sta- tus. When using Mobile Mapping in RTK (ProMark3 RTK only), this screen is the only screen that shows whether the position solution is fixed or not (see screen opposite). -
Page 77: Appendices
Minimizes the Bluetooth Manager window (but keeps Bluetooth Man- ager running). Unlocking RTK and FAST Survey To change your ProMark3 into a ProMark3 RTK, you need to download the specific firmware from the Magellan FTP server and purchase an upgrade from Magellan. -
Page 78: Fast Survey Function Key Re-Allocation
Use the same procedure to unlock the FAST Survey option. From the same serial number, your local Magellan dealer will deliver a product key specific to your ProMark3 RTK. To acti- vate the FAST Survey option, double-tap the Utilities icon and then the Unlock FAST Survey Option icon. -
Page 79: Glossary
UHF: Ultra High Frequency band. Magellan state. radio modems use this frequency band. GPS: Global Positioning System. Passive, VRMS: Vertical Root Mean Square. - Page 80 Index Height Type 24 HI 15 Holding the unit 10 Symbols HRMS 25 # Sats 46 I/O module 4 AC adapter/charger 2 Initialization methods 42 Age 25 Initialize 48 Alarms 60 Initialize rover 17 Antenna Height 24 Initializer bar 49 Area feature (logging) 58 Instrument height 15 Attributes (of a feature) 56...
- Page 81 Solution 25 Speedometer screen 70 Stake out 36 Stakeout screen 29 Static Survey screen 45 Storage option 62 STORE 25 Stylus 3 Survey Mode 24 Survey Settings screen, kinematic 53 Survey Settings screen, static 44 Survey Settings screen, Stop & Go 48 Tap 57 Target on Map screen 60 Time on Site 53...
- Page 82 Magellan follows a policy of continuous product improvement; specifications and descriptions are thus subject to change without notice. Please contact Magellan for the latest product information. © 2005-2007 Magellan Navigation, Inc. All rights reserved. ProMark is a registered trademark of Magellan Navigation, Inc. All other product and brand names are trademarks of their respective holders.
Need help?
Do you have a question about the ProMark3 RTK and is the answer not in the manual?
Questions and answers
where can I get updated firmware for Promark3
You can obtain updated firmware for the Magellan ProMark3 by using an SD card and downloading the update files over the Internet. If you do not have access to a card reader to use with your PC, you will need to purchase one or obtain an SD card containing the update from your ProMark3 dealer.
This answer is automatically generated
mon promark 3 ne s'initialise plus comment faire un reset total
To perform a total reset on the Magellan ProMark3 RTK, use the following methods:
1. Hardware Reset (Shuts down the unit):
- Press ESC + ENTER + Red Power key simultaneously.
2. Software Reset (Restores factory settings):
- Press LOG + IN + MENU simultaneously.
3. Clear All Memory (Removes waypoints, routes, tracks, and user settings but not files):
- Go to Setup Menu > Clear Memory > Select "All" and confirm.
4. Reset Default (Restores all factory defaults):
- Go to Setup Menu > Clear Memory > Select "Reset Default" and confirm.
These steps will reset the device and erase stored data as specified.
This answer is automatically generated
i have a serial number for my controller of megallan promark 3 rtk may you assist me with product key to unlock fast survey key
To obtain a product key to unlock the FAST Survey feature for the Magellan ProMark3 RTK, provide your serial number to your local Magellan dealer. They will deliver a product key specific to your device.
This answer is automatically generated
fast survey product key
The product key for the FAST Survey software on the Magellan ProMark3 RTK is not provided in the available information. To unlock the FAST Survey option, you need to purchase an upgrade from Magellan and receive a product key.
This answer is automatically generated
I have Promark3 but firmware is dated 2005 and stopped working. Where can I get updated firmware?