Table of Contents
Advertisement
Advertisement
Table of Contents

Related Manuals for Magellan Magellan eXplorist 100


Summary of Contents for Magellan Magellan eXplorist 100
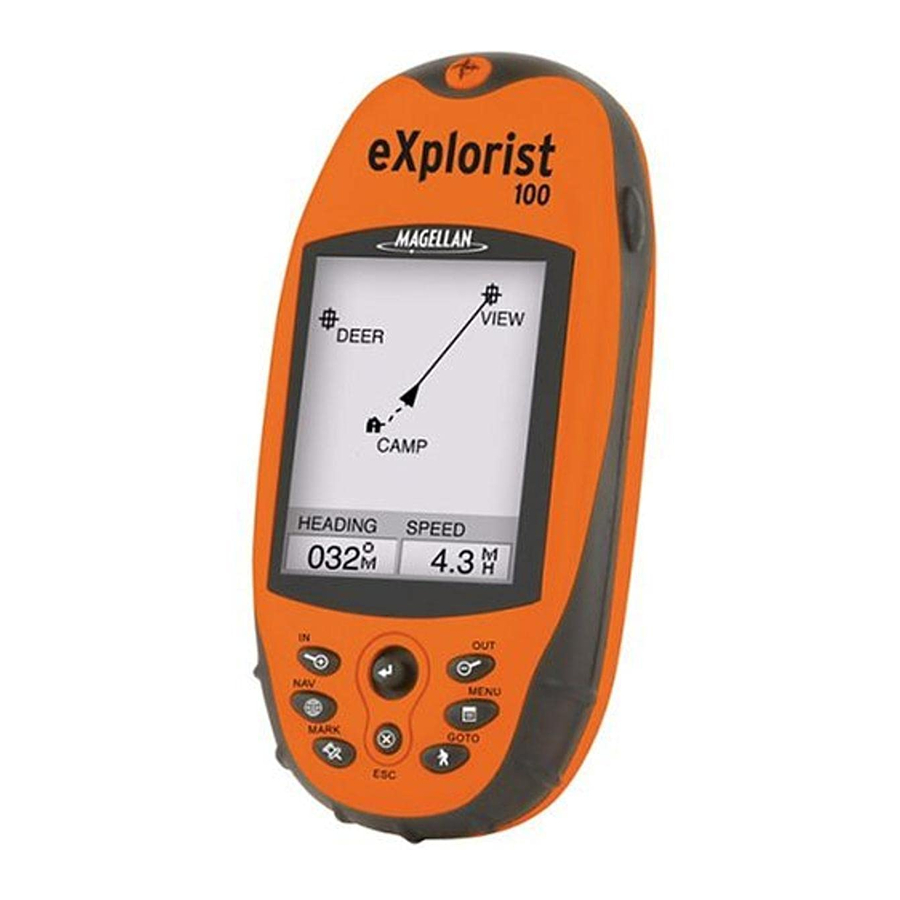
- Page 1 Magellan eXplorist 100 Reference Manual Topics: • eXplorist 100 GPS Receiver • Using the eXplorist 100 • Starting Up • Navigation Screens • Points of Interest • Routes • Track Logs • Preferences • Specifications • Accessories • Contacting Magellan Support...
- Page 2 Federal Radionavigation Plan. Accuracy can also be affected by poor satellite geometry and obstructions, such as buildings and large trees. USE PROPER ACCESSORIES Use only Magellan cables and antennas; the use of non-Magellan cables and antennas may severely degrade performance or damage the receiver, and will void the warranty. LICENSE AGREEMENT Thales Navigation grants you, the purchaser, the right to use the software supplied in and with Thales Navigation GPS products (the “SOFTWARE”) in the normal operation of the equipment in...
-
Page 3: Table Of Contents
Table of Contents eXplorist 100 GPS Receiver ....... . . 1 Features of the Magellan eXplorist GPS Receiver. - Page 4 Table of Contents Points of Interest ........24 Marking Your Position .
- Page 5 Accessories ..........70 Contacting Magellan Support ....... 71...
-
Page 6: Explorist 100 Gps Receiver
100 GPS Receiver Features of the Magellan eXplorist GPS receiver: • Rugged design, rubber-protected • Superior tracking with 14 parallel channels • 14 hour+ battery life on 2 AA batteries ™ • TrueFix GPS technology Antenna Display Backlight Button... -
Page 7: Button Descriptions
100 GPS Receiver Button Descriptions: On/Off Turns the eXplorist on or off. Backlight Turns the display backlight on. Sequences from off to low to high intensity. ENTER Used to access highlighted menu items or accept highlighted buttons. ESCAPE Cancels data inputs. - Page 8 100 GPS Receiver Wrist Lanyard Strap Mounting Hole Battery Door eXplorist 100 GPS Receiver (back) Battery Door Fastener (Unscrew to open battery door to install batteries.)
-
Page 9: Installing The Batteries
100 GPS Receiver Installing the Batteries The eXplorist 100 uses two AA batteries that are installed as shown in the accompanying diagram. Be sure to observe the proper polarity when installing the batteries. Under normal operating conditions you can expect to get more than 14 hours of battery life when using fresh batteries. -
Page 10: Using The Explorist 100
Using the eXplorist 100 The eXplorist 100 uses information from the GPS satellites orbiting the earth to provide you with detailed information about your exact location. This is the foundation that your eXplorist will use to provide you with the necessary information to arrive at your destination. Going to a Destination The most common use of your eXplorist will be to provide you with the navigation tools you’ll need to arrive at your chosen destination. -
Page 11: Saving Your Position
Using the eXplorist 100 Step Two: Where Do You Want To Go? Now that the eXplorist knows where you are, you need to tell it where you want to go. There are many different ways you can do this, but the simplest and most commonly used is a “GOTO”... -
Page 12: Tracing Your Steps
Using the eXplorist 100 A simpler example, and one you can do at just about any time, is finding your car in that ocean of other cars in the shopping mall parking lot. Just park your car, step outside and let your eXplorist compute your position. -
Page 13: Additional Features
Using the eXplorist 100 Additional Features Your Magellan eXplorist contains all of the features that you would expect from a high-quality Magellan-brand handheld navigation device, as well as many more to make your outdoor experience more enjoyable. You have the ability to customize the navigation screens, enabling you to view the information that is important to you. -
Page 14: Starting Up
Starting Up Turning the eXplorist On To turn the eXplorist on, press the POWER button on the top right side. To prevent the eXplorist from being turned on accidentally, draining the batteries, you need to press ENTER when the Startup screen is displayed. -
Page 15: Using The Explorist For The First Time
Starting Up Using the eXplorist for the First Time Turn the eXplorist on. Press the Power button. When the Startup screen is displayed, press ENTER. Select Language. When you turn on the eXplorist for the first time, you are given the option of selecting one of the ten languages that can be used. - Page 16 Starting Up The Satellite Status screen will continuously update, and you will be able to graphically see how well your eXplorist is performing. When the eXplorist has enough information to compute a position fix, the Satellite Status screen is replaced with the Plotter screen. The arrow cursor in the center of the Plotter screen represents your position.
- Page 17 Starting Up Enter Current Time. Use the arrow joystick to enter the current time. Arrow Joystick Up: Increases the highlighted number Arrow Joystick Down: Decreases the highlighted number Arrow Joystick Right: Moves the highlight one character to the right Arrow Joystick Left: Moves the highlight one character to the left Toggle between AM and PM by moving the arrow joystick up or down when AM or PM is highlighted.
-
Page 18: Conclusion
Conclusion This concludes the initial startup procedure for the Magellan eXplorist 100. Once the Plotter screen is displayed, you have successfully initialized the eXplorist and are ready to Now would be a good time to familiarize yourself with the different navigation screens (using the NAV button) and to set any preferences that may be different from the factory defaults. -
Page 19: Navigation Screens
Navigation Screens Accessing the Navigation Screens The eXplorist has three navigation screens, as well as a Satellite Status screen that can be accessed by pressing the NAV button. Each screen provides the same information in a different format, giving you the choice of choosing the screen that best suits your needs. OakTree 1.60mi Heading... -
Page 20: Plotter Screen Overview
Navigation Screens Plotter Screen Overview Original Route Marker Track Indicator Plotter Scale Data Field 1 Changing Plotter Scale Press the Zoom In or the Zoom Out buttons to change how much of the usable plotter area is displayed on the screen. The plotter scale indicator in the bottom left corner of the plotter indicates the relative distance between the two end-points of the scale. -
Page 21: Showing Or Hiding Plotter Information
Navigation Screens In the Cursor mode, you have a cursor icon displayed that you can use to pan around the plotter. The information displayed at the bottom of the screen provides you with the heading and distance of the cursor from your present position. -
Page 22: Customizing The Displayed Map Information
Navigation Screens Customizing the Displayed Map Information The information displayed at the bottom of the screen can be customized to change what is shown in the two plotter information fields. You can select from: • Bearing • Distance • Speed [default] •... -
Page 23: Changing The Plotter Orientation
Navigation Screens Changing the Plotter Orientation The default orientation for the Plotter screen is North Up. This means that the top of the display represents true north. This orientation can be changed so that the top of the display is more useful to you. You can choose from: •... -
Page 24: Compass Screen
Navigation Screens Compass Screen The Compass screen provides an easy-to-use graphical compass that should be familiar to most GPS users. Highlights of the Compass screen: • With an active route, the top of the Compass screen displays the name of the destination. -
Page 25: Customizing The Information Fields
Navigation Screens Customizing the Information Fields The information displayed at the top of the screen can be customized to information that is important to you. You can select from: • Bearing • Distance [default] • Speed [default] • Heading • ETA (Estimated Time of Arrival) •... -
Page 26: Position Screen
Navigation Screens Position Screen The Position screen provides detailed position information in a text format that is familiar to seasoned navigators. Highlights of the Position screen: • Position is displayed in textual format using the coordinate system selected. (See Setting Coordinate System for information on how to select the coordinate system.) •... -
Page 27: Resetting The Trip Odometer
Navigation Screens Resetting the Trip Odometer Whenever you begin a trip and you want to record how far you have travelled, you will want to reset the trip odometer to zero. To reset the trip odometer: While viewing the Position screen, press MENU. Use the Arrow joystick to highlight Reset Trip. -
Page 28: Satellite Status Screen
Navigation Screens Satellite Status Screen The Satellite Status screen is a handy way to visually see just how well the eXplorist is tracking and receiving satellite signals. Highlights of the Satellite Status screen: • Type of position fix and the number of satellites being tracked is displayed. [A 2D Position Fix requires three satellites;... -
Page 29: Points Of Interest
Points of Interest Whether driving in a car, hiking on the trail, or out for an afternoon sail, you are going to want to save places you’ve been in your eXplorist so that you can go back to them in the future. This is the fundamental starting point for any GPS navigator. -
Page 30: Marking Your Position (Personalized)
Points of Interest Marking Your Position (Personalized) Normally, marking your position is simply a two-button process: MARK and ENTER. However, sometimes you will want to personalize the POI you are marking to make it easier to identify later. You are able to change the icon, change the name, and create a message. -
Page 31: Making Pois For Locations Other Than Your Present Position
Points of Interest Making POIs for Locations Other Than Your Present Position Sometimes, you may want to save a position that is not your present position. The eXplorist offers you two ways of doing that. You can modify the coordinates of your present position or you can use the Cursor mode of the Plotter screen to pan to the location you want to mark. -
Page 32: Marking A Position Using The Plotter Cursor
Points of Interest Marking a Position using the Plotter Cursor This gives you a way of marking a position, other than your present position, by moving the cursor around the plotter to a place where you want to create a POI. While viewing the Plotter screen, use the Arrow joystick to put the eXplorist into Cursor mode. -
Page 33: The Poi Database
Points of Interest The POI Database All of the POIs that you have saved can be accessed using the POI database. Once the database has been accessed and the POI selected, you can view or edit the POI. Highlights of the POI database are: •... -
Page 34: Editing A Poi
12b, to enter a message for this POI. 13. When the Icon, Name and Message fields are ready, use the Arrow joystick to highlight Save. 14. Press ENTER. Mark Icon Name MAGELLAN Location 34°06.560N 117°49.566W Elevation Message CREATE MESSAGE? -
Page 35: Deleting A Poi
Points of Interest Deleting a POI POIs that you have saved can be deleted using this operation. If you have created a lot of POIs, you may wish to delete any unneessary ones so that you may more easily search for a newly created POI. -
Page 36: Viewing A Poi On The Plotter Screen
Points of Interest Viewing a POI on the Plotter Screen POIs that you have saved can be viewed on the Plotter screen to assist you in locating the POI. Press MENU. Use the Arrow joystick to highlight My Pts of Interest. Press ENTER. -
Page 37: Routes
Routes Routes are the least understood and one of the most important functions of a GPS receiver. The better you understand routes and how to use them, the more enjoyment you will receive from using your eXplorist. The simpliest and most common form of a route is a GOTO route. -
Page 38: Creating A Goto Route
Routes Creating a GOTO Route The instructions here describe the most common and easiest way to create a GOTO route. Press GOTO. Use the Arrow joystick to highlight Nearest or Alphabetical. Press ENTER Use the Arrow joystick to highlight the POI you want to go to. -
Page 39: Creating A Goto Route From The Cursor
Routes Creating a GOTO Route from the Plotter Cursor This will create a GOTO route to a point on the plotter that you have indicated by moving the crosshair cursor on the Plotter screen. While viewing the Plotter screen, use the Arrow joystick, causing the eXplorist to go into Cursor mode. -
Page 40: Multi-Leg Routes
Routes Multi-Leg Routes Multi-leg routes can be used to navigate to a final destination using multiple legs. An example would be leaving the dock, motoring over to buoy 1, then the bait boat, and finally to a fishing hot spot. This route would go from Dock to Buoy 1,Buoy 1 to Bait, Bait to Fish. Features of a multi-leg route: •... -
Page 41: Creating A Multi-Leg Route
Routes Creating a Multi-leg Route The eXplorist will provide you with an empty list for your route, and you can use the POIs saved in the POI database to create the route. All the tools you’d need to create the route will be described here. -
Page 42: Activating/Deactivating A Route
Press ENTER. You will be returned to the last viewed navigation screen with the route chosen activated or deactivated. Route List 1 Tahoe Camp 2 Trout Spot 3 Magellan <New> Legs Distance 4.95 List of routes with route named “Magellan” active. -
Page 43: Changing The Destination Leg Of An Active Route
Routes Changing the Destination Leg of an Active Route When a route is created it can have many different legs to it, each leg with its own destination. If during your travels you want to skip some of the legs, you can select the leg that you want to proceed to next. -
Page 44: Editing A Saved Route
Routes Editing a Saved Route Saved routes can be edited to add a new leg at the end of the route (<Add POI>), remove a leg (Delete POI), insert a new leg (Insert POI), or change the destination from one POI to another (Replace POI). -
Page 45: Reversing A Route
Routes Reversing a Route Reversing a route takes a saved route and recreates it in reverse order. The sample route that was discussed earlier, Camp > Bridge > Marker > Ranger > Swim, would now be Swim > Ranger > Marker > Bridge > Camp. Press MENU. -
Page 46: Deleting A Route
Routes Deleting a Route The eXplorist can hold up to 20 different routes. When you have 20 routes saved, you will need to delete one before you can create a new one. Press MENU. Use the Arrow joystick to highlight Routes. Press ENTER. -
Page 47: Copying A Route
Routes Copying a Route Copying a route makes an exact duplicate of a route that can then be edited, saving you time in creating a new route that is similar to an existing route. Another use would be to copy a route and reverse it. -
Page 48: Viewing A Route On The Plotter
Routes Viewing a Route on the Plotter Viewing the route on the plotter gives you a way of graphically seeing the legs of the route as they appear on the plotter. Press MENU. Use the Arrow joystick to highlight Routes. Press ENTER. -
Page 49: Track Logs
Track Logs As you are moving, the eXplorist continuously records your track. Much like leaving breadcrumbs on the trail that you can use later to find your way back, the eXplorist leaves “electronic breadcrumbs” on the map. The advantage here is that you don’t have to worry about animals coming along and eating your return route markers. -
Page 50: Stopping And Resuming Active Track Logging
Track Logs Stopping and Resuming Active Track Logging This provides the ability to turn off the recording of the active track and then to starting it up again. Press MENU. Use the Arrow joystick to highlight Track Log. Press ENTER. With Active Track highlighted, press MENU. -
Page 51: Starting A New Active Track Log
Track Logs Starting a New Active Track Log Before you can start a new active track log, you need to stop the one that is presently recording. Press MENU. Use the Arrow joystick to highlight Track Log. Press ENTER. Use the Arrow joystick to highlight Active Track. Press MENU. -
Page 52: Saving An Active Track Log
Track Logs Saving an Active Track Log This will save your active track log with a name you enter that you can use at some time in the future. This does not erase your presently active route; only saves the current active track and adds it to the list of available track logs. -
Page 53: Creating A Backtrack Route
Track Logs Creating a BackTrack Route BackTrack routes use your active track to create a route back to where you started, turning around and following the electronic breadcrumb trail that the eXplorist dropped. Press MENU. Use the Arrow joystick to highlight Track Log. Press ENTER. -
Page 54: Clearing The Active Track
Track Logs Clearing the Active Track The active track can get to be very large, especially if you haven’t cleared it in a while. It is recommended that if you plan to use BackTrack or to save the upcoming track log that you should clear the active track before beginning your journey. -
Page 55: Converting The Track Log To A Route
Track Logs Converting the Track Log to a Route This function takes the track log and turns it into a multi-leg route that is saved in your route list. From here, the route can be edited if necessary. Note: Convert to Route is available for both active track logs and track logs you have saved. Press MENU. -
Page 56: Viewing The Track Log On The Plotter
Track Logs Viewing the Track Log on the Plotter Selecting View on Map displays the track log chosen and plots it on the Plotter screen. This gives you the opportunity to graphically view the track log. Note: View on Map is available for both active track logs and track logs you have saved. Press MENU. -
Page 57: Working With Saved Track Logs
Track Logs Working with Saved Track Logs It has been mentioned before that you can convert saved track logs to a route and view saved track logs on the plotter. There are three functions unique to saved track logs that you can perform: following, reversing, and deleting the track. -
Page 58: Deleting A Saved Track Log
Track Logs Deleting a Saved Track Log Use this function to remove track logs that have been previously saved and are no longer needed. Press MENU. Use the Arrow joystick to highlight Track Log. Press ENTER. Use the Arrow joystick to highlight any track log you have previously saved. Press MENU. -
Page 59: Preferences
Preferences The Preferences portion of the eXplorist provides the tools to personalize the eXplorist to your usage and needs. There are tools that are designed to give you full flexibility over its use, as well as to perform maintanence on the internal memory should the need arise. -
Page 60: Restarting The Gps
Restarting the GPS provides a means of giving the eXplorist information about its approximate position. Long time GPS receiver users will know this option as initializing. To understand when you would use this option, a brief explanation of how the eXplorist works will be helpful. - Page 61 Preferences Region. Use the Arrow joystick to highlight the region of the world for your present location. You can also enter the coordinates for your present position, if you know them, by highlighting Enter Coord. This is rarely used and is not described in this manual. Press ENTER.
-
Page 62: Setting The Map Units
Preferences Setting the Map Units In the Map Units option of Preferences you can select which units of measure for navigation data, the north reference, the coordinate system, and the map datum that will be used by the eXplorist. Selecting Navigational Units of Measure The eXplorist can be set to display navigation data in Miles/Yd/MPH, Miles/Ft/MPH, NM/Ft/Knots, NM/M/Knots, or KM/KPH. -
Page 63: Selecting The North Reference
Preferences Selecting the North Reference You can set the north reference used by the eXplorist to be either magnetic north or True North. Press MENU. Use the Arrow joystick to highlight Preferences. Press ENTER. Use the Arrow joystick to highlight Map Units. Press ENTER. -
Page 64: Selecting The Coordinate System
Preferences Selecting the Coordinate System Position data will be displayed in the coordinate system chosen in Map Units. The default system is latitude/longitude (Lat/Lon) and should be fine for most users. Experienced navigators will want to select a coordinate system that matches the maps or charts they are using. -
Page 65: Selecting The Map Datum
Preferences Selecting the Map Datum When using the eXplorist in conjunction with a map or chart, you should make sure that the map datum in the eXplorist matches the map datum that the map or chart uses. This can usually be found in the legend block on the map or chart. The default map datum for the eXplorist is WGS84 and should be used when in doubt. -
Page 66: Using The Power Management Tool
Preferences Using the Power Management Tool When you are out in the field or on the water, extending the life of the batteries in your eXplorist should be something that you are mindful of. Two areas that you can control to extend the battery life are turning the eXplorist off when not in use and setting how long the display backlight will be on. -
Page 67: Setting The Light Timer
Preferences Setting the Light Timer As has been mentioned before, the display backlight makes the display easier to read in low- light situations, but it also is the largest drain on the batteries. The Light Timer function provides you with the selection of how long you want the backlight to remain on while no buttons have been pressed. -
Page 68: Personalizing The Explorist
Preferences Personalizing the eXplorist This function provides a way to input information about yourself that could be used to return your eXplorist should you happen to lose it. The name you enter in the Name field will be displayed on the About screen. Steps to Personalize your eXplorist Press MENU. -
Page 69: Selecting Languages
Preferences Selecting Languages The eXplorist can be set to display information from any one of ten different languages. You can select from English, Français (French), Deutsch (German), Nederlands (Dutch), Suomi (Finnish), Español (Spanish), Italiano (Italian), Português (Portuguese), Svenska (Swedish), and Norsk (Norwegian). Selecting the Language for Your eXplorist Press MENU. -
Page 70: Clearing Memory
Preferences Clearing Memory The Clear Memory function of Preferences gives you a tool that you can use to globally clear: • all track logs [All Track Log] • all POI’s and routes [POIs/Routes] • all multi-leg routes [Routes] • all track logs, POIs, and routes [All] Using Clear Memory, you can also set all of the defaults in the eXplorist to the factory defaults. -
Page 71: Clearing All Pois And Routes
Preferences Clearing All POIs and Routes Press MENU. Use the Arrow joystick to highlight Preferences. Press ENTER. Use the Arrow joystick to highlight Clear Memory. Press ENTER. Use the Arrow joystick to highlight POIs/Routes. Confirm. Use the Arrow joystick to highlight Yes to confirm or No to cancel. Press ENTER. -
Page 72: Reseting The Explorist To Factory Defaults
Preferences Reseting the eXplorist to Factory Defaults Press MENU. Use the Arrow joystick to highlight Preferences. Press ENTER. Use the Arrow joystick to highlight Reset Default. Press ENTER. Use the Arrow joystick to highlight All. Confirm. Use the Arrow joystick to highlight Yes to confirm or No to cancel. Press ENTER. -
Page 73: Specifications
Specifications Performance Receiver 14 parallel-channel technology, tracks up to 14 satellites to compute and update information. Antenna Patch Acquisition Times (optimal conditions) Warm Cold Update Rate Accuracy Position Velocity Limits Speed Altitude Physical Size 4.6” x 2.1” x 1.3” [h] x [w] x [d] 11.7 cm x 5.3 cm x 3.3 cm Weight 4 ounces (110 grams) with 2 AA batteries installed... - Page 74 Specifications Coordinate Systems Available 11 plus 1 user grid. Lat/Lon, UTM, OSGB, Irish, Swiss, Swedish, Finnish, German, French, USNG and MGRS Routes Total Up to 20 saved routes GOTO route BackTrack route Name Length 10 characters (including spaces) Track Logs Total Up to 3 saved track logs plus active track log Name Length...
-
Page 75: Accessories
Accessories Expand the use of your Magellan eXplorist with accessories from the Magellan Online Store for all of your adventures. Carrying Case Specially designed for your Magellan eXplorist, this rugged black canvas carrying case attaches conveniently to your belt or pack strap. It features handy pockets for carrying extra batteries. -
Page 76: Contacting Magellan Support
Contacting Magellan Support The following information is provided so that if you need support for your Magellan eXplorist in North America, you can direct your questions/comments to the proper person at Thales Navigation. Customers in North America, Central America, South America, Asia, and South Technical Support If you need technical assistance, "how-to"... - Page 77 *free of charge phone access available from Eire, UK, Portugal, Spain, France, Belgium, The Netherlands, Germany, Austria, Switzerland, Norway, Sweden, Denmark and Finland For Magellan product phone support in English, French or German from other Europe, Middle East or African locations please dial: +33 2 28 09 38 00* or send an e-mail to: magellansupportfr@thalesnavigation.com...
Need help?
Do you have a question about the Magellan eXplorist 100 and is the answer not in the manual?
Questions and answers