Advertisement
Quick Links
Advertisement

Related Manuals for WELLTECH ATA-151


Summary of Contents for WELLTECH ATA-151
- Page 1 ATA-151/152 ATA-151/152 Quick Guide Quick Guide...
-
Page 2: Before Installation
1. Copyright declaration The copyright of the content which been mentioned in this manual is owned by Welltech computer Co., Ltd. The copyright of brand and mark which been mentioned is belong to its own company. 2005 Copyright Welltech computer Co., Ltd. -
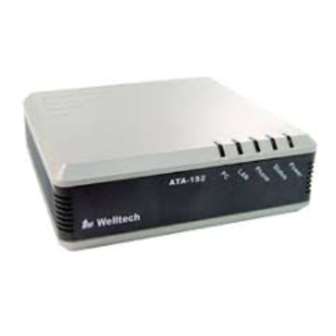
Page 3: Physical Interface
5 seconds. 7.For PC to connect to network with a RJ-45 ethernet cable that via ATA-151/152. 8. For ATA-151/152 to connect to a private network or internet with a RJ-45 ethernet cable. 9. For connecting to PSTN(Fixed line) with a RJ-11 cable as backup if network failed. - Page 4 5. Start to installation The following will show you how to install and configure the ATA-151/152 step by step. Scenario 1. XDSL connection Connect to XDXL modem directly. Please refer the figure 3 to install. X D S L M o d e m...
- Page 5 Scenario 1.1. Cordless connection Also you can connect a cordless phone to ATA for instead of a cord phone as figure 5 if you don't want to be limited by a annoying cord, and there is no any special setting. X D S L M o d e m PSTN CO line...
-
Page 6: Section 1. Configure Your Pc
7. Configuration Section 1. Configure your PC Step 1. Double click "My network places " Step 2. Click "View network connections" Step 3. Right -click "Local Area connection" then select "Properties"... - Page 7 Step 4. Click "Internet Protocol (TCP/IP)" Step 5. Click Obtained an IP automatically Step 6. Run Iexplorer Step 7. Input 192.168.123.123...
- Page 8 Step 8. Please input "root" as a username then enter, then you will login into the configuration WEB page. Step 9. Click "Installation wizard" Step 10. Click next which on right-button of the screen. Step 11.There are 3 options for you to select. 1.
- Page 9 Step 13. You can fill the IP address, Subnet mask and gateway IP here. Please goto step 18 after this step. Step 14.DHCP mode is for you to configure the ATA if you used dynamic IP already, the option will be better for you.
- Page 10 Step 16. Please input the account and password here which given by your ISP. Step 17. Click "Next" Step 18. There are 2 of operation mode for you to choose, one "Proxy mode", another is "P2P mode". You can choose "Proxy mode" if you can get service from a voice service provider or there is a valid service platform in your place already,...
- Page 11 any provider if "P2P mode" is selected, so you need to configure The number which you will dial in the future by manual. Step 25. Please configure the number which you will dial via the following steps. Step 26.Click the Arrow beside "Advanced Configuration"...
- Page 12 can dial the number to talk. 4. Input the IP address of the called party. 5. No need to configure the port setting unless you know how to define. 6. Click "Add" for adding a record into phone book. 7. You can configure other information as the above steps if there is not only one called party.
- Page 13 ATA-151/152 § Ö ³ t ¦ w ¸ Ë...
- Page 14 1. ª©Åv«Å§i The copyright of the content which been mentioned in this manual is owned by Welltech computer Co., Ltd. The copyright of brand and mark which been mentioned is belong to its own company. 2005 Copyright Welltech computer Co., Ltd.
- Page 15 5 seconds. 7.For PC to connect to network with a RJ-45 ethernet cable that via ATA-151/152. 8. For ATA-151/152 to connect to a private network or internet with a RJ-45 ethernet cable. 9. For connecting to PSTN(Fixed line) with a RJ-11 cable as backup if network failed.
- Page 16 Powerful solution on VOIP Powerful solution on VOIP http://www.welltech.com.tw...
Need help?
Do you have a question about the ATA-151 and is the answer not in the manual?
Questions and answers