
Related Manuals for Paxar Monarch Sierra Sport 2 9460


Summary of Contents for Paxar Monarch Sierra Sport 2 9460
- Page 1 ® Monarch ™ Sierra Sport ™ 9460 Printer TC9460OH Rev. AE 10/04 ©2004 Paxar Americas, Inc. All rights reserved.
- Page 2 Réglement sur le brouillage radioélectrique édicte par le ministère des Communications du Canada. Trademarks Monarch®, 9460, 9462, 9463, 9464, MPCL, and Sierra Sport are trademarks of Paxar Americas, Inc. Paxar is a trademark of Paxar Corporation. The Bluetooth™ Trademarks are owned by Bluetooth SIG, Inc.
-
Page 3: Table Of Contents
T A B L E O F C O N T E N T S Getting Started ..............1-1 Introduction..............1-1 Audience ..............1-1 Documentation ............. 1-1 Printer Utilities ............. 1-2 Unpacking the Printer ........... 1-2 Powering the Printer ............. 1-3 Installing the Battery............. - Page 4 Printer Options ..............C-1 Linerless ..............C-1 Bluetooth..............C-1 Table of Contents ii...
-
Page 5: Getting Started
The Operator's Handbook is for the person who prints and applies labels. Documentation The online version of the Programmer's Manual, the RCL Programmer's Manual, and the System Administrator's Guide can be downloaded free from www.paxar.com as an Adobe® Acrobat® Reader file. Getting Started 1-1... -
Page 6: Printer Utilities
Keep all packaging material in case you need to move or return the printer. If any items are missing, contact Paxar at the number listed on the back of this manual for replacement items. 1-2 Getting Started... -
Page 7: Powering The Printer
Powering the Printer There are two ways to power the printer: ♦ Using a battery. See "Installing the Battery" for more information. ♦ Using the optional AC power adapter. For more information about the AC power adapter, refer to the 9463 Operating Instructions included with the AC power adapter. - Page 8 Insert the connector end of the battery into the printer. Close the supply door until the release buttons click into place. Turn on the printer by pressing and holding the P button until the LCD screen comes on (about two seconds).
-
Page 9: Battery And Safety Information
Battery and Safety Information ♦ You must charge a battery before using it. For optimal battery life, charge the battery within three months of receipt. WARNING Use only Monarch chargers (Monarch® 9462 Single Station Charger or the Monarch® 9464 Four Station Charger) designed for lithium-ion batteries when charging. - Page 10 CAUTION Do Not disassemble, short-circuit, heat above 80°C, or incinerate the battery. It may explode. ♦ The battery should be charged immediately for either long-term storage or after the battery has been exhausted from a printing session. Frequent charging will actually prolong battery life and has no negative effects such as memory issues.
-
Page 11: Connecting The Communications Cable
Connecting the Communications Cable 9-pin and 25-pin serial communication cables are available. For best results, use only Monarch® cables. See Appendix B, "Accessories" for part number information. Open the hinged cable door by loosening the two screws and lifting up on the door. Screws CAUTION Do not use sharp objects around the printhead or... - Page 12 Plug the DB9 connector into the DB9 port. DB9 Port Connector 2.5” Place the cable in the cable cavity. Cable in Cable Cavity Close the hinged cable door and tighten the screws. To connect the optional AC power adapter, refer to the 9463 Operating Instructions included with it.
-
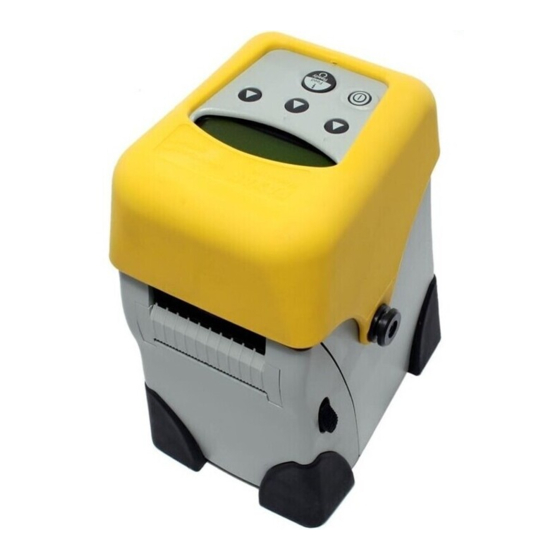
Page 13: Using The Display And Buttons
Using the Display and Buttons Turns the printer on and off. Advances the supply or returns the display to the next higher menu. Three buttons for selecting options on the display. Navigation Buttons Display On/Off Button Feed/Ready Button Printing The host sends online packets containing print jobs to the printer. - Page 14 Programmer's Manual can be downloaded free from our web site (www.paxar.com). The printer prints either a strip of supplies or one at a time (on-demand mode). Remove the printed supplies.
-
Page 15: Loading Supplies
L O A D I N G S U P P L I E S This chapter describes how to load supply for ♦ non-peel mode (prints on continuous strip of supply). ♦ peel mode (prints and separates the label from the liner). - Page 16 Remove the tape from a new roll of supply. Push apart the supply holder tabs to widen the supply holders. Insert a roll of supplies. Supply Holder Tabs The supply should unwind as shown with the loose end of the supply feeding through the exit chute.
-
Page 17: Tearing The Supplies
Close the supply door until the release buttons click into place. Press the F button to calibrate the supply under the printhead. If you receive a supply error, see Chapter 4, "Troubleshooting" for more information. Tear Edge Tearing the Supplies Tear the supply from the right or left using the tear edge as a guide. -
Page 18: Loading For Peel Mode
Loading for Peel Mode You need label supply with a liner to use these instructions. Open the supply door by pushing down on the release buttons located on both sides of the printer. The supply door should swing open. Release Button Remove the tape from a new roll of supply. - Page 19 The supply should unwind as shown with the loose end of the supply feeding through the exit chute. Pull out enough supply to lay across the exit chute and raise the supply door back to the upright position (as shown below). Exit Chute Remove a couple of labels from the liner.
- Page 20 Close the supply door until the release buttons click into place. The peel bar closes when the supply door clicks into place. Lightly tug on the liner to remove the slack. Press the F button once or twice to advance the labels and to calibrate the supply under the printhead.
-
Page 21: Care & Maintenance
C A R E & M A I N T E N A N C E This chapter explains how to ♦ clean the printhead, platen roller, and the supply sensors. ♦ clear label jams. CAUTION Do not use sharp objects to clean the printhead or touch the printhead with your fingers. - Page 22 Use any of the following items to clean the printhead: ♦ A soft cloth moistened with isopropyl alcohol. CAUTION Use isopropyl alcohol on the interior areas only, never on the exterior. ♦ A Monarch Cleaning Pen (part number 114226). To clean the printhead, platen roller, and supply sensors: Turn off the printer by pressing and holding the P button until the display is blank.
- Page 23 Clean the printhead with a clean soft cloth moistened with isopropyl alcohol, a cleaning pen, or a small brush. CAUTION The printhead is sensitive to static electricity, which can damage the printhead or reduce its life. Ground yourself by touching some metal before cleaning the printhead.
-
Page 24: Clearing Label Jams
Clean the on-demand and black mark sensor with a clean soft cloth or cotton swab moistened with isopropyl alcohol or a cleaning pen. Black Mark Sensor On-Demand Sensor Reload the supply. Close the supply door until the release buttons click into place. 10. -
Page 25: Troubleshooting
T R O U B L E S H O O T I N G This chapter lists some of the common printer problems and their possible solutions. If these solutions do not work, call Service. Problem Solution Printer will Make sure the battery is fully charged. -
Page 26: Common Errors
Problem Solution Supply does Check the on-demand, black mark, die not calibrate cut, or non-indexed sensors. Refer to the properly. System Administrator's Guide for more information. You may need a new sensor. Common Errors The following is a list of common printer errors you may receive. - Page 27 Error Description Portion of field off supply or there may Invalid Data be an invalid character in the packet. The printer sensed a calibration of Check Supply different-sized black marks. Make sure the correct supply is loaded. Printer has not sensed a supply mark Check Supply within the specified number of inches or is out of supplies.
- Page 28 Resend the packets. If you see a System Error Vector ## on the display, call Technical Support for instructions. If you need to return the printer to Paxar, use the original packaging (box and packing material). 4-4 Troubleshooting...
-
Page 29: Specifications
S P E C I F I C A T I O N S This appendix includes information about printer specifications and cable pin-outs. Printer Specifications Height: 5.8" (147 mm) Width: 3.6" (91 mm) Depth: 4.8" (122 mm) Weight without 1.61 lb. - Page 30 Operating Limits 40° to 104°F (5° to 40° C) (Printer): Storage -40° to 140° F (5° to 60° C) Storage Limits -4° to 95°F (-20° to 35° C) (Battery): within one year -4° to 104°F (-20° to 40° C) within six months -4°...
-
Page 31: Supply Specifications
Supply Specifications Supply Types: Labels (standard or linerless), tags or receipt paper Supply Widths: 0.5" (13 mm) minimum 2.0" (51 mm) maximum Tag/Receipt Paper W idth - .5" (13 mm) to 2.05" (52 mm) Supply Lengths: .375" (9.5 mm) minimum 12.0"... - Page 32 A-4 Specifications...
-
Page 33: Accessories
This appendix lists the accessories that work with your printer and briefly describes them. Use these part numbers when ordering an item. Call Paxar at the number listed on the back of this manual to order parts or supplies. Accessory Items... -
Page 34: Single Station Battery Charger
Single Station Battery Charger The Monarch® 9462™ Single Station Battery Charger is designed for the Monarch® 9460™ portable printer. It can charge one battery at a time. For more information about the battery, see Chapter 1, "Getting Started." For more information about the Single Station Battery Charger, refer to 9462 Operating Instructions included with the charger. - Page 35 P R I N T E R O P T I O N S This appendix lists the options that may be installed in your printer. ♦ Linerless ♦ Bluetooth Linerless The printer is configured to use supplies without the backing paper.
- Page 36 C-2 Printer Options...
Need help?
Do you have a question about the Monarch Sierra Sport 2 9460 and is the answer not in the manual?
Questions and answers