
Related Manuals for Paxar Monarch 9800 Series


Summary of Contents for Paxar Monarch 9800 Series
- Page 1 All manuals and user guides at all-guides.com Monarch 9800 Series Printers TC9825OH Rev. AA 2/02 ©2002 Paxar Corporation. All rights reserved.
- Page 2 Any update will be incorporated in a later edition of this manual. ©2002 Paxar Corporation. All rights reserved. No part of this publication may be reproduced, transmitted, stored in a retrieval system, or translated into any language in any form by any means, without the prior written permission of Paxar Corporation.
-
Page 3: Table Of Contents
All manuals and user guides at all-guides.com T A B L E O F C O N T E N T S GETTING STARTED ........... . 1-1 Audience. - Page 4 All manuals and user guides at all-guides.com Feed Mode ........... . . 4-5 Backfeed .
- Page 5 All manuals and user guides at all-guides.com Viewing Script Information ......... 7-6 Deleting a Script .
- Page 6 All manuals and user guides at all-guides.com SPECIFICATIONS ............A-1 Printer.
-
Page 7: Getting Started
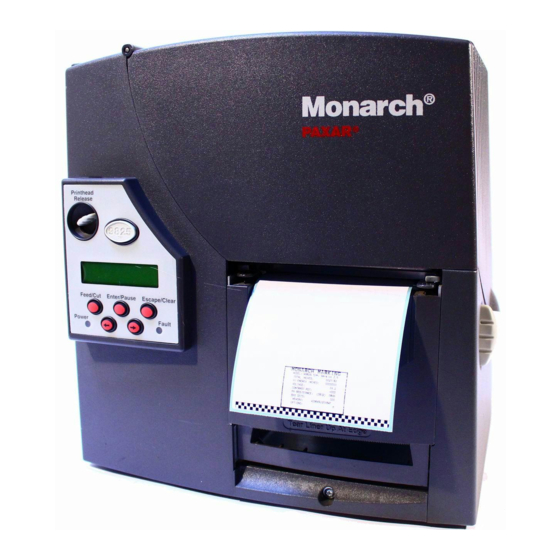
All manuals and user guides at all-guides.com G E T T I N G S T A R T E D ® The Monarch 9825 printer lets you print text, graphics, and bar codes on thermal transfer (ribbon) and thermal direct labels or tags. -
Page 8: Ordering Programmer's Manuals
All manuals and user guides at all-guides.com A u d i e n c e The Operator’s Handbook is for the person who prints and applies labels. U n p a c k i n g t h e P r i n t e r After you unpack the printer, you should have the 9825 printer, a power cord, and a ribbon take-up core (may already be on take-up reel). -
Page 9: Connecting The Power Cable
All manuals and user guides at all-guides.com C o n n e c t i n g t h e P o w e r C a b l e The power supply automatically switches between 115V or 230V. No operator settings are required. 1. -
Page 10: Connecting The Communication Cable
All manuals and user guides at all-guides.com C o n n e c t i n g t h e C o m m u n i c a t i o n C a b l e Connect the communication cable into the appropriate port. Secure the cable with the connecting screws (serial) or spring clips (parallel). -
Page 11: Display
All manuals and user guides at all-guides.com Enter/Pause: When the printer is online, pauses the current print job or resumes a paused print job. When the printer is offline, selects the displayed menu item. Escape/Clear: When an error is present, clears the error. When a job (batch) is printing, cancels the print job (batch). -
Page 12: Selecting A Function
All manuals and user guides at all-guides.com S e l e c t i n g a F u n c t i o n The Main menu has several functions (operating modes). These functions are shown in the chart below. MAIN MENU CANCEL PRINT... -
Page 13: Exiting An Option
All manuals and user guides at all-guides.com When you see the menu option you want, press Enter/Pause to select it. The Main Menu controls the printer’s setup and operation. Through the Setup Menu, you can select a sub-menu for the supply, contrast, default, or port settings. - Page 14 All manuals and user guides at all-guides.com 1-8 Getting Started...
-
Page 15: Loading Supplies
All manuals and user guides at all-guides.com L O A D I N G S U P P L I E S This chapter describes how to load: a roll of supply fan-fold supply a roll of tag supply. There are two types of supplies: Thermal Direct specially treated thermal supplies that do not use a ribbon for printing. -
Page 16: Loading Labels Or Tags
All manuals and user guides at all-guides.com L o a d i n g L a b e l s o r Ta g s Make sure the printer is configured for the correct supply type. 1. Open the cover. 2. - Page 17 All manuals and user guides at all-guides.com Supply Holder Guides 5. Adjust the supply holder guides so the sides barely touch the roll. Make sure the supply roll turns freely. If you are using fan-fold supplies, place the supply stack behind the printer, label side facing up.
- Page 18 All manuals and user guides at all-guides.com 8. Adjust the supply guides so they touch the supply. Push up on the supply lever to lock the supply guides into place. Die Cut Sensor Nibs Supply Lever 9. Hold the printhead assembly by the printhead tab while pressing down on the printhead release.
- Page 19 All manuals and user guides at all-guides.com 10. Close the printhead by pressing down on the thumb well until you hear it click into place. Thumb Well 11. Close the cover. 12. Press Feed/Cut to position the supply under the printhead. You may need to adjust the wide/narrow knobs depending on the width of your supply.
- Page 20 All manuals and user guides at all-guides.com L o a d i n g L a b e l s f o r t h e O p t i o n a l P e e l M o d e : Peel mode is an option that must be purchased separately.
- Page 21 All manuals and user guides at all-guides.com 3. Feed the backing paper over the peel bar. Peel Bar Lower Opening 4. Feed the backing paper through the lower opening of the exit cover. Close the exit cover. Pull down firmly on the backing paper to remove any slack.
-
Page 22: Using The Optional Tear Bar
All manuals and user guides at all-guides.com 5. Close the printer’s cover. 6. Press Feed/Cut to position the supply under the printhead. U s i n g t h e O p t i o n a l Te a r B a r Note the following change to loading labels if you have purchased the optional tear bar. -
Page 23: Using Linerless Supply
All manuals and user guides at all-guides.com U s i n g L i n e r l e s s S u p p l y Linerless printing is an option that must be purchased separately on the original printer order. The linerless option is not customer or field-installable. - Page 24 All manuals and user guides at all-guides.com 5. Press down on the exit cover tabs to open the exit cover. 6. Pull back slightly on the spring latch with your thumb or fingernail and lift the shelf out. CAUTION Be careful when inserting or removing the shelf. The shelf has sharp points.
- Page 25 All manuals and user guides at all-guides.com 7. If inserting the peel bar: Insert the left edge of the peel bar into the side slot at an angle. Then, slide the peel bar to the right and press down until you hear it click into place. The peel bar must be lined up with the platen roller.
- Page 26 All manuals and user guides at all-guides.com The shelf must be parallel to the platen roller, not at an angle. See the following diagrams. Platen Roller Spring Latch Shelf Shelf inserted correctly. Platen Roller Shelf Shelf not inserted correctly. CAUTION Make sure the shelf is not misaligned with the platen roller, or damage to the platen roller could occur.
-
Page 27: Adjusting The Wide/Narrow Knobs
All manuals and user guides at all-guides.com 9. Close the exit cover. 10. Load supplies by following the label loading procedures. You may notice a different color and texture on the platen roller. Linerless supplies do not stick to the textured platen roller. 11. - Page 28 All manuals and user guides at all-guides.com 2-14 Loading Supplies...
-
Page 29: Loading Ribbon
All manuals and user guides at all-guides.com L O A D I N G R I B B O N This chapter describes how to load a ribbon roll. There are different ribbon requirements for the two types of supplies: Thermal Direct do not use a ribbon for printing. - Page 30 All manuals and user guides at all-guides.com L o a d i n g R i b b o n Make sure the printer is configured to use a ribbon. To load ribbon: 1. Open the cover. 2. Unlock the printhead by turning the retaining latch. 3.
- Page 31 All manuals and user guides at all-guides.com 6. Remove the new ribbon from the package as shown. Do not wrinkle or crush the new ribbon. 7. Slide the ribbon onto the back reel as far as it will go with the "Monarch This End Out"...
- Page 32 All manuals and user guides at all-guides.com 11. Rotate the take-up core until the leader is past the printhead. 12. Remove any slack in the ribbon by turning the take-up reel clockwise. 13. Hold the printhead assembly by the printhead tab while pressing down on the printhead release.
-
Page 33: Setting Supply Options
All manuals and user guides at all-guides.com S E T T I N G S U P P L Y O P T I O N S This chapter explains how to select the supply type, ribbon, speed, feed mode, backfeed, print position, supply position, margin position, separators, and skip index mode. -
Page 34: Supply Type
All manuals and user guides at all-guides.com S u p p l y Ty p e You can print on edge aperture, black mark, die cut, or continuous supplies. You have to tell the printer which supplies you are using. If you are using edge aperture supplies, use the die cut setting. -
Page 35: Ribbon
All manuals and user guides at all-guides.com R i b b o n You have to tell the printer if your supplies require a ribbon. To change the setting, from the Main menu, select Setup, then Supply. 1. Press l or r until you see SUPPLY Ribbon 2. -
Page 36: Speed
All manuals and user guides at all-guides.com S p e e d You can change the print speed for bar codes or graphics. If you select "default" for speed, formats with serial bar codes automatically print at 2.5IPS and formats with parallel bar codes print at 6.0 ips. -
Page 37: Feed Mode
All manuals and user guides at all-guides.com F e e d M o d e You can use continuous or on-demand printing. On-demand printing allows you to remove a label before printing the next one. To change the setting, from the Main menu, select Setup, then Supply. -
Page 38: Positioning
All manuals and user guides at all-guides.com To change the setting, from the Main menu, select Setup, then Supply. 1. Press l or r until you see SUPPLY Backfeed 2. Press Enter/Pause to set the backfeed option. You will see the current setting, for example: BACKFEED 3. - Page 39 All manuals and user guides at all-guides.com To change the setting, from the Main menu, select Setup, Supply, then Positioning. 1. Press l or r until you see POSITIONING Print Pos 2. Press Enter/Pause. You will see the current setting, for example: Enter print pos [-99/99]: +0...
-
Page 40: Supply Position
All manuals and user guides at all-guides.com S u p p l y P o s i t i o n This function adjusts the machine to print at the vertical 0,0 point on the supply. The supply position adjustment should only be made on inital printer setup. -
Page 41: Margin Position
All manuals and user guides at all-guides.com 4. Press Enter/Pause when the number you need appears. Press Escape/Clear until you see the Main menu. M a r g i n P o s i t i o n This function adjusts where the format prints horizontally on the supply. - Page 42 All manuals and user guides at all-guides.com To change the setting, from the Main menu, select Setup, Supply, then Positioning. 1. Press l or r until you see POSITIONING Margin Pos 2. Press Enter/Pause. You will see the current setting, for example: Enter margin pos [-99/99]: +0...
-
Page 43: Batch Separators
All manuals and user guides at all-guides.com B a t c h S e p a r a t o r s A batch separator is an extra tag printed in between batches with a pinstripe pattern. For non-indexed supply, the batch separator is always six inches long. -
Page 44: Skip Index
All manuals and user guides at all-guides.com S k i p I n d e x You can use the skip index mode to skip (or ignore) a sense mark and print an image over multiple labels, if necessary. For example, if you have 4.0"... -
Page 45: Setting Contrast
All manuals and user guides at all-guides.com S e t t i n g C o n t r a s t The print contrast controls the darkness of the printing on your supply. The range is -390 to +156 and the default is 0. Having the correct print contrast setting is important because it affects how well your bar codes scan and how long your printhead lasts. - Page 46 All manuals and user guides at all-guides.com 4-14 Setting Supply Options...
-
Page 47: Communication Values
All manuals and user guides at all-guides.com C O M M U N I C A T I O N V A L U E S This chapter tells you how to set the serial or parallel communication values. These values provide the link for normal online printing. -
Page 48: Baud Rate
All manuals and user guides at all-guides.com B a u d R a t e To change the setting, from the Main menu select Setup, Port Settings, then Serial Comm. 1. Press l or r until you see SERIAL COMM Baud Rate 2. -
Page 49: Stopbits
All manuals and user guides at all-guides.com 3. Press l or r to display the word length you need, then press Enter/Pause. Press Escape/Clear until you see the Main menu. S t o p B i t s To change the setting, from the Main menu select Setup, Port Settings, then Serial Comm. -
Page 50: Flow Control
All manuals and user guides at all-guides.com 2. Press Enter/Pause. You will see the current setting, for example: PARITY None 3. Press l or r to display the parity you need, then press Enter/Pause. Press Escape/Clear until you see the Main menu. -
Page 51: Reset To Default Values
All manuals and user guides at all-guides.com R e s e t t o D e f a u l t V a l u e s To change the setting, from the Main menu select Setup, Port Settings, then Serial Comm. 1. - Page 52 All manuals and user guides at all-guides.com The parallel communication values are listed in the table below. Option Choices Default Port External/Internal External Mode Compatible/IEEE-1284 Compatible (Centronics mode) To change the setting, from the Main menu select Setup, Port Settings, then Parallel Comm. 1.
-
Page 53: Setting Defaults
All manuals and user guides at all-guides.com S E T T I N G D E F A U L T S This chapter explains how to select the monetary sign, secondary sign, decimal places, slashed zero, power-up mode, and prompt set. - Page 54 All manuals and user guides at all-guides.com The monetary sign, secondary sign, and decimal places options are used in conjunction with option 42. Refer to the optional Packet Reference Manual for more information. The settings for Monetary Sign, Secondary Sign, Slashed Zero, and Decimal Places are applied when a format is downloaded.
-
Page 55: Monetary Sign
All manuals and user guides at all-guides.com To change the setting, from the Main menu, select Setup, then Defaults. To exit an option without changing the setting, press Escape/Clear. 1. Press l or r until you see DEFAULTS Monetary Sign 2. -
Page 56: Secondary Sign
All manuals and user guides at all-guides.com To change the setting, from the Main menu, select Setup, then Defaults. 1. Press l or r until you see DEFAULTS l Secondary Sign r 2. Press Enter/Pause. You will see the current setting, for example: SECONDARY SIGN 3. -
Page 57: Slashed Zero
All manuals and user guides at all-guides.com 3. Press l or r until you see the option you want. Then press Enter/Pause. Press Escape/Clear until you see the Main menu. S l a s h e d Z e r o The slashed zero feature lets you select how you want the zero character printed;... -
Page 58: Powerup Mode
All manuals and user guides at all-guides.com P o w e r - U p M o d e Power-up mode lets you decide how your printer starts each time you turn it on. If you want the printer to be ready to start printing when it is turned on, use the Online power-up mode. -
Page 59: Prompt Set
All manuals and user guides at all-guides.com P r o m p t S e t Prompt set determines which language displays on the printer’s menu. You can select English, French, German, or Spanish. Some prompts may remain in English, even if you select a different language. - Page 60 All manuals and user guides at all-guides.com 6-8 Setting Defaults...
-
Page 61: Using Scripts
This chapter explains how to load, enable, and delete scripts. You can also enable status polling and immediate commands. Using the Scripts menu requires custom software from Paxar. It allows you to print data streams written for other printers. Ignore these menus if you do not use Scripts. -
Page 62: Checking Script Information
All manuals and user guides at all-guides.com C h e c k i n g S c r i p t I n f o r m a t i o n 1. To see if your printer has a script loaded from the Main menu, press l or r until you see MAIN MENU Scripts... - Page 63 All manuals and user guides at all-guides.com 1. To format flash memory, from the Setup Menu, press l or r until you see SETUP Flash Memory 2. Press Enter/Pause. You will see: FLASH MEMORY Format Flash 3. Press Enter/Pause. You will see: Are you sure? 4.
-
Page 64: Downloading A Script
All manuals and user guides at all-guides.com D o w n l o a d i n g a S c r i p t Follow these instructions to download a script from the MS DOS prompt. Set the communication parameters using the MODE command. -
Page 65: Enabling A Script
All manuals and user guides at all-guides.com E n a b l i n g a S c r i p t To enable or disable a script: 1. From the Script Menu, press l or r until you see SCRIPTS Enable Script 2. -
Page 66: Deleting A Script
All manuals and user guides at all-guides.com V i e w i n g S c r i p t I n f o r m a t i o n To view the script information (name and version number): 1. -
Page 67: Enabling Status Polling
All manuals and user guides at all-guides.com E n a b l i n g S t a t u s P o l l i n g Status polling allows you to obtain information about the readiness of the printer and the current (or last received) print job. -
Page 68: Checking Available Flash Memory
All manuals and user guides at all-guides.com 3. Use l or r to select either "Yes" or "No" and press Enter/Pause. The default is "No." C h e c k i n g A v a i l a b l e F l a s h M e m o r y If you receive errors when downloading a script, make sure you have enough flash memory available for the script. -
Page 69: Printing
All manuals and user guides at all-guides.com P R I N T I N G This chapter explains how to use on-demand mode printing. print an error label. print, pause, restart, cancel, and repeat a batch. You can send format, batch, and graphic data to the printer from a host. -
Page 70: On-Demand Mode Printing
All manuals and user guides at all-guides.com If the printer will be unused for extended periods of time, we recommend leaving the printhead unlatched. O n - D e m a n d M o d e P r i n t i n g When the 9825 printer is operating in the on-demand mode, the next label prints when the previous label is removed from the printer or when Feed/Cut is pressed. -
Page 71: Pausing A Batch
All manuals and user guides at all-guides.com P a u s i n g a B a t c h You can pause printing by pressing Enter/Pause. You may want to interrupt a batch to make adjustments for: Loading a different roll of supply or a ribbon. See Chapter 2, "Loading Supplies"... -
Page 72: Canceling A Paused Batch
All manuals and user guides at all-guides.com 2. Press l or r until you see PAUSE MENU Restart Batch 3. Press Enter/Pause. The batch starts printing from the beginning. C a n c e l i n g a P a u s e d B a t c h You can cancel a paused batch, delete a format, graphic, or font in memory, or all the batches waiting to print. - Page 73 All manuals and user guides at all-guides.com 2. To cancel only the paused batch, press l or r until you PAUSE MENU Cancel Batch Press Enter/Pause. The batch is deleted and the printer prints any remaining batches. 3. To cancel all the batches (including the paused batch), press l or r until you see PAUSE MENU Cancel All...
-
Page 74: Repeating A Batch
All manuals and user guides at all-guides.com If password protection is enabled, you will be prompted to enter a password before the formats, graphics, and fonts are deleted. Press Feed/Cut three times and then press Enter/Pause. All formats are deleted. If you enter the wrong password, you return to the Main menu. -
Page 75: Printing Truetype® Fonts
All manuals and user guides at all-guides.com 1. From the Main menu, press l or r until you see MAIN MENU Repeat Batch 2. Press Enter/Pause. You will see Printing xxxx of xxxx The number increments until the entire batch has printed. When it is finished, you will see PRINT MODE Ready... -
Page 76: Licensing Your Fonts
All manuals and user guides at all-guides.com The 9825 printer can accept a TrueType font file that has been converted to Hex or Run-Length encoding using the Font Utility, which is available on our Web site (www.monarch.com). You can also use a wide variety of Code Pages with International (Turkish, Latin, Spanish, etc.) characters. -
Page 77: Care And Maintenance
All manuals and user guides at all-guides.com C A R E A N D M A I N T E N A N C E This chapter tells you how to clear label jams and clean the printhead and platen roller replace a printhead adjust print contrast. - Page 78 All manuals and user guides at all-guides.com daily if your printer is in an excessively dirty, hot, or humid environment. when you see voids or streaking in the print as shown. 1. Turn off the printer and open the cover and printhead assembly.
- Page 79 All manuals and user guides at all-guides.com 6. Moisten another cotton swab with isopropyl alcohol. Rub the cotton swab across the printhead and remove any build-up. You may need to use a printhead CLEAN-STRIP if the printhead is extremely dirty or you see streaks on the supply. Printhead 7.
-
Page 80: Replacing The Printhead
All manuals and user guides at all-guides.com 10. Close the exit cover by pushing firmly on it. Both latches will click into place. 11. Close the cover and printhead assembly. 12. Turn on the printer. 13. Press Feed/Cut to position the supply under the printhead. Resend your format, batch, and check digit packets. - Page 81 All manuals and user guides at all-guides.com 4. Press forward and down on the two latches on top of the printhead assembly as shown. The printhead will drop down. 5. Lift the printhead assembly using the printhead tab and push back until the printhead assembly clicks into place.
- Page 82 All manuals and user guides at all-guides.com 9. Snap the printhead into place. Do not touch here Make sure the printhead cable does not touch the ribbon roll. 10. Clean the new printhead with a cotton swab dipped in isopropyl alcohol to remove any salt or oil left from handling. 11.
-
Page 83: Using Diagnostics
All manuals and user guides at all-guides.com U S I N G D I A G N O S T I C S This chapter explains how to perform simple diagnostic functions such as checking the software version, the supply quality, printing test labels, and using password protection. -
Page 84: Printing A Test Label
All manuals and user guides at all-guides.com Line one lists the printer model number (M9825) and line two gives the version of software in the printer. P r i n t i n g a Te s t L a b e l 1. -
Page 85: Checking Supply Quality
All manuals and user guides at all-guides.com C h e c k i n g S u p p l y Q u a l i t y The printer continuously stores data from the most recent 16 supplies printed to check the reflectivity of the sensor marks on the supply. -
Page 86: Using Password Protection
All manuals and user guides at all-guides.com U s i n g P a s s w o r d P r o t e c t i o n The password protection feature prevents formats, graphics or fonts from accidentally being deleted from the printer’s memory. E n a b l i n g t h e P a s s w o r d ( S y s t e m A d m i n i s t r a t o r s o n l y ) A System Administrator can enable the password that must be entered before formats, graphics or fonts can be deleted. -
Page 87: Service Diagnostics
All manuals and user guides at all-guides.com The default for password protection is "No," so you will always see "No" even if passwords are enabled. 7. If you do not want the user to enter a password before they can delete formats, graphics or fonts, press Enter/Pause. You return to the User Diagnostics menu. -
Page 88: Troubleshooting
All manuals and user guides at all-guides.com Tr o u b l e s h o o t i n g This section helps you correct some problems that may occur. Problem Action Error message appears Turn off the printer, wait fifteen seconds and during startup. -
Page 89: Error Messages
All manuals and user guides at all-guides.com Problem Action Backing paper is Carefully remove the backing paper. Make wrapped around platen sure the backing paper tears at the or peel roller. saw-toothed tear edge when using backfeed and peel mode. Blank labels print or 750 Clean supply sensors. -
Page 90: Common Errors
All manuals and user guides at all-guides.com C o m m o n E r r o r s Errors 001 to 405 and 429 to 435 are data errors. This type of error indicates that incorrect data was sent to the printer and the printer is ignoring it. - Page 91 All manuals and user guides at all-guides.com Font, bar code, or density in the batch does not fit the format. The data in this line of the batch is either missing or does not match the format. Reference point off supply. Portion of field off supply or there may be an invalid character in the packet.
- Page 92 All manuals and user guides at all-guides.com Load supplies (supply length mismatch), because the calibrated supply length differs by plus or minus .25 inches from the format. Press Feed/Cut. Either the supply is not seen or the on-demand sensor is broken. Check for a label jam, clear the supply path, or reload supplies.
-
Page 93: Specifications
All manuals and user guides at all-guides.com S P E C I F I C A T I O N S P r i n t e r Height: 12.5 inches (318 mm) Width: 12 inches (305 mm) Depth: 13 inches (330 mm) with the optional 13"... -
Page 94: Supplies
All manuals and user guides at all-guides.com Print Speed: 2.5 ips (64 mm) default for all serial bar codes, 4.0 ips (102 mm), or 6.0 ips (152 mm) default for parallel bar codes Printing Method: Thermal Transfer (ribbon) or Thermal Direct Maximum Print 4.0 inches x 16.0 inches (102 mm x 406 mm) Area... -
Page 95: Linerless Supplies
All manuals and user guides at all-guides.com L i n e r l e s s S u p p l i e s For Supply Width greater Use Supply Length than or equal to 1.5" (38 mm) 1.5" to 16" (38 mm to 406 mm) 2.0"... -
Page 96: Cable Pinouts
All manuals and user guides at all-guides.com C a b l e P i n o u t s The following tables show the connector pins for a 9-pin to 25-pin (118364) cable or a 25-pin to 25-pin cable (118366). 9-Pin (F) 25-Pin (M) CD 1... -
Page 97: Accessories & Options
All manuals and user guides at all-guides.com A C C E S S O R I E S & O P T I O N S A c c e s s o r i e s 415 External Rewind Replacement Printhead Kit (12055101) Ribbon Take-Up Core (11796120, 30, or 40;... -
Page 98: Factory-Installed Options
Metal Cover E t h e r n e t I n f o r m a t i o n Paxar offers internal and external Ethernet connectivity solutions. These solutions make it easy to set up, manage, and monitor a Monarch 9825 printer linked to an Ethernet connection. - Page 99 All manuals and user guides at all-guides.com G L O S S A R Y The following terms will help you use this manual. continuous mode Mode in which the printer prints all the labels in the batch without stopping. download (send) Transmission of data from the host to your printer.
- Page 100 All manuals and user guides at all-guides.com...
- Page 101 All manuals and user guides at all-guides.com I N D E X com m unication errors 10-7 com m unication param eters baud rate 5-1 accessories B -1 parity 5-1 adjusting resetting 5-5 m argin position 4-9 start (X on) character 5-1 print position 4-6 stop (X off) character 5-1 supply position 4-8...
- Page 102 All manuals and user guides at all-guides.com flow control on-dem and printing 8-2 options 5-4 online function, selecting 1-6 m ode 8-1 option selecting 1-6 options B -1 baud rate 5-2 IE E E -1284 5-5 flow control 5-4 inform ation parity 5-4 E thernet B -2 w ord length 5-2...
- Page 103 All manuals and user guides at all-guides.com establishing com m unication 1-3 specification features 1-1 operating A -1 lights 1-4 specifications operating specifications A -1 linerless supply A -3 physical specifications A -1 physical A -1 ribbon default 4-3 ribbon A -3 unpacking 1-2 supplies A -2 printer accessories B -1...
- Page 104 All manuals and user guides at all-guides.com 4 Index...
- Page 105 All manuals and user guides at all-guides.com...
- Page 106 All manuals and user guides at all-guides.com...
Need help?
Do you have a question about the Monarch 9800 Series and is the answer not in the manual?
Questions and answers