Table of Contents
Advertisement
Quick Links
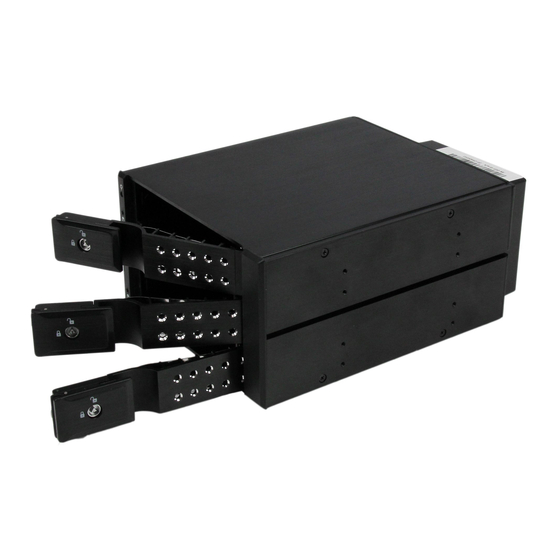
3 Drive Trayless 3.5" SATA/SAS Mobile Rack
HSB3SATSASBA
*actual product may vary from photos
DE: Bedienungsanleitung - de.startech.com
FR: Guide de l'utilisateur - fr.startech.com
ES: Guía del usuario - es.startech.com
IT: Guida per l'uso - it.startech.com
NL: Gebruiksaanwijzing - nl.startech.com
PT: Guia do usuário - pt.startech.com
For the most up-to-date information, please visit: www.startech.com
Manual Revision: 10/23/2013
Advertisement
Table of Contents

Summary of Contents for StarTech.com HSB3SATSASBA
- Page 1 DE: Bedienungsanleitung - de.startech.com FR: Guide de l'utilisateur - fr.startech.com ES: Guía del usuario - es.startech.com IT: Guida per l'uso - it.startech.com NL: Gebruiksaanwijzing - nl.startech.com PT: Guia do usuário - pt.startech.com For the most up-to-date information, please visit: www.startech.com Manual Revision: 10/23/2013...
-
Page 2: Fcc Compliance Statement
StarTech.com. Where they occur these references are for illustrative purposes only and do not represent an endorsement of a product or service by StarTech.com, or an endorsement of the product(s) to which this manual applies by the third-party company in question. Regardless of any direct acknowledgement elsewhere in the body of this document, StarTech.com hereby... -
Page 3: Table Of Contents
Table of Contents Product Diagram ..................1 Front View ..............................1 Rear View ..............................1 Introduction ....................2 Packaging Contents ..........................2 System Requirements ..........................2 Installation ....................3 Hardware Installation ..........................3 3.5in Hard Drive Installation ........................4 3.5in Hard Drive Removal ........................5 How to Use ....................6 Connecting the Hard Drive ........................ -
Page 4: Product Diagram
Product Diagram Front View 1. 3 x 2.5” Drive bays 2. 3 x 2.5” Drive bay key hole 3. 3 x /3.5in LED indicators Rear View 1. 2 x SATA Drive Power Connector ports 2. 3 x SATA Data Connector ports 3. -
Page 5: Introduction
Introduction Packaging Contents • 1 x 3 SATA HDD Backplane • 3 x 18” SATA Cable • 2 x Bay Key • 1 x Installation Screw kit • 1 x Instruction Manual System Requirements • 1X Computer System with SATA connectivity and two available 5.25” bays •... -
Page 6: Installation
HSB2535SATBK (pictured below), with installation holes on the 5.25” slot inside the computer. 3. Hold the HSB3SATSASBA into place, and fix 8 of the included screws through the installation holes on the 5.25” bays, into the side installation holes on the HSB3SATSASBA. -
Page 7: In Hard Drive Installation
3.5in Hard Drive Installation 1. Insert either of the included bay keys into the your desired 3.5in Drive bay key holes depending on which drawer you intend to install the drive into. And Turn the key clockwise into the unlock position. 2. -
Page 8: In Hard Drive Removal
3.5in Hard Drive Removal 1. Insert either of the included bay keys into the “2.5in/3.5in Drive bay key holes depending on which type of drive you intend to install. And Turn the key clockwise into the unlock position. 2. Pull the drive door handle to open the drive bay 3. -
Page 9: How To Use
How to Use Connecting the Hard Drive Once the drive has been installed in the drive bay, the drivers will install automatically, and the inserted drive will be accessible as though it were installed within the system. Note: some operating systems may require that the system be scanned for hardware changes from within device manager, for the newly connected drive(s) to be recognized. -
Page 10: Initializing The Hard Drive
Initializing the Hard Drive 1. If the SATA Hard Drive is blank it may need to be initialized and formatted before use. From the main Windows desktop, right-click on “My Computer” (“Computer” in Vista/ 7 / 8), then select Manage. In the new Computer Management window, select Disk Management from the left window panel. -
Page 11: Technical Support
Limitation of Liability In no event shall the liability of StarTech.com Ltd. and StarTech.com USA LLP (or their officers, directors, employees or agents) for any damages (whether direct or indirect, special, punitive, incidental, consequential, or otherwise), loss of profits, loss of business, or any pecuniary loss, arising out of or related to the use of the product exceed the actual price paid for the product. - Page 12 StarTech.com is an ISO 9001 Registered manufacturer of connectivity and technology parts. StarTech.com was founded in 1985 and has operations in the United States, Canada, the United Kingdom and Taiwan servicing a worldwide market.


Need help?
Do you have a question about the HSB3SATSASBA and is the answer not in the manual?
Questions and answers