Table of Contents
Advertisement
Advertisement
Table of Contents

Related Manuals for Monster Go-DJ

Summary of Contents for Monster Go-DJ
- Page 1 Manual and Warranty...
-
Page 2: Table Of Contents
Upper Side of the Monster ® GO-DJ™ . . . . . . . . . . . . . . . . . - Page 3 TABLE OF CONTENTS FILE BROWSER SCREEN History . . . . . . . . . . . . . . . . . . . . . . . . . . . . . . . . . . . . . 30 Display of History .
- Page 4 TABLE OF CONTENTS EQUALIZER SCREEN External Inputs . . . . . . . . . . . . . . . . . . . . . . . . . . . . . . . . 56 Assign Audio from Line-In to the Digital Turntable .
- Page 5 TABLE OF CONTENTS FIRMWARE DEVICE Tab . . . . . . . . . . . . . . . . . . . . . . . . . . . . . . . . . . . 62 DEVICE (1) .
-
Page 6: Introduction
For your convenience, a digital copy of the Monster GO-DJ ™ User ® Manual is included in the firmware. You can find a copy in the Monster ® GO-DJ ™ by searching the “GO-DJ Manual” directory. You can also download the latest version of the Monster... -
Page 7: Firmware Updates
Gain Slider available Gain control is available via the Gain Slider in the Equalizer Screen. History available The Monster ® GO-DJ™ also keeps a detailed play history of the tracks. Musical Pad Screen Reset menu option available Reset the menu on files, directories and other storage drives. -
Page 8: Overview
OVERVIEW Technical Specifications General Hardware Specifications Display Dual Touch Screen Sound Card Integrated (Built In) 320×240 resolution color display (×2) Battery (Internal Charging Time: 8 hours Li-Polymer Battery) Battery Internal Li-Polymer Battery Battery Life Max: 12 hours MIC ×1 ( ¹ ∕ ₈ inch) Energy Saver Supports SLEEP mode Input Terminals... -
Page 9: Software Specifications
OVERVIEW Technical Specifications (continued) Software Specifications Software Specifications (continued) File Manager General directory based file system Turntable/Platter Operation Scratch (support up to 10,000 files) Pitch Bend Sort by File Name Loop Range Adjustment Sort by Track Name Cue Point Search Sort by BPM Volume Control Master Volume... - Page 10 OVERVIEW Technical Specifications (continued) Software Specifications (continued) 4-Beat Step Sequencer Editable preset pattern ×4 per channel (×2) User pattern storage ×4 per channel (×2) 18 instrument sources BPM controller Stock samples included Upload custom samples AUTO DJ Normal Mix Mode Simple Mix Mode Advanced Mix Mode Options...
-
Page 11: What's In The Box
® Monster GO-DJ . For international use, we have included a variety of ™ ® international plug adapters. Use your USB Cable Connector to charge your Monster GO-DJ ™ with the ® Monster GO-DJ Power Adapter. You can also use your Monster GO-DJ ™... -
Page 12: Front Of The Monster Go-Dj
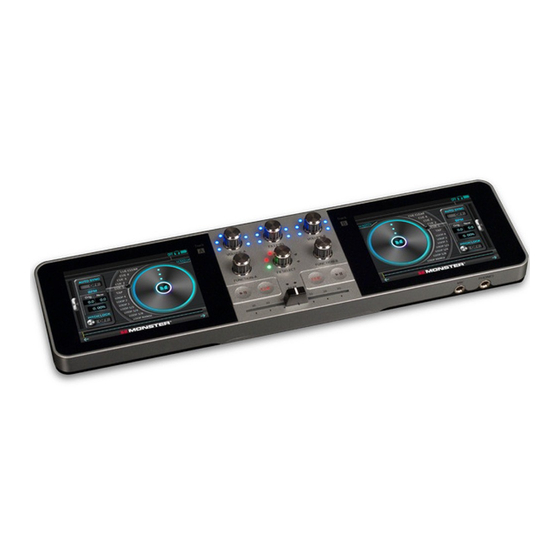
OVERVIEW Front of the Monster Go-DJ Upper Side of the Monster Go-DJ ™ ™ ® ® USB Connector (MINI-B USB) LINE OUT LINE IN Back Side of the Monster Go-DJ ™ ® Touch panel for Track-A b . Touch panel for Track-B... -
Page 13: Buttons
OVERVIEW Buttons The buttons are arranged to replicate the layout of a traditional DJ setup for two turntables and a mixer. Button 1 Volume for Tracks A and B Button 2 FX Level Button 3 FX Select Button 4 Analog Controller Button 5 Play/Pause Button 6... - Page 14 OVERVIEW Buttons (continued) Button Primary Function Secondary Function VOLUME-A Turn the button in order to toggle the volume Send Track-A to Headphones: of Track-A. The track level is indicated by the Click to route the audio from Track-A to the LED meter.
- Page 15 OVERVIEW Buttons (continued) Button Primary Function Secondary Function FX LEVEL Turn the FX LEVEL button to change the level Note: Some FX functions have secondary of the selected (or grouped) FX function(s). functions. Please refer to the “EFFECTS” section of the manual. Master Volume: When the FX SELECT button is placed on the last option (ALL FX OFF), turn the FX LEVEL...
- Page 16 OVERVIEW Buttons (continued) Button Primary Function Secondary Function Press to set a cue point on Track-A. Press and hold to begin playing Track-A from the cue point. Releasing the CUE button will stop playback and return Track-A to the cue point, unless PLAY is pressed.
-
Page 17: Beat Led
OVERVIEW Beat LeD Two Beat LED lights, located right above the crossfader, indicate the internal status of the Monster GO-DJ ™ . The following tables describe what the Beat ® LED lights indicate: In the Power OFF State In the Standby State... -
Page 18: Information Bar
Elapsed Time. FX Function (FL) Displays that the FX SELECT has been Icon Messages set to Flanger. The following table is the key to the graphic icons in the Monster GO-DJ ™ ® FX Function (DL) Displays that the FX SELECT has been set to Delay. -
Page 19: Getting Started
Minimum and Advanced. ® ® to two (2) seconds. The power button is located at the right side of the Monster In Minimum Mode there are 3 screens of functionality. In Advanced Mode there ®... -
Page 20: Advanced Mode
GETTING STARTED Advanced Mode The Monster GO-DJ ™ has six (6) screens in Advanced Mode: ® • Musical Pad • File Browser Screen • Digital Turntable • Beat Sequencer • Equalizer • Options... -
Page 21: How To Switch Between Screens
Turntable, either swipe left across the screen, or click on the gray bar to the right of the File Browser. To access the Volume Control / Options Screen from the Digital Turntable Screen, either swipe left across the Monster logo at the bottom of the screen, ®... -
Page 22: How To Connect To A Sound System
Connect your Monster GO-DJ to a sound system with speakers by connecting ™ ® the appropriate cable to the LINE OUT jack of your Monster GO-DJ ™ ® Connect headphones or earbuds to the PHONES jack. For a simple sound check, you can connect your headphones or earbuds to the LINE OUT jack and test to see if the sound is outputting properly. -
Page 23: Volume Control
VOLUME CONTROL Control the sound levels by using the VOLUME-A button, FX LEVEL button and Track-A Volume the VOLUME-B button. To change the volume level of Track-A, rotate the VOLUME-A button. The level is indicated by the LED lights that surround the VOLUME-A button. Track-B Volume To change the volume level of Track-B, rotate the VOLUME-B button. -
Page 24: Summary Of Volume Control Functions
VOLUME CONTROL Summary of Volume Control Functions The operation and function control of various volumes are summarized in the following table. Please refer to the section on External Inputs for detailed information regarding the microphone (MIC) volume and line-in (LINE-IN) volume. Volume Type how to operate Volume-Affected... -
Page 25: How To Prepare Music
™ does not recognize file names that start with a period/dot (.). ® • GO-DJ™ Drive: The “GO-DJ Drive” directory is located in the internal intelligent Stream Technology memory, where you can store your music and audio samples. • GO-DJ™ Recorded: The “GO-DJ Recorded” directory is located in the... -
Page 26: Automatic File Analysis
Please note that the sample file should be a WAV file format (8–48 kHz, 8–24 bit). The uploaded sample file will then be converted into a uniform WAV format (44.1 kHz, 16 bit). When file conversion is necessary, the Monster ®... -
Page 27: File Browser Screen
You can read, browse, load and edit your files in the SD card. The “GO-DJ Drive” directory is displayed with this icon. The “GO-DJ Drive” directory is located in the internal memory of the Monster ® GO-DJ™. You can read, browse, load and edit your files located in the internal drive. -
Page 28: Directories And Files
FILE BROWSER SCREEN Directories and Files How to Sort Files How to Select a File You can change the method of sorting files by touching the tabs located You can select files using two (2) methods: analog operation with the FUNCTION at the top of the File Browser Screen. -
Page 29: Using The Touch Screens
FILE BROWSER SCREEN Using the Touch Screens • Swipe Up or Down: You can swipe vertically to scroll through the File Icons Description Browser Window vertically. • Tap: You can touch (tap) the screen to select a file or directory. The white dots can indicate two pieces of information: how many times or how recently the file is played. -
Page 30: File Properties Window
FILE BROWSER SCREEN File Properties Window How to Load a Track with the Digital Turntables The File Properties Window is opened when you select a file and open it by pressing the FUNCTION knob, swiping (to the left) over the filename or double-tapping the file name. -
Page 31: Unanalyzed Files
When you try to open or load an unsupported file, its BPM is shown as 0 (or “---”) ® through the internal memory (“GO-DJ Drive”) or the SD card memory, the in the File Selection screen. If the file type is unsupported, you cannot load or... -
Page 32: Playlists
How to Add and Remove Items from a Playlist • The length of the playlist name is 28 characters maximum. If you do not The Monster GO-DJ ™ can store up to a maximum of 100 playlists. Each playlist enter a playlist name, then a playlist name is created for you. -
Page 33: How To Change Track Order In A Playlist
Description • The maximum number of items (10,000) has been reached. The original file is stored on the internal drive (either in “GO-DJ Drive” • In the case that items can no longer be added to a playlist, the File or “GO-DJ Rec”) -
Page 34: How To Search Playlist Tracks
FILE BROWSER SCREEN If the original file is not found, then the track name is displayed as “File Not How to Edit Playlists Found” in the playlist. Sorting Playlists Note: You can still select an item labeled “File Not Found” and open the File Properties Window. -
Page 35: Playlist Edit Menu
FILE BROWSER SCREEN Playlist Edit Menu How to Clear All Playlists You can delete all the playlists at the same time by following these directions: • Select “Playlists” on the Media Selection Tab. • Press and hold the FUNCTION knob, and a menu window will pops up. When you select a playlist and press the FUNCTION knob, the menu window pops up. -
Page 36: Display Of History
Song A, Song A, Song A, Song B, Song C, Song, Song C. Then, the History the file selection screen are also displayed in History. The storage icons would be displays as the following: Song A, Song B, Song C. in History indicate where the original file is stored in the Monster GO-DJ ™... -
Page 37: Reset Menu
File Properties window. and holding the FUNCTION knob. • If the reset menu is opened for any of the files located in the “GO-DJ Rec” In the pop up window, the following commands can be selected: directory, the dedicated actions for the recorded files are displayed in the • Discard BPM: Deletes the BPM and beat positions data. -
Page 38: Dedicated Folders For Samples
FILE BROWSER SCREEN Dedicated Folders for Samples Located within the “GO-DJ Drive” directory, two directories labeled “Pad” and “Seq” are automatically created as dedicated folders for the samplers (i.e., musical pad, synthesizer keyboard, and beat sequencer). Customized samples can be loaded in the sub-folders that correspond to the file location. -
Page 39: Digital Turntables Screen
DIGITAL TURNTABLES SCREEN how to Control Tracks Hot-Cue Points In the Digital Turntable screen, you can control the playback position, tempo (BPM) and other functions on a loaded track file. Arc Selector The Arc Selector is located at the side of the digital turntable. On Track-A, the Arc Selector is located just to the left of the Digital Turntable platter. - Page 40 DIGITAL TURNTABLES SCREEN Recorded hot-cue points are preserved even after the unloading of the track Loop file, a shutdown of the Monster GO-DJ and/or the reset of the settings. ™ ® Recorded hot-cue points can be cleared with the CUE CLEAR command by following these directions: • Use the FUNCTION knob to select the CUE CLEAR command on the...
-
Page 41: Arc Selector And Corresponding Functions
DIGITAL TURNTABLES SCREEN Arc Selector and Corresponding Functions The following table diagrams the Arc Selector position and the corresponding functions: Arc Selector Command When Pressing the FUnCTion Knob Cue Clear Clear a selected CUE point. Once selected, all (when white in color) colored hot-cue points (CUE 1, CUE 2, CUE 3, CUE 4) will begin blinking. -
Page 42: Digital Turntables
DIGITAL TURNTABLES SCREEN Digital Turntables Pitch Bend Mode The Digital Turntables are controlled by using the touchscreen interface. When the highlight bar in the Arc Selector is positioned over the Cue Clear command, the Pitch Bend mode is activated on the Digital Turntable. Use Pitch There are five main modes of the Digital Turntable that are activated Bend mode to bend the pitch of the track. -
Page 43: Off Mode
DIGITAL TURNTABLES SCREEN Off Mode Loop Adjust Mode When the highlight bar in the Arc Selector is positioned over the Loop Range When the highlight bar in the Arc Selector is positioned over any of the Loop command, then every touch operation of the Digital Turntable is ignored. commands and the Loop function is active, you can adjust the position of a loop section by touching the turntable. -
Page 44: Tap Mode
DIGITAL TURNTABLES SCREEN Tap Mode Break Mode When the highlight bar in the Arc Selector is positioned over the Tap command When the highlight bar in the Arc Selector is positioned over any of the Loop and the track is playing, you can activate the Tap function by pressing the commands while the track is playing, the Break mode is activated. -
Page 45: Search Mode
DIGITAL TURNTABLES SCREEN Scratch Mode When the highlight bar in the Arc Selector is positioned over any of the Cue commands (CUE 1, CUE 2, CUE 3, or CUE 4) between the Tap command and the Cue Clear command, the user can scratch the track by rotating the Digital Turntable. -
Page 46: Beat Radar
DIGITAL TURNTABLES SCREEN Beat Radar The three aligned points that rotate around the Digital Turntable is called the During Scratch mode or Loop mode, the external two radars continuously Beat Radar. The rotation corresponds with the rotation angle of the turntable follow the rotation angle of the turntable. -
Page 47: Tempo Controllers
DIGITAL TURNTABLES SCREEN Tempo Controllers Auto-Sync Switch (2) When the Auto-Sync switch is set to the ON position, the BPM and beat position are adjusted automatically to the track being played on the other Digital Turntable. The Beat LED indicates the current status of synchronization, and different colors signify different status points: • Blue: The track is being synchronized. -
Page 48: Equalizer Screen
EQUALIZER SCREEN In the Equalizer screen, you can adjust the output levels of the 3 bands (i.e., low, middle, and high) on each track. You can also change the gain level of each track. Basic operations of the equalizer Touch Panel Operation Analog Control Operation The Equalizer screen can be operated by the touchscreen interface. -
Page 49: Eq Crossfader Mode
EQUALIZER SCREEN eQ Crossfader Mode EQ crossfade from Track-A to Track-B Track-A: 100% • Crossfader: The crossfader blends the sounds from the two tracks drawing the equalization curve. The fade-out starts from the Low band, Track-B fades in, starting from High and the fade-in starts from the High band. -
Page 50: Gain Operation
EQUALIZER SCREEN Gain operation Saving and Loading Gain Levels A Gain slider is located on the left side of the equalizer screen, and it is used to normalize the volume level of the audio files. The gain value is applied to the file currently loaded, and the user-updated Gain level is saved for each track. -
Page 51: Gain On File Loading
EQUALIZER SCREEN Gain on File Loading You can regulate the method of how the initial gain is set when a file is loaded to the turntable on the CONTROL(2) tab in the Options screen. In the “Reset Each Gain File” option, if the “Keep for Each File” option is selected, the previously saved gain level is loaded. -
Page 52: Samplers Screen
SAMPLERS SCREEN The Monster GO-DJ ™ comes with two types of samplers: Musical Pad Touchscreen Operation ® sampler and a Synthesizer Keyboard sampler. In the Musical Pad screen and If you touch the Pattern Select area at the bottom of the screen, a set of the Synthesizer Keyboard screen, you can play the samples assigned to the samples and sound producing pattern can be changed. -
Page 53: Loading And Assigning Samples
GO-DJ Drive. These directories are as follows: • Upload the sample to the corresponding sub-folder located in the • GO-DJ DRIVE “/GO-DJ Drive/pad” folder. The audio sample file needs to be in .WAV • Pad format. The file name should be name “padXX.wav” where XX corresponds to the sampler pad position number. -
Page 54: Assignment Priorities
SAMPLERS SCREEN Assignment Priorities You do not necessarily need to assign samples to all of the 24 pads. There are 8 Musical Pad windows and 3 patterns, which totals 24 customizable sampler pads. The rest are complemented in the following order: • If the file names are properly labeled with assignment number, the correctly numbered files are each allocated accordingly to the corresponding sampler pad position. -
Page 55: Synthesizer Keyboard
SAMPLERS SCREEN Synthesizer Keyboard If the Synthesizer Keyboard octave screens are displayed out side-to-side, the octaves of the Synthesizer Keyboard will look like the following diagram: Instrument Window (2) The Instrument Window displays the current instrument selected and being used for the Synthesizer Keyboard. You can toggle the instruments with the select buttons on the both sides of the window. -
Page 56: Adding Instruments To The Synthesizer Keyboard
® • Create a subfolder (with any name) in the folder “/GO-DJ Drive/pad/key/”. The folder name is displayed in the Instrument window of the Synthesizer Keyboard screen as the name of the instrument. The length of the name should be no more than 14 characters. -
Page 57: Assignment Priorities
SAMPLERS SCREEN Assignment Priorities The samples uploaded to the Synthesizer Keyboard are assigned with the following prioritization: • The correctly numbered files are each assigned to the corresponding key. • If any filename is used (without the numbered assignment), the uploaded sample files in the folder are assigned to unoccupied keys in alphabetical order of the file name(s). -
Page 58: Beat Sequencer
SAMPLERS SCREEN Beat Sequencer • Sliding the BPM Slider (3): Changes the tempo of the Beat Sequencer. You can change the BPM only if both tracks (i.e., Track-A and Track-B) are paused. Otherwise, the Beat Sequencer tempo (BPM) is synchronized to the track currently being played with the larger volume. -
Page 59: Assigning Samples To The Beat Sequencer
™ to a computer. ® automatically created in the GO-DJ Drive (/GO-DJ DRIVE/seq/[a-d]). By • Navigate to the corresponding folder (choose one of the folders in storing .WAV files here, you can assign them to the Beat Sequencer. Just like “/GO-DJ DRIVE/seq/”). -
Page 60: Assignment Priorities
SAMPLERS SCREEN Assignment Priorities You do not need to necessarily assign samples to all parts of the Beat Sequencer. The rest of the parts are complemented in the following order: • The correctly numbered files are each allocated at its corresponding position. • If any filename is used, the other sample files in the folder are assigned to the other parts of the Beat Sequencer in alphabetical order of the file name. -
Page 61: External Inputs
SAMPLERS SCREEN external inputs When using Intelligent Stream technology, once the third-party audio device is connected via the Line-In jack of the Monster GO-DJ and assigned to ™ ® Intelligent Stream Technology a Digital Turntable, the following functions can be used to manipulate the streaming audio: Scratch, Loop, Beat Sequencer, FX, Record. -
Page 62: Volume Control Of External Inputs
SAMPLERS SCREEN Volume Control of External Inputs Real-Time BPM Analysis Press and rotate the VOLUME-A knob to changes the microphone volume. When the LINE-IN or MIC is assigned to a Digital Turntable, the Monster GO-DJ ™ ® applies real-time BPM and beat analysis to the incoming audio. The results Slide the “Line In amp volume”... -
Page 63: Options Screen
OPTIONS SCREEN ConTRoL Tab You can change the optional settings in the Options screen. The Options screen is categorized into five (5) tabs that have multiple pages. The pages are CONTROL (1) signified by the number located underneath the tab name. The Control tab has 4 pages;... -
Page 64: Control (2)
OPTIONS SCREEN CONTROL (2) Reset tempo on load The settings of the tempo controllers (i.e., tempo slider and/or PITCH LOCK switch) can be reset every time a file is loaded. The options are as follows: • Keep for each file: Preserves the tempo setting for each file and restores them when the file is loaded again. -
Page 65: Control (3)
OPTIONS SCREEN CONTROL (3) Delay FX time Selects the unit of the adjustment of delay time for the delay effect from beat (dependent on the BPM) or msec (absolute value). Rotating the FX LEVEL knob changes delay time as follows: ³... -
Page 66: Control (4)
OPTIONS SCREEN CONTROL (4) Dot counter in Browser represents Selects the indication of the white dots in the file browser screen. The options are as follows: • Play count: Represents the play count of the file up. The maximum count is four (4) times. -
Page 67: Device Tab
OPTIONS SCREEN DeViCe Tab Send main sound to HP When this is set to the ON position, the sound output of the LINE-OUT is DEVICE (1) sent to the headphone jack as well. Please note: Pressing the VOLUME knob (i.e., Track-B Volume knob) to control the headphone volume level is disabled. Beat LED Enables or disables the Beat LED Microphone type... -
Page 68: Device (2)
Changes backlight brightness. Backlight off timer Sets a time for backlight off when there is no operation. Wake up / shutdown on USB power When this is set to the ON position, the Monster GO-DJ ™ is awake if there ®... -
Page 69: Rec Tab
When this is set to the ON position, the Monster GO-DJ starts recording. If no ™ ® output signal is produced (i.e., sound is mute), then the Monster GO-DJ waits ™ ® until the first audio signal comes before initializing the digital recording function. -
Page 70: Autodj Tab
There are three mixing styles. The options are as follows: • None: No automatic crossfading. No automatic beat matching. No transition effects. The tracks will just be played back to back. The Monster GO-DJ ™ is equipped with the AutoDJ function. It plays music ®... -
Page 71: System Tab
In SD / In internal drive USB storage mode When the firmware update file is uploaded to and exists in the SD card or the When this is set to the ON position, the Monster GO-DJ enters into USB ™... -
Page 72: System (3)
• While playing music on either track • While deleting or copying a file on either screen When formatting, please note the following: • If you format a storage medium, all data (including those not displayed on the Monster GO-DJ ™ ) are discarded. -
Page 73: Firmware
USB cable. ™ ® • Remove the USB cable if connected. • Place the firmware update file on the internal drive (GO-DJ Drive) or SD card. • Press the RESET button located at the back side of the Monster GO-DJ ™... -
Page 74: Firmware Recovery Menu
The other menu item functions include the following: • Normal Boot: Boots normally with the firmware currently installed • Recovery from GO-DJ DRIVE: Reboots after installing the firmware stored in the GO-DJ DRIVE • USB mode: Starts to wait to be connected with a computer as well as USB Storage Mode in the Options screen • Initialize Database: Deletes the preserved data and settings... - Page 75 Monster, the M Monster logo, GO-DJ and the GO-DJ logo are trademarks or registered trademarks of Monster, Inc . and its subsidiaries in the U .S . and other countries . Used under license . Manufactured and Distributed by JD Sound, Inc .
Need help?
Do you have a question about the Go-DJ and is the answer not in the manual?
Questions and answers