Table of Contents
Advertisement
Quick Links
Advertisement
Table of Contents

Related Manuals for Baumatic TG1


Summary of Contents for Baumatic TG1
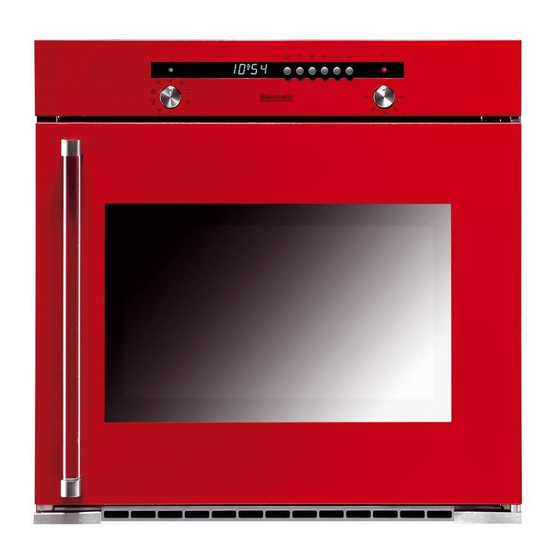
- Page 1 TG1/MG1/SB1 60cm Multifunction built in oven.
- Page 2 User Manual for your Baumatic TG1/MG1/SB1 60 cm Multifunction built in oven You will be mine NOTE : This User Instruction Manual contains important information, including safety & installation points, which will enable you to get the most out of your appliance. Please keep it in a safe place so that it is easily available for future reference;...
-
Page 3: Table Of Contents
Cleaning and maintenance Removable oven roof liner Replacing the oven bulb Installation Electrical connection Reversing the door of your appliance 21-24 Installing the oven into the kitchen cabinet My appliance isn’t working correctly 26-27 Baumatic Ltd. conditions of guarantee Contact details... -
Page 4: Environmental Note
Environmental note o The packaging materials that Baumatic uses are environmentally friendly and can be recycled. o Please discard all packaging material with due regard for the environment. -
Page 5: Important Safety Information
Your new appliance is guaranteed against electrical or mechanical defects, subject to certain exclusions that are noted in Baumatic’s Conditions Of Guarantee. The foregoing does not affect your statutory rights. o Repairs may only be carried out by Baumatic Service Engineers or their authorised service agent. - Page 6 Warning and safety instructions o This appliance complies with all current European safety legislation. Baumatic do wish to emphasise that this compliance does not remove the fact that the appliance surfaces will become hot during use and retain heat after operation.
- Page 7 This appliance must be correctly installed by a suitably qualified person, strictly in accordance with the manufacturer’s instructions. o Baumatic Ltd. declines any responsibility for injury or damage, to person or property, as a result of improper use or installation of this appliance.
-
Page 8: Specifications
Specifications Product Dimensions Height: 596 mm Width: 596 mm Depth: 545 mm Aperture Dimensions Height: 585 mm Width: 560 mm Depth: 560 mm Cooling fan o A tangential cooking fan is fitted inside of this appliance, to make the internal temperature of the oven stable and the external surface temperature lower. -
Page 9: Control Panel
Control Panel Oven function selector knob Power indicator light Oven programmer/timer Timer “minute minder” button Timer “duration” button Timer “end cook” button Timer “manual operation” button Timer “minus” button Timer “plus” button Oven operating light Thermostat control knob Oven programmer/timer display “Auto”... -
Page 10: Setting And Using The Oven Programmer/Timer
Setting and using the oven programmer/timer Selecting manual operation mode After your appliance is connected to your mains supply for the first time, the numbers on the timer display will flash. Before you can select a cooking function or set a temperature, you must set the appliance into “manual operation”... -
Page 11: Setting The Duration Function
Setting the duration function This function will allow you to set a countdown time similar to the minute minder function. However the oven will no longer continue to heat, once the countdown period has elapsed. o Use the thermostat control knob (11) to set the temperature that you require. -
Page 12: Setting The End Cook Function
Setting the end cook function This function is similar to the duration function, however instead of selecting a period of time that you wish the oven to switch off after. You select the time of day that you wish the oven to switch off at. -
Page 13: Setting The Start And End Time Function
Setting the start and end time function This function will allow you to set a time in the future that the oven switches on at and a time that the oven will switch off at. o Use the thermostat control knob (11) to set the temperature that you require. -
Page 14: Selecting A Cooking Function And Temperature
Selecting a cooking function and temperature Selecting manual operation mode After your appliance is connected to your mains supply for the first time, the numbers on the timer display will flash. Before you can select a cooking function or set a temperature, you must set the appliance into “manual operation”... -
Page 15: Thermostat Control Knob
ensure fast, even distribution of the heat. This function is suitable for light and delicate baking such as pastries. You can cook on different shelf levels, as long as the food being cooked requires the same cooking temperature. TOP ELEMENT ONLY: This method of cooking uses the outer part of the top element to direct heat downwards onto the food. -
Page 16: Cooking Guidelines
Cooking guidelines o Please refer to the information given on food packaging for guidance on cooking temperatures and times. Once familiar with the performance of your appliance, temperatures and times can be varied to suit personal preference. o If you are using the fan oven function, then you should follow the information given on the food packaging for this particular mode of cooking. -
Page 17: Accessories
o The grill heating element becomes extremely hot during operation, avoid touching it inadvertently when handling the food which you are grilling. o Important: Be careful when opening the door, to avoid contact with hot parts and steam. o The drip tray handle should only be used to reposition the drip tray and NOT for removing it from the oven cavity. -
Page 18: Cleaning And Maintenance
Any damage that is caused to the appliance by a cleaning product will not be fixed by Baumatic free of charge, even if the appliance is within the guarantee period. -
Page 19: Removable Oven Roof Liner
Removable oven roof liner o Your appliance is supplied with a roof liner, which should be slid over the top of the grill element. o Once you have finished cooking, the liner should be removed and thoroughly cleaned after each use of the appliance. o Do not allow fat and grease to build up on the oven liner, as this could cause a fire hazard. -
Page 20: Installation
Care must be taken to ensure that the temperature of the mains supply cable does not exceed 50°C. o If the mains supply cable is damaged, then it must be replaced by an appropriate replacement which can be obtained from the Baumatic Spares Department. -
Page 21: Reversing The Door Of Your Appliance
Reversing the door of your appliance IMPORTANT: This operation must be only carried out by a suitably qualified person. Baumatic Ltd. do not recommend that a customer completes this operation. o It is necessary to disconnect the oven from the mains before executing the operations described in the present manual. - Page 22 3) IMPORTANT: Support the oven door from the underneath whilst attempting the next stage. o Rotate the control panel as shown whilst supporting the underneath of the oven door. o Pull the door away from the oven cavity and gently lean it on some padded material, to ensure that no damage is caused to the oven door or door glass.
- Page 23 6) Remove the side covers from both sides of the appliance. 7) To gain access to the rear part of the door frame, the following stages need to be followed; o The door has two pivots, which slot into the lock assemblies that are located behind the door frame.
- Page 24 8) Change the position of the pivot and cylindrical insert that sit in the base of the oven frame. 9) Unscrew the door handle and place it on the other side of the oven door. o You should also reverse the position of the locking pivots. IMPORTANT: When the above steps have been followed, it is necessary to reassemble all of the components.
-
Page 25: Installing The Oven Into The Kitchen Cabinet
Installing the oven into the kitchen cabinet Ventilation cut out. Ventilation cut out. Fixing the oven into a cabinet. o Ensure that the aperture that you will be fitting the oven into is of the size given in the above diagram. o Ensure that the rear panel of the furniture housing unit has been removed. -
Page 26: My Appliance Isn't Working Correctly
My appliance isn’t working correctly o The oven isn’t coming on. * Check that the oven is in manual operation mode. * Check that you have selected a cooking function and a cooking temperature. o There appears to be no power to the oven and grill. * Check that the appliance has been connected to the electrical mains supply correctly. - Page 27 Or any installation other than the one specified by Baumatic Ltd. has been completed. Please refer to the conditions of guarantee document on page 28 of...
-
Page 28: Baumatic Ltd. Conditions Of Guarantee
Baumatic appliance. * In addition, your appliance is covered by a 5 year parts warranty. Baumatic Ltd will provide free of charge the parts required to repair the appliance, only if they are fitted by a Baumatic engineer, for any defect that arises due to faulty materials or workmanship within a period of 5 years from the original purchase date. - Page 29 Baumatic Ltd You will be mine Headquarters Baumatic Ltd. Baumatic Buildings, 6 Bennet Road, Reading, Berkshire RG2 0QX, United Kingdom Sales Telephone +44 118 933 6900 Sales Fax +44 118 931 0035 Service Telephone +44 118 933 6911 Service Fax...
Need help?
Do you have a question about the TG1 and is the answer not in the manual?
Questions and answers