Table of Contents
Advertisement
Quick Links
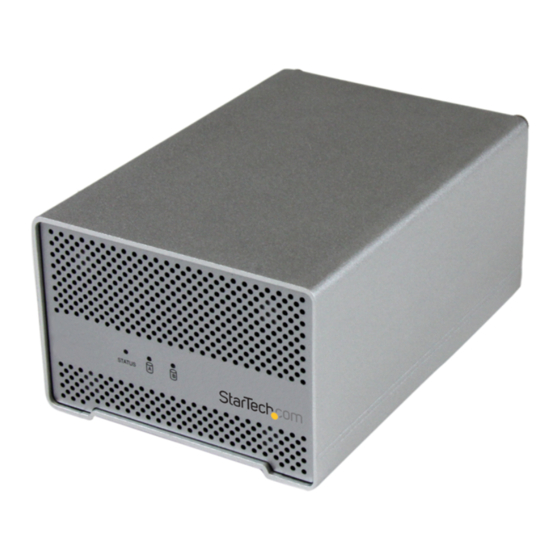
ThunderBolt Dual 2.5" SATA SSD/HDD
Enclosure
S252SMTB3
DE: Bedienungsanleitung - de.startech.com
FR: Guide de l'utilisateur - fr.startech.com
ES: Guía del usuario - es.startech.com
IT: Guida per l'uso - it.startech.com
NL: Gebruiksaanwijzing - nl.startech.com
PT: Guia do usuário - pt.startech.com
For the most up-to-date information, please visit: www.startech.com
Manual Revision: 12/04/2013
*actual product may vary from photos
Advertisement
Table of Contents

Related Manuals for StarTech.com S252SMTB3


Summary of Contents for StarTech.com S252SMTB3
- Page 1 DE: Bedienungsanleitung - de.startech.com FR: Guide de l'utilisateur - fr.startech.com ES: Guía del usuario - es.startech.com IT: Guida per l'uso - it.startech.com NL: Gebruiksaanwijzing - nl.startech.com PT: Guia do usuário - pt.startech.com For the most up-to-date information, please visit: www.startech.com Manual Revision: 12/04/2013...
-
Page 2: Fcc Compliance Statement
StarTech.com. Where they occur these references are for illustrative purposes only and do not represent an endorsement of a product or service by StarTech.com, or an endorsement of the product(s) to which this manual applies by the third-party company in question. Regardless of any direct acknowledgement elsewhere in the body of this document, StarTech.com hereby... -
Page 3: Table Of Contents
Table of Contents Product Diagram ..................1 Front View ..............................1 Rear View ..............................1 Introduction ....................2 Packaging Contents ..........................2 System Requirements ..........................2 Installation ....................3 Hardware Installation ..........................3 How to Use ....................6 Connecting the Hard Drives ........................6 LED Indicator .............................. -
Page 4: Product Diagram
Product Diagram Front View 1. Status LED 2. Drive Activity LEDs Rear View 1. Drive bay panel 2. Thumb screws 3. Drive Fan 4. Power Jack 5. 2 x Thunderbolt ports Instruction Manual... -
Page 5: Introduction
Introduction Packaging Contents • 1 x Thunderbolt 2.5” HDD RAID Enclosure • 1 x Thunderbolt Cable • 1 x HDD installation screw kit • 1 x Universal Power Adapter w/ regional power cables (NA/EU/UK/AUS) • 1 x Rubber foot set •... -
Page 6: Installation
Installation Hardware Installation WARNING! Hard drives and storage enclosures require careful handling, especially when being transported. If you are not careful with your hard disk, lost data may result. Always handle your hard drive and storage device with caution. Be sure that you are properly grounded by wearing an anti-static strap when handling computer components or discharge yourself of any static electricity build-up by touching a large grounded metal surface (such as the computer case) for several seconds. - Page 7 3. Grasp the drive tray handels to slide each of the drive trays out of the enclosure 4. Place the drive tray arround your 2.5” HDD/SSD with the label facing upward. 5. Fix four of the included hdd installation screws into place through the screw holes on the drive tray using a Phillips head screw driver (not included).
- Page 8 6. Slide the drive trays back into drive slots on the HDD Enclosure. 7. Replace the drive panel and thumb screws. 8. Connect the included thunderbolt cable from one of the Thunderbolt ports on the back of the enclosure, to an available Thunderbolt port on your computer. Note: Either Thunderbolt port may be used to connect the enclosure to the host computer system.
-
Page 9: How To Use
How to Use Connecting the Hard Drives Once the enclosure has been attached to a computer, and your the drivers will install automatically, and the inserted drives will be accessible as though they were installed within the system. Prior to using the drive array, it will need to be formatted according to your operating system requirements. -
Page 10: Initializing The Hard Drive
Initializing the Hard Drive 1. If the drive array is new it may need to be initialized and formatted before use. From the main Windows desktop, right-click on “My Computer” (“Computer” in Vista/ 7 / 8), then select Manage. In the new Computer Management window, select Disk Management from the left window panel. -
Page 11: Technical Support
Limitation of Liability In no event shall the liability of StarTech.com Ltd. and StarTech.com USA LLP (or their officers, directors, employees or agents) for any damages (whether direct or indirect, special, punitive, incidental, consequential, or otherwise), loss of profits, loss of business, or any pecuniary loss, arising out of or related to the use of the product exceed the actual price paid for the product. - Page 12 StarTech.com is an ISO 9001 Registered manufacturer of connectivity and technology parts. StarTech.com was founded in 1985 and has operations in the United States, Canada, the United Kingdom and Taiwan servicing a worldwide market.
Need help?
Do you have a question about the S252SMTB3 and is the answer not in the manual?
Questions and answers